Users
The Users feature allows you to manage and access Users. The Users page shows the list of all the users associated with the account.
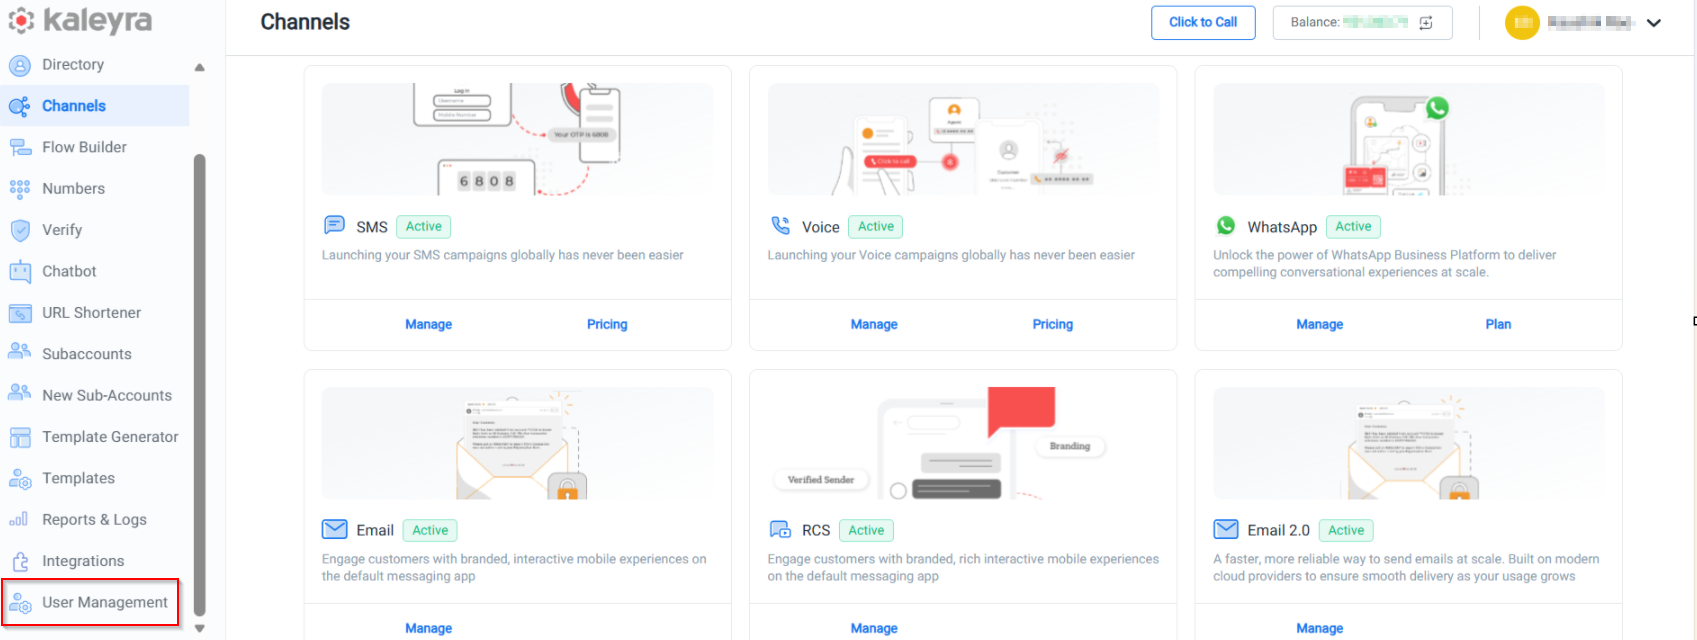
To view the Users page, click User Management tab in the left navigation pane of the Kaleyra platform.
Using this feature, you can:
- Add New User
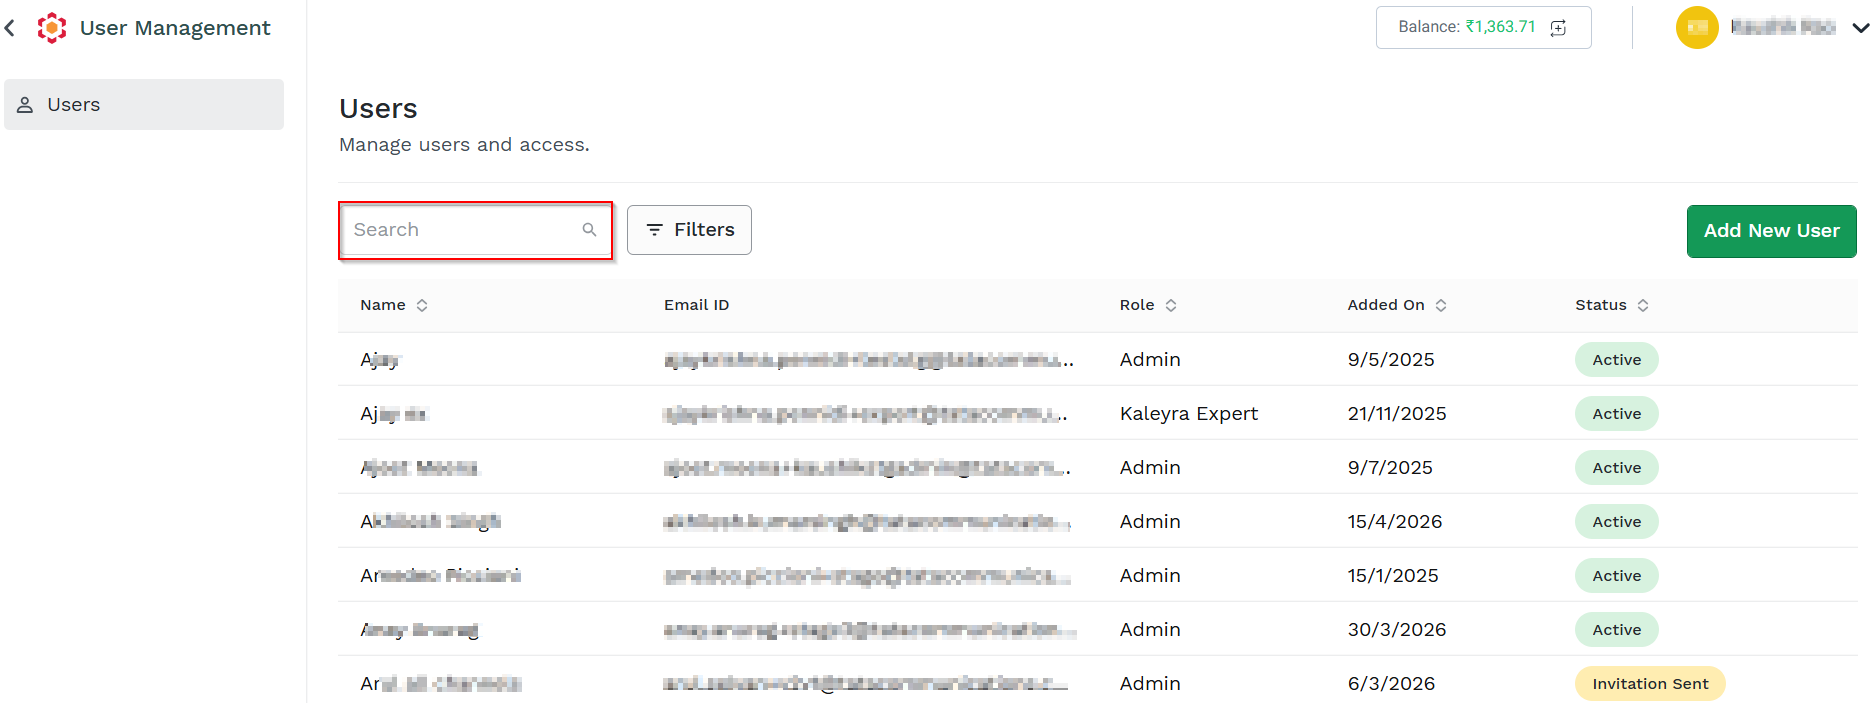
- Search Users
- Filter Users
- Edit User
- View Details
- Revoke Access
- Resend invite
- Delete User
Add New User
The Add New User option allows you to invite a new user to access the Kaleyra platform.
To add a new user, perform the following steps:
- Log in to your Kaleyra Platform.
- On the left navigation bar, click User Management tab. The Users listing page appears.
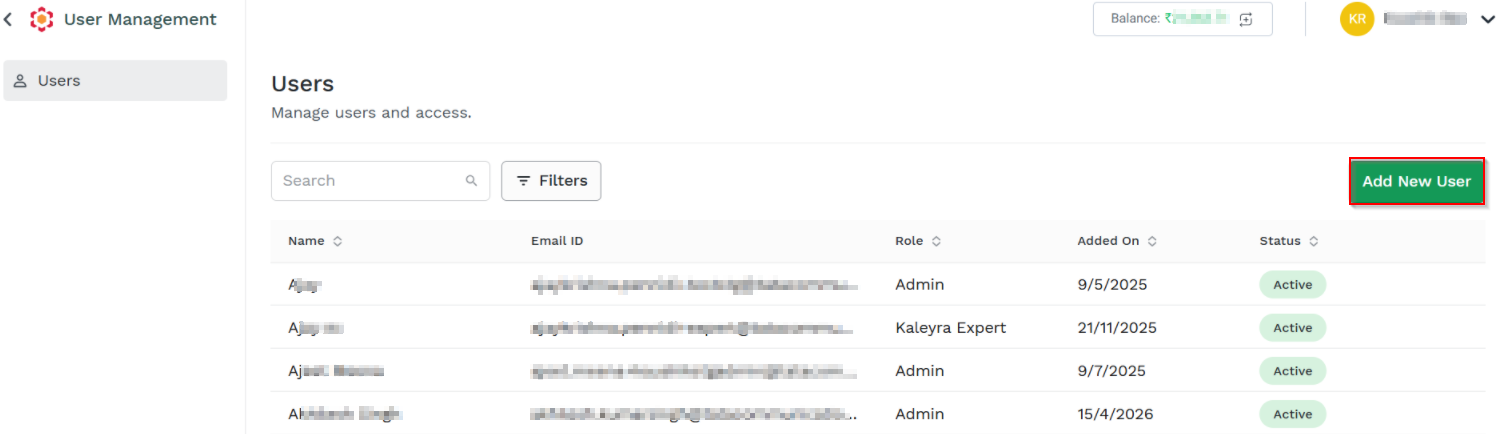
- On the Users listing page, click Add New User.
The Add User page appears.
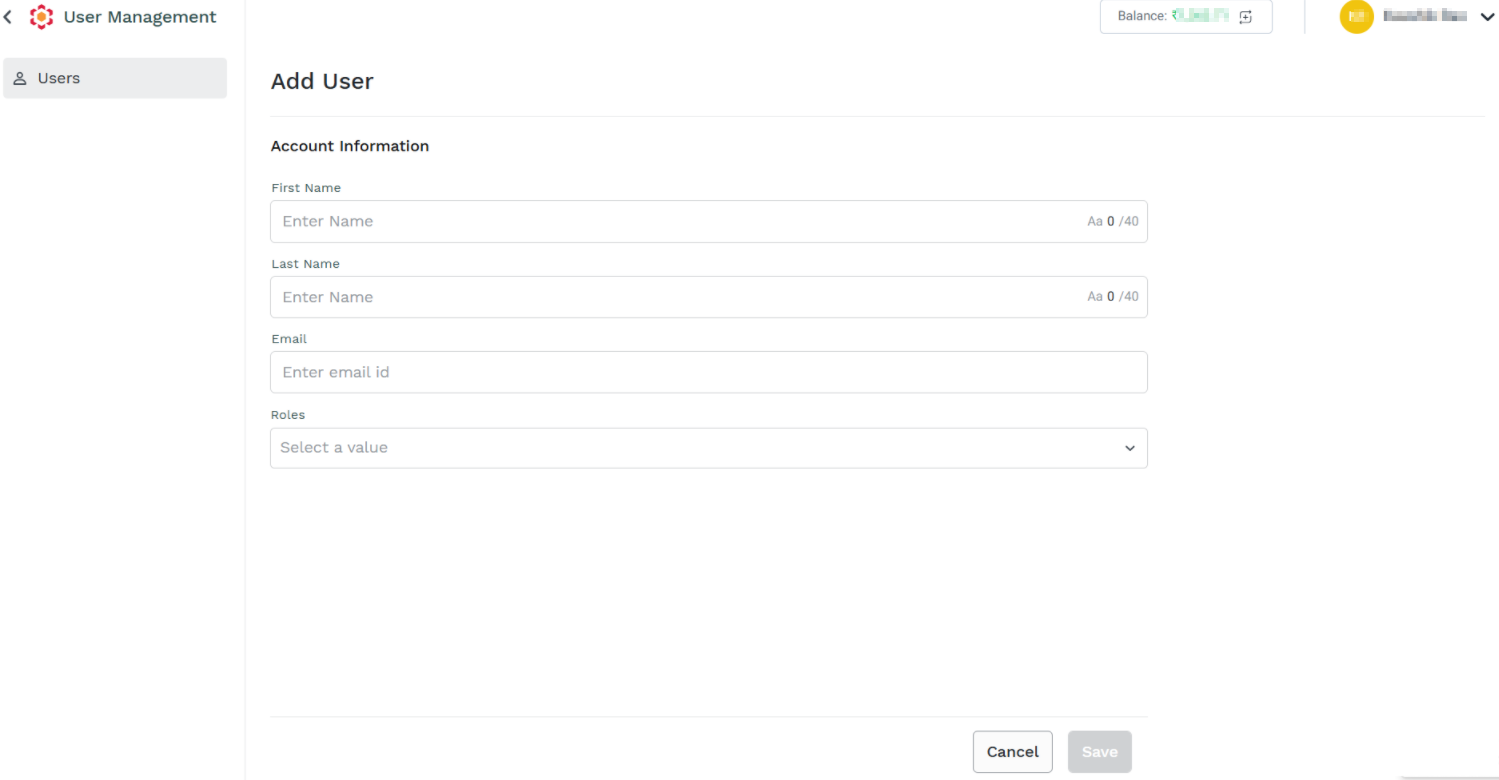
- The Add User page has the following account Information fields:
-
First Name - Enter the user's first name. Must be at least 3 characters long.
-
Last Name - Enter the user's Last Name. Must be at least 3 characters long.
-
Email - Enter the valid user's email address of the Kaleyra personnel you want to invite. The only allowed emails are the ones with
@tatacommunications.comdomain name. -
Roles - Select the roles from the drop-down list. The supported options are:
- Admin - You can access all features, create and edit team, manage API credentials and billing, see logs and usage.
- Communication Manager - You can design communication flows, manage campaigns, and use our tools offerings. Has access to logs, analytics and usage.
- Support- You can only access logs and usage.
- Kaleyra Expert - Can support you to resolve any issue or configure the platform.
Additional Roles:
The following are the additional roles used:
Operational User
- Whatsapp Only - Can only access WhatsApp channel and launch WhatsApp Campaign.
- Numbers Read-Only - Can only access the Numbers page.
Note:
Contact the Kaleyra Support team for enabling the above Additional roles.
- Click Save.
The name of the user is shown in the Invitation Sent status on the Users page.
The user receives an email invitation to join the Kaleyra account through the Kaleyra registration process.
After successful registration, the user row is shown with the 'Active' status in the Users list.
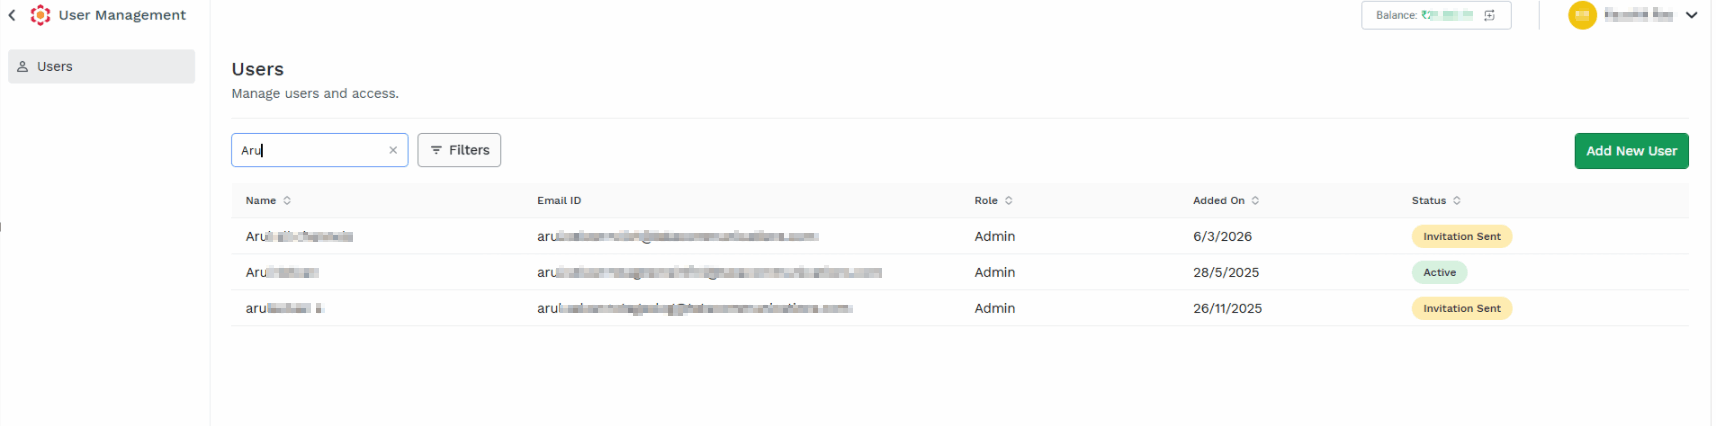
Search Users
You can search for users from the Users list page based on the name you provided for the user when configuring.
To search for the users, perform the following steps:
- Perform the steps from 1 through 2 of the Users page.
- In the Search field enter the complete or partial users name for which you wish to search. The corresponding list of users appears.
Filter Users
You can filter the users based on the selected criteria, conditions, and selected value.
To filter the users, perform the following steps:
- Perform the steps from 1 through 2 of the Users page.
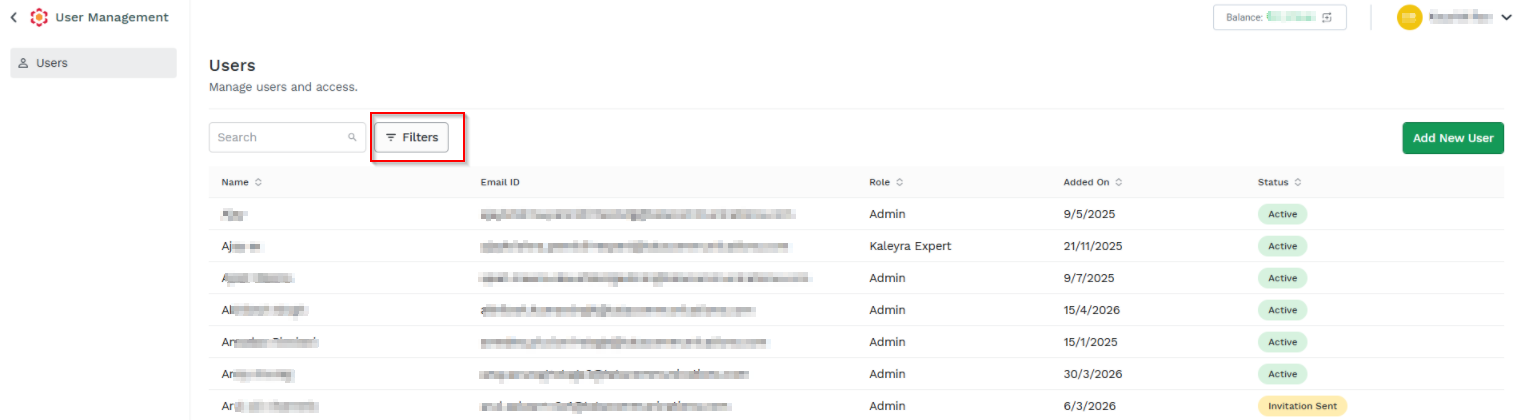
- Click the Filters.
The Filters option pop-up appears.
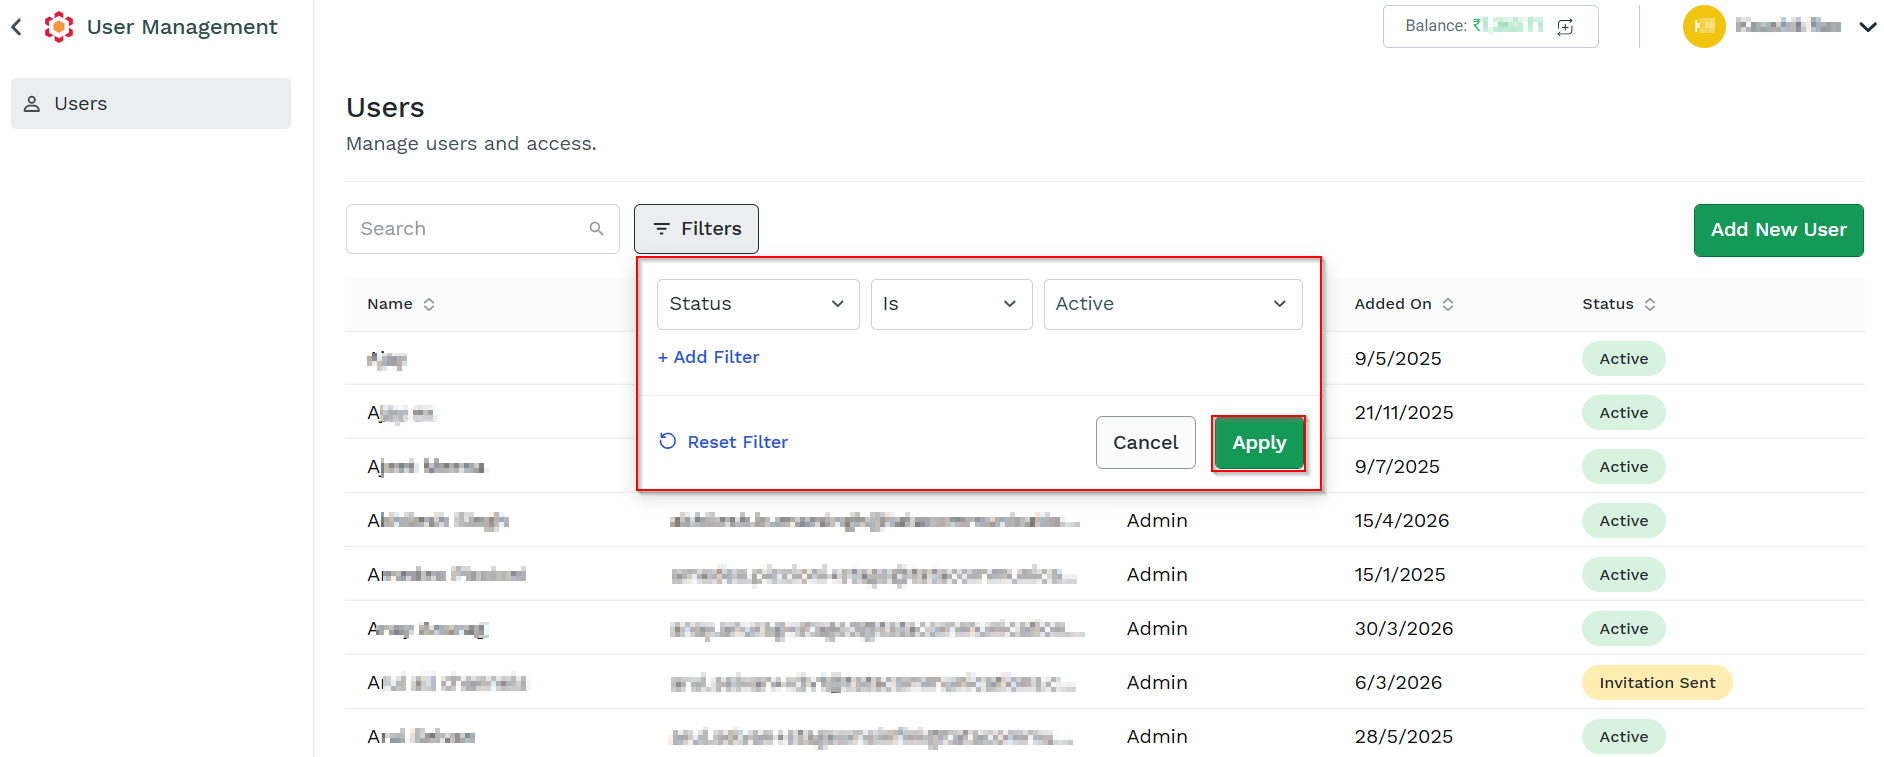
- Perform the following steps:
- Click the arrow next to the Select criteria. The supported options are Role and Status. Select the criteria. For example, Status.
- Click the arrow next to the Condition. The supported options are Is or Not. Select any one of the options. For example, Is.
- Click the arrow next to the select a option. The supported options are Active, Inactive, Invitation Sent. For example, Active.
- Click Apply.
Based on the filter, the search result appears.

Note:
- To reset the filter, click Reset Filter.
- To add a filter, click Add Filter.
Edit User
You can edit the Users access permissions for Admin, Communication Manager, Support, and Kaleyra Expert.
To edit the user, perform the following steps:
- Perform the steps from 1 through 2 of the Users page.
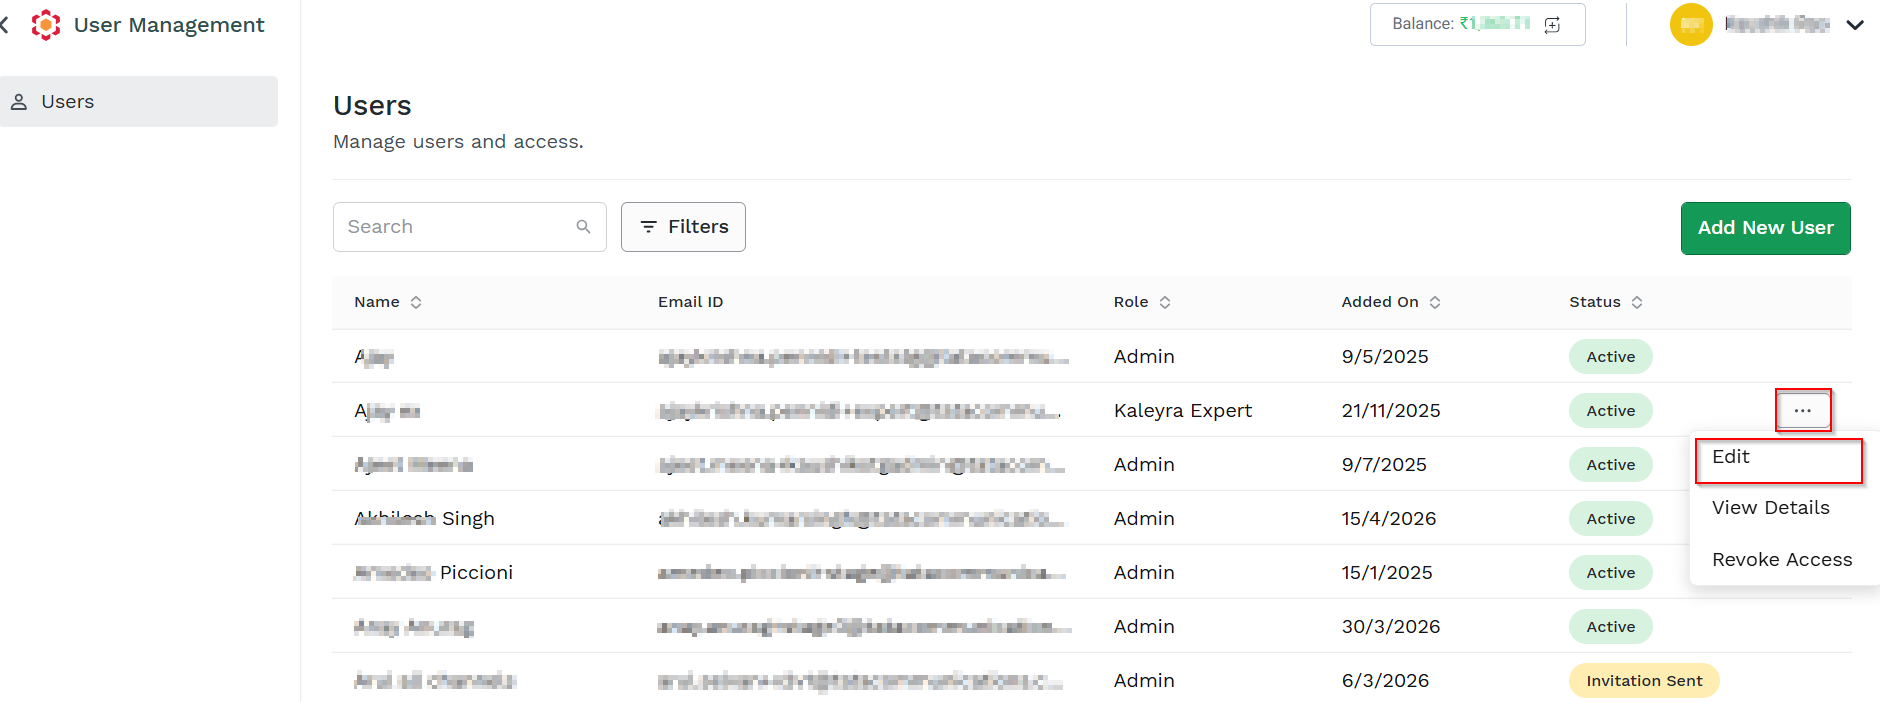
- Click the three dots next to the Status column (for example, Active status is selected) and then click the Edit option.
The Edit User pop-up appears.
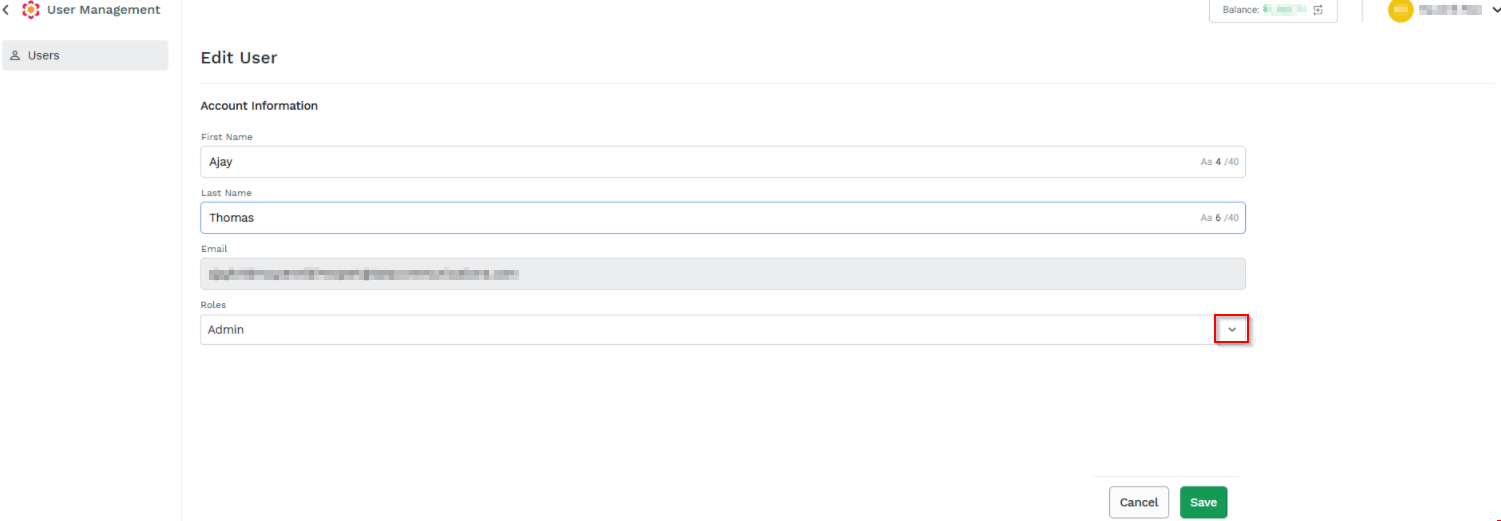
- Click the drop-down next to the Roles field.
The list of user roles appears.
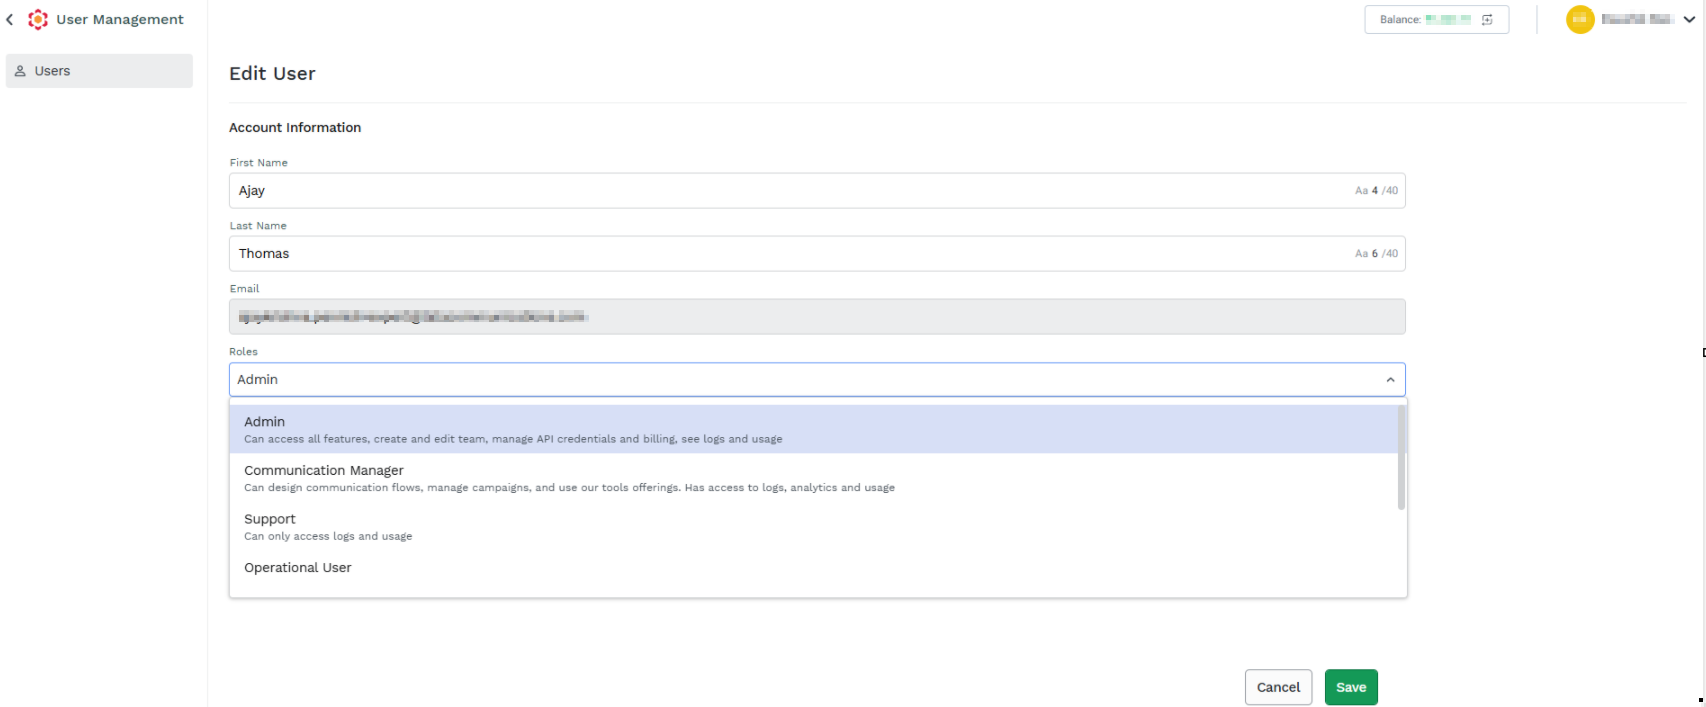
- Select the user roles based on your requirements.
- Click Save. The user role gets changed.
View Details
You can view the account details information such as the name of the user, Last Login, IP Address, Device, Access Details, Access Till of the user.
To view the account details information, perform the following steps:
- Perform the steps from 1 through 2 of the Users page.
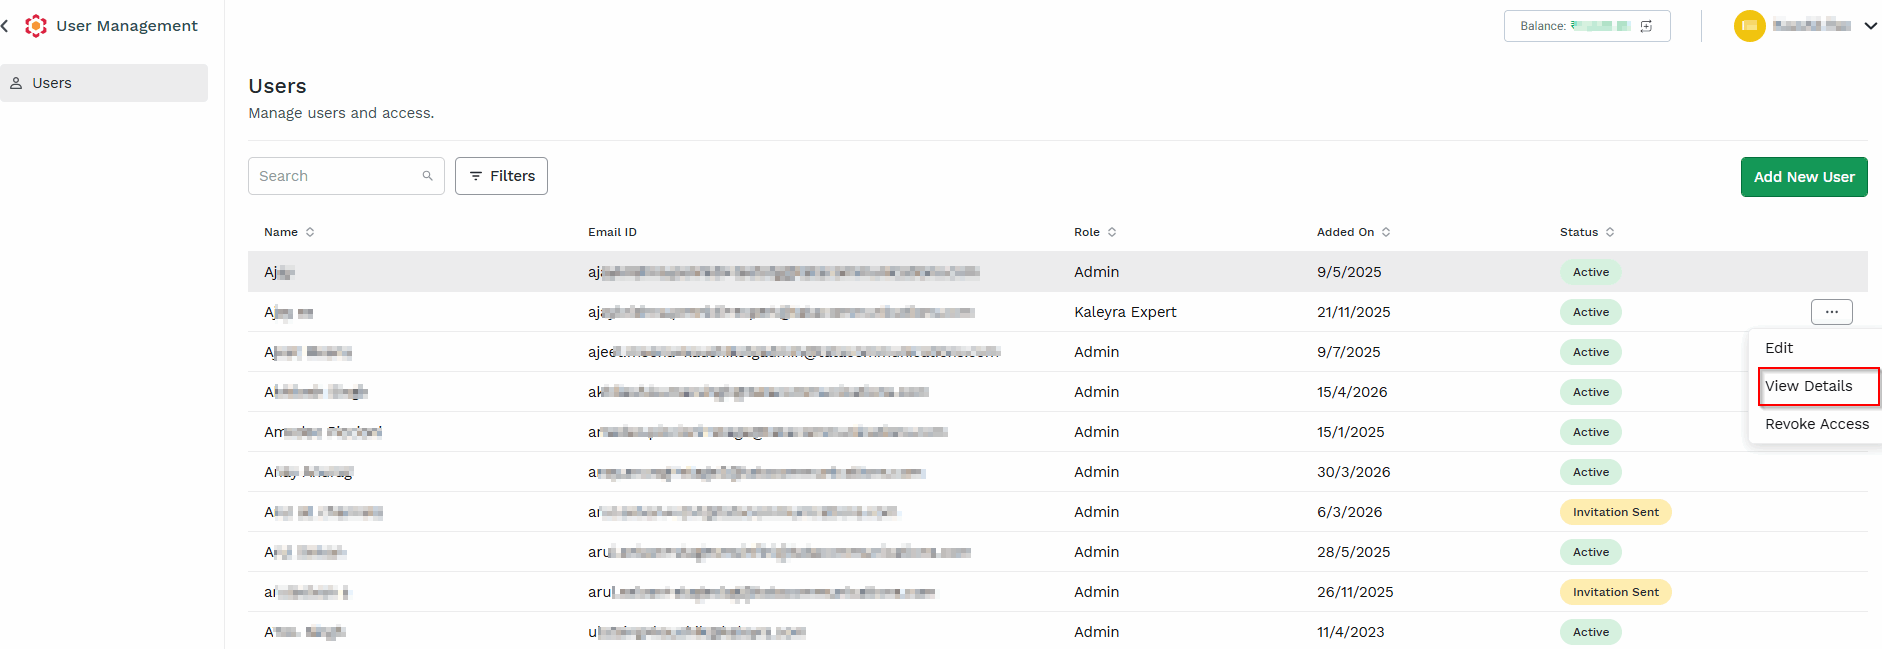
-
Click the three dots next to the Status column (for example, Active status is selected) and then click the View Details option.
The Account Details page appears.
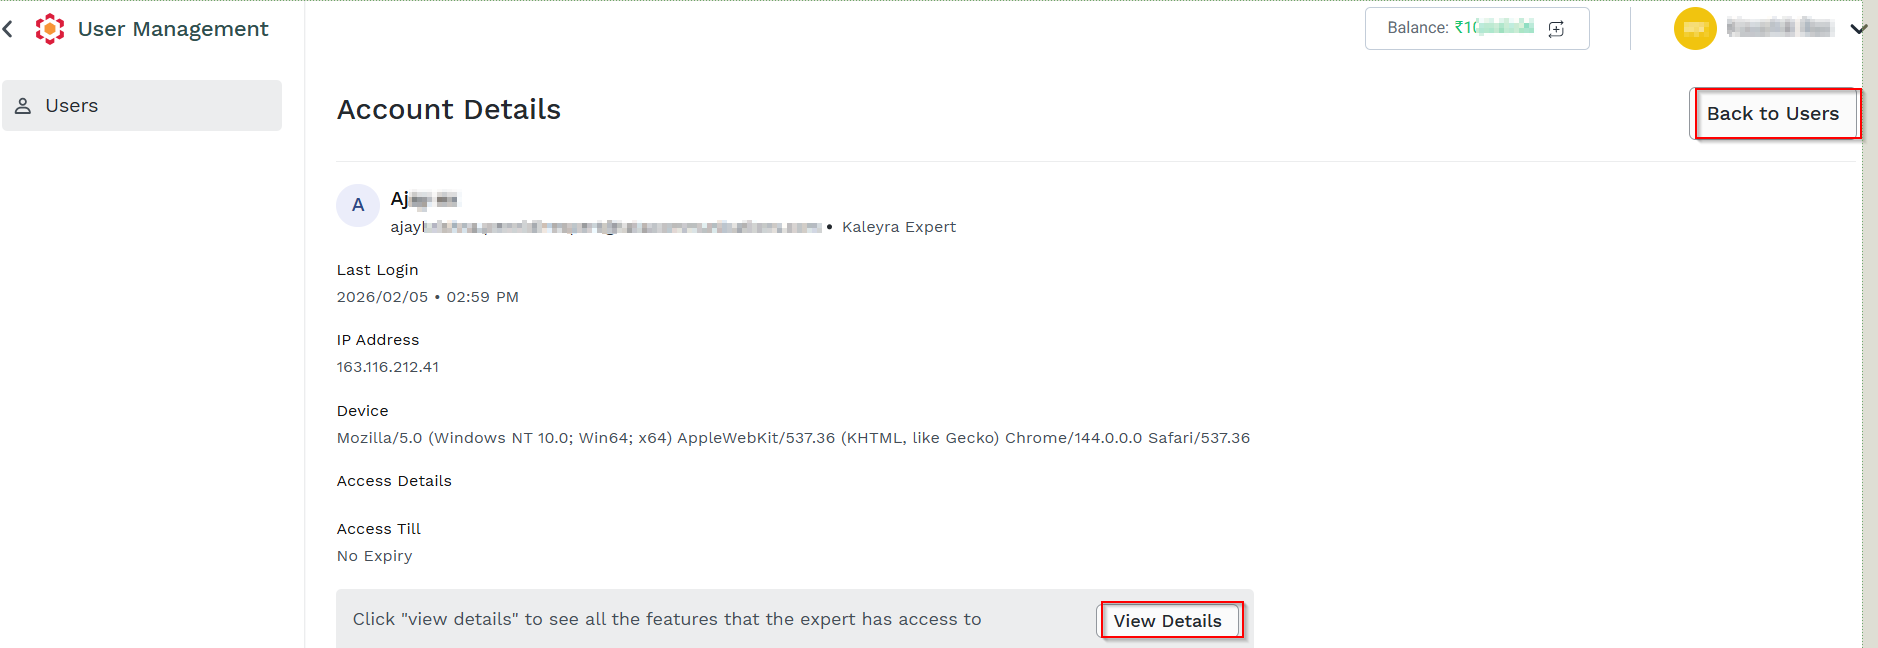
- Click View Details. The pop-up page appears where you can see all the features that the expert has access to.
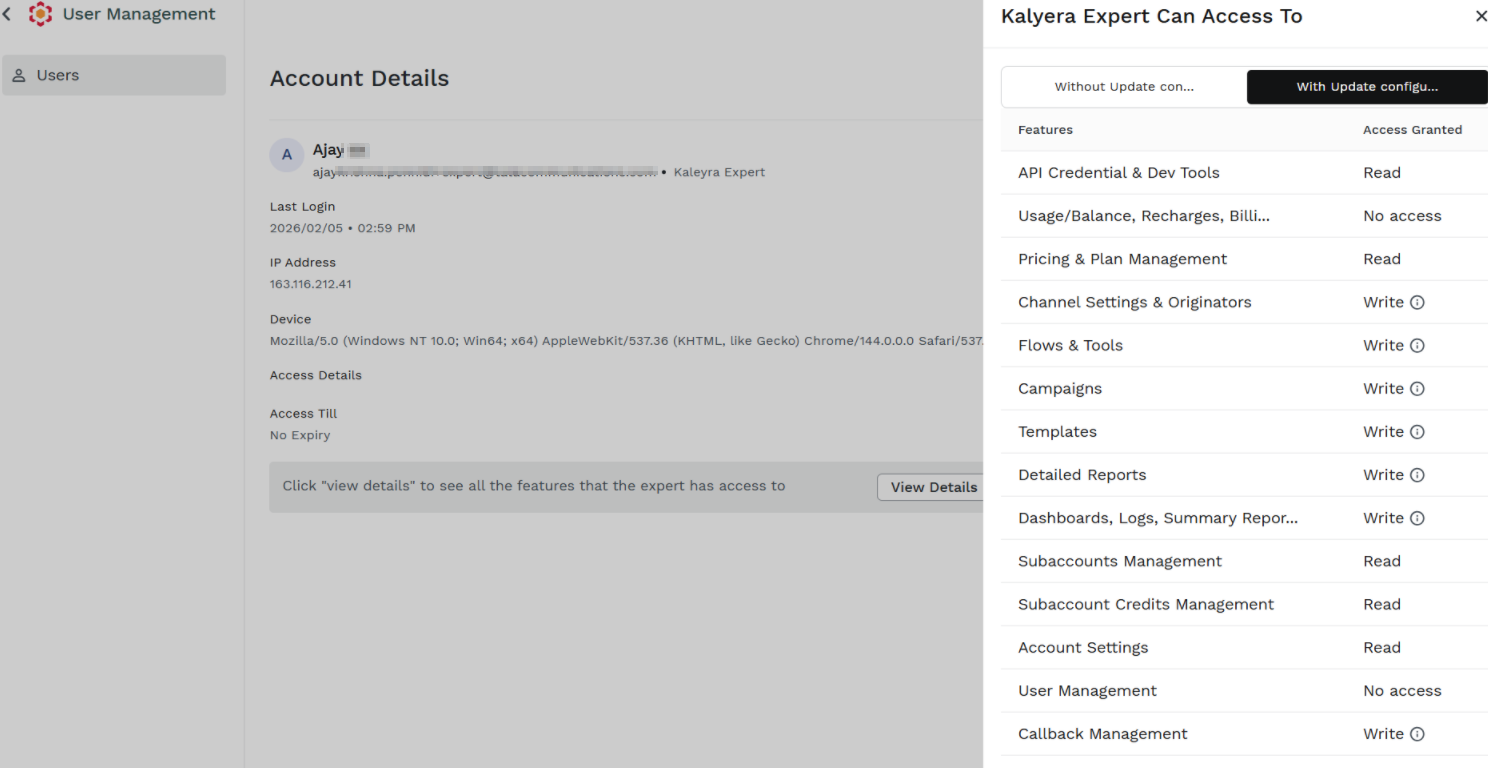
- Click Back to Users to go back to the Users page.
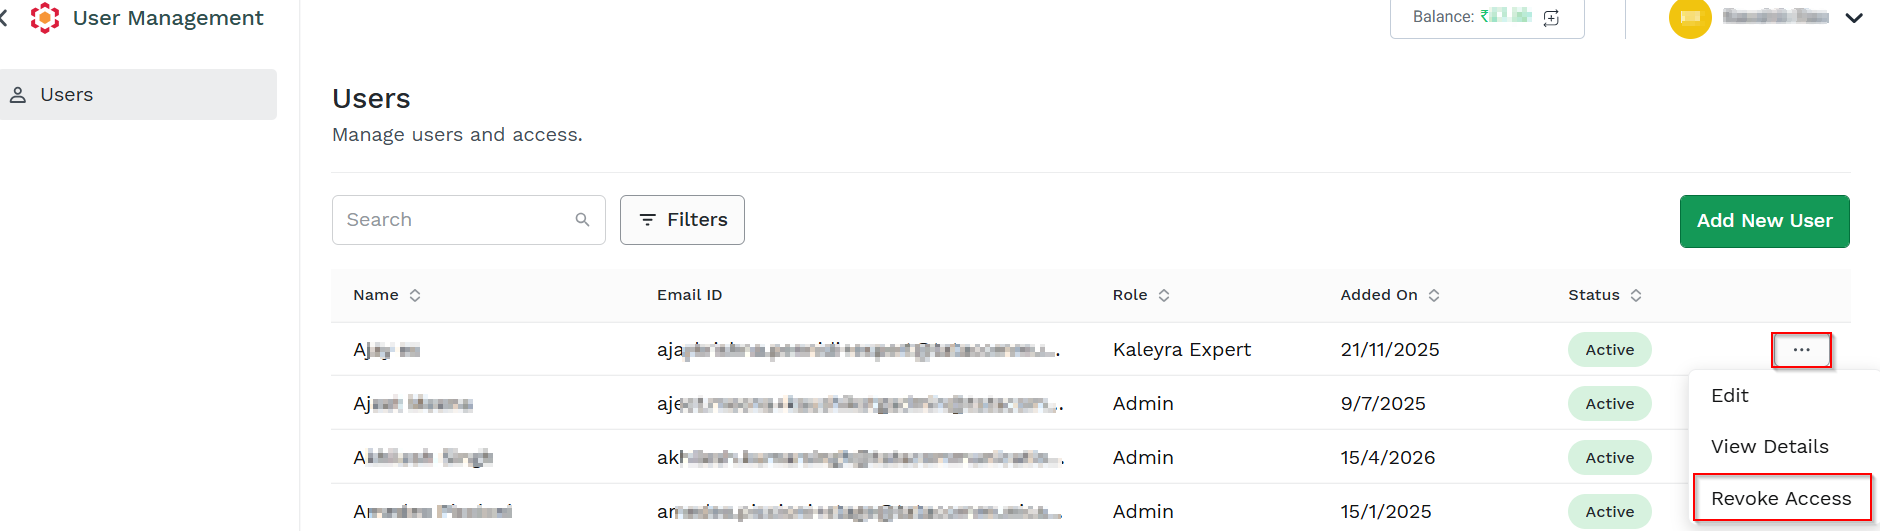
Revoke Access
You can temporarily revoke an end user's access to the account without deleting the user record. An end user whose access has been revoked cannot sign in to the account until access is restored.
To revoke an end user's access, perform the following steps:
-
Perform the steps from 1 through 2 of the Users page.
-
Locate the user whose access you want to revoke.
-
Click the three-dot next to the Status column, and then click Revoke Access.
The Revoke Access confirmation dialog "Revoking access will permanently delete this team member. Proceed?" appears.
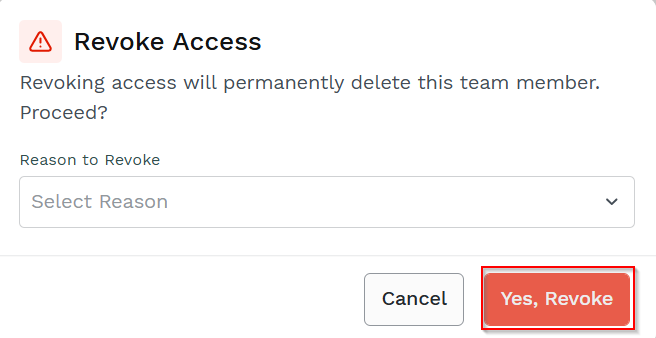
4. Click Yes, Revoke will permanently delete the user.
Note:
- You can view the reason to revoke by selecting the drop-down. The available options are Issue was resolved, Security & Privacy concerns, and Other.
- Revoking access temporarily disables the user's ability to sign in.
- The user record and assigned role are retained.
- You can restore the user's access later by editing the user's status or using the Restore Access option, if available.
- Revoking access does not delete the user's account or associated records.
Resend Invite
You can resend the invitation only to the user who has not accepted the invitation by clicking the link in the invitation email and completing the procedure to join Kaleyra platform based on their role.
Note:The invitation link in the email is only valid for an hour from the sent time. Once the link is expired you can resend the invitation to Kaleyra personnel to rejoin the session. If the session has expired, then you cannot resend the invitation to Kaleyra personnel.
The Resend Invite option is applicable only for the Invitation Sent Status.
To resend the invitation to a user, perform the following steps:
-
Perform the steps from 1 through 2 of the Users page.
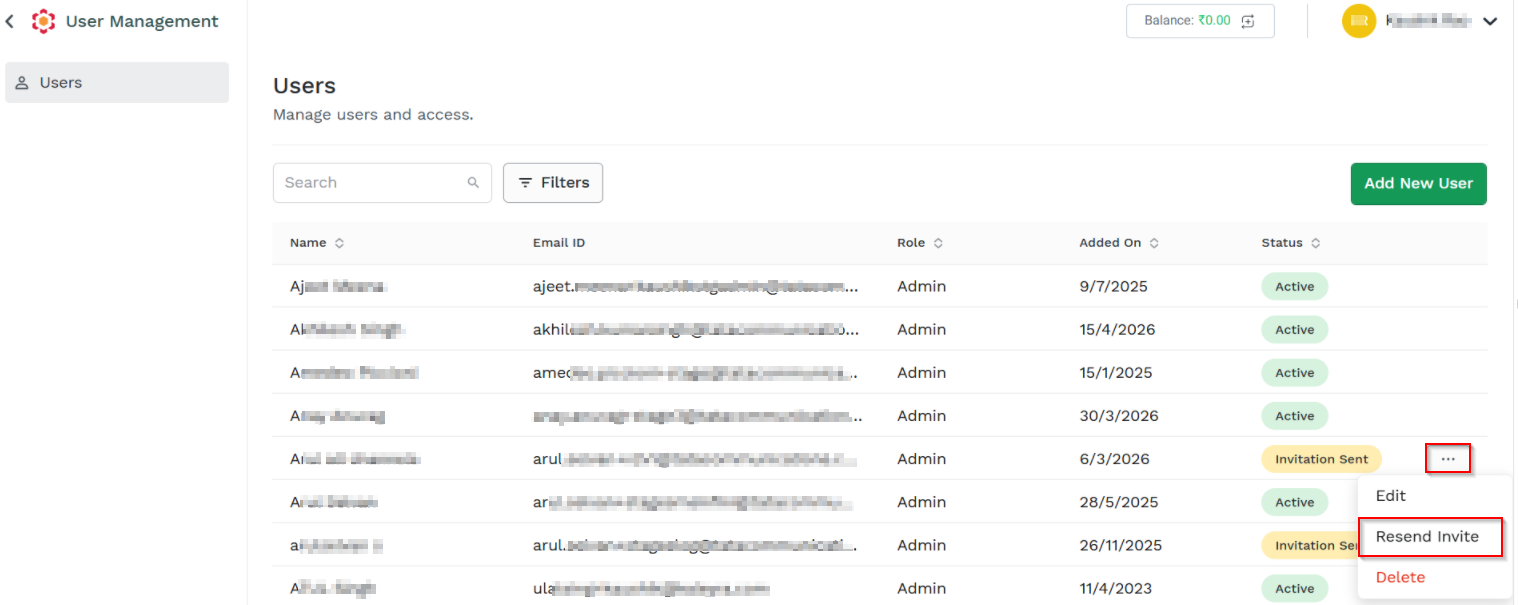
2. Click the three dots next to the Invitation Sent column and then click Resend Invite.
The Invite resent message appears. An email is resent to the user.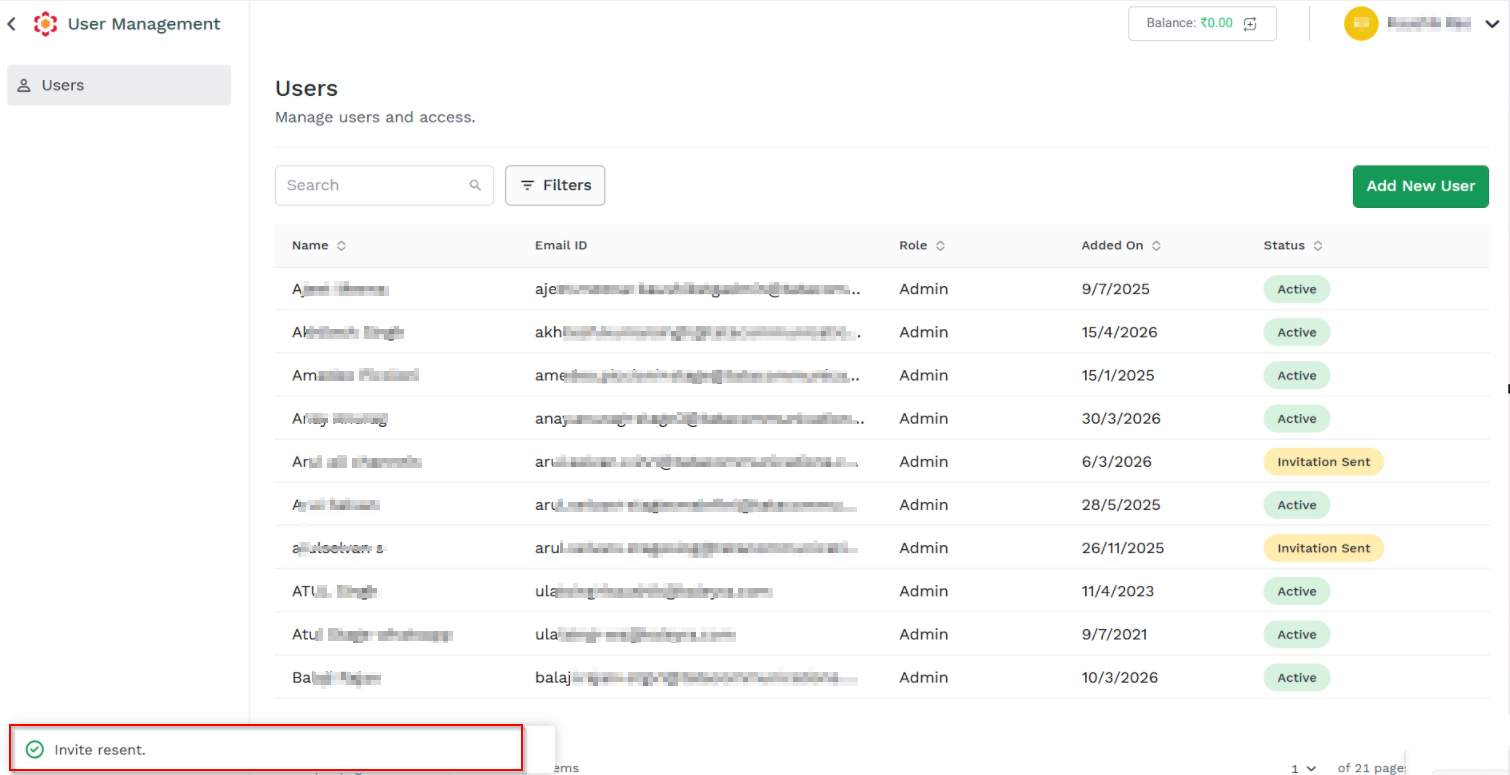
Delete User
You can delete user record from the Users page.
To delete user record, perform the following steps:
- Perform the steps from 1 through 2 of the Users page.
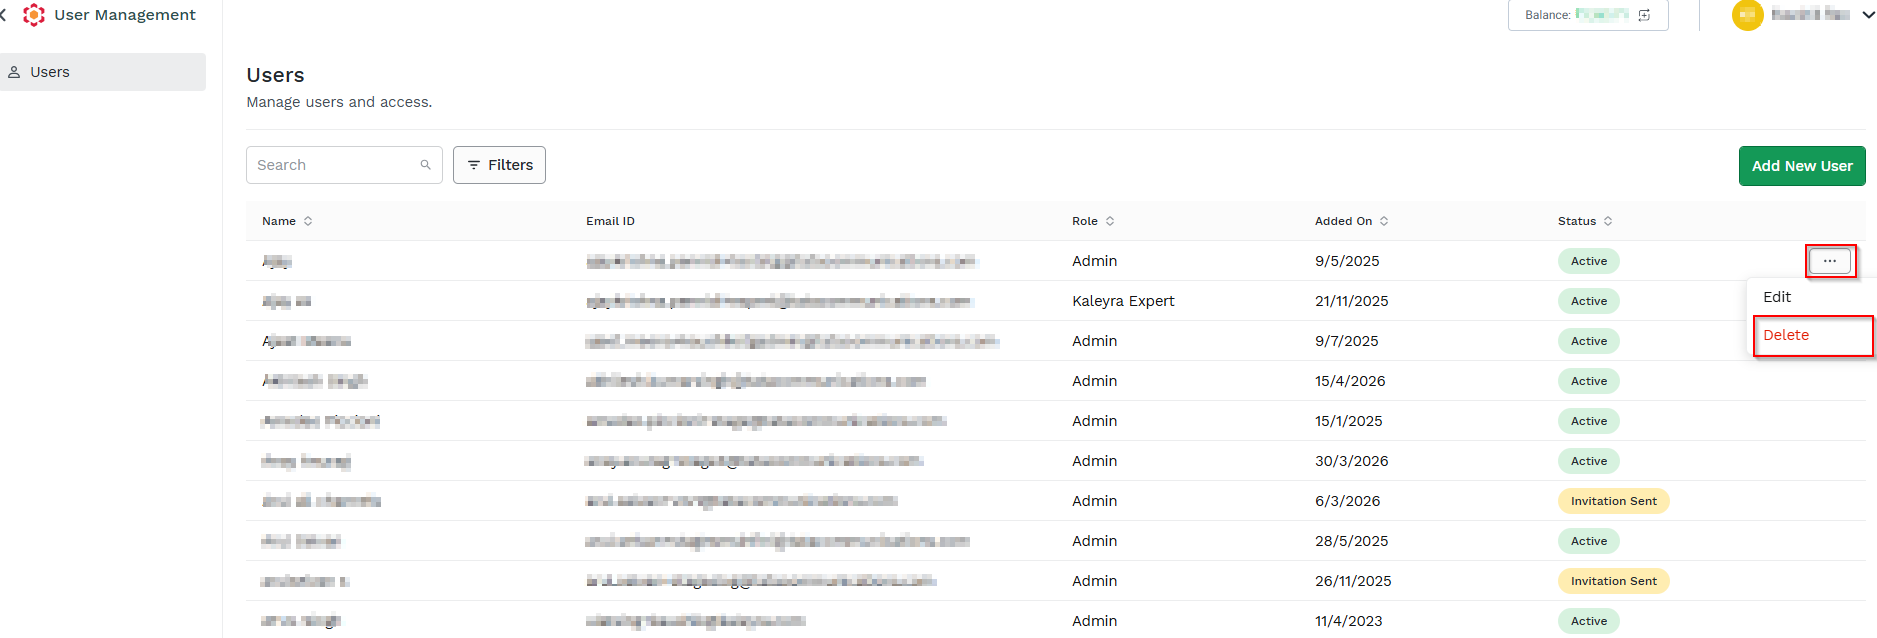
- Click the three dots next to the Status column (for example, Active status is selected) and then click the Delete option.
The Delete User dialog window "Are you sure you want to delete the user "Ajay"? appears.
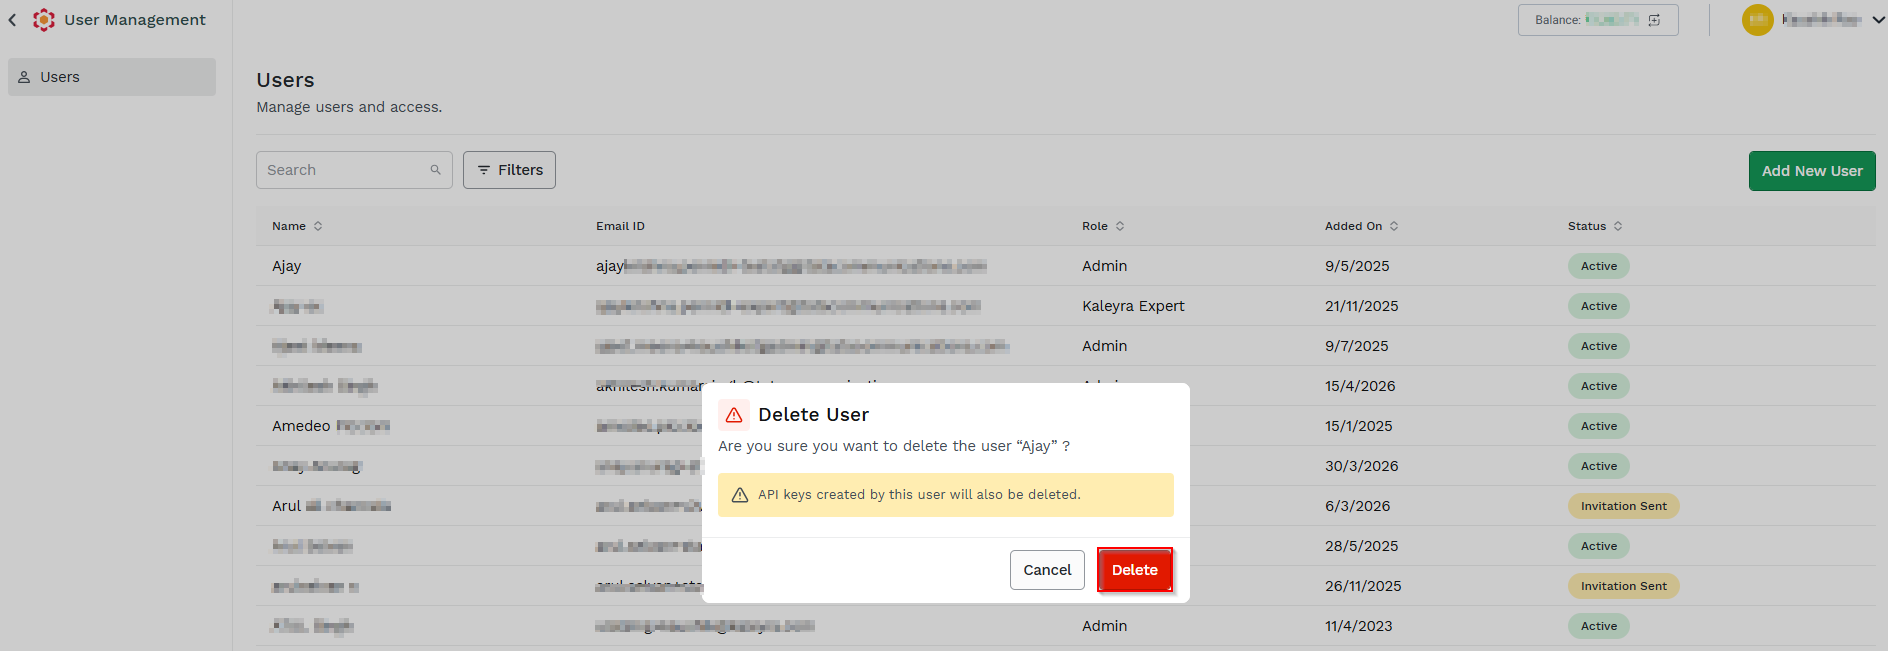
- Click Delete to delete the user record.
- Select Cancel to abort the deletion.
Note:If you delete a user's account who has created one or more API keys, all the API keys created by the user become invalid and any API calls made using the API keys will fail.
Before deleting a user's account, contact the kaleyra support team to know which API keys get affected due to deletion.
The system does not show any warning message about the deletion impact while performing the delete operation.
Updated 17 days ago