Configure Workflow Rules and Send WhatsApp
You can configure the workflow rules for different conditions and a WhatsApp message will get triggered for your set condition to leads, contacts, or accounts.
Use case: In this procedure, the workflow rule is created for the lead. Whenever a new lead is created a WhatsApp message is sent to new leads provided the condition that the first name contains John, using the Kaleyra plugin and WhatsApp service.
To send WhatsApp messages with workflow rules to leads, contacts, or accounts, perform the following steps:
- Sign in to your Zoho CRM account.
- On the menu bar, click the Settings (gear) icon.
The Setup page appears.
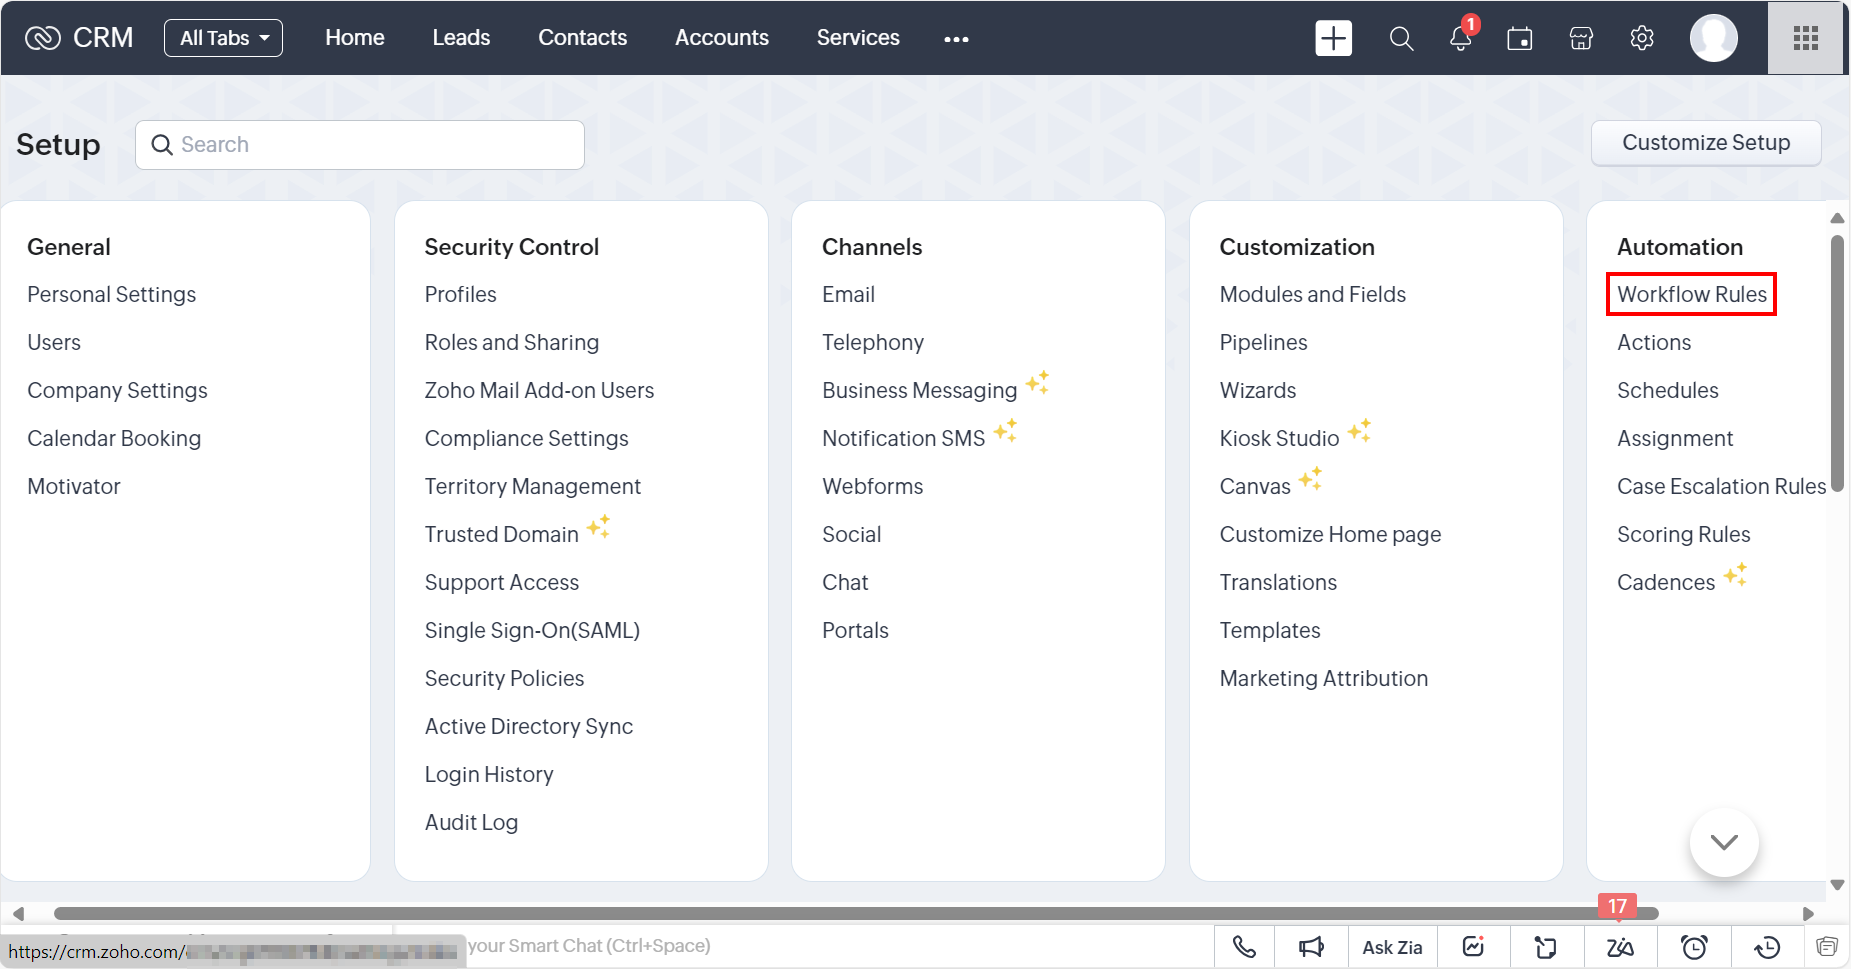
- In the Automation section, click Workflow Rules.
The Rules tab detail appears.
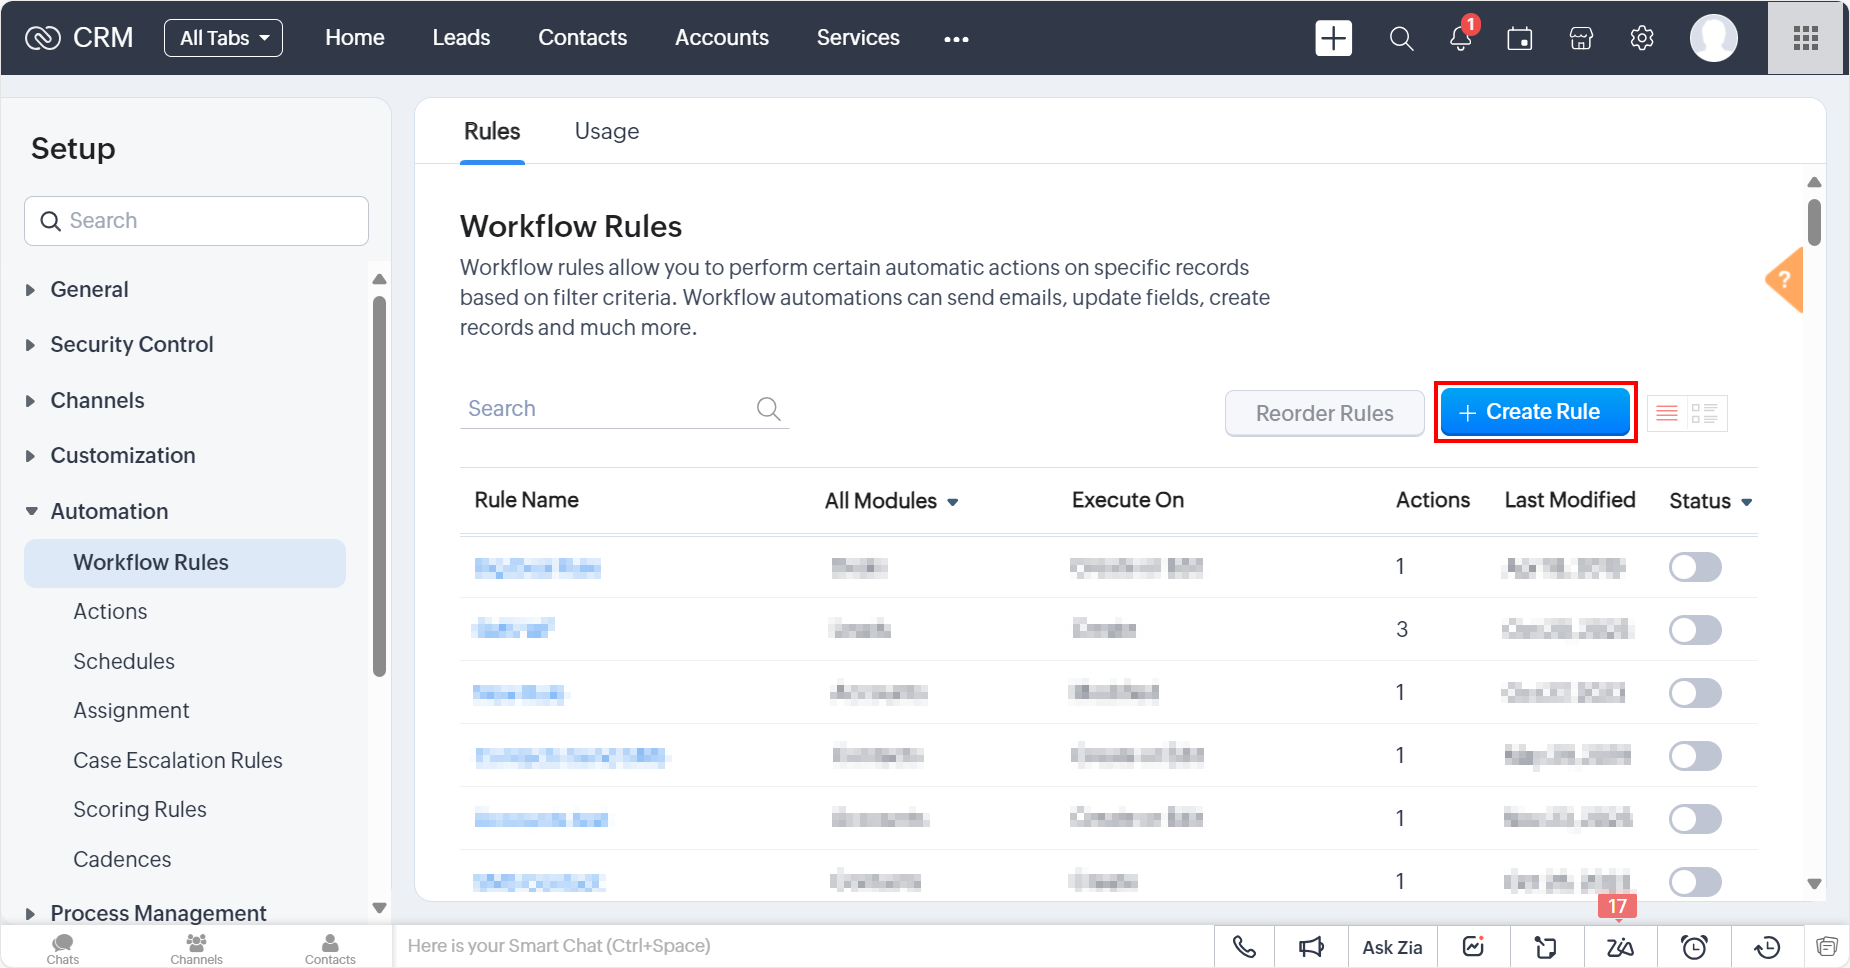
- Click + Create Rule.
The Create New Rule pop-up appears.
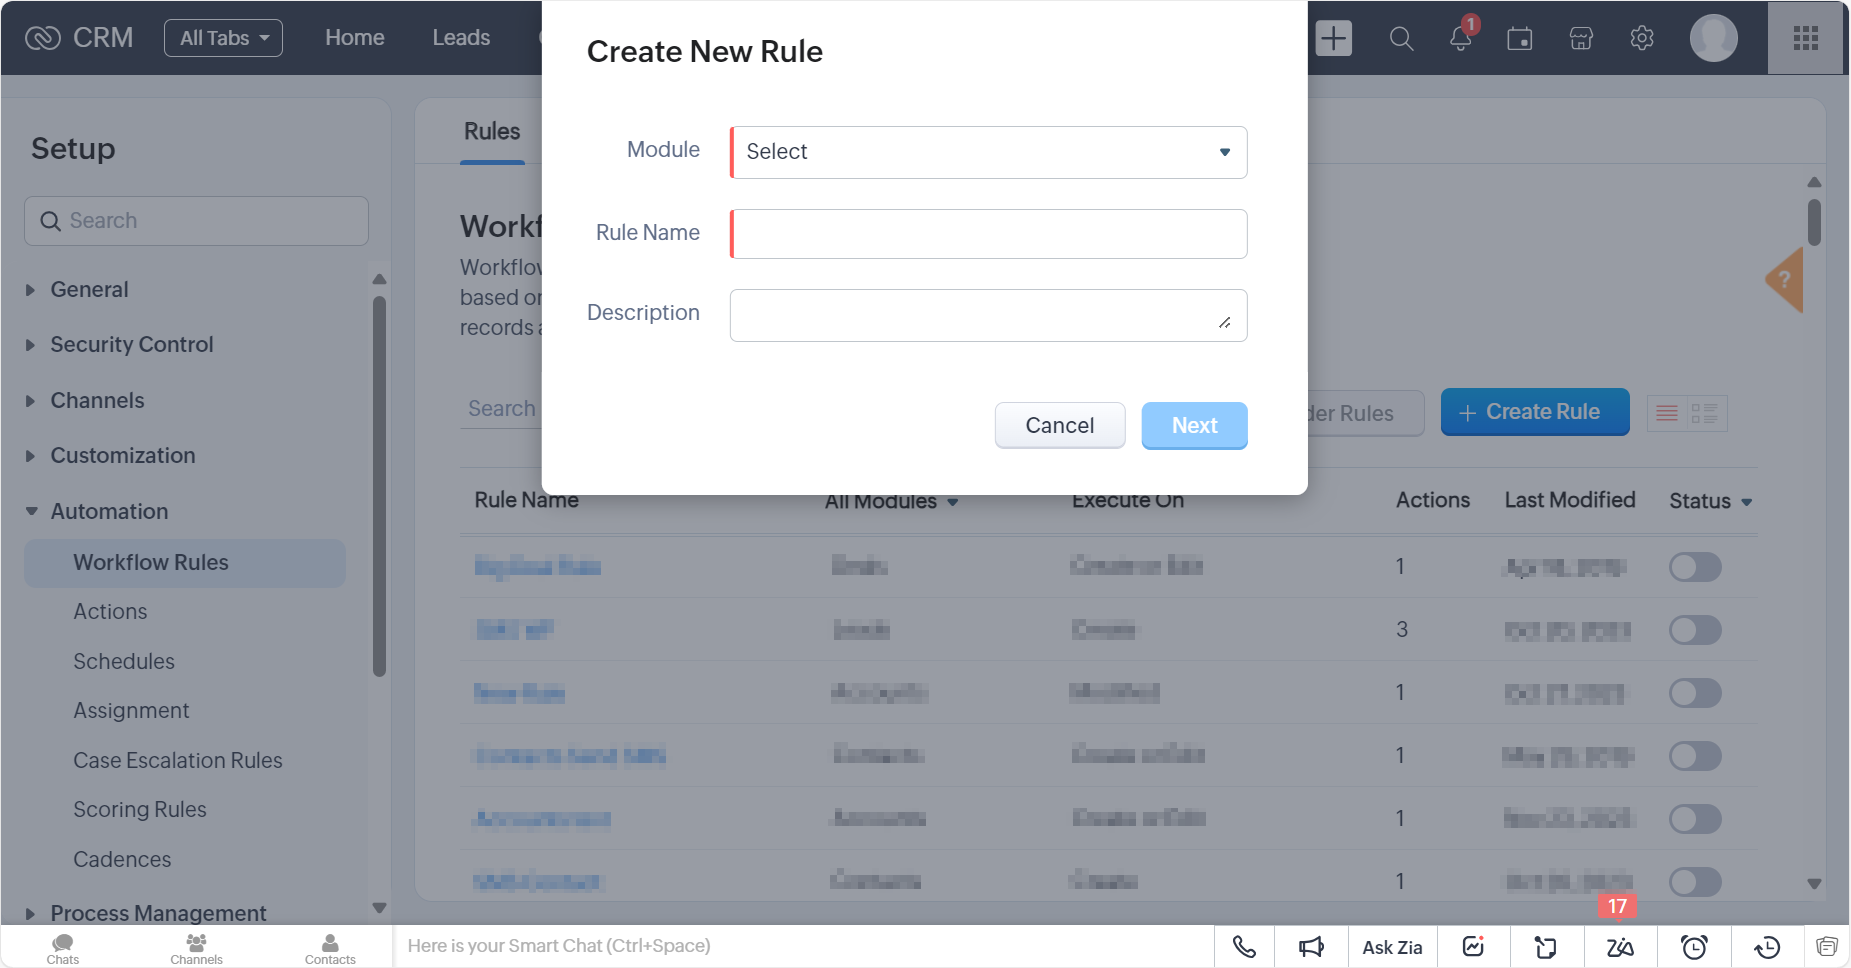
- Perform the following:
- Click the drop-down arrow next to the Module, and a supported list of modules appears. Select from Leads, Contacts, or Accounts. Kaleyra currently supports workflow rules for these three modules. For example, the Leads module is selected.
- In the Rule Name field, enter the name for your workflow rule based on your choice. It is recommended to enter a name that is easy to remember based on the workflow action.
- (Optional) In the Description field, enter the description for your workflow rule.
- Click Next.
The WHEN option appears to configure the workflow rules.
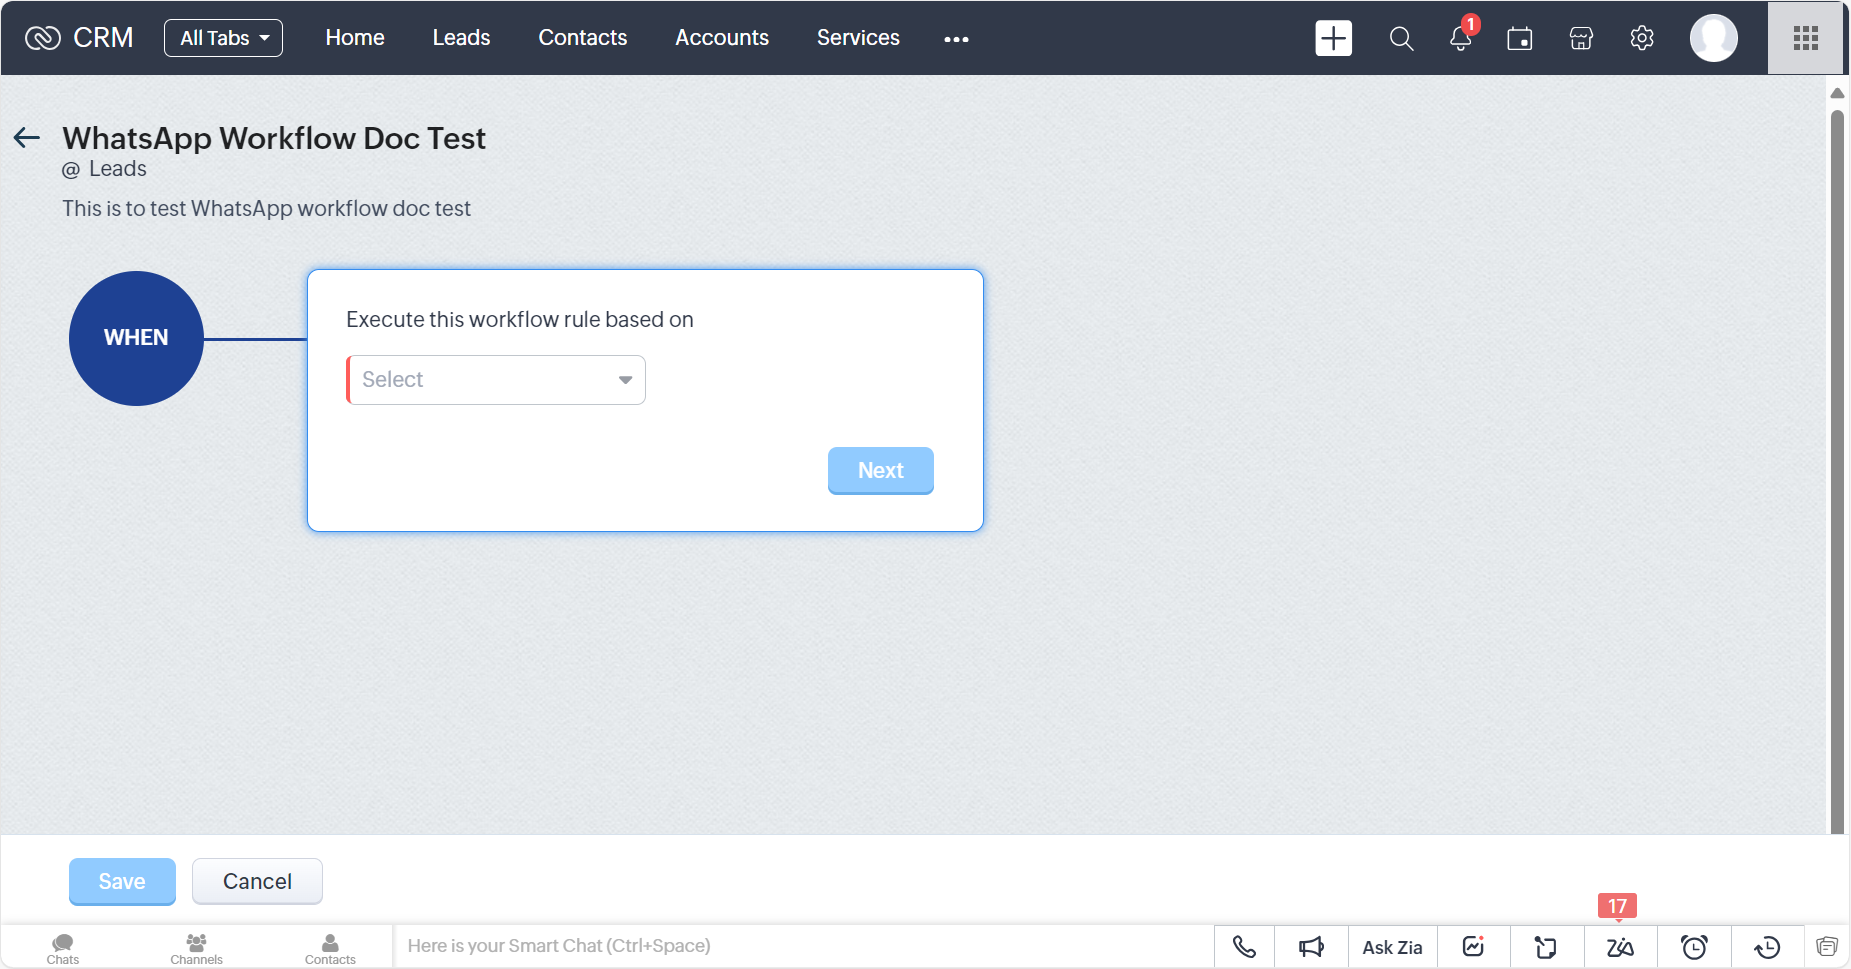
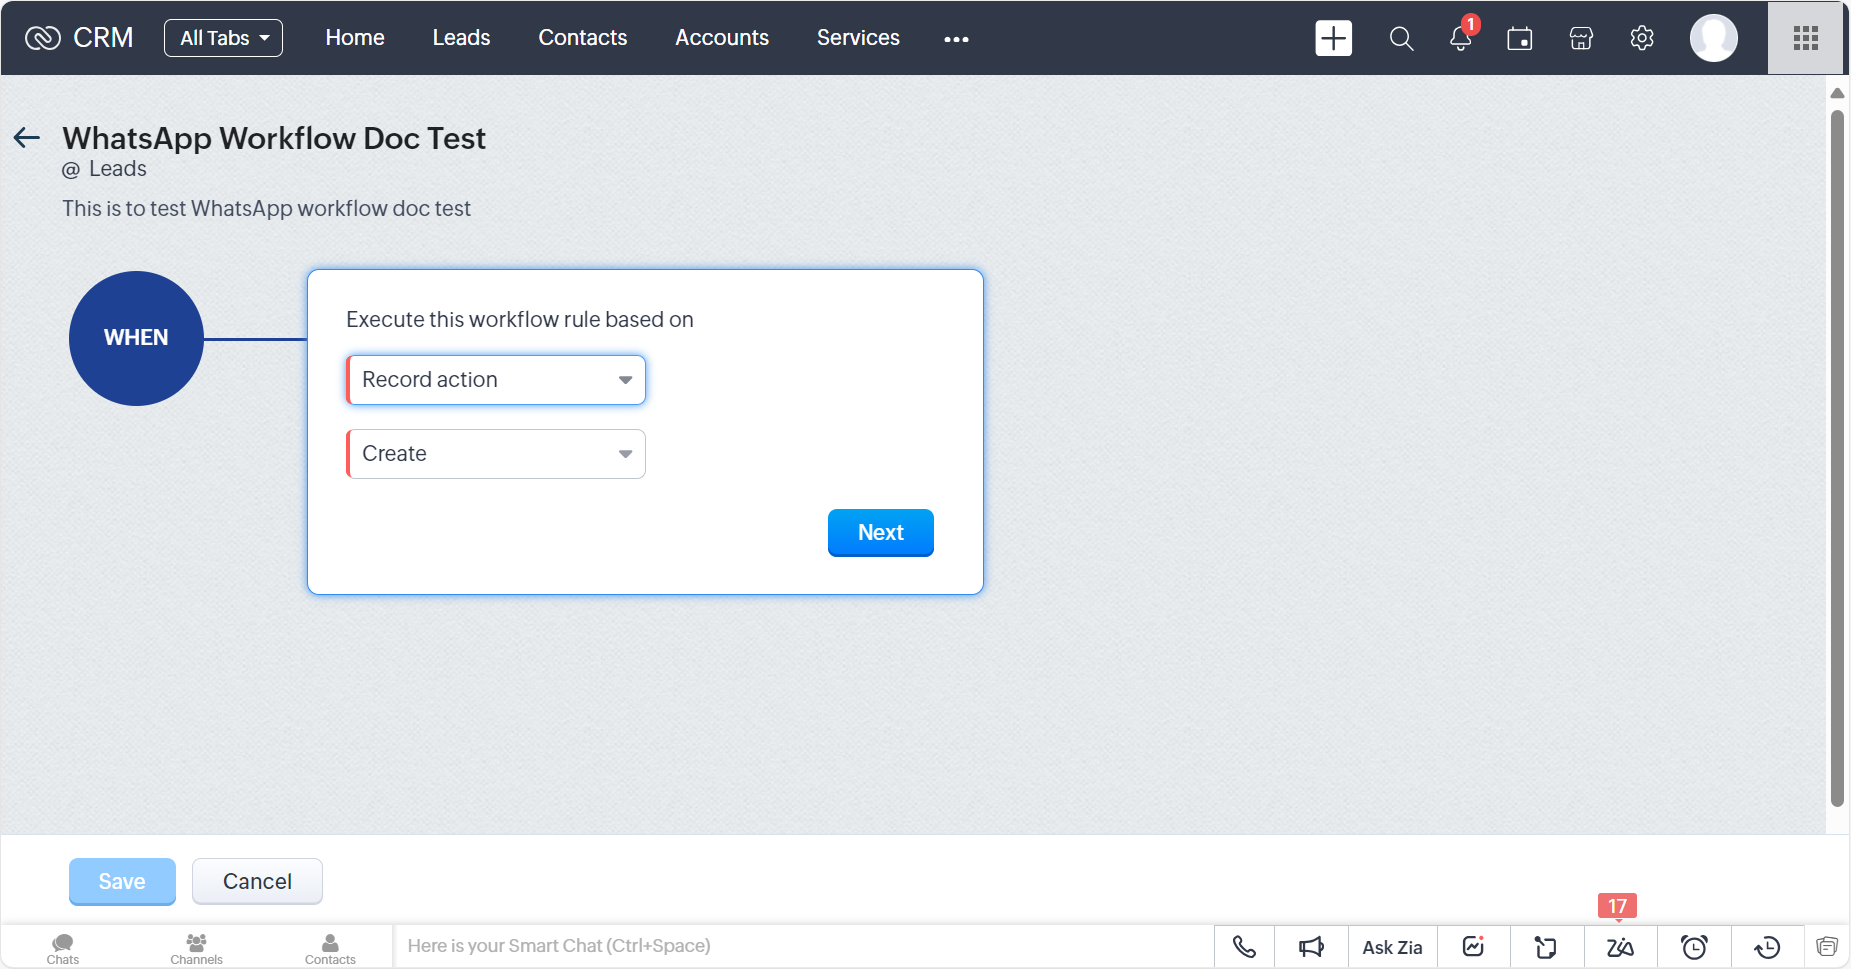
- Click the drop-down arrow next to the Select field and the following options appears:
Record Action
The record action allows you to send a WhatsApp message whenever a specific event takes place, depending on the actions you have selected. For example, the “create” Record Action is selected meaning that the rule will be triggered as the creation of a new Lead in the system.
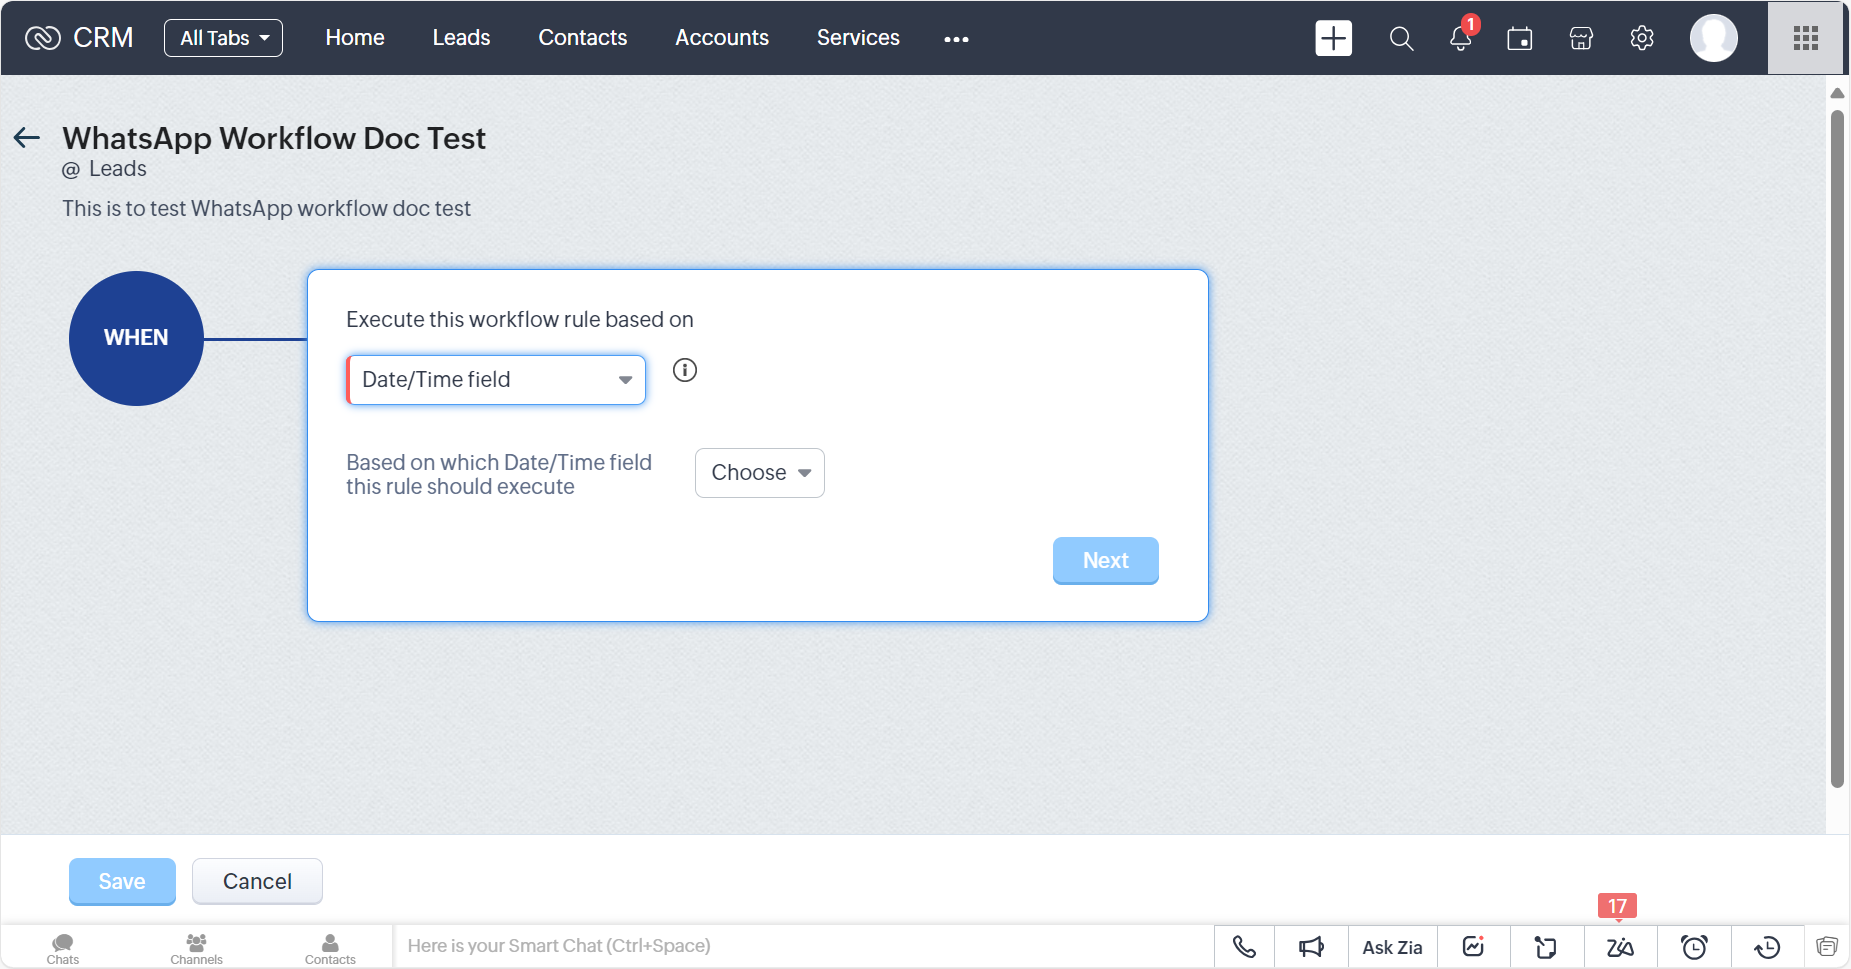
Date/Time field
The date/time allows you to send a WhatsApp message whenever a specific event takes place, depending on the date and time you have selected.
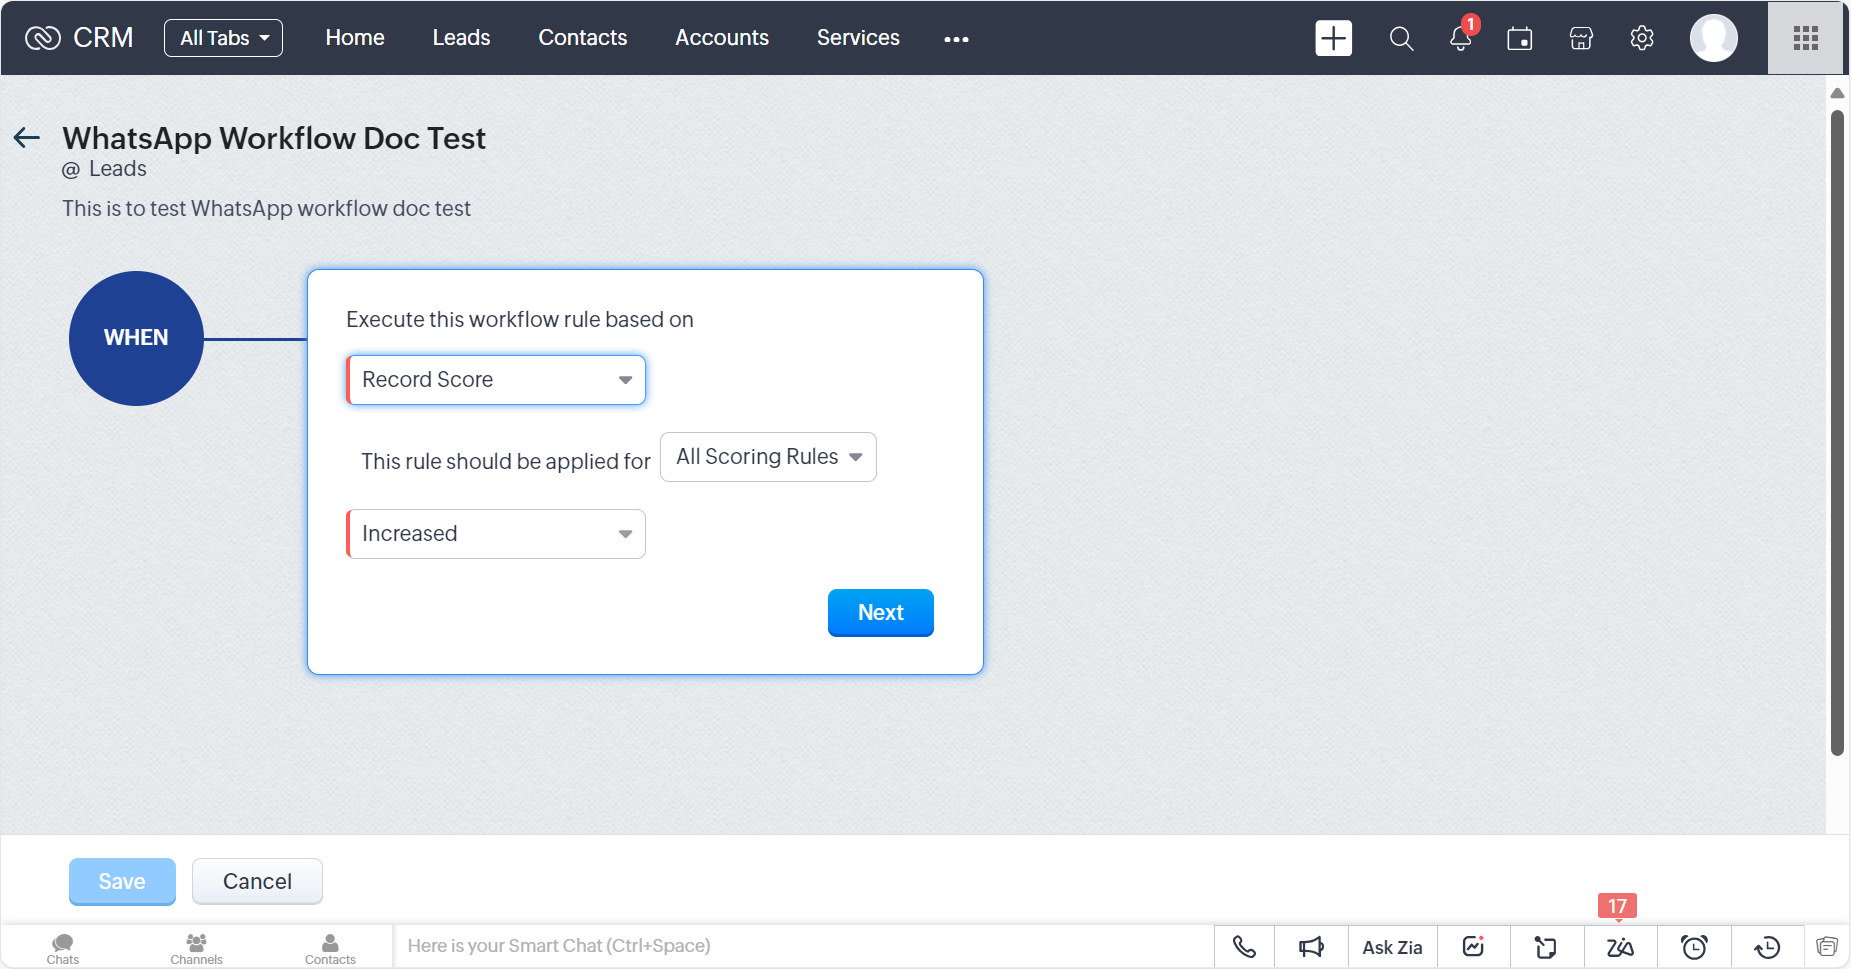
Record Score
The record score allows you to send a WhatsApp message whenever a specific event takes place, depending on whether the record score increased, decreased, or updated.
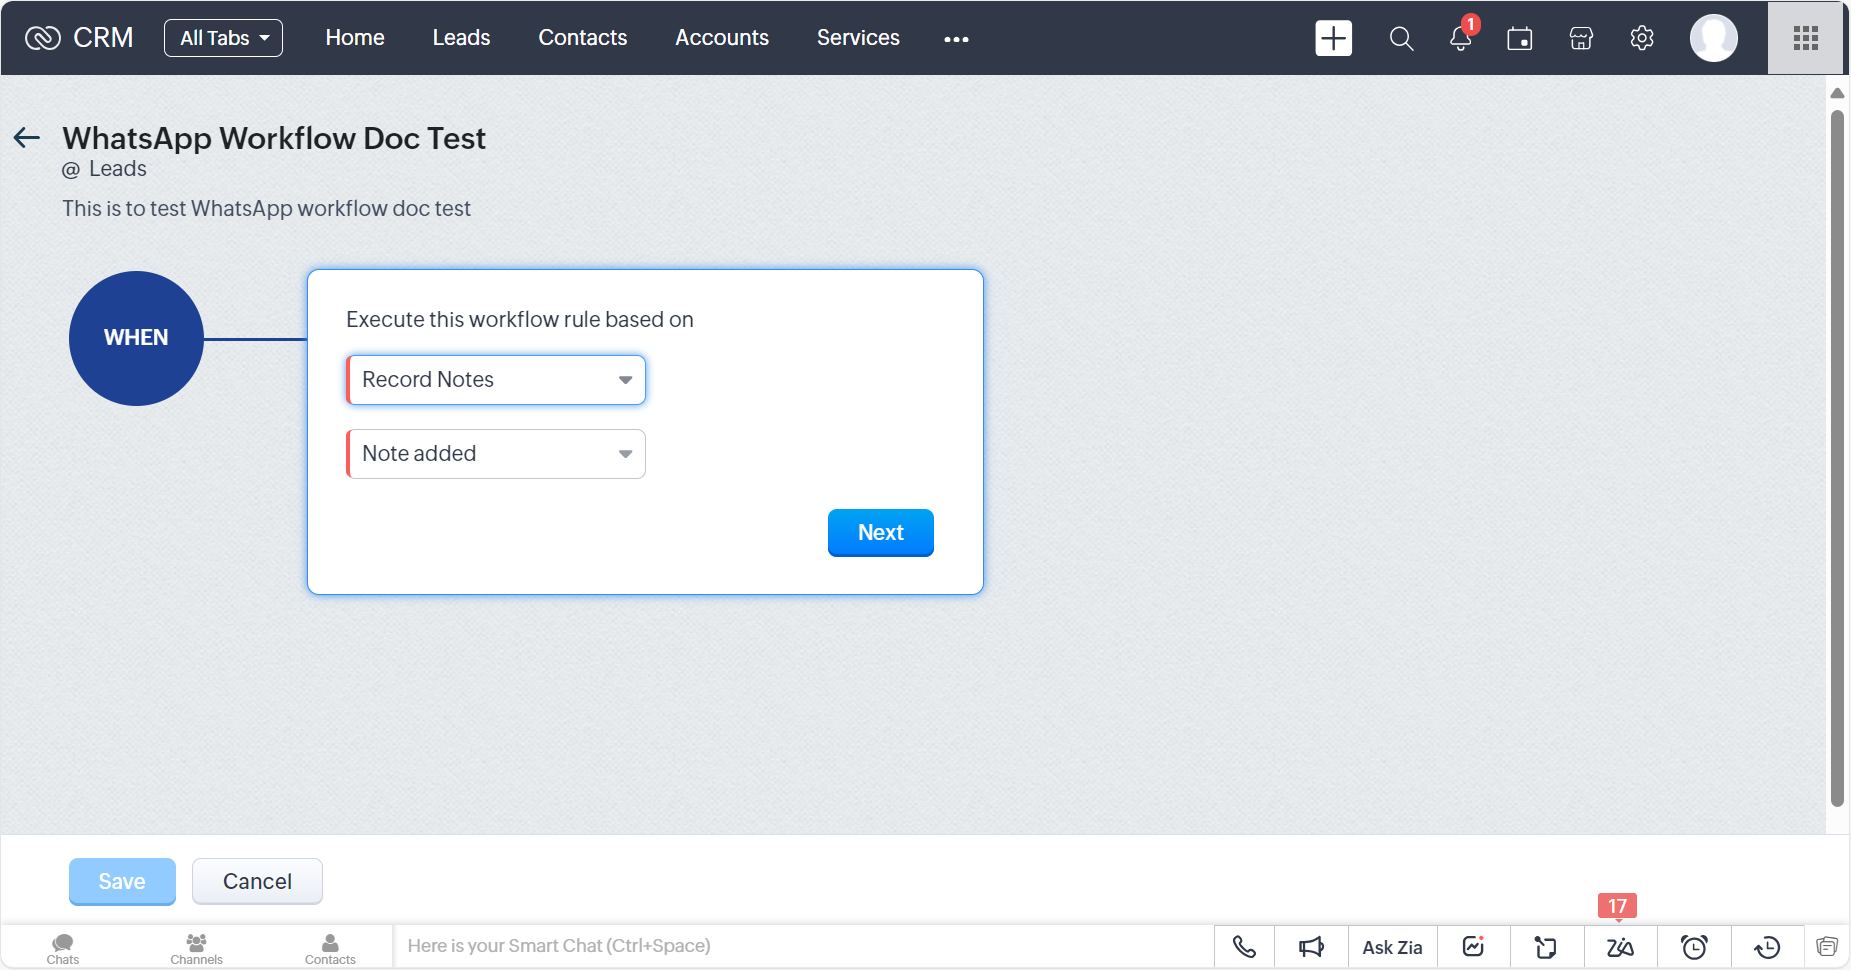
Record Notes
The record notes allows you to send a WhatsApp message whenever a specific event takes place, depending on whether the record notes are added, added or modified, modified, or deleted.
- Based on the Record Action selection, click the drop-down arrow next to the Create option, and the following options list appears to trigger the workflow when a new lead is:
- Created - Select the Create option to trigger the WhatsApp message when any new leads are created. For example, Create is selected.
- Created or Edited - Select the Create or Edit option to trigger the WhatsApp message when any lead is created or edited.
- Edited - Select the Edit option to trigger the WhatsApp message when any lead is edited.
- Deleted - Select the Delete option to trigger the WhatsApp message when any lead is deleted.
- Click Next.
The CONDITION1 option appears to configure the workflow rules.
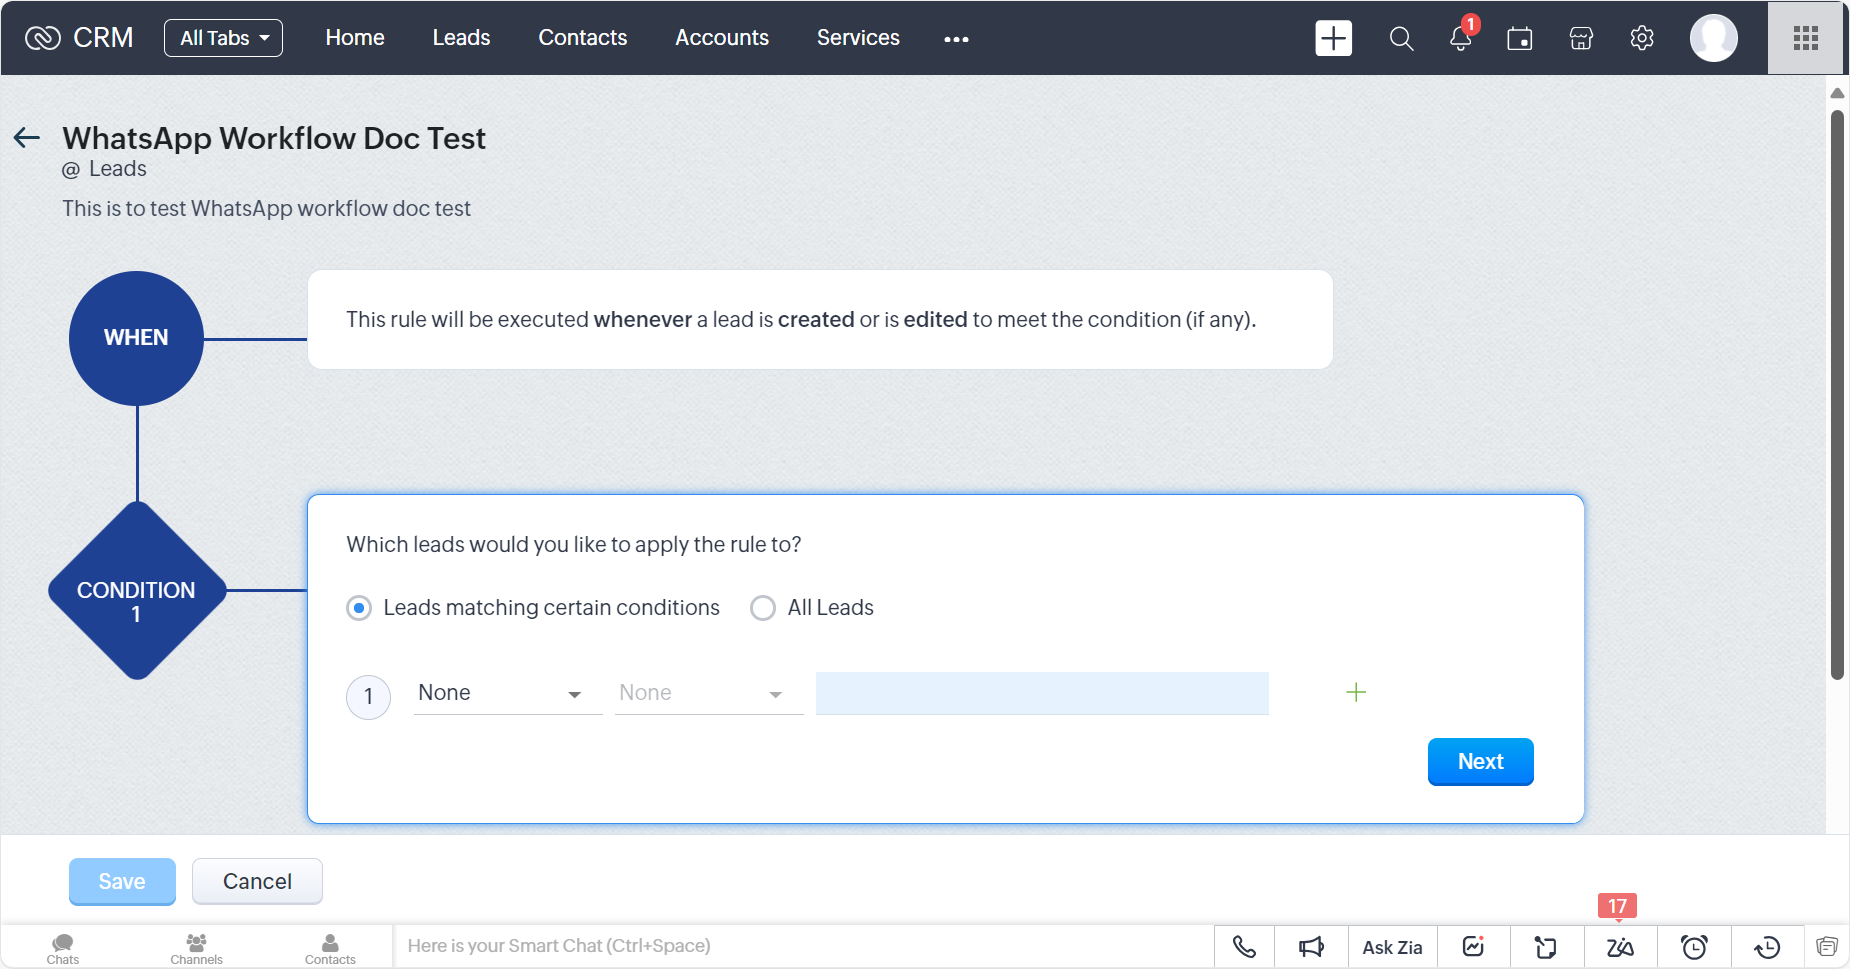
- Select any one of the following based on the record action for lead creation:
- Leads matching certain conditions - Select to send a WhatsApp message to matched conditions based on your configured conditions. In the above example, this option is selected.
For example, click and select First Name from the list in the first drop-down field. In the second drop-down field, click and select contains (set the condition) from the list. In the third field enter John. So, when a new lead is created with a first name containing John, the WhatsApp message gets triggered. - All Leads - Select to send WhatsApp messages to all the leads based on the WHEN.
- Leads matching certain conditions - Select to send a WhatsApp message to matched conditions based on your configured conditions. In the above example, this option is selected.
- Click Next.
The Instant Actions appear.
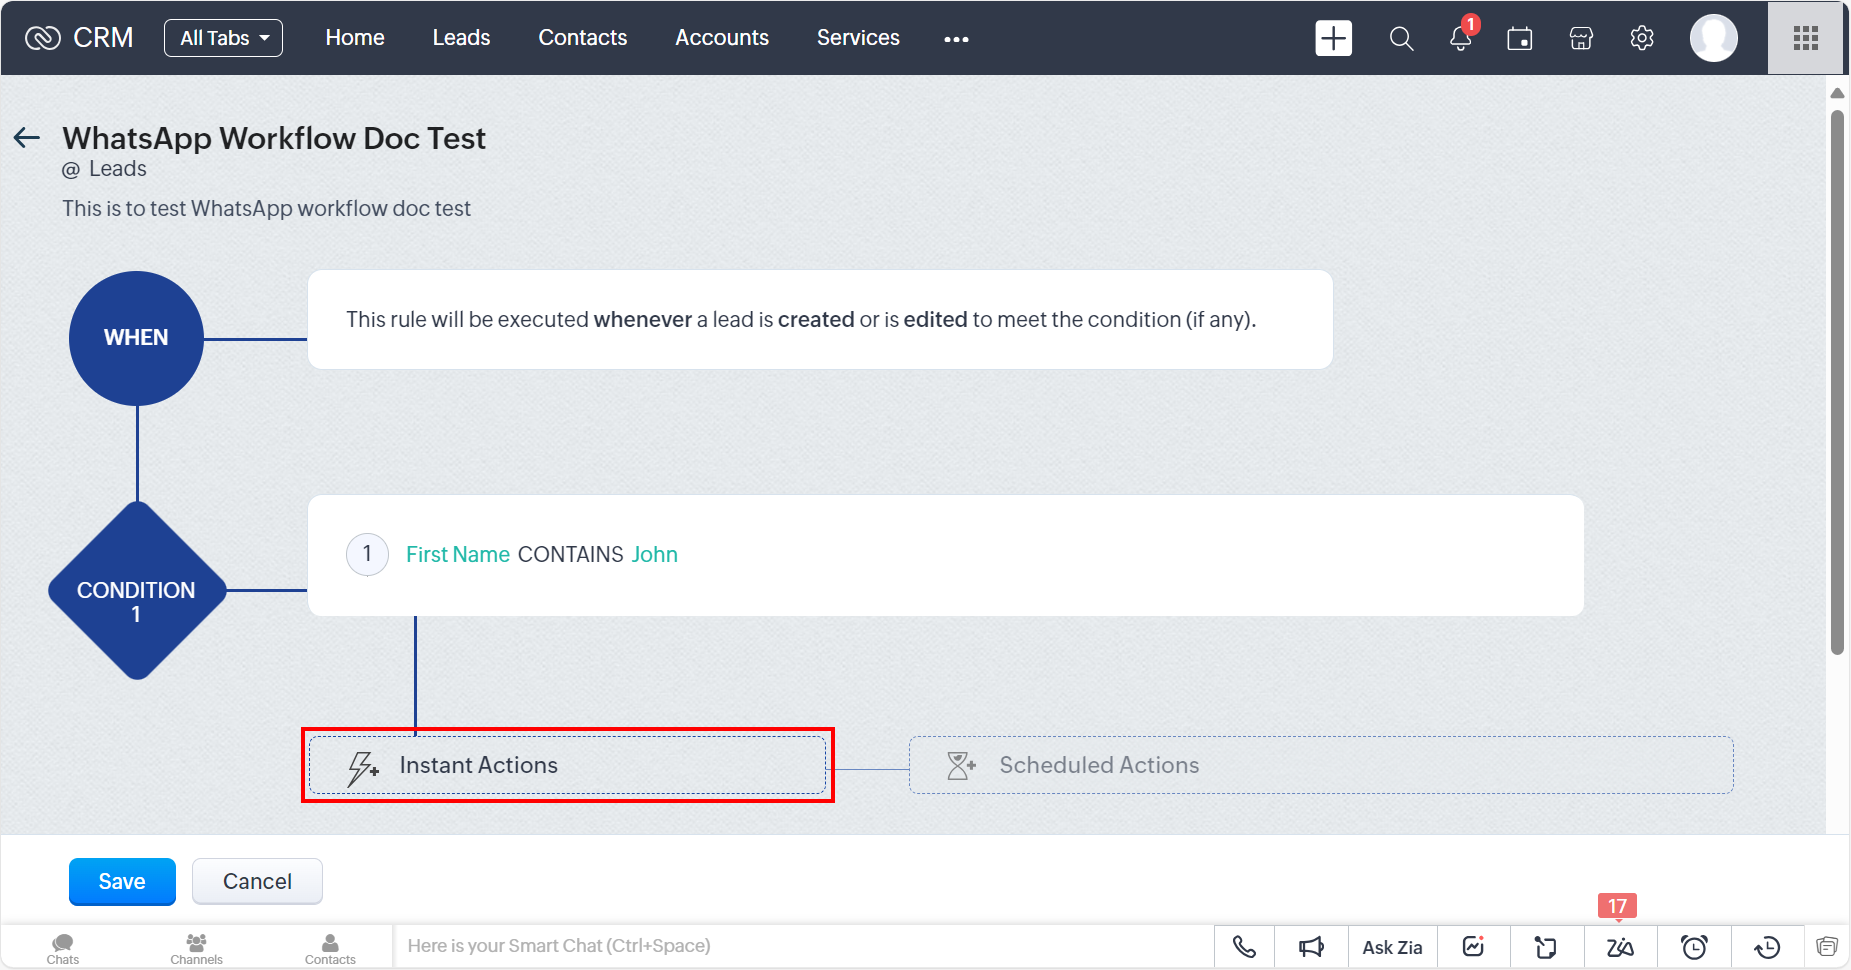
- Click the Instant Actions and a list of actions appears. Scroll down and hover over Custom Actions.
The list of available Custom Actions appears.
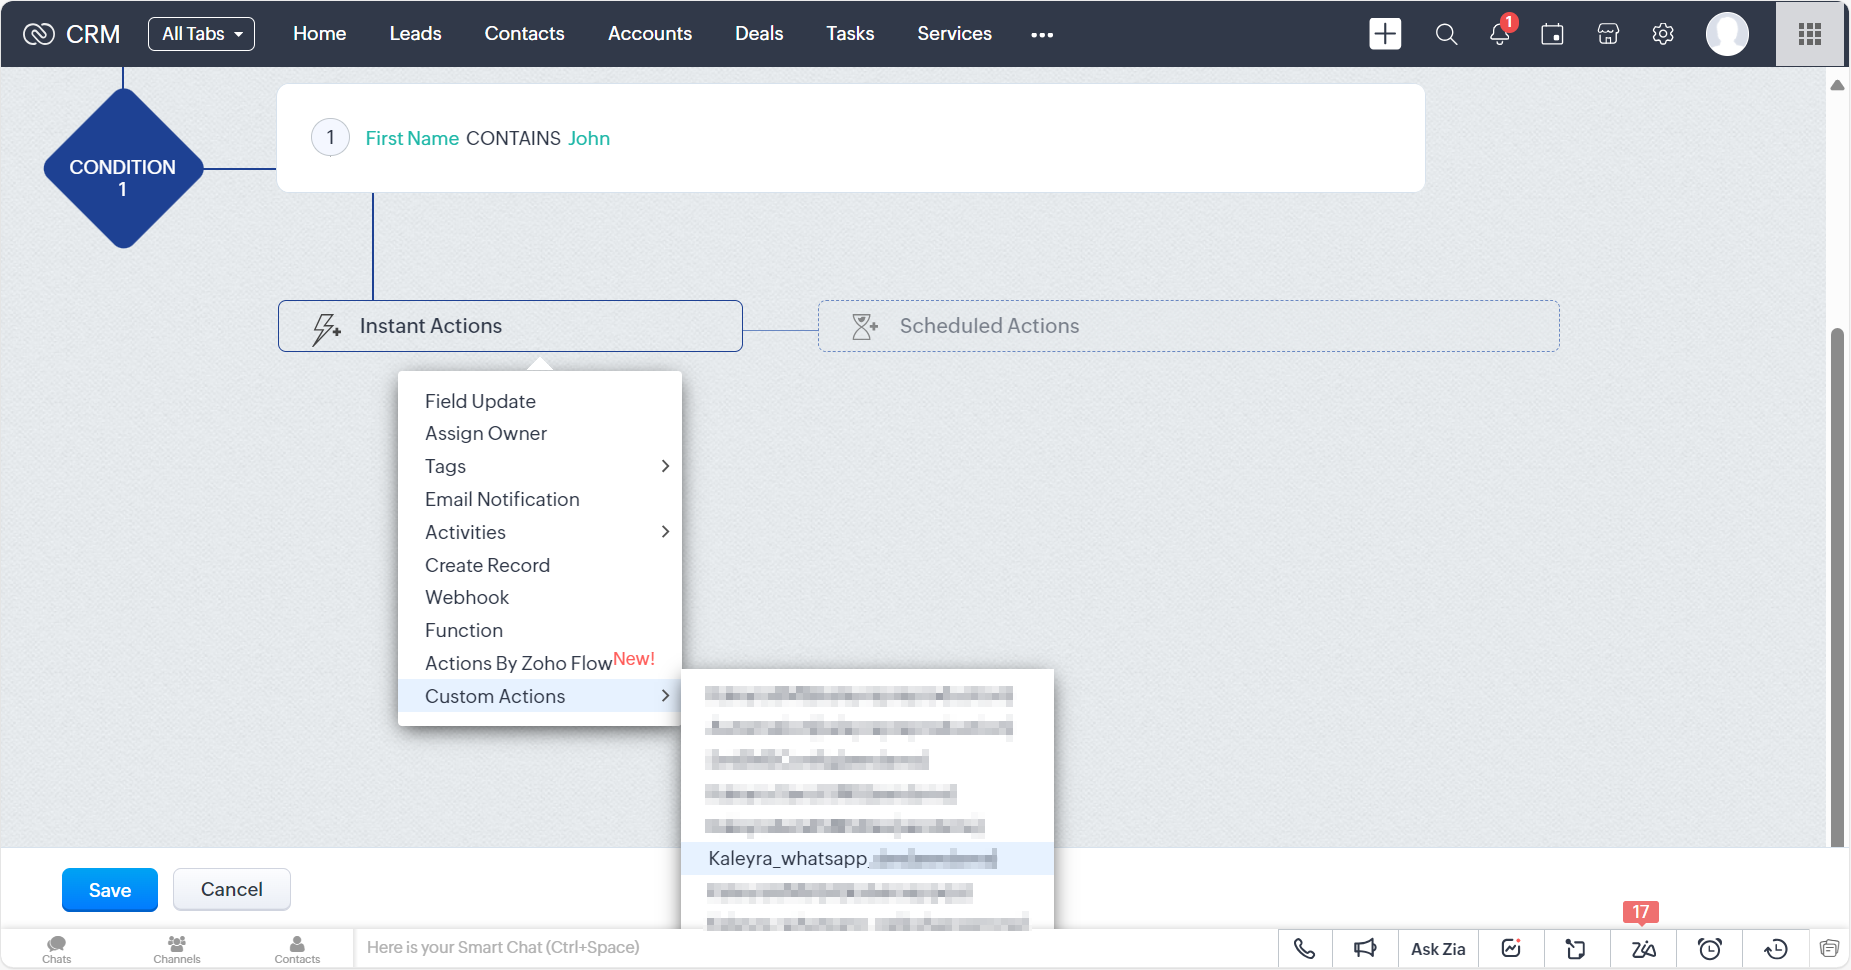
- Select Kaleyra_whatsapp.
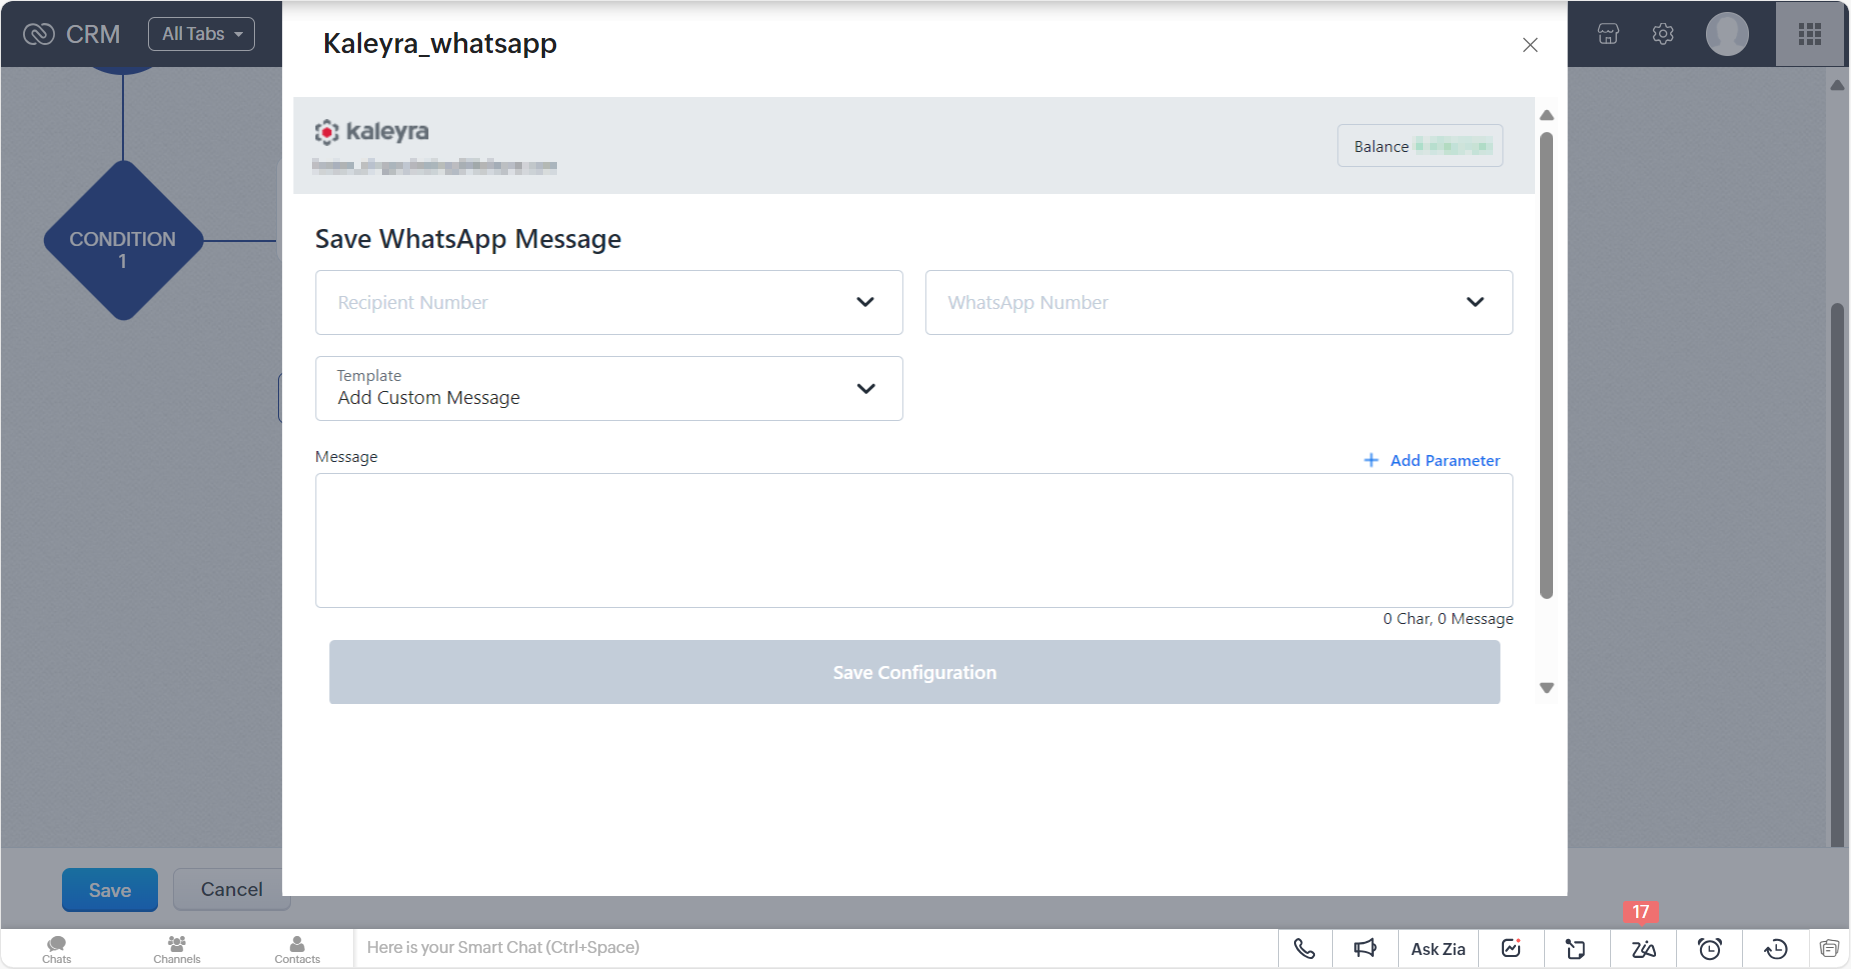
The Kaleyra_whatsapp pop-up appears.
-
Perform the following steps:
-
In the Recipients Number field, click the arrow next to Recipients Number to view the list. Select the recipient's number type from the Mobile or Phone.
-
In the WhatsApp Number field, click the arrow next to WhatsApp Number to view the list. Select the number from the list through which you wish to send WhatsApp messages. The WhatsApp Number in the list are the Number associated with your WABAs ID configured in your kaleyra.io account. For more information, see Adding a new WABA ID.
-
In the Templates field, click the arrow next to Templates to view the list. The Templates shown in the list are the ones configured and approved in your kaleyra.io account. For more information, see WhatsApp Templates. Select one of the following template types:
-
Select an approved template from the list.

-
Add Custom Message - You can add a custom message without using any templates.
In both cases, you can add parameters and define their value or set it as default from the available lists in the Add Parameter.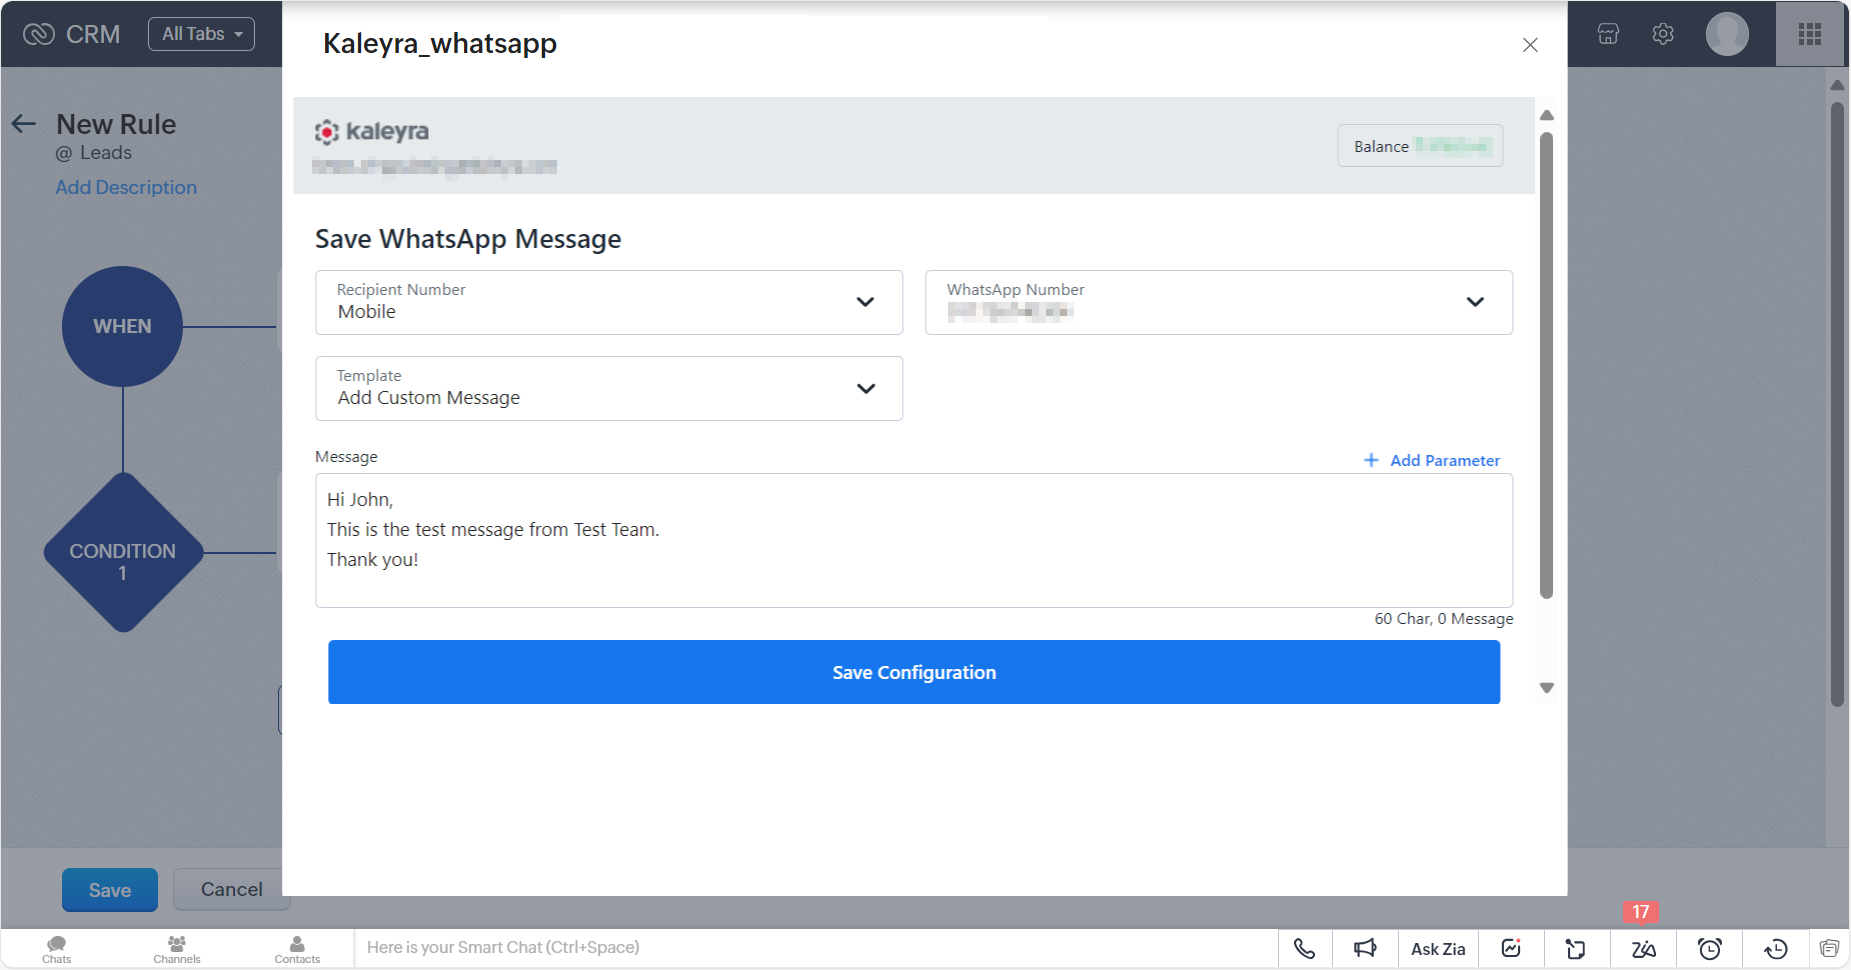
-
In the Message field, you can compose a message in the following ways:
- Use static message content selecting an approved template from the drop-down menu.
- Compose a message directly if the Add Custom Message option has been selected.
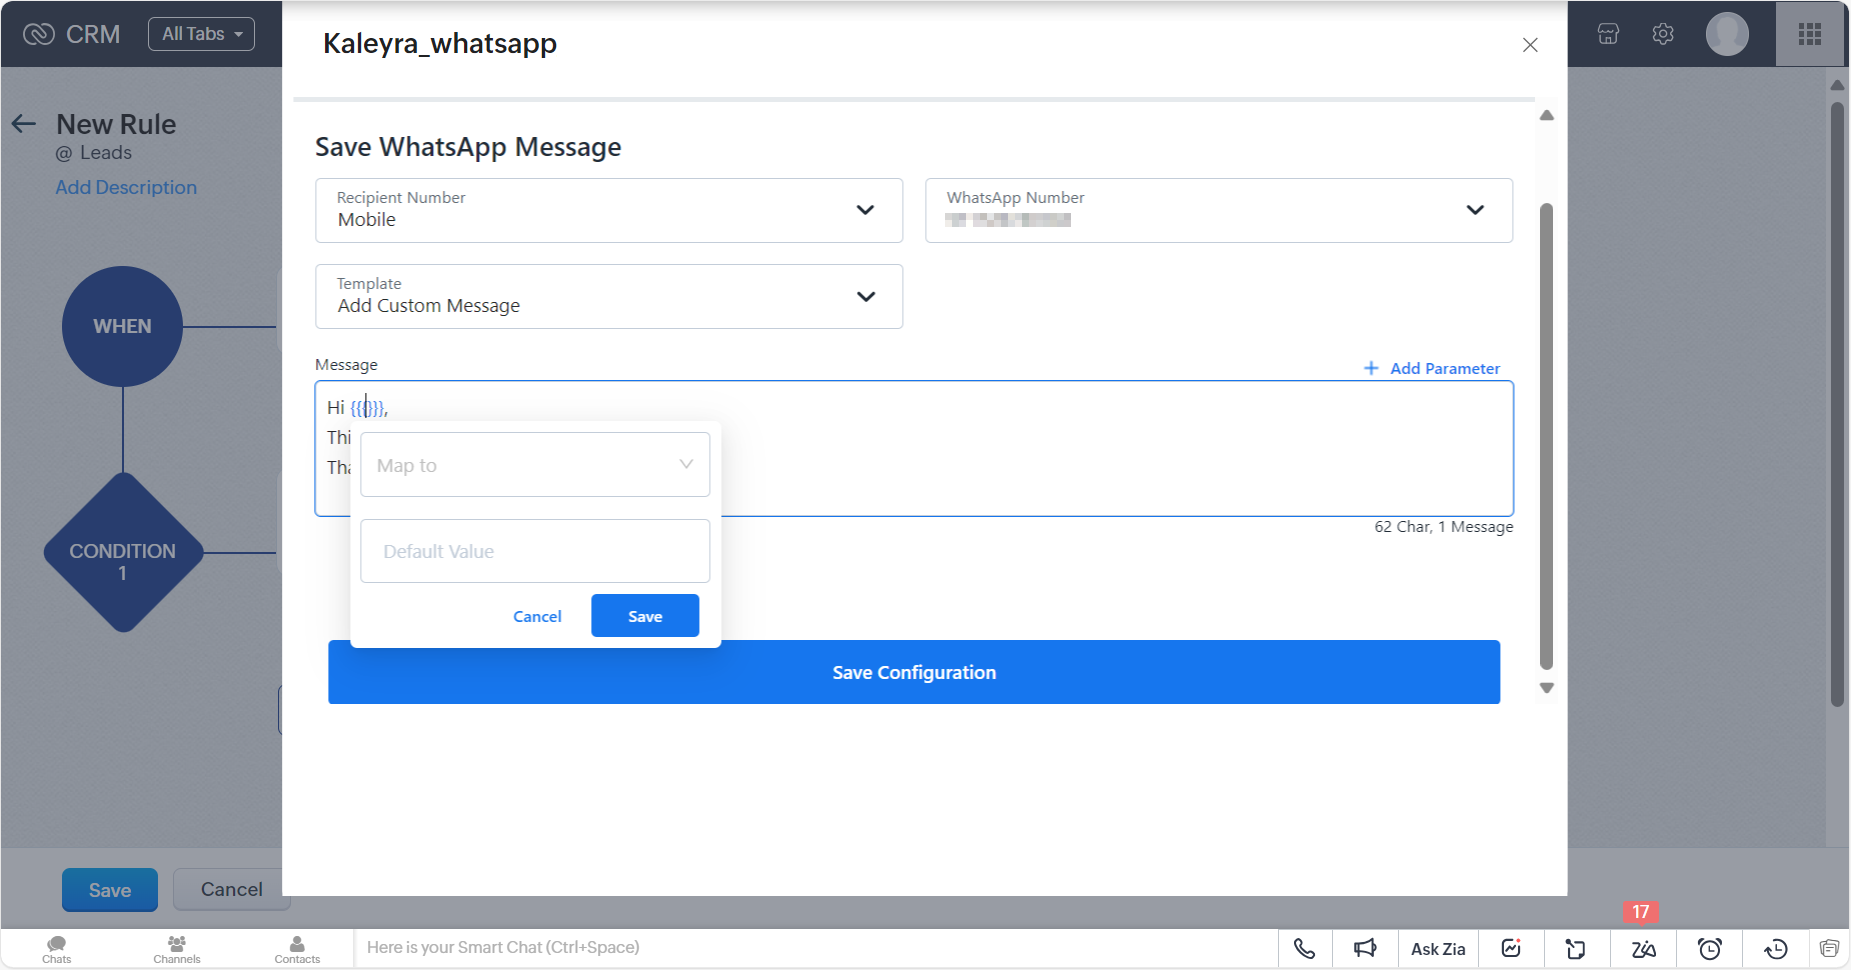
- Click Add Parameter to insert dynamic parameters to your message content. If you want to use dynamic parameters in your message text, those must be marked with three open and closed curly braces. For example, {{{lastname}}}.
-
Click the arrow next to the Map to field to view the list of available attributes from contact details that can be used to retrieve the value of the parameter for each contact. Select the field based on your choice for mapping.
-
Default Value - Enter the default value to be used in case no value is found for a given contact in the attribute mapped to the parameter and click Save.
The added parameter will be displayed in the Message field.
Note:If the added parameter has no value, then it will return to the Default Value in the Message section.
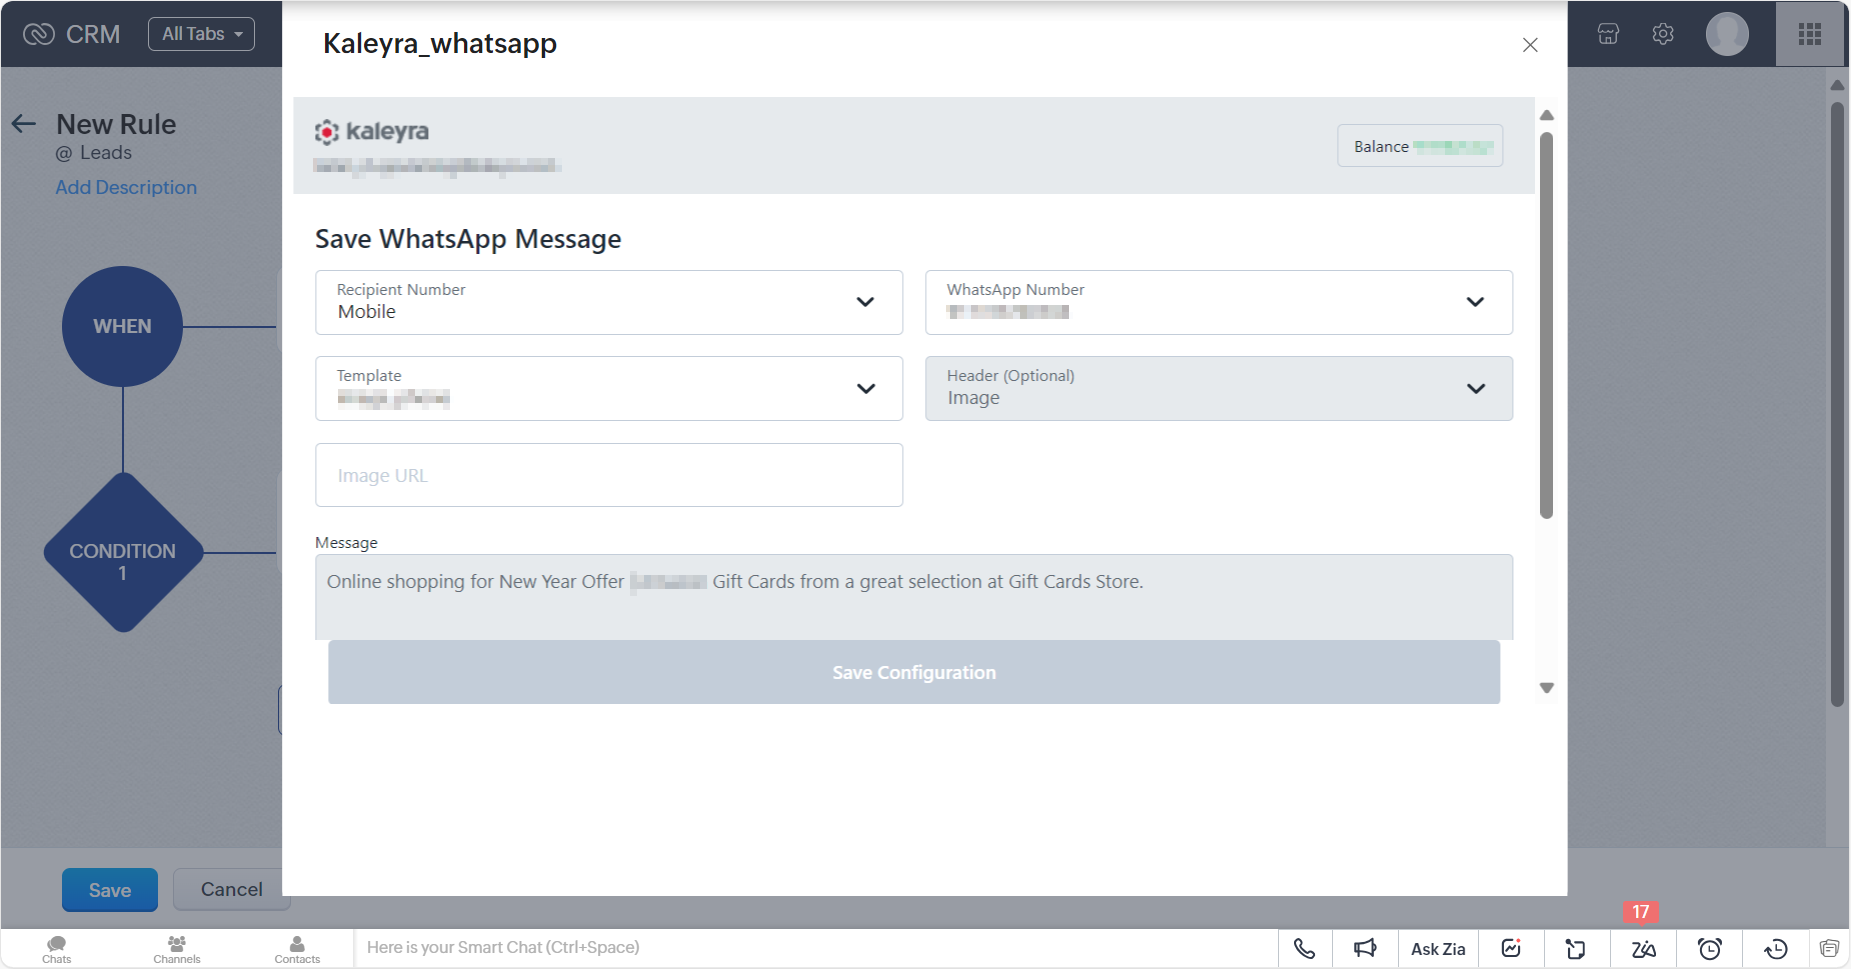
- A message with attachment - If the selected template requires a media, then you need to provide the media (document/video/image) URL.
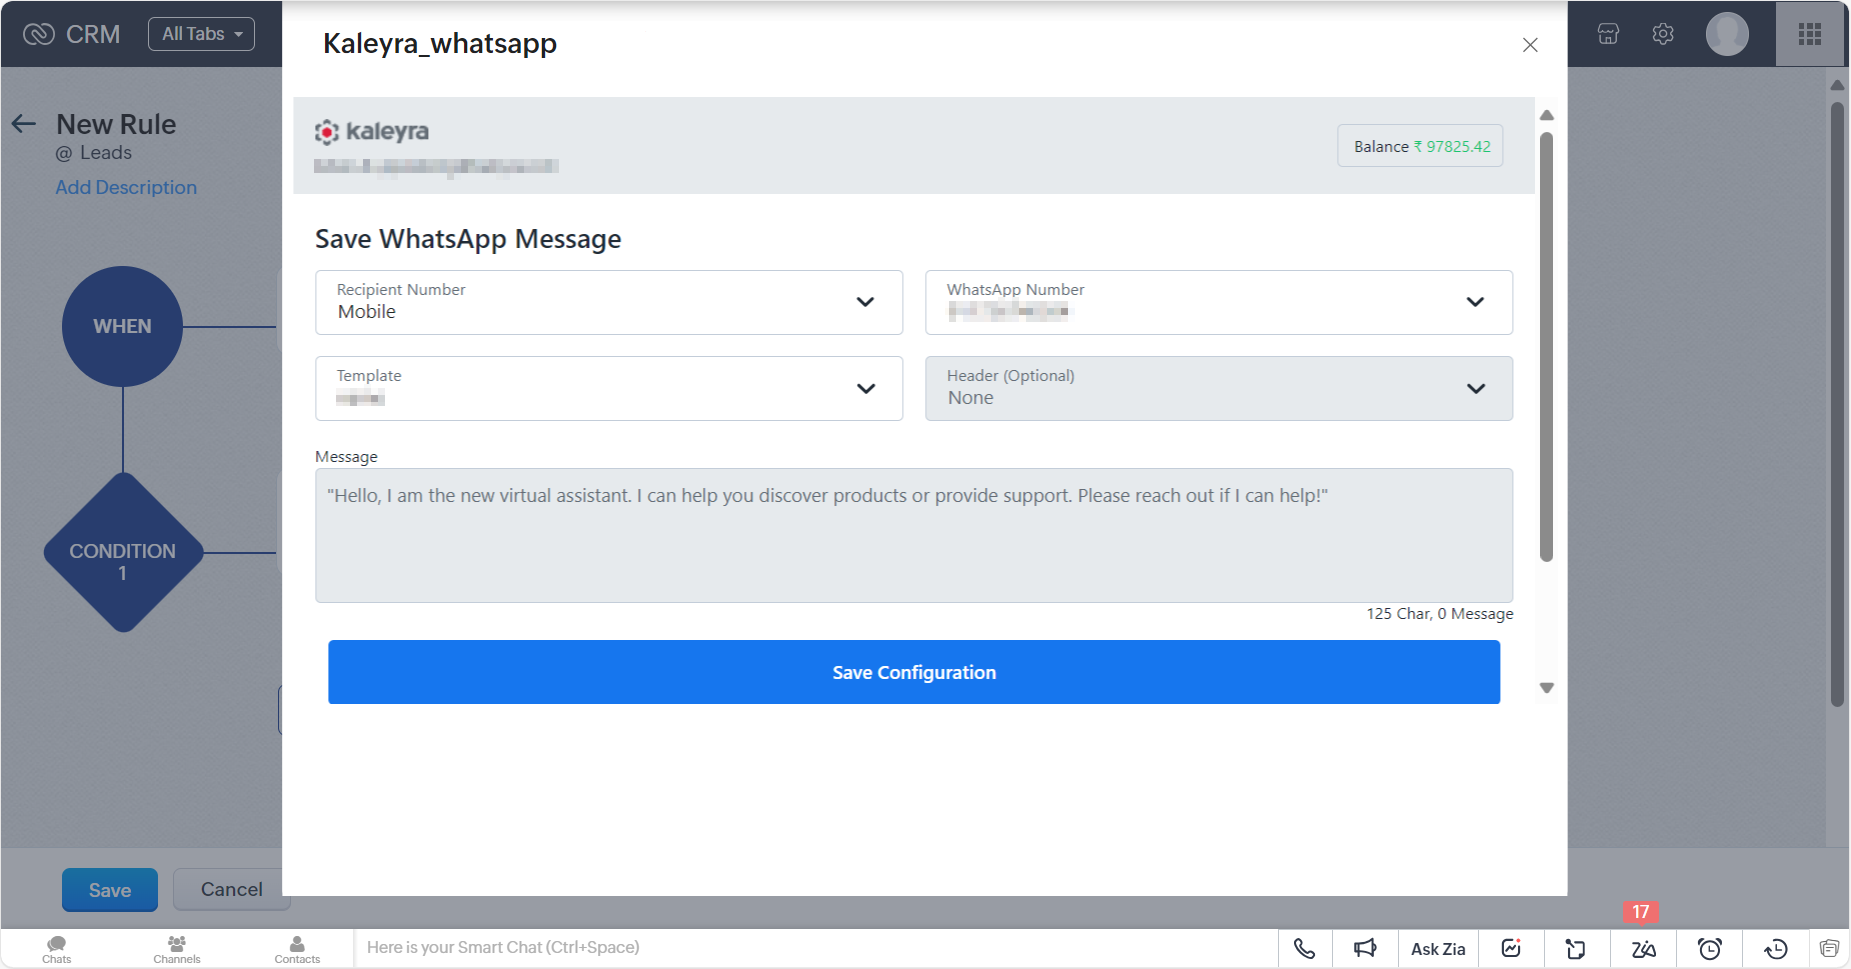
- Header None - When you select the template with header None, in that case, you do not have the option to add any messages in the text box. The defined message in the Message field will be delivered to recipients. If the header is not None, you can add a header to the message.
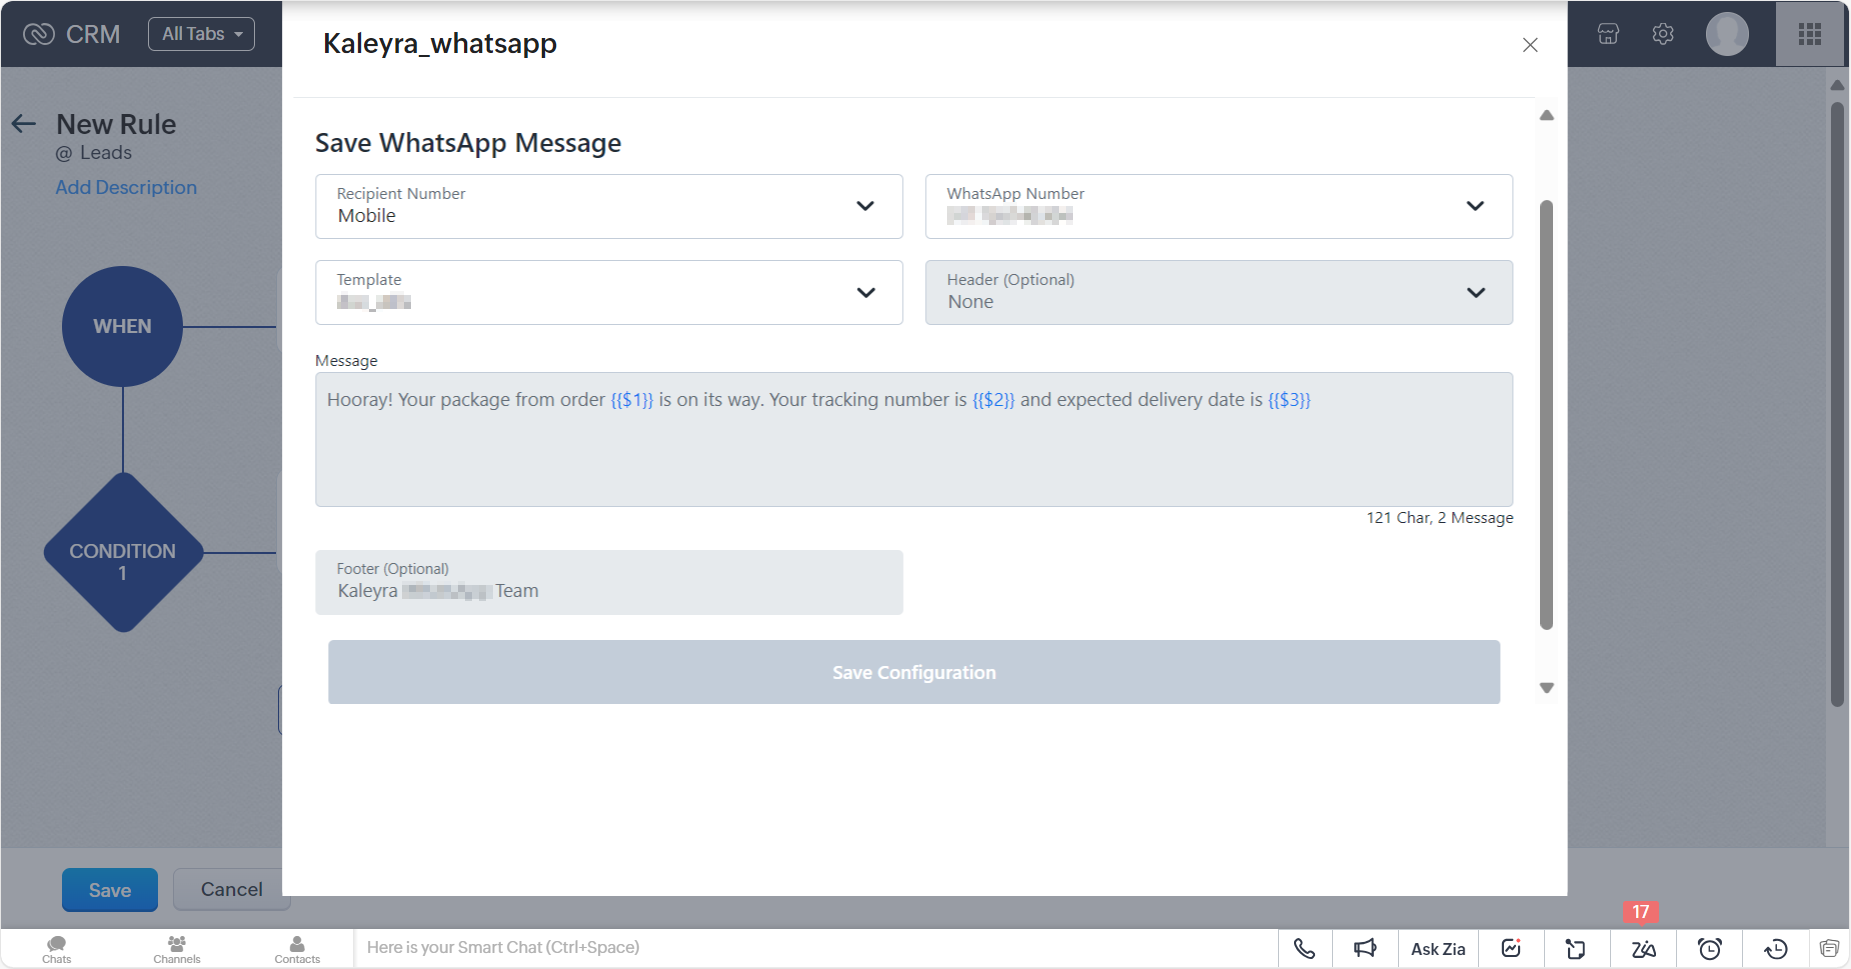
- Footer - If the footer is enabled in the template, you can add a footer in your WhatsApp message based on your requirements.
-
-
-
Click Save Configuration.
The WhatsApp Request Successfully Submitted confirmation message appears.
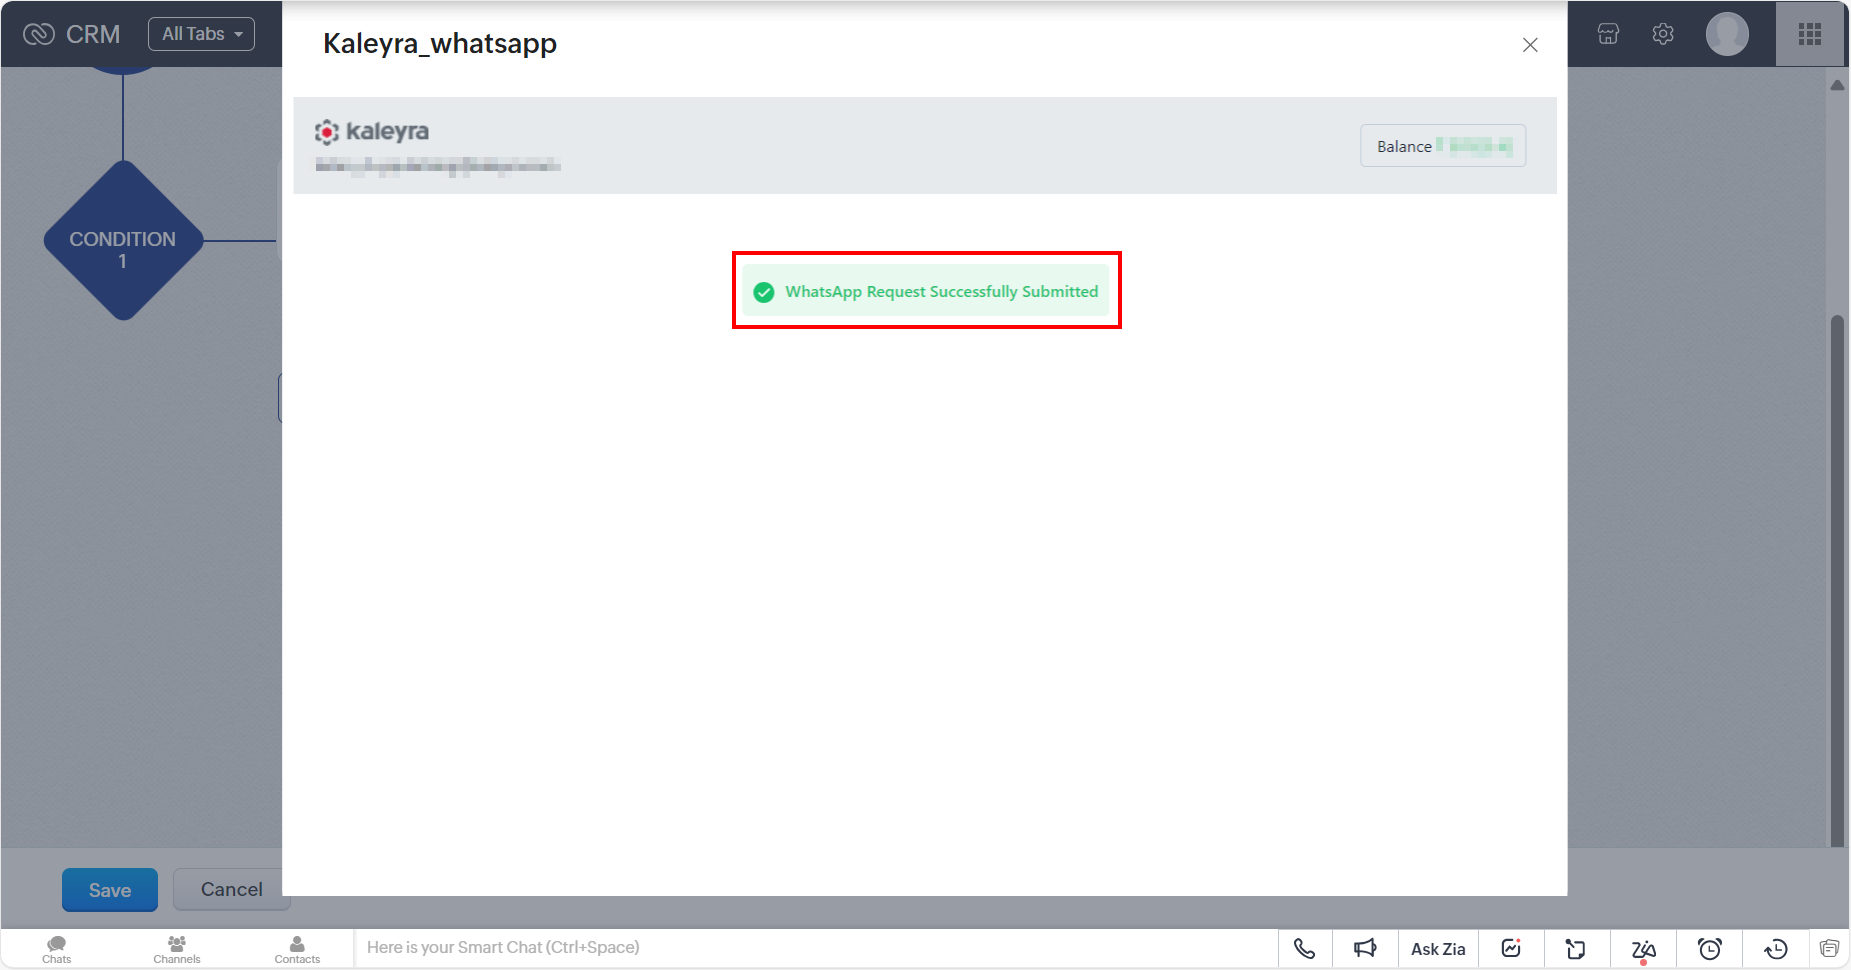
After the WhatsApp Request Successfully Submitted confirmation message, a pop-up appears allowing the user to enter a workflow name.

- In the Name field, enter the workflow name and then click Save and Associate.
The New Rule page appears.
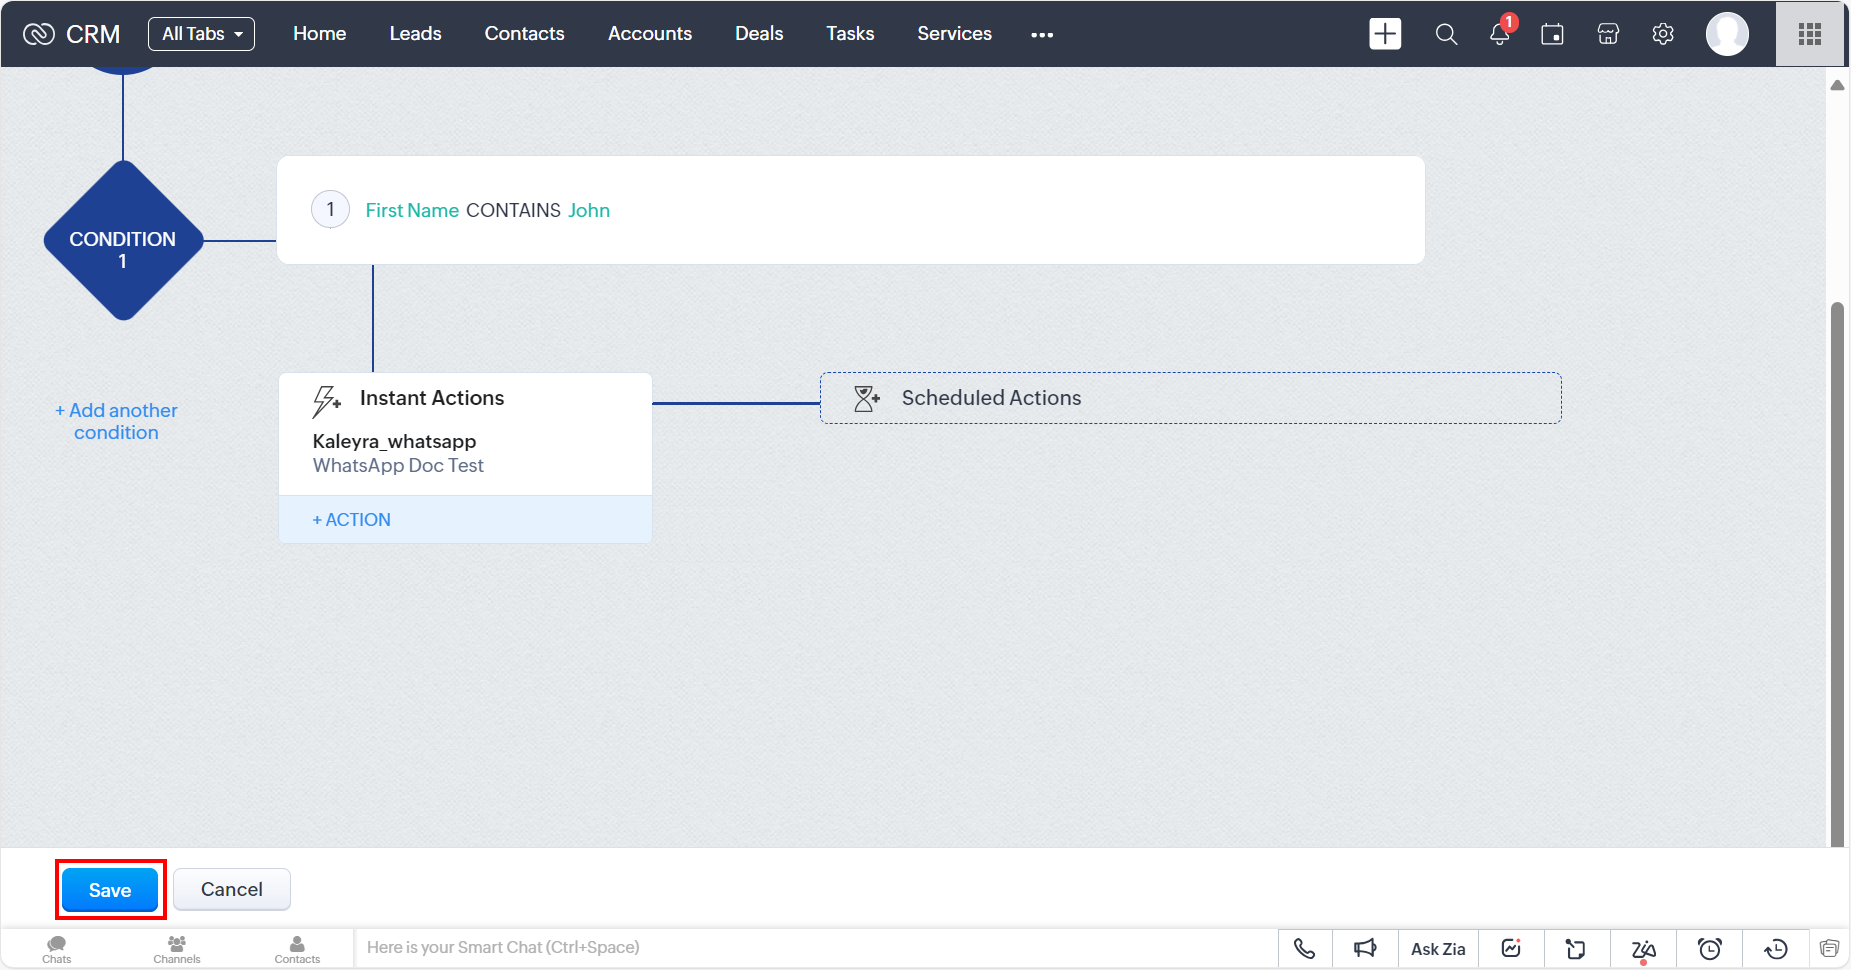
- Click Save.
A list of Rules tab details appears with the recently added workflow.
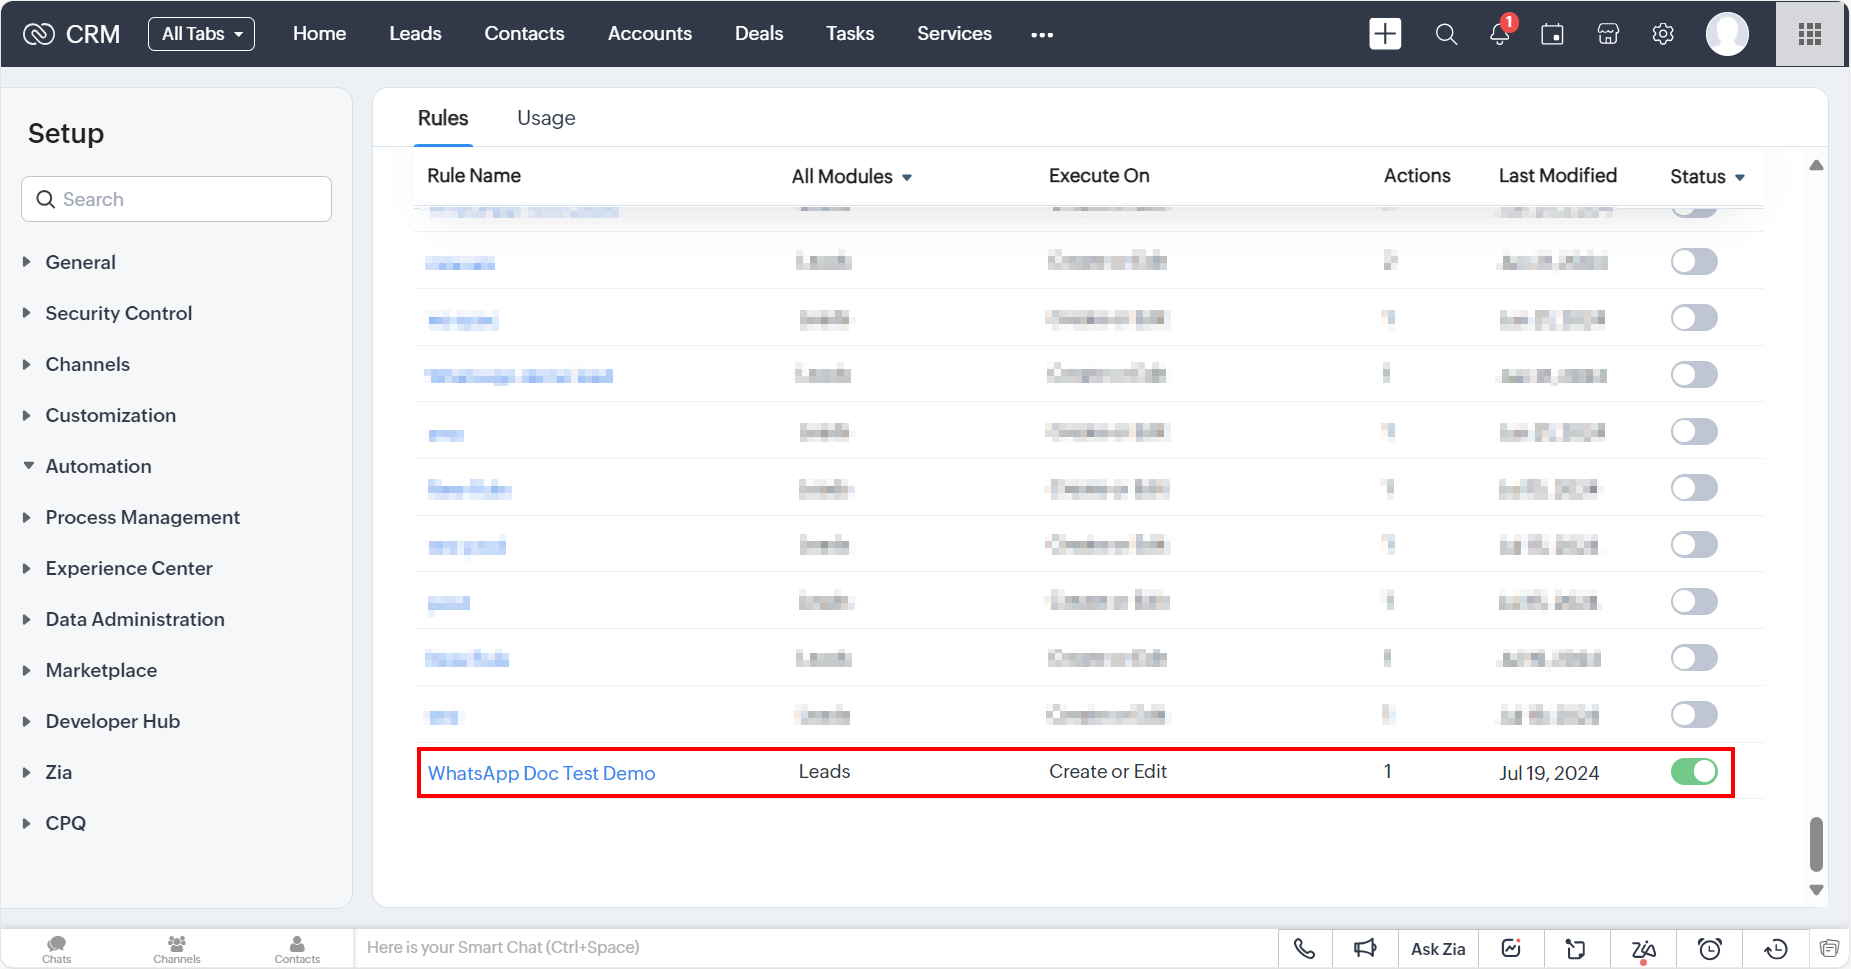
Now, if any new Leads are created then a WhatsApp message is sent to the newly created Leads. In this example, if any new lead is created with the first name containing John, then the system will trigger the WhatsApp message through the Kaleyra plugin. You can view the WhatsApp logs in kaleyra.io by navigating to Channels > WhatsApp > Analytics > Logs. For more information, see WhatsApp Analytics – Logs.
Updated about 1 year ago