Create a Databot
You can create a databot chatbot flow and publish it. You need to know the intent of the databot chatbot, questions to collect the end user's information, and set the callback.
To create a databot chatbot, perform the following steps:
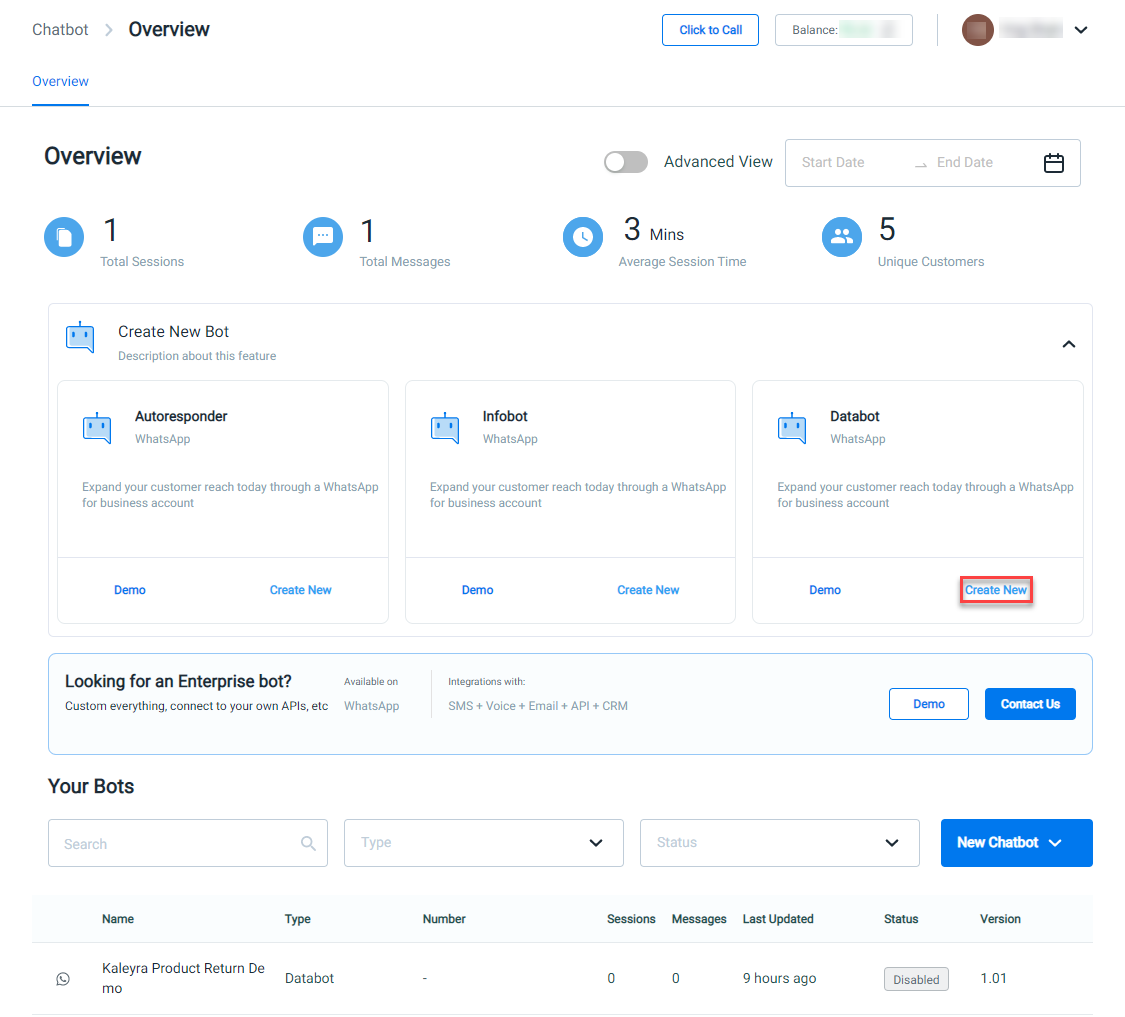
- On the Chatbot page, in the Databot section, click Create New.
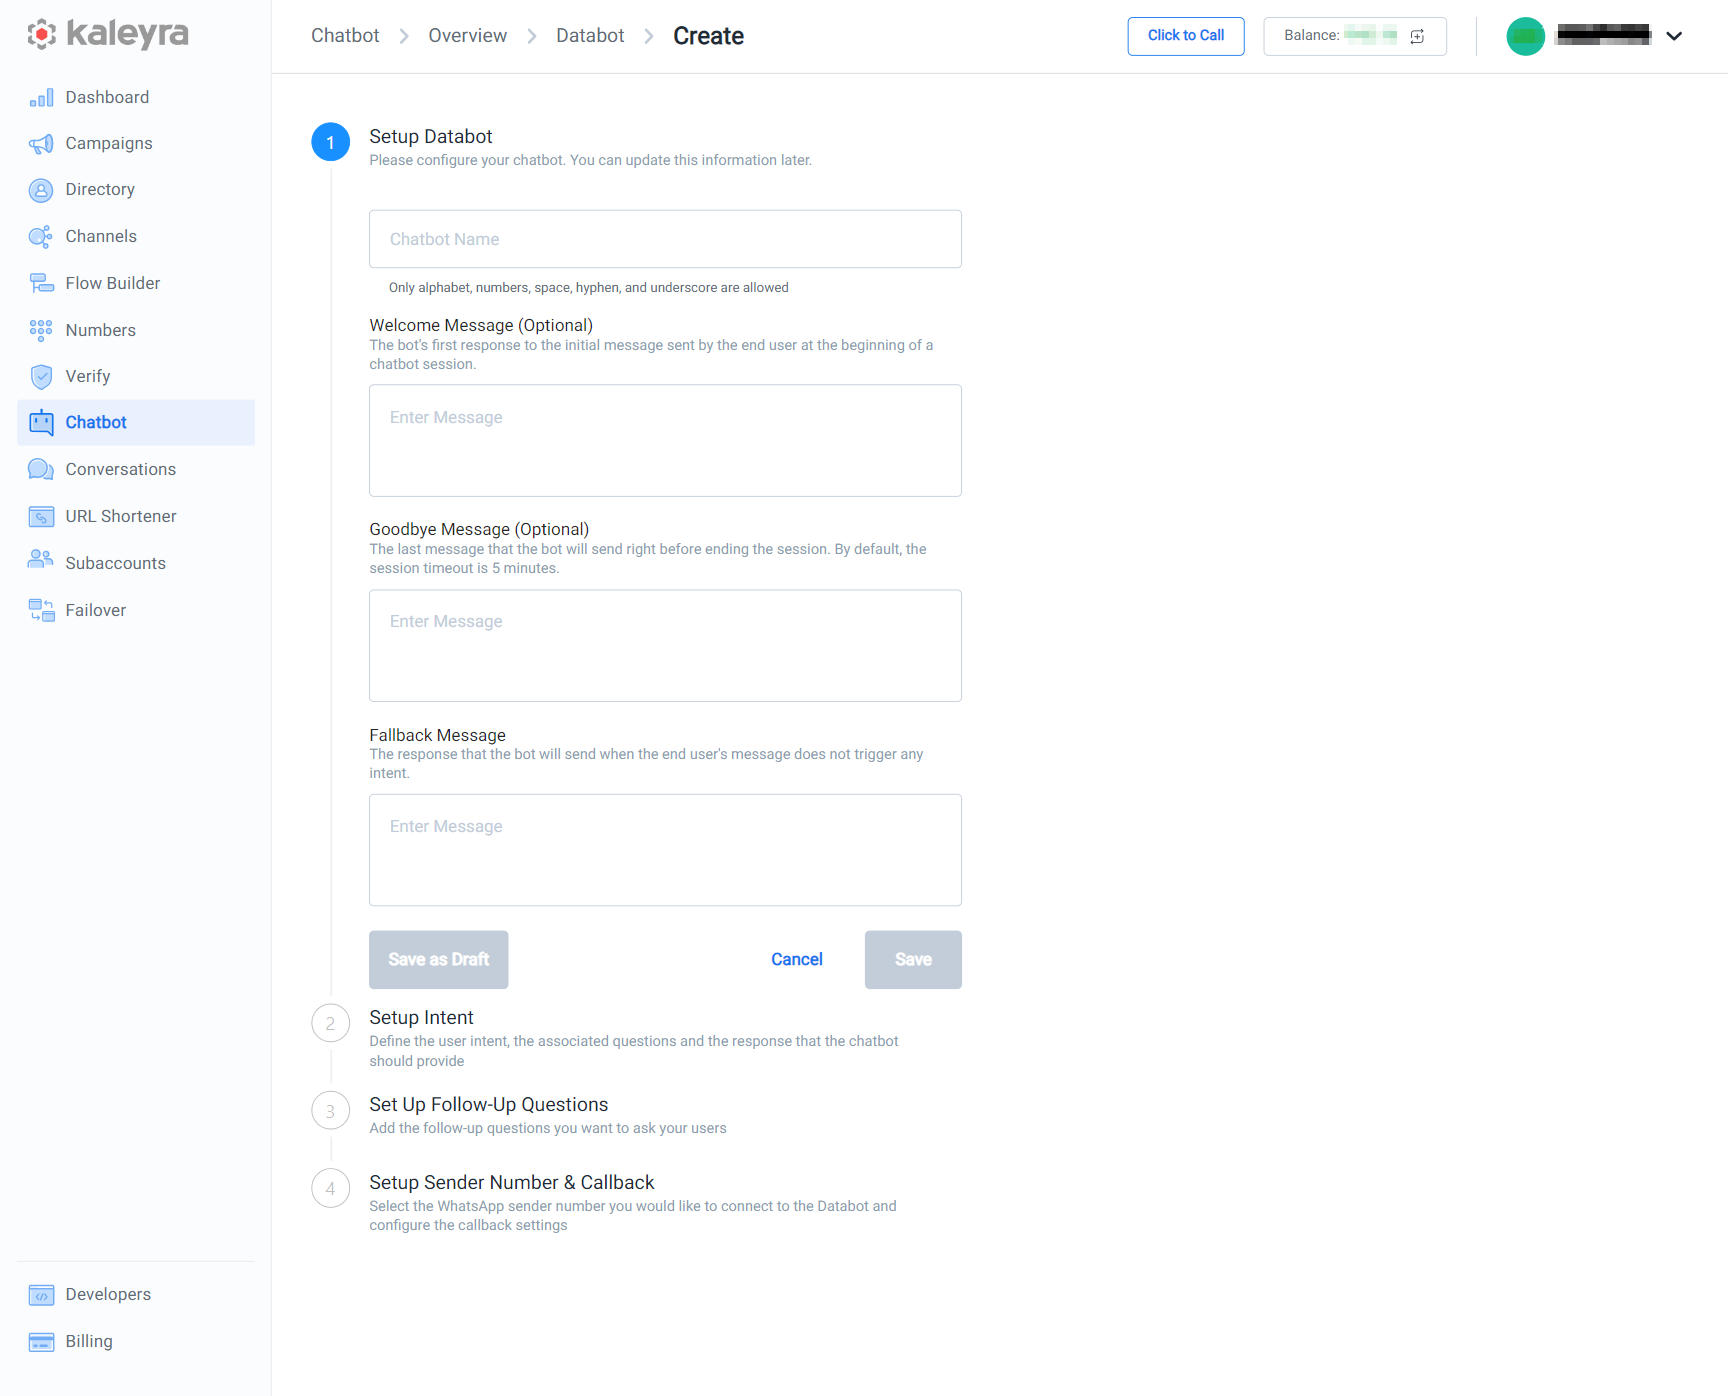
The Setup Databot section appears.
-
In the Setup Databot section, perform the following steps:
- In the Chatbot Name field, enter the chatbot name you want to provide to the databot. Only alphabet, numbers, spaces, hyphens, and underscores are allowed.
- In the Welcome Message (Optional) field, enter the chatbot's first response to the initial message sent by the end user at the beginning of a chatbot session.
- In the Goodbye Message (Optional) field, enter the last message that the bot will send right before ending the session. By default, the session timeout is 5 minutes from the last messages sent by the bot with no further reply.
- In the Fallback Message field, enter the response that the bot will send when the end user's message does not trigger any intent.
-
Perform one of the following:
- Click on Save as Draft to save the drafted Databot setup.
- Click on Cancel to cancel the Databot setup.
- Click on Save to save the Databot setup. For now, we are selecting Save.
The Setup Intent section appears.
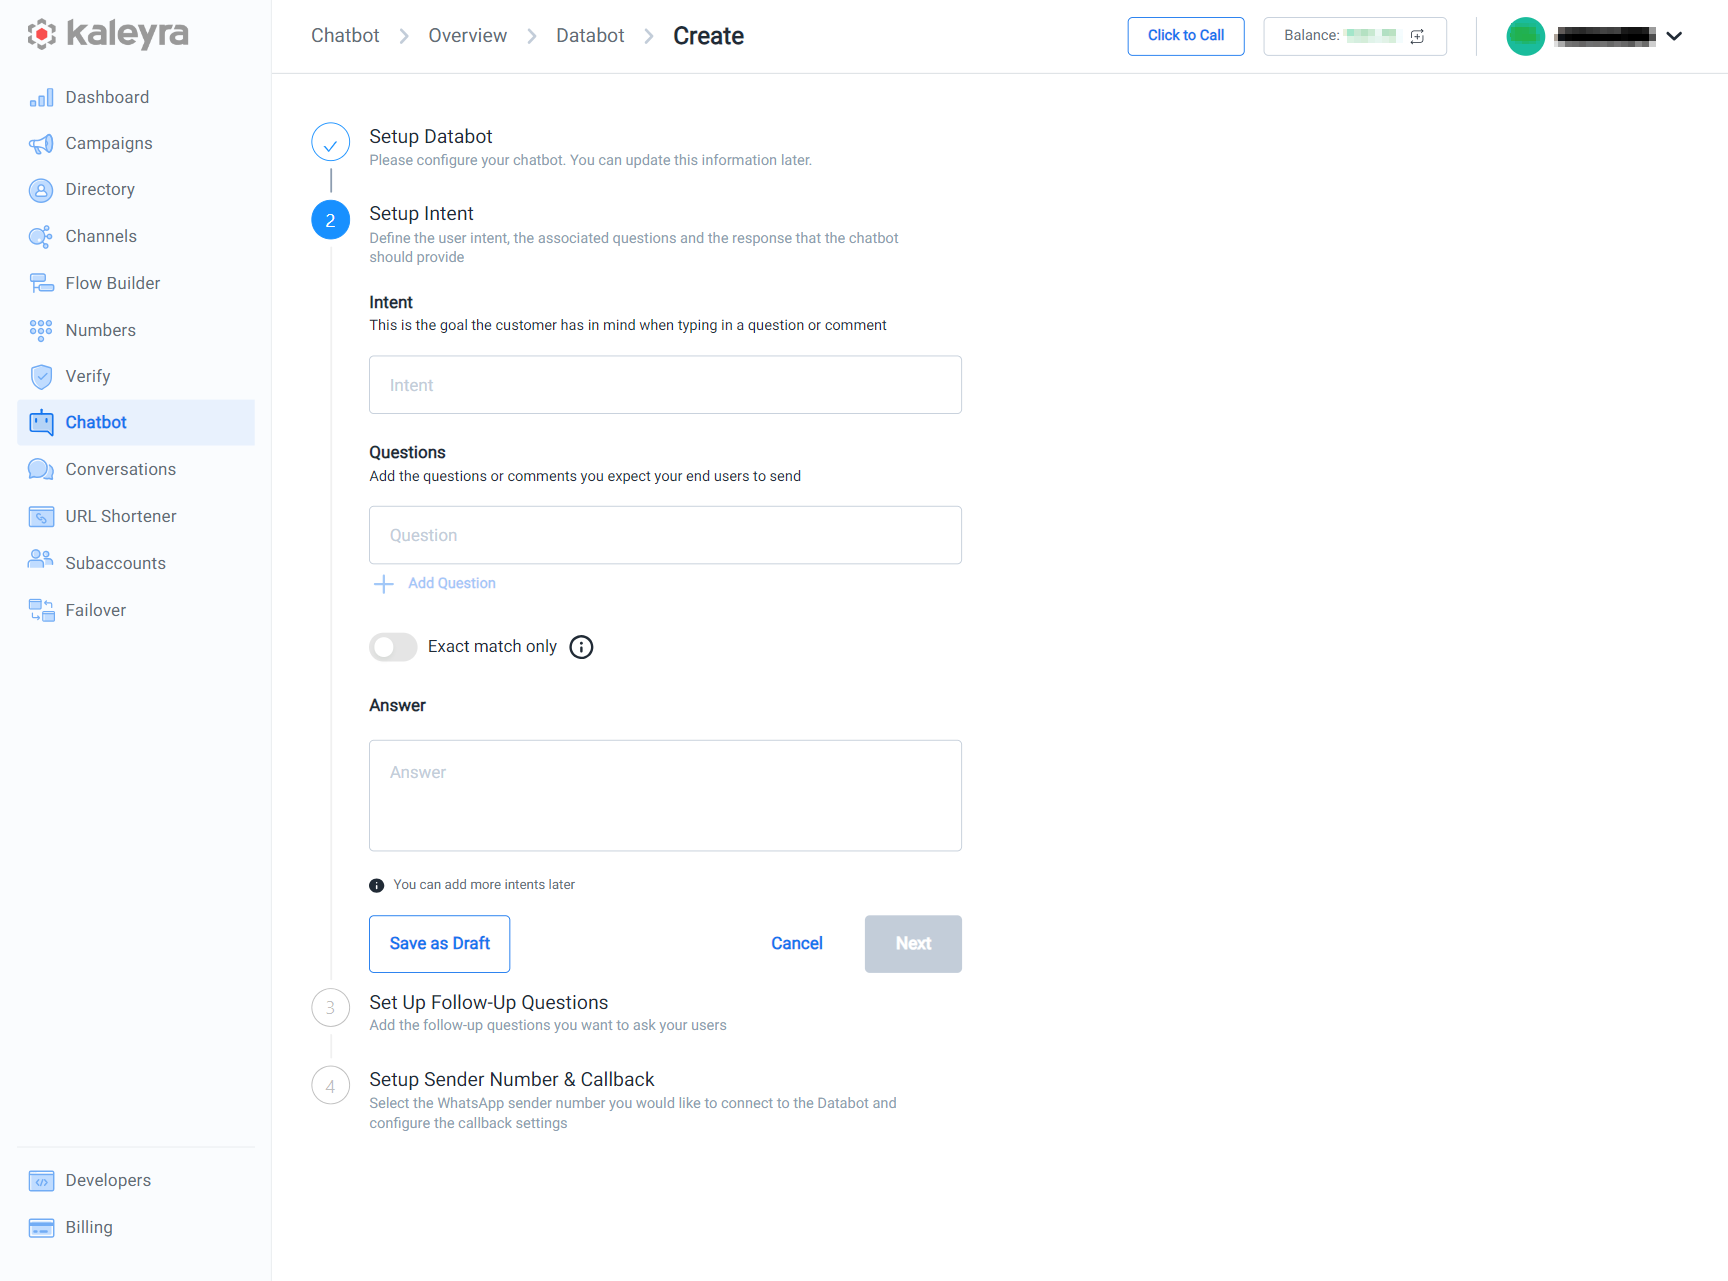
- In the Setup Intent section, perform the following steps:
- In the Intent field, enter the intent for your chatbot.
- In the Questions field, enter the expected questions you want to add that could be sent by the end user. You have the option to edit the questions as well as update new questions. To add more questions click + Add Questions, and enter your questions.
- In the Answer field, enter the answer for the questions that you have entered in the questions field.
Notes:
- Toggle the Exact match only option in the Questions subsection if you want the chatbot to respond or reply to end-user questions only if they are a 100 percent match to one of the listed questions you defined. You have the option to choose between case-sensitive and case-insensitive matching. For example, if an Intent with the Exact Match option enabled has Return product as the only question, the input from the end-user should be Return product, and then the chatbot can answer the question. You have the option to choose between case-sensitive and case-insensitive matching.
- You can add more than one intent in a datatbot.
- If you add more than one intent then the chatbot will try to match the end user's questions with one of the intents (through Kaleyra's AI-based automated system) and answer accordingly.
- Default system variables are available to customize bot messages, and they can be included in the intent’s answer, in the bot questions, or in the Goodbye or Fallback messages. These variables include:
whatsapp_name- WhatsApp profile name of the recipient.whatsapp_first_name- The first word of the recipient's WhatsApp profile name. Depending on how users configure their WhatsApp username, it may not always reflect the user's actual first name.whatsapp_number- WhatsApp number of the recipient (the user sending the message to the bot).bot_number- WhatsApp number of the bot.
For more details on how to access the data stored in a user-defined or system variable, see Advanced Variable Features - Customize Bot Messages.
- Perform one of the following:
- Click on Save as Draft to save the drafted Databot intent setup.
- Click on Cancel to cancel the Databot intent setup.
- Click on Next to move next to the Databot intent setup. For now, we are selecting Next.
The Set Up Follow-Up Questions section appears.
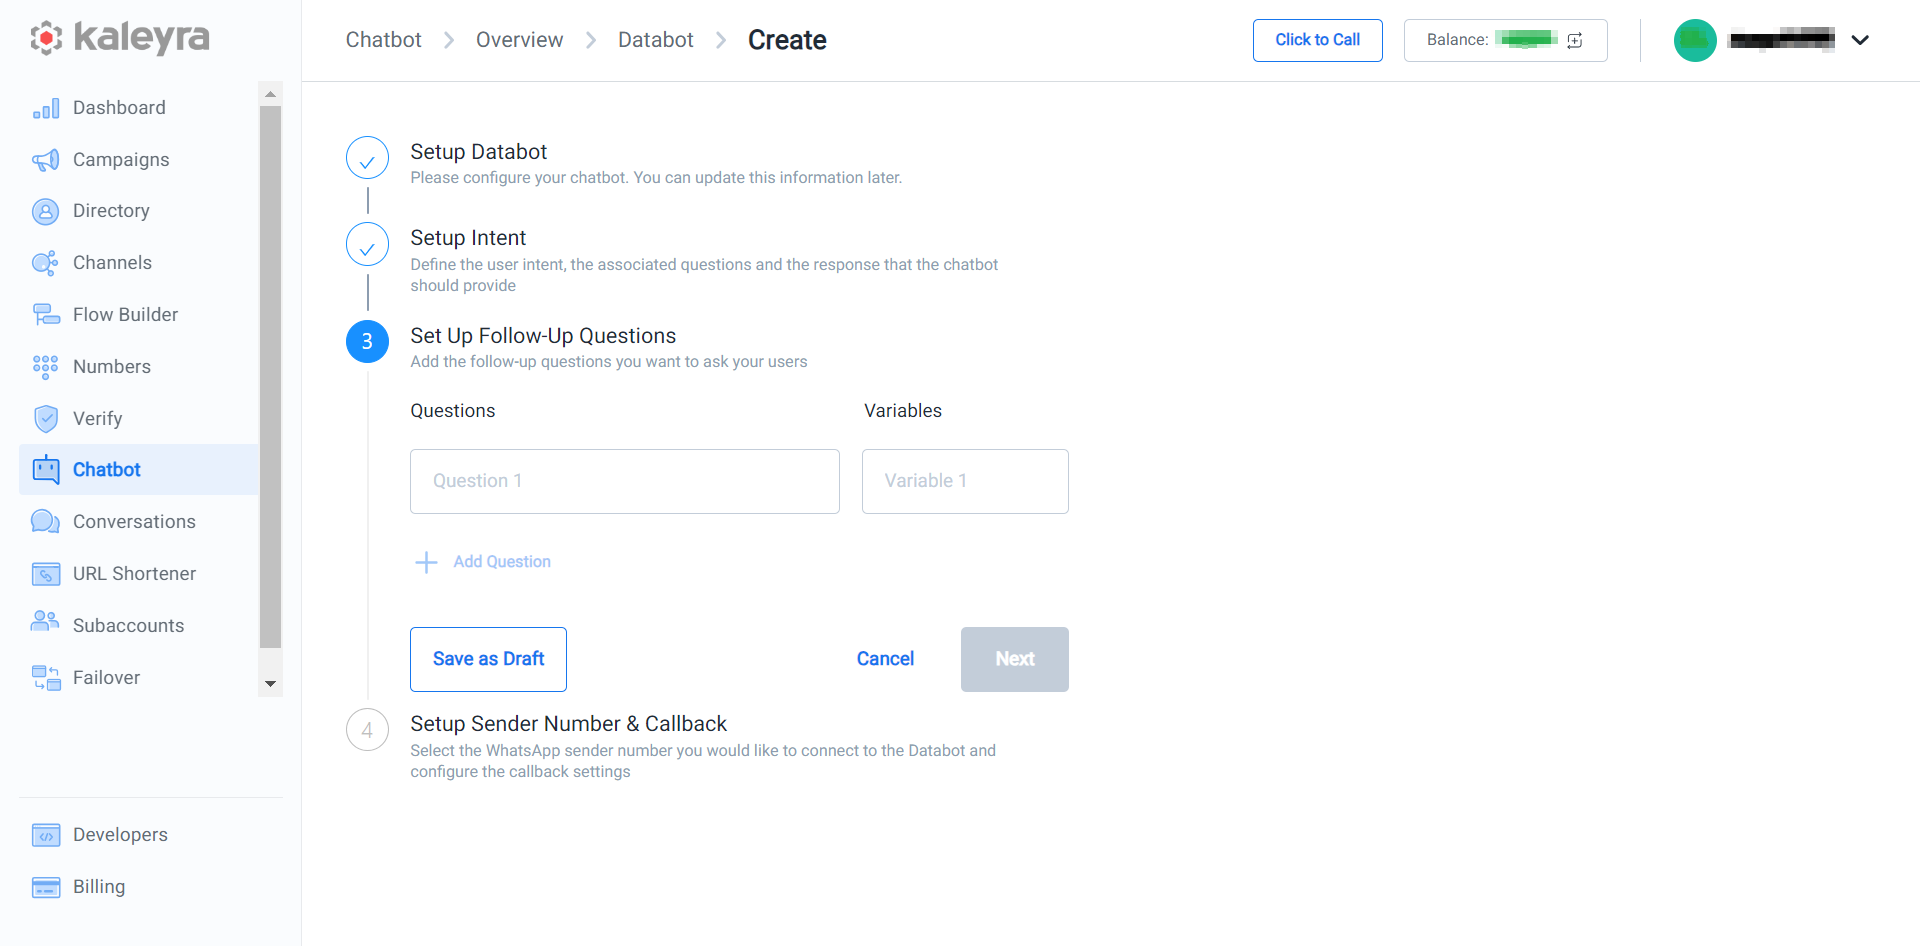
- In the Set Up Follow-Up Questions section, perform the following steps:
- In the Question 1 field, enter the question that you want your end users to answer through the chatbot. For example, questions related to the refund process for a product include product name, Purchase Date, product pick-up address, and location.
- In the Variable 1 field, define the variable to collect the information. For example, product_name, purchase_date, and many more. If the follow-up question is "Please provide the order ID for which you want additional information" and the variable is called order_id, then whatever the end-user replies to the follow up question will be stored in the variable. These variables will reset once the user reaches the Callback step. As a result, they can only be utilized in subsequent questions.
Notes:
- You have to define the variable for every question in the Setup your Questions section.
- If you want to add a new question, defining the variable is mandatory. To add a new question, after defining the variable parameter, click + Add Question.
- Perform one of the following:
- Click on Save as Draft to save the drafted Databot setup follow-up questions.
- Click on Cancel to cancel the Databot setup follow-up questions.
- Click on Next to move to the Databot setup follow-up questions. For now, we are selecting Next.
The Setup Sender Number & Callback section appears.
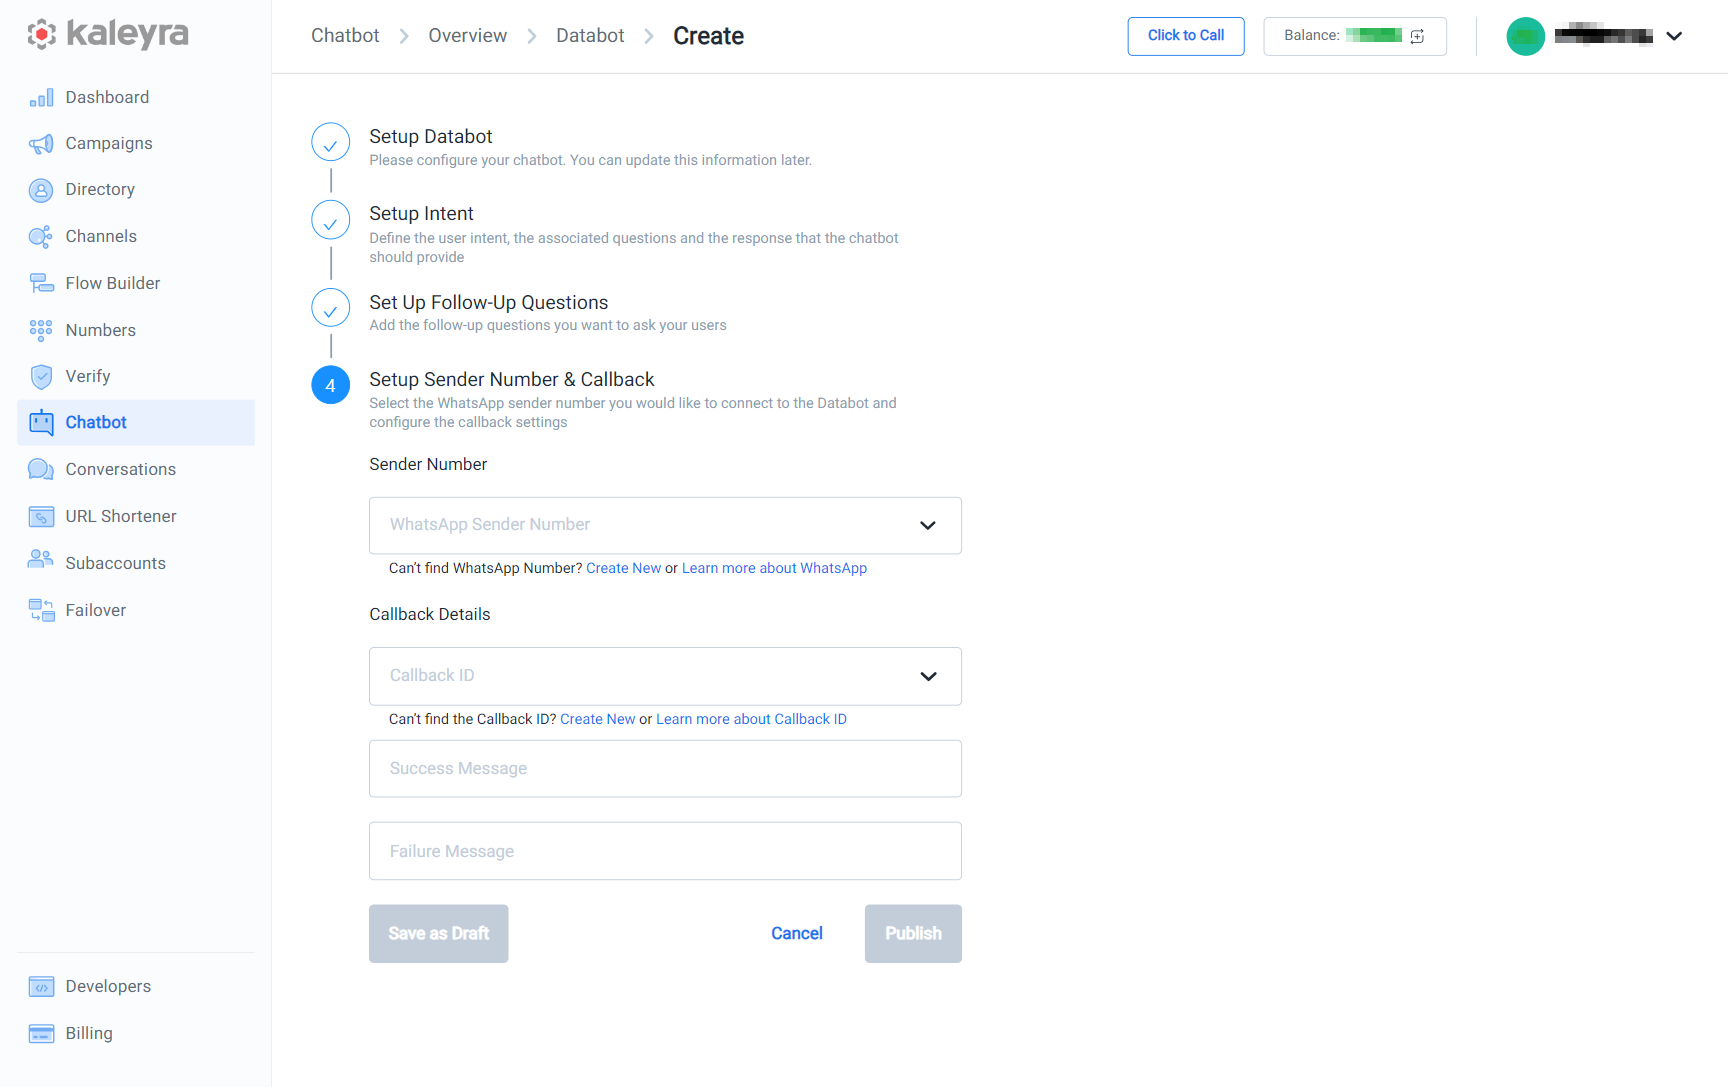
- In the Setup Sender Number & Callback section, perform the following steps:
- Click the arrow in the Sender Number field and a list of WhatsApp sender numbers appears. Select the sender number from the dropdown field. This is the number that you would like to connect to databot. For more information about how to add a sender number, see Adding WhatsApp Number.
- Click the arrow in the Callback ID and a list of callback IDs appears. Select the callback id from the dropdown list through which you want to initiate the callback. For more information on how to create a callback see Callback Profiles.
- In the Success Message field, enter the success message you want to display when the callback is successful.
- In the Failure Message field, enter the failure message you want to display when the callback failed.
- Perform one of the following:
- Click on Save as Draft to save the drafted Databot setup for the sender number and callback.
- Click on Cancel to cancel the Databot setup for the sender number and callback.
- Click on Publish to publish the Databot setup for the sender number and callback. For now, we are selecting Publish. The databot gets published.
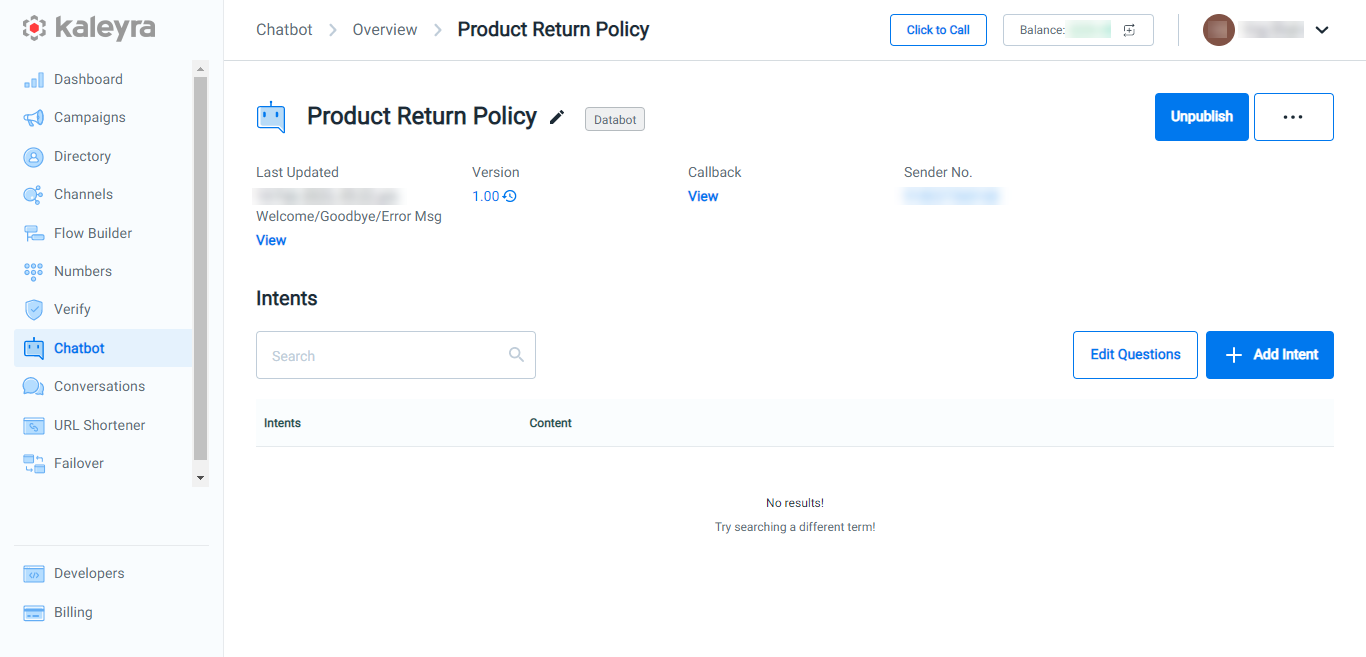
Notes:After publishing the databot chatbot, you can select one of the following options by clicking the ellipsis on the right side of the page:
- Rename Chatbot - You can rename the chatbot. To rename the chatbot, select the Rename Chatbot option. The Edit Chatbot Name pane appears on the right side of the page. Update the databot name and click Update. Also, you can rename it by clicking the pencil icon next to the databot name.
- Add Intent - You can add intent to the existing databot. For more information, see Step 4 of this page to Set up your intent.
- Unpublish Chatbot - You can unpublish the chatbot. To unpublish the chatbot, select the Unpublish Chatbot option, the confirmation message Are you sure you want to Disable this Chatbot? appears, select Disable Chatbot.
- Lock Chatbot - You can lock the chatbot, after you lock the chatbot, you cannot make any further changes until you unlock the chatbot. To lock the chatbot, select the Lock Chatbot option, the confirmation message Are you sure you want to Lock this Chatbot? appears, select Lock Chatbot. The Lock/Unlock feature is reserved only for the Owner or Admin of the kaleyra.io account.
Once the databot is in the unpublished stage, you can select one of the following options by clicking the ellipsis on the right side of the page in addition to Rename Chatbot, Add Intent, and Lock Chatbot:
- Delete Chatbot - You can delete the unpublished chatbot. To delete the unpublished chatbot, select the Delete Chatbot option. the confirmation message Are you sure you want to delete this Chatbot? appears, click Yes, Delete to delete the chatbot.
- Publish Chatbot - You can publish the chatbot. To publish the chatbot, select the Publish Chatbot option, and follow the instructions from Step 2 of the Set up Infobot section.
Updated 5 months ago
Did this page help you?