Send WhatsApp messages to Customer or group of Customers
You can send WhatsApp messages using Kaleyra plugin to a customer or group of customers. You can send custom messages with templates supporting images, videos, document links, and footers.
To send WhatsApp messages to a customer, perform the following steps:
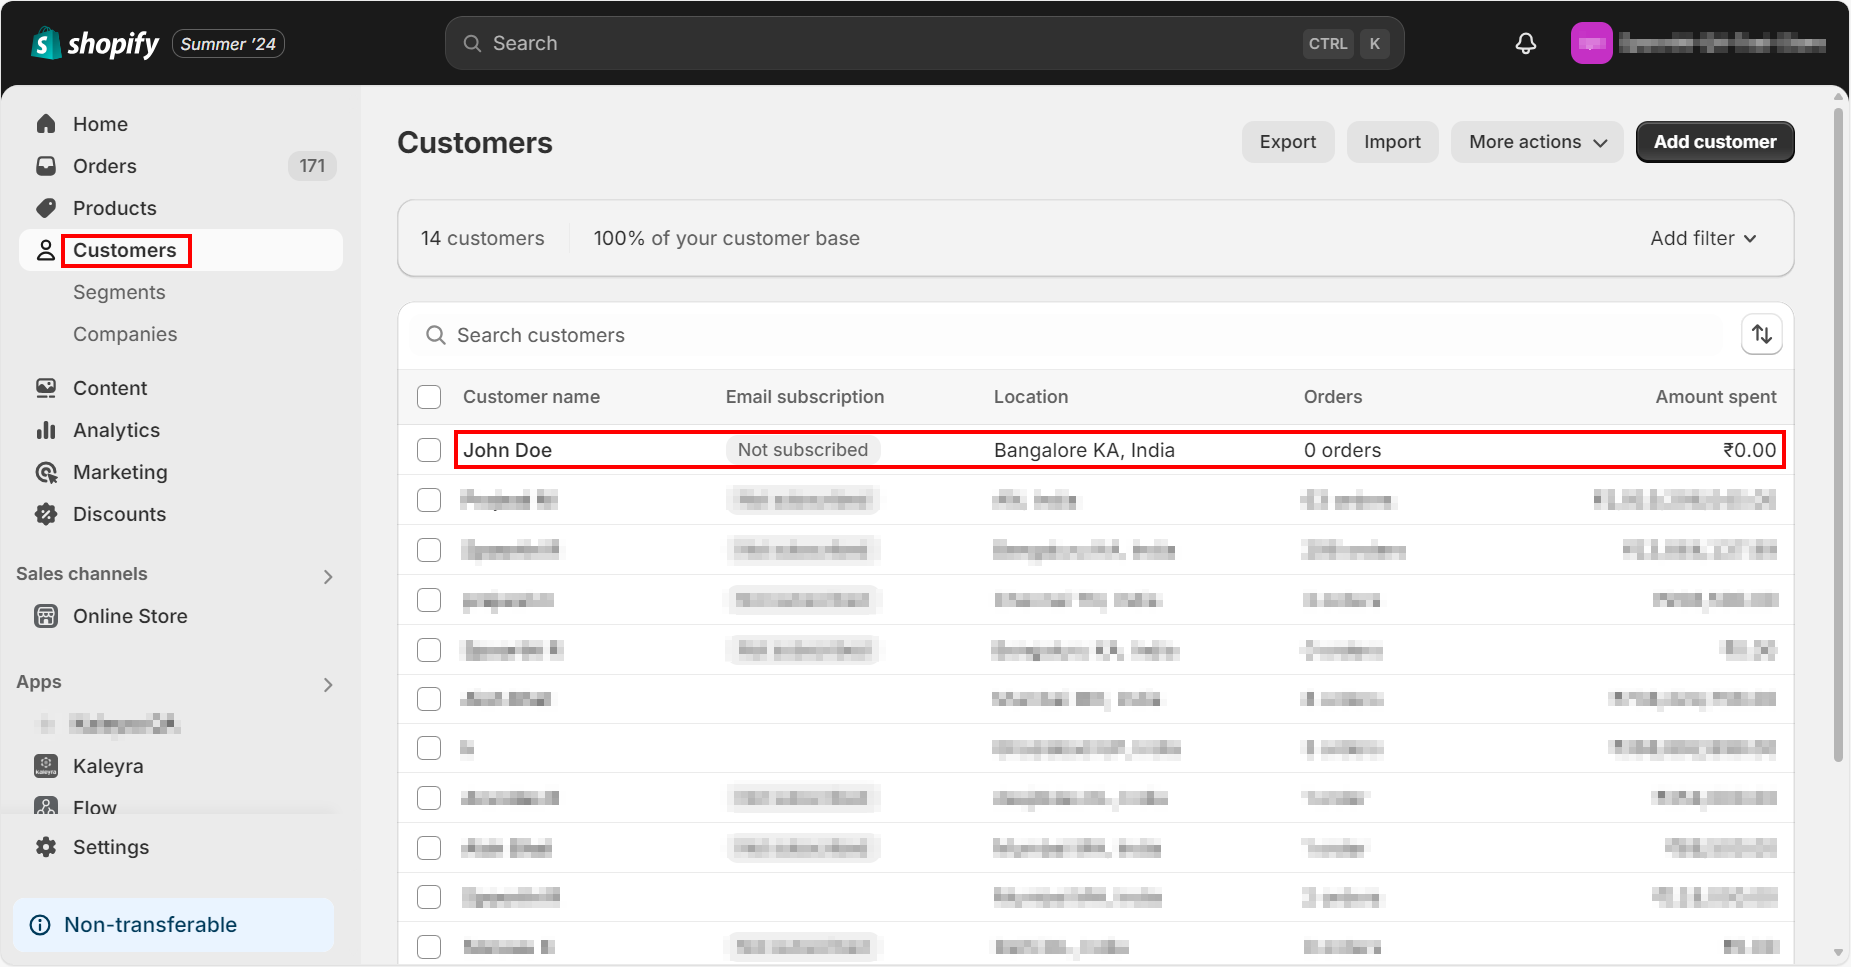
- On the Shopify home page, from the left navigation bar, click Customers.
The list of customers appears.
Notes:
- You can click the multiple checkboxes from the list of customers name in the Customer name column to send WhatsApp messages to them at a time.
- If you wish to select all the customers, click the checkbox before the Customer name column heading.
- You can view the customer details by clicking the customer’s name from the Customer name column.
- Select the checkbox before the name of the customer to whom you want to send the WhatsApp message.
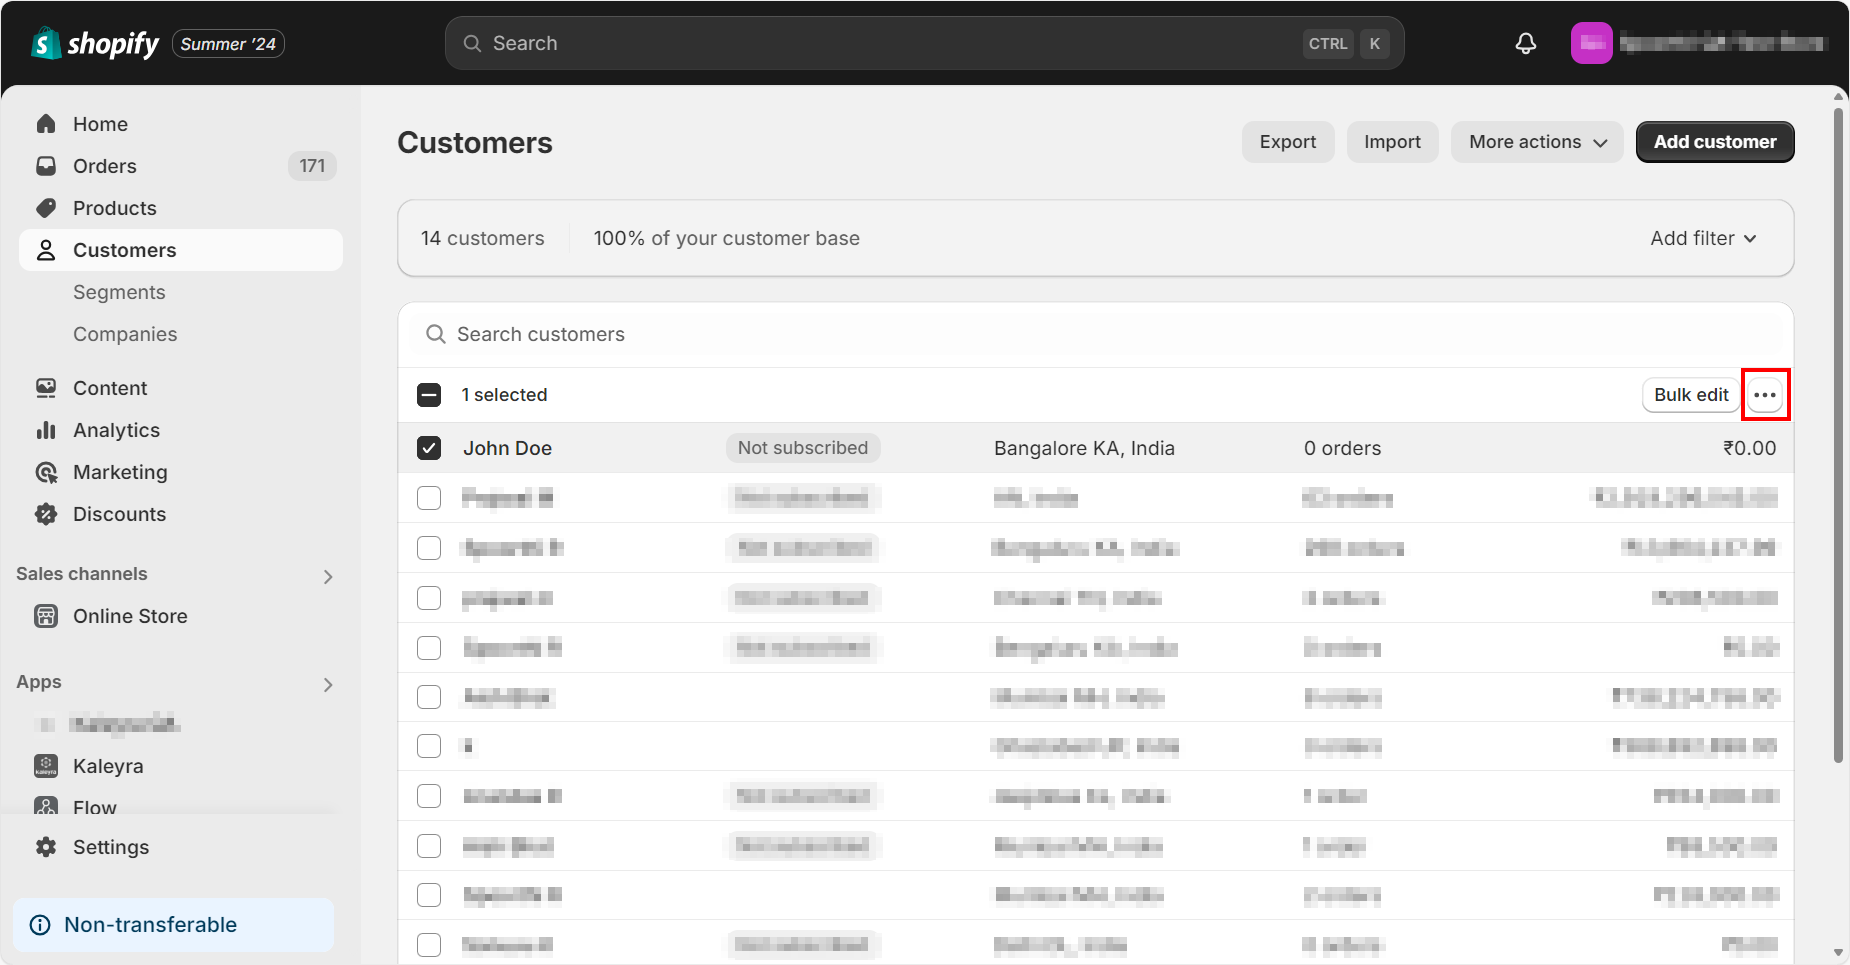
- On the right side of the Customers page, click the ellipsis icon (three dots) next to the Bulk edit button.
The list of available options appears.
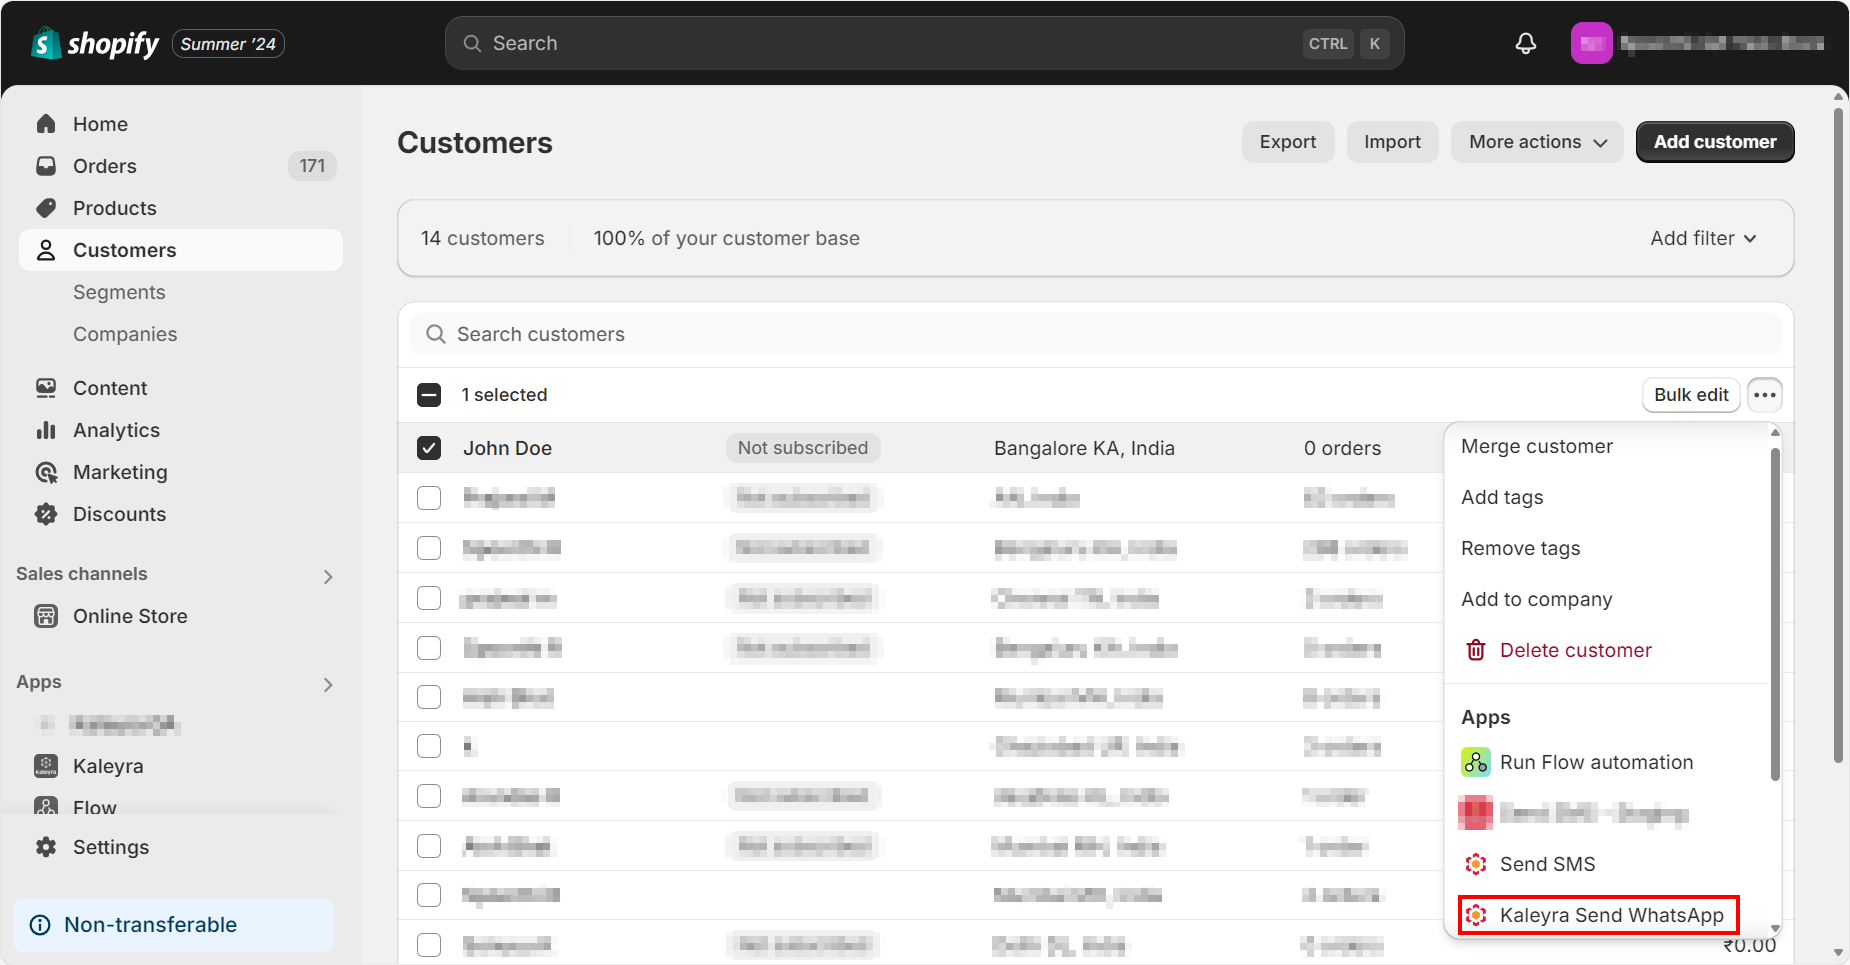
- Click Kaleyra Send WhatsApp.
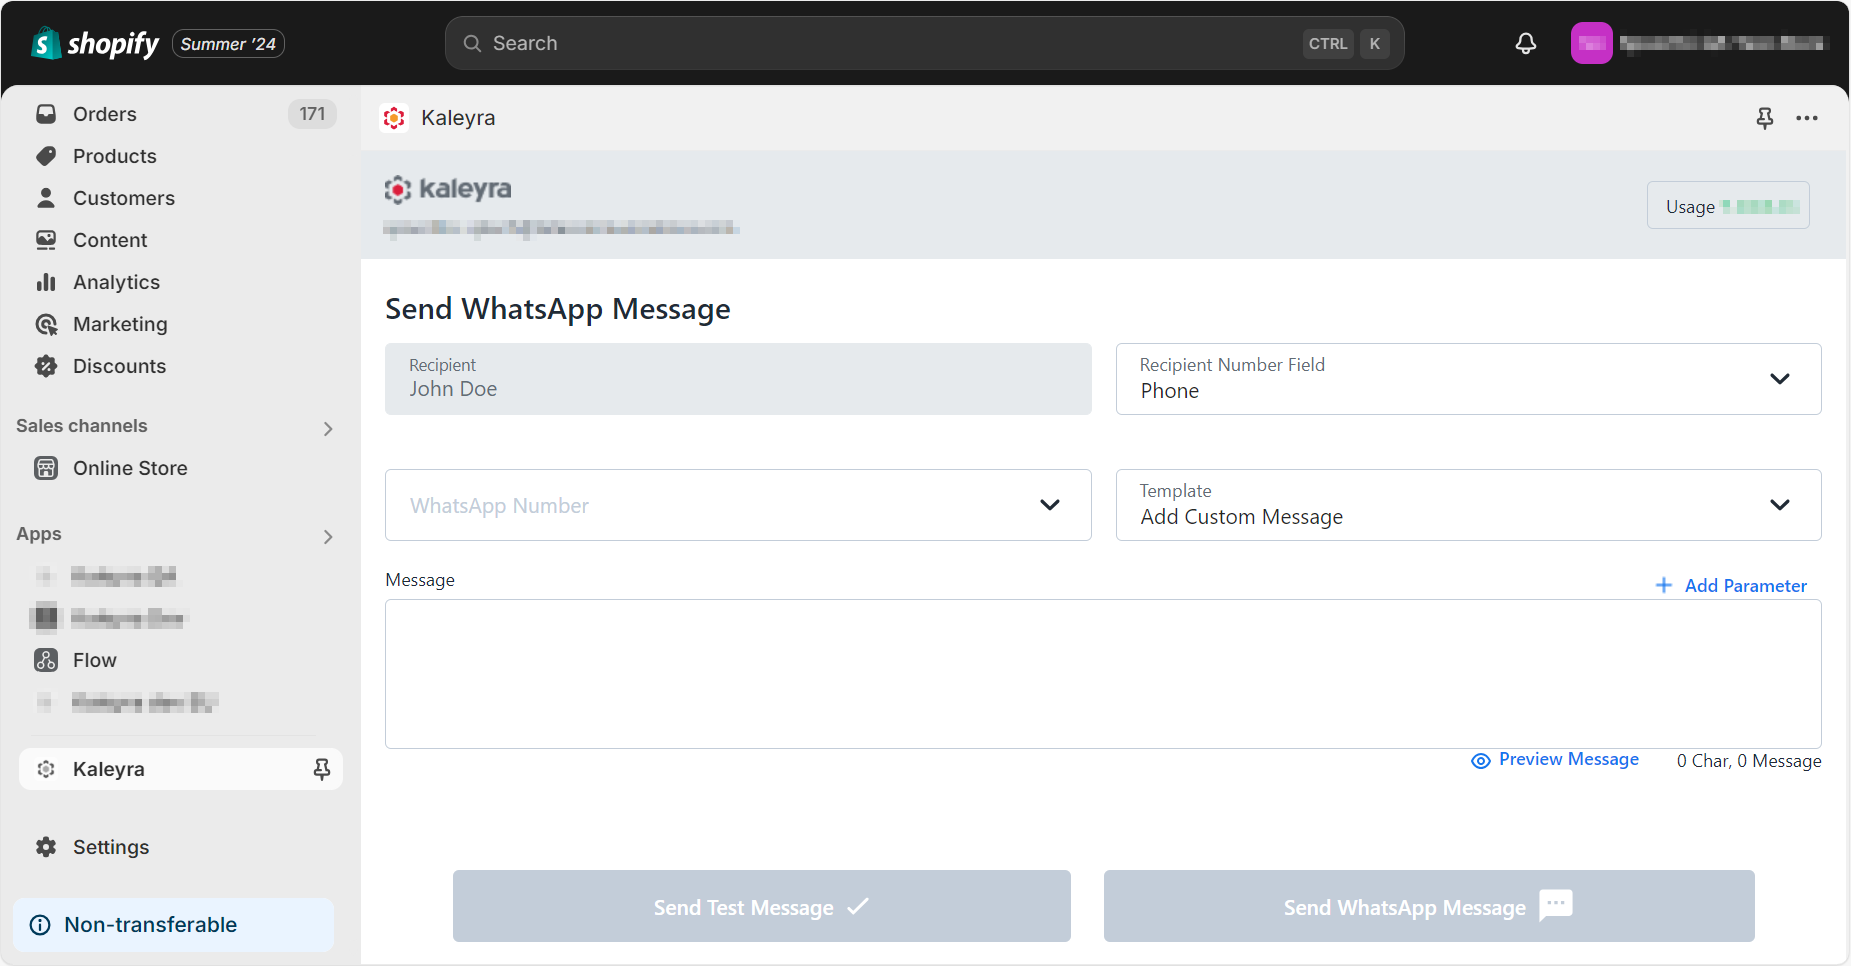
The Send WhatsApp Message page appears.
-
Perform the following steps:
-
In the Recipients Number field, by default, the selected customers' number gets selected. Select the recipient's number type from the Mobile or Phone. If you are selecting more than one customer, then instead of the name of the customer you can view the number of recipients.
-
In the WhatsApp Number field, click the arrow next to WhatsApp Number to view the list. Select the number from the list through which you wish to send WhatsApp messages. The WhatsApp Number in the list is the Number associated with your WABAs ID configured in your kaleyra.io account. For more information, see Adding a new WABA ID.
-
In the Templates field, click the arrow next to Templates to view the list. The Templates shown in the list are the ones configured and approved in your kaleyra.io account. For more information, see WhatsApp Templates. Select one of the following template types:
- Select an approved template from the list.
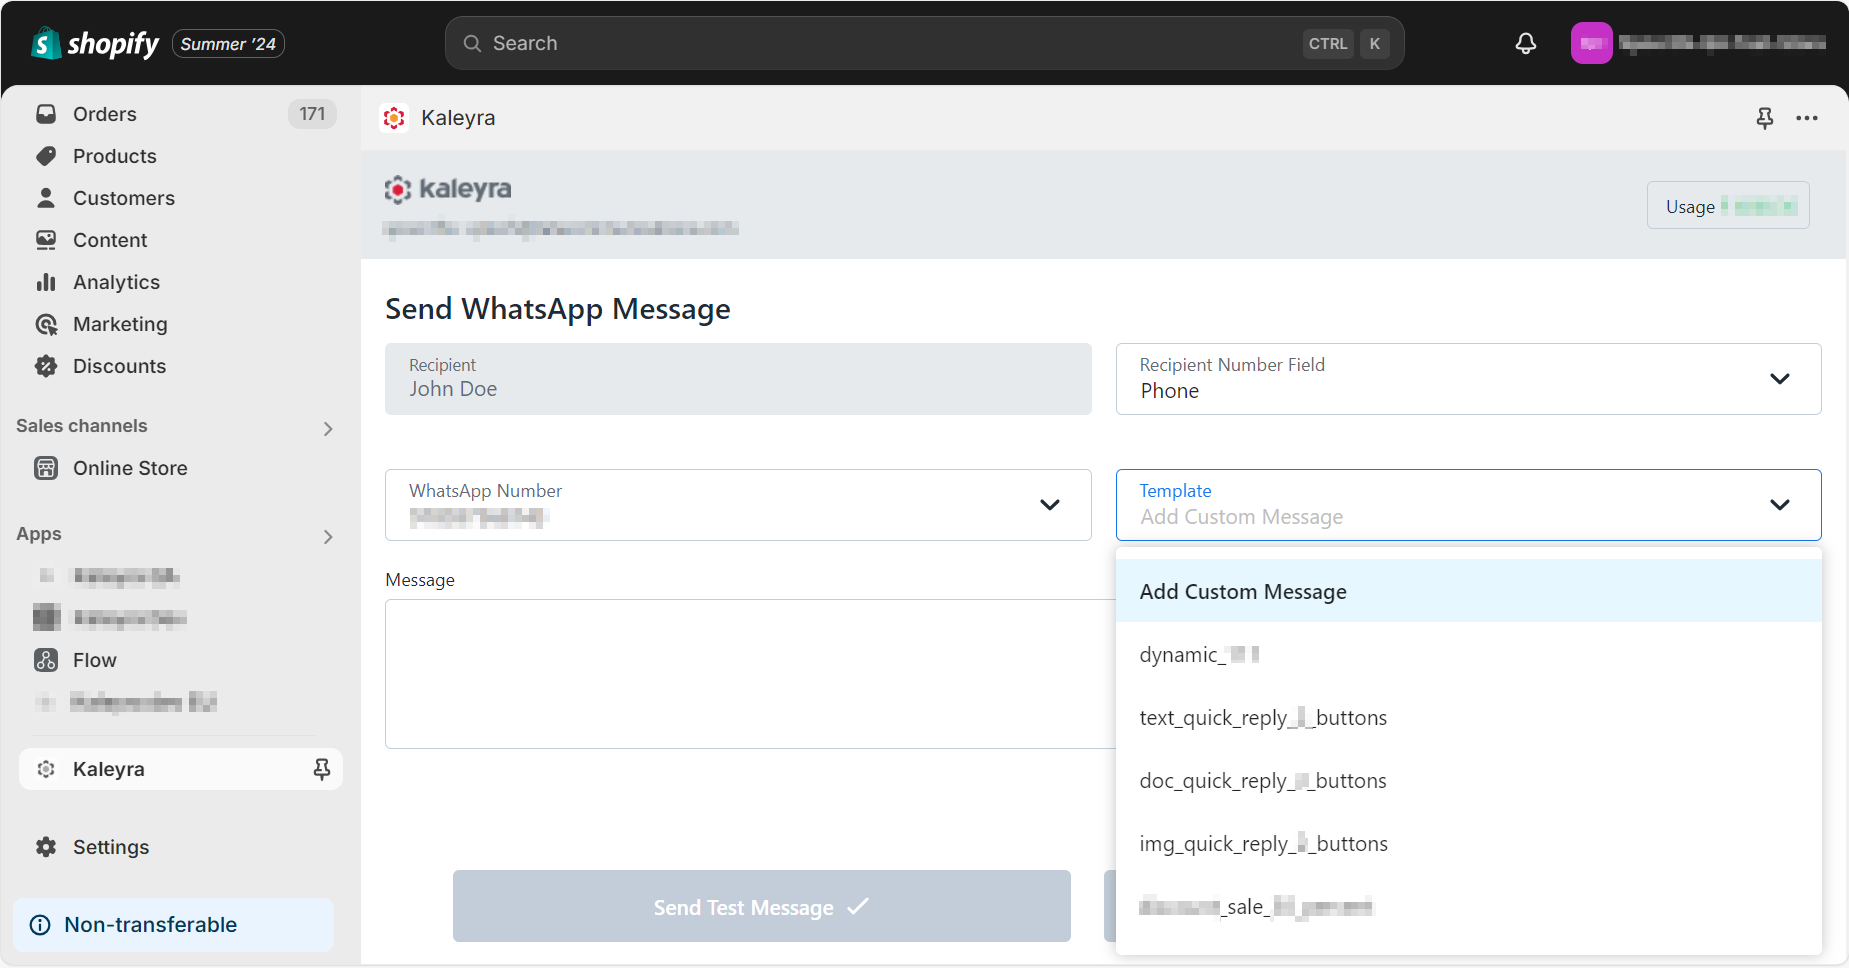
- Add Custom Message - You can add a custom message without using any templates.
In both cases, you can add parameters and define their value or set it as default from the available lists in the Add Parameter.
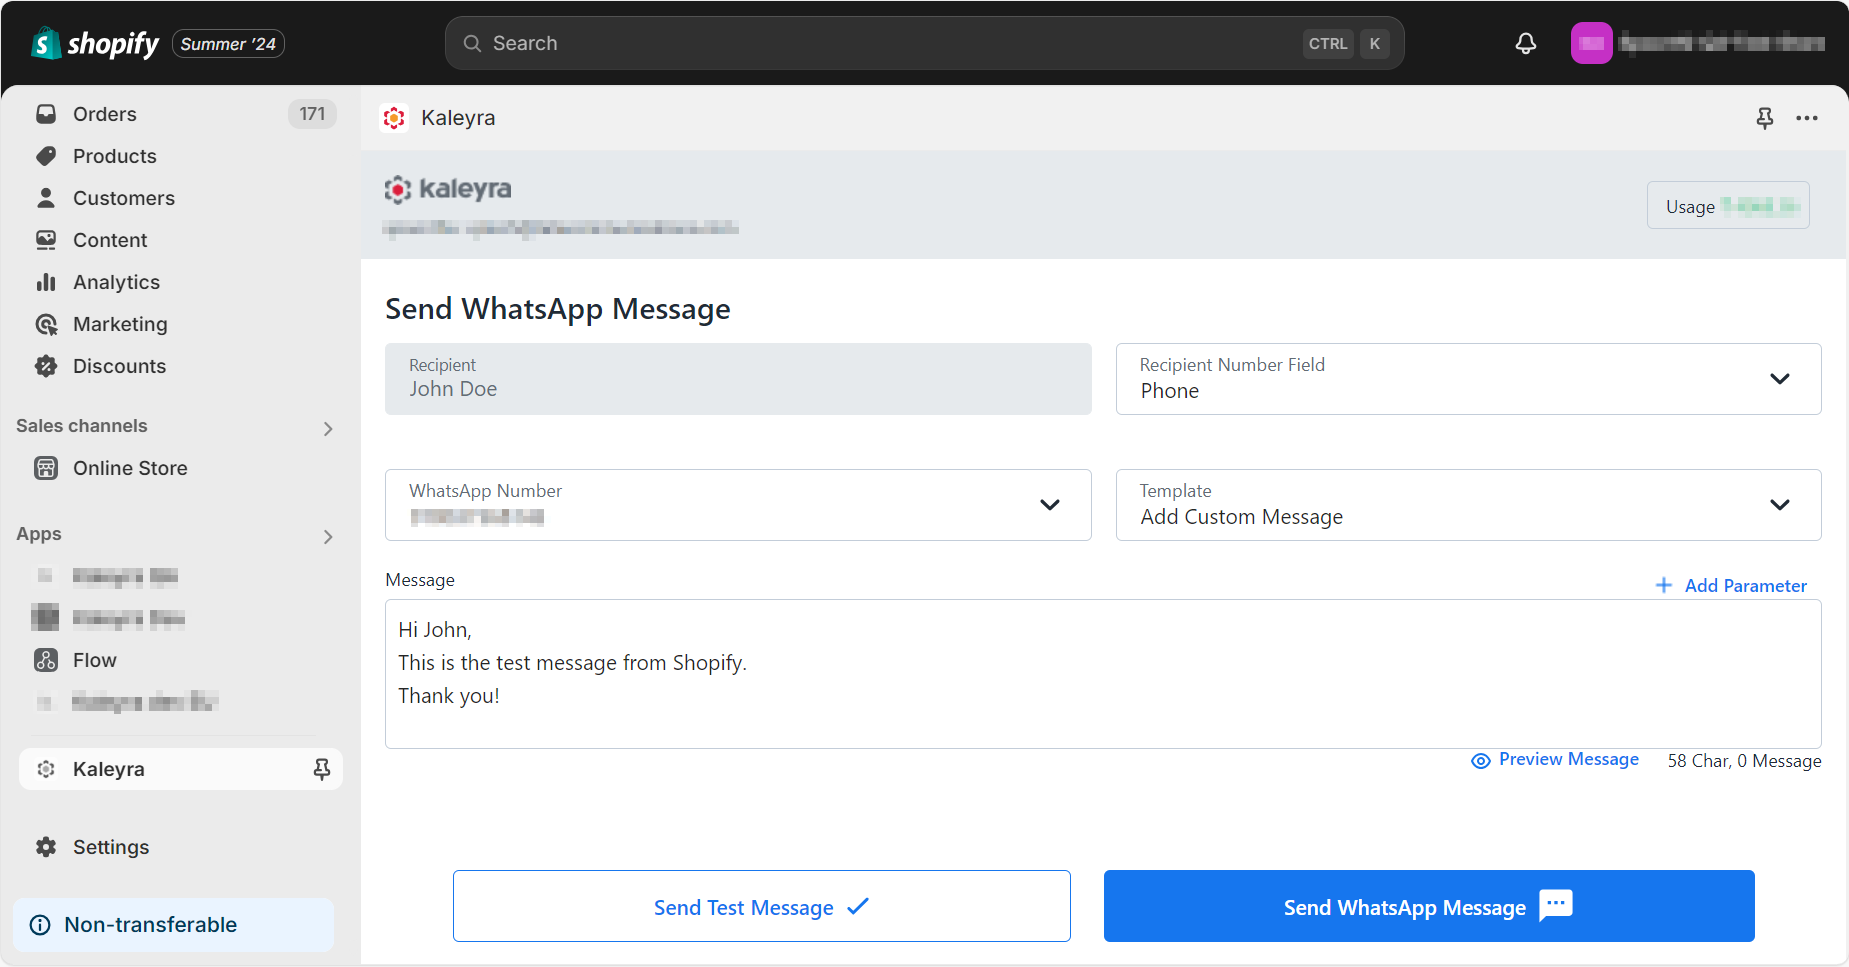
- In the Message field, you can compose a message in the following ways:
- Use static message content selecting an approved template from the drop-down menu.
- Compose a message directly if the Add Custom Message option has been selected.
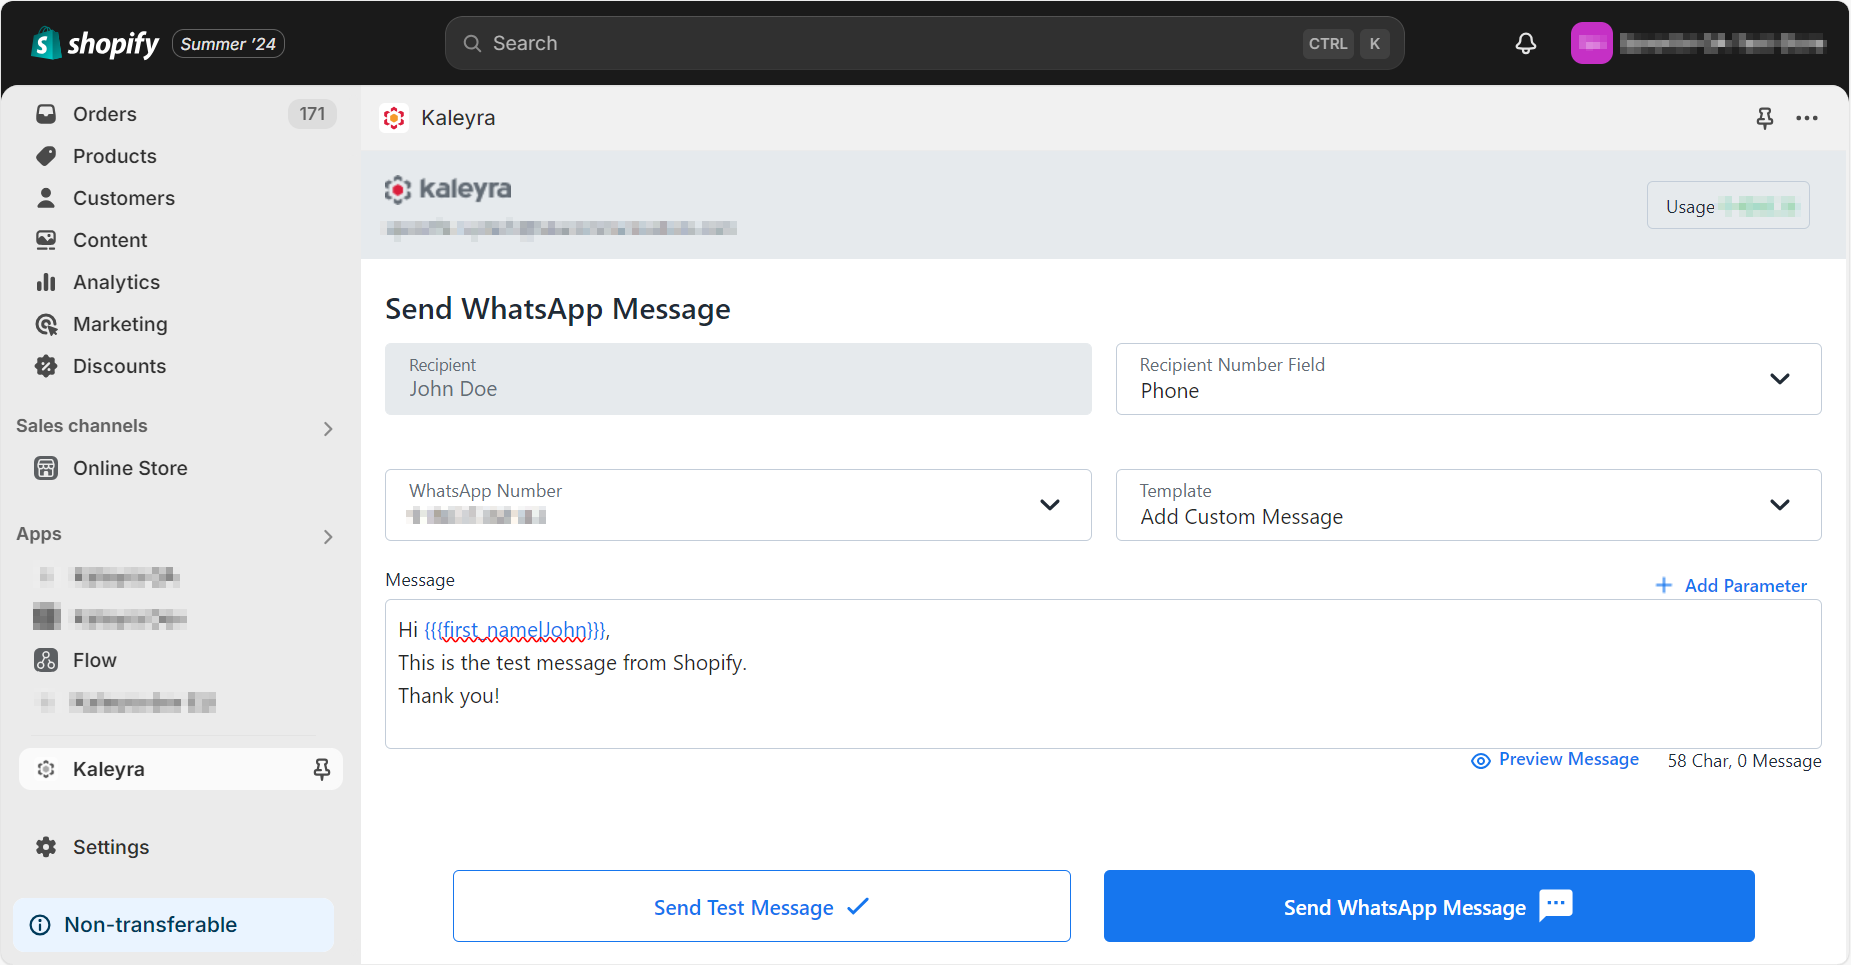
- Click Add Parameter to insert dynamic parameters to your message content. If you want to use dynamic parameters in your message text, you need to enclose them within three open and closed curly braces. For example, {{{lastname}}}.
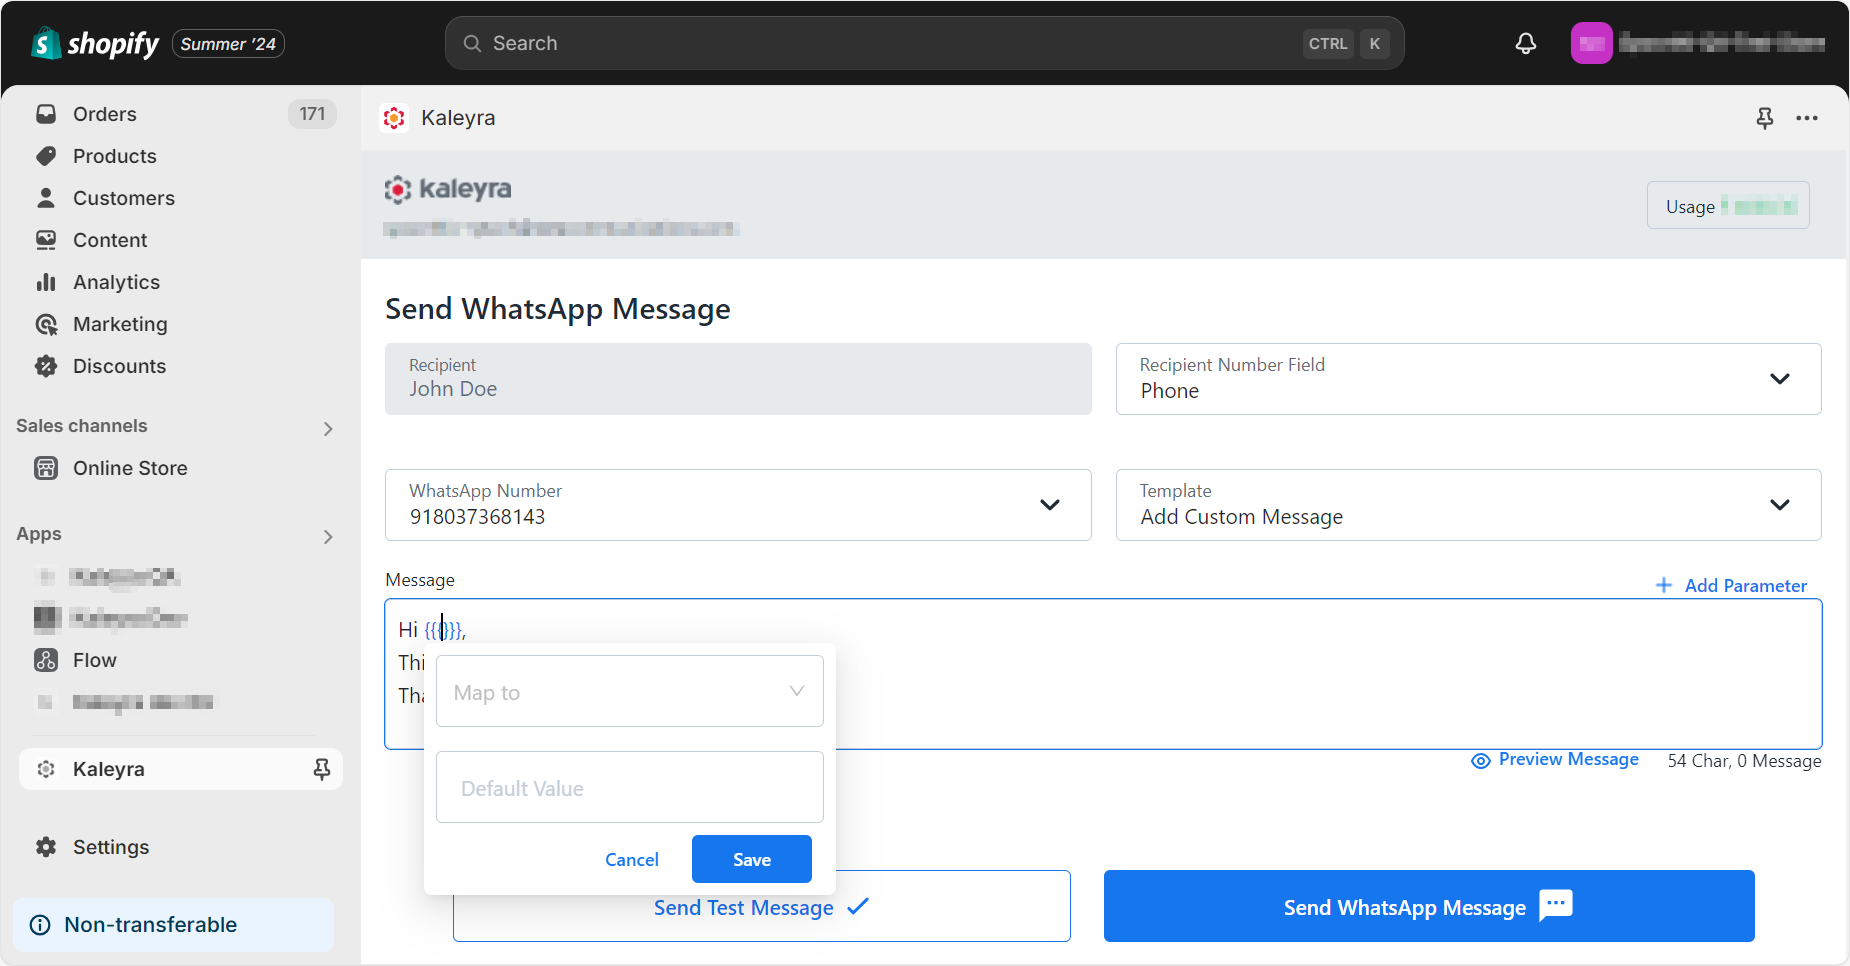
- Click the arrow next to the Map to field to view the list of available attributes from contact details that can be used to retrieve the value of the parameter for each contact. Select the field based on your choice for mapping.
- Default Value - Enter the default value to be used in case no value is found for a given contact in the attribute mapped to the parameter and click Save.
The added parameter will be displayed in the Message field.
 Note:
Note:If the added parameter has no value, then it will return to the Default Value in the Message section.
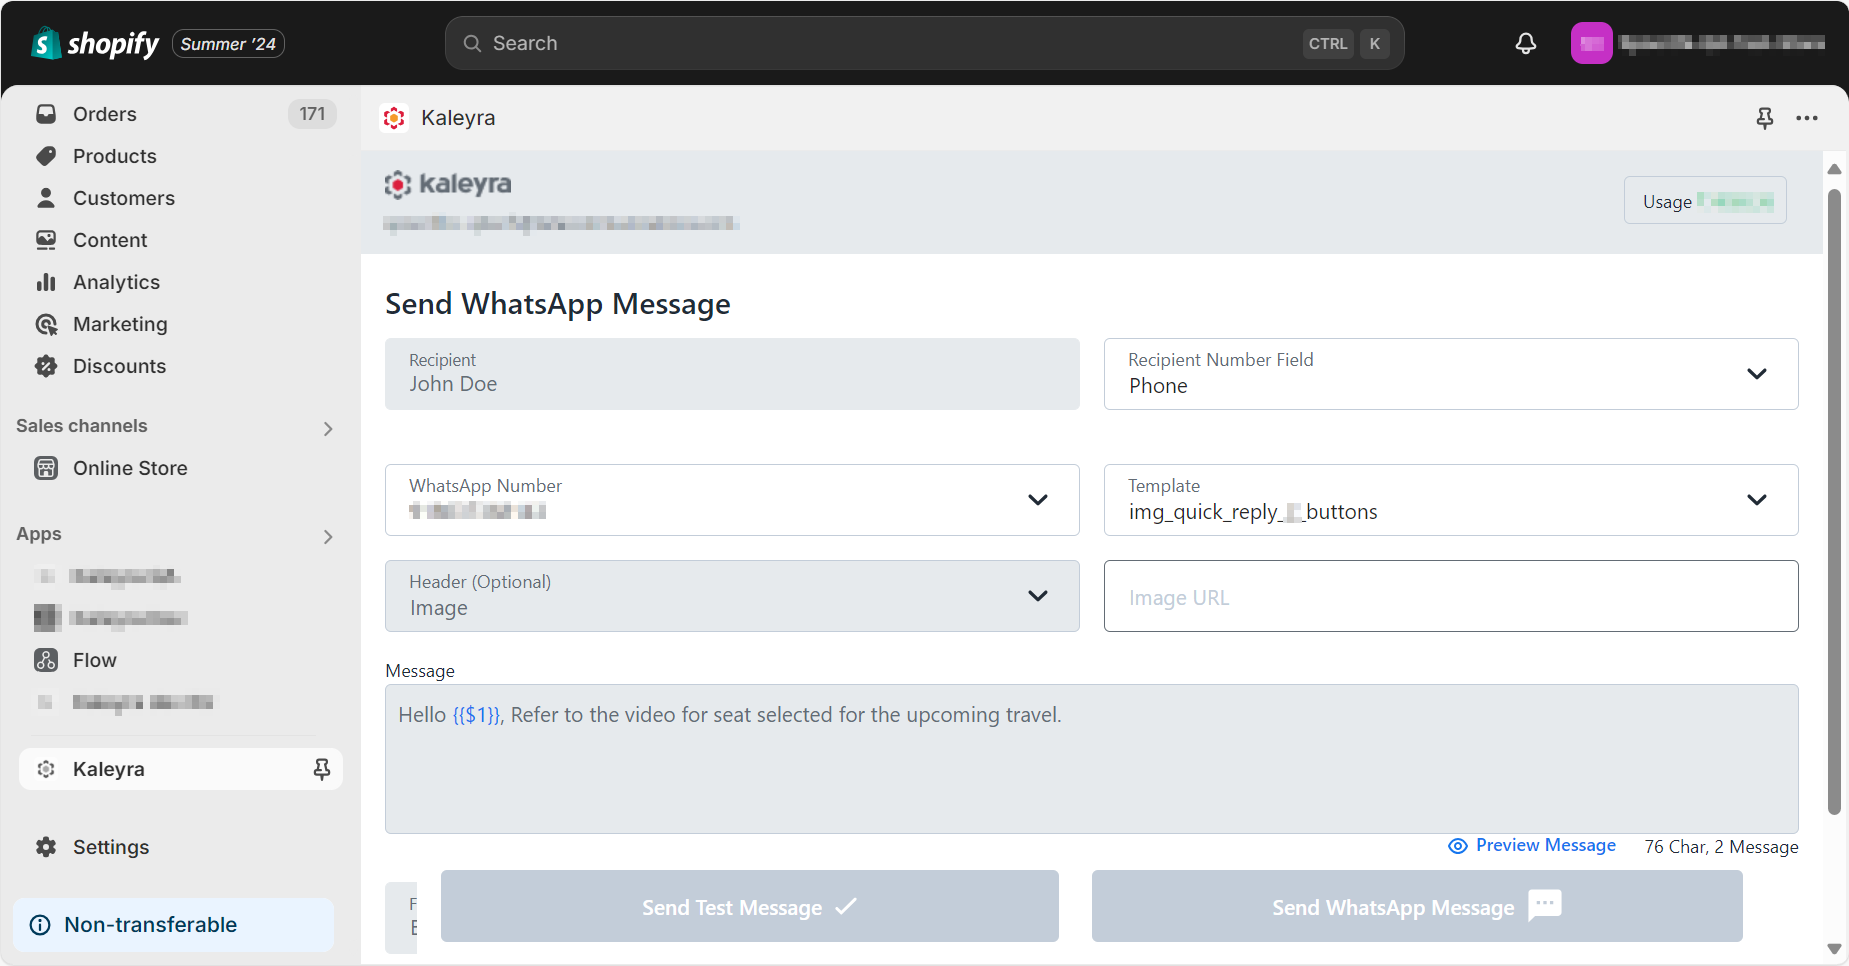
- A message with attachment - If the selected template requires a media, then you need to provide the media (document/video/image) URL.
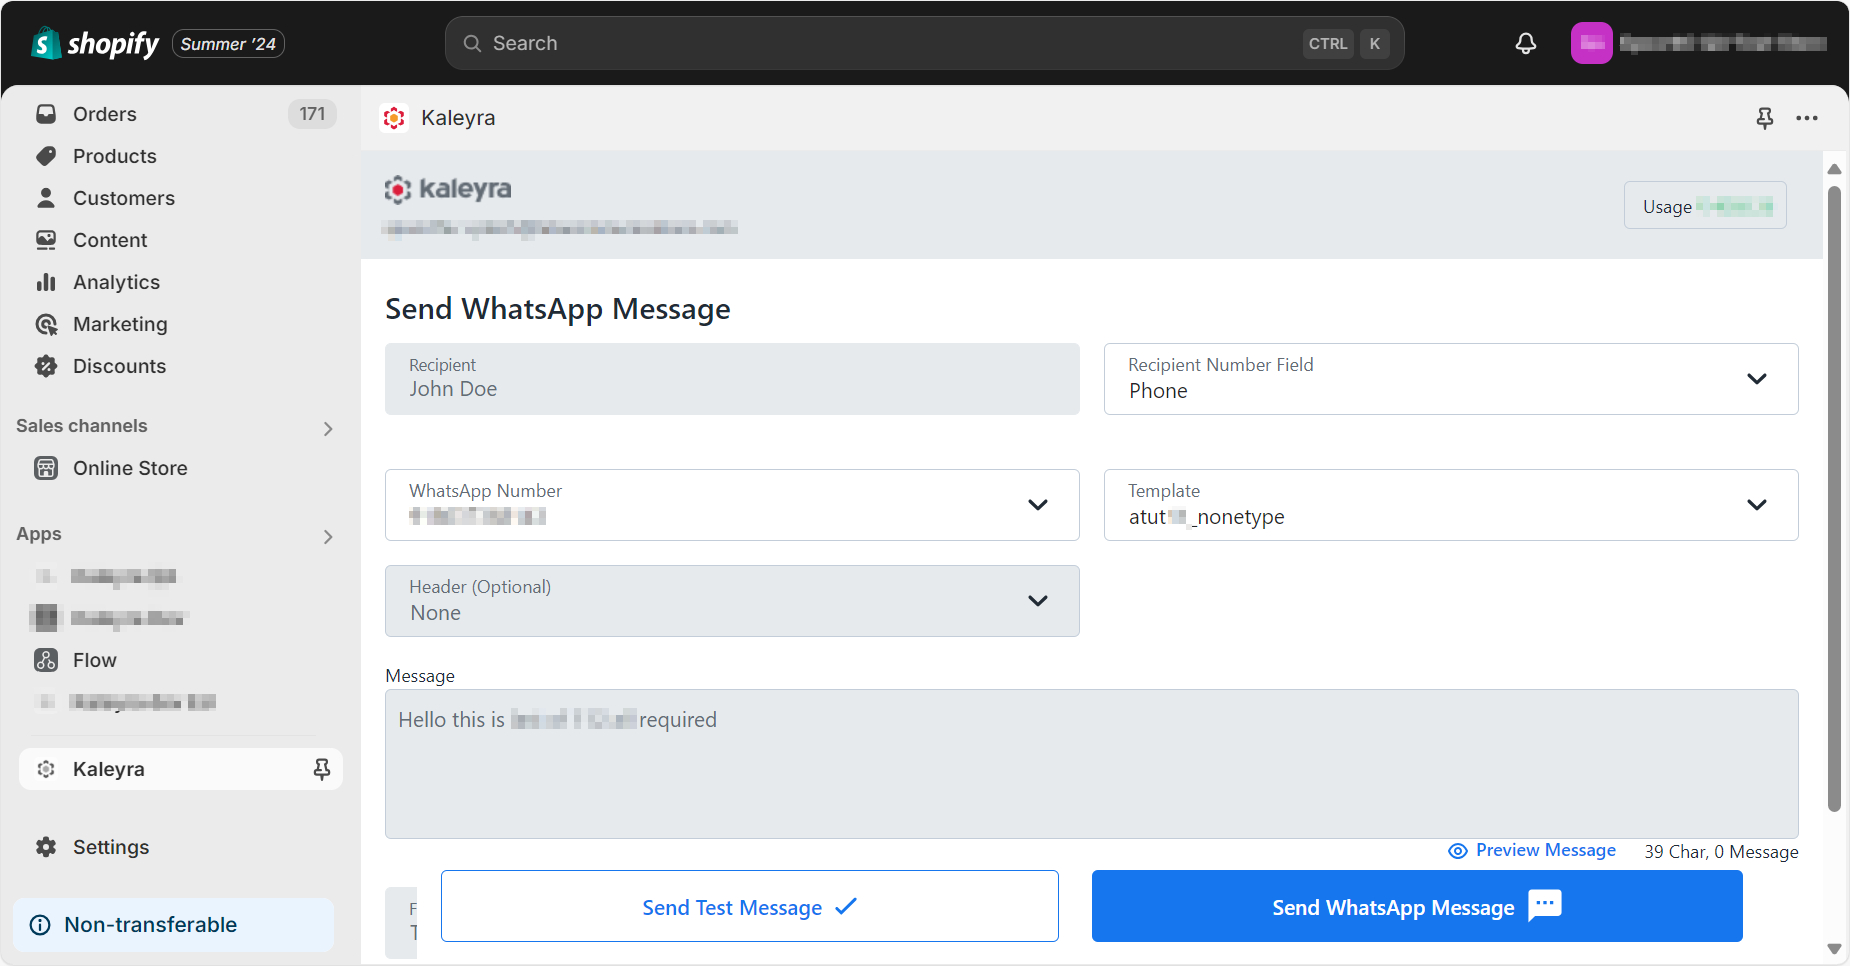
- Header None - When you select the template with header None, in that case, you do not have the option to add any messages in the text box. The defined message in the Message field will be delivered to recipients. If the header is not None, you can add a header to the message.

- Footer - If the footer is enabled in the template, you can add a footer in your WhatsApp message based on your requirements.
-
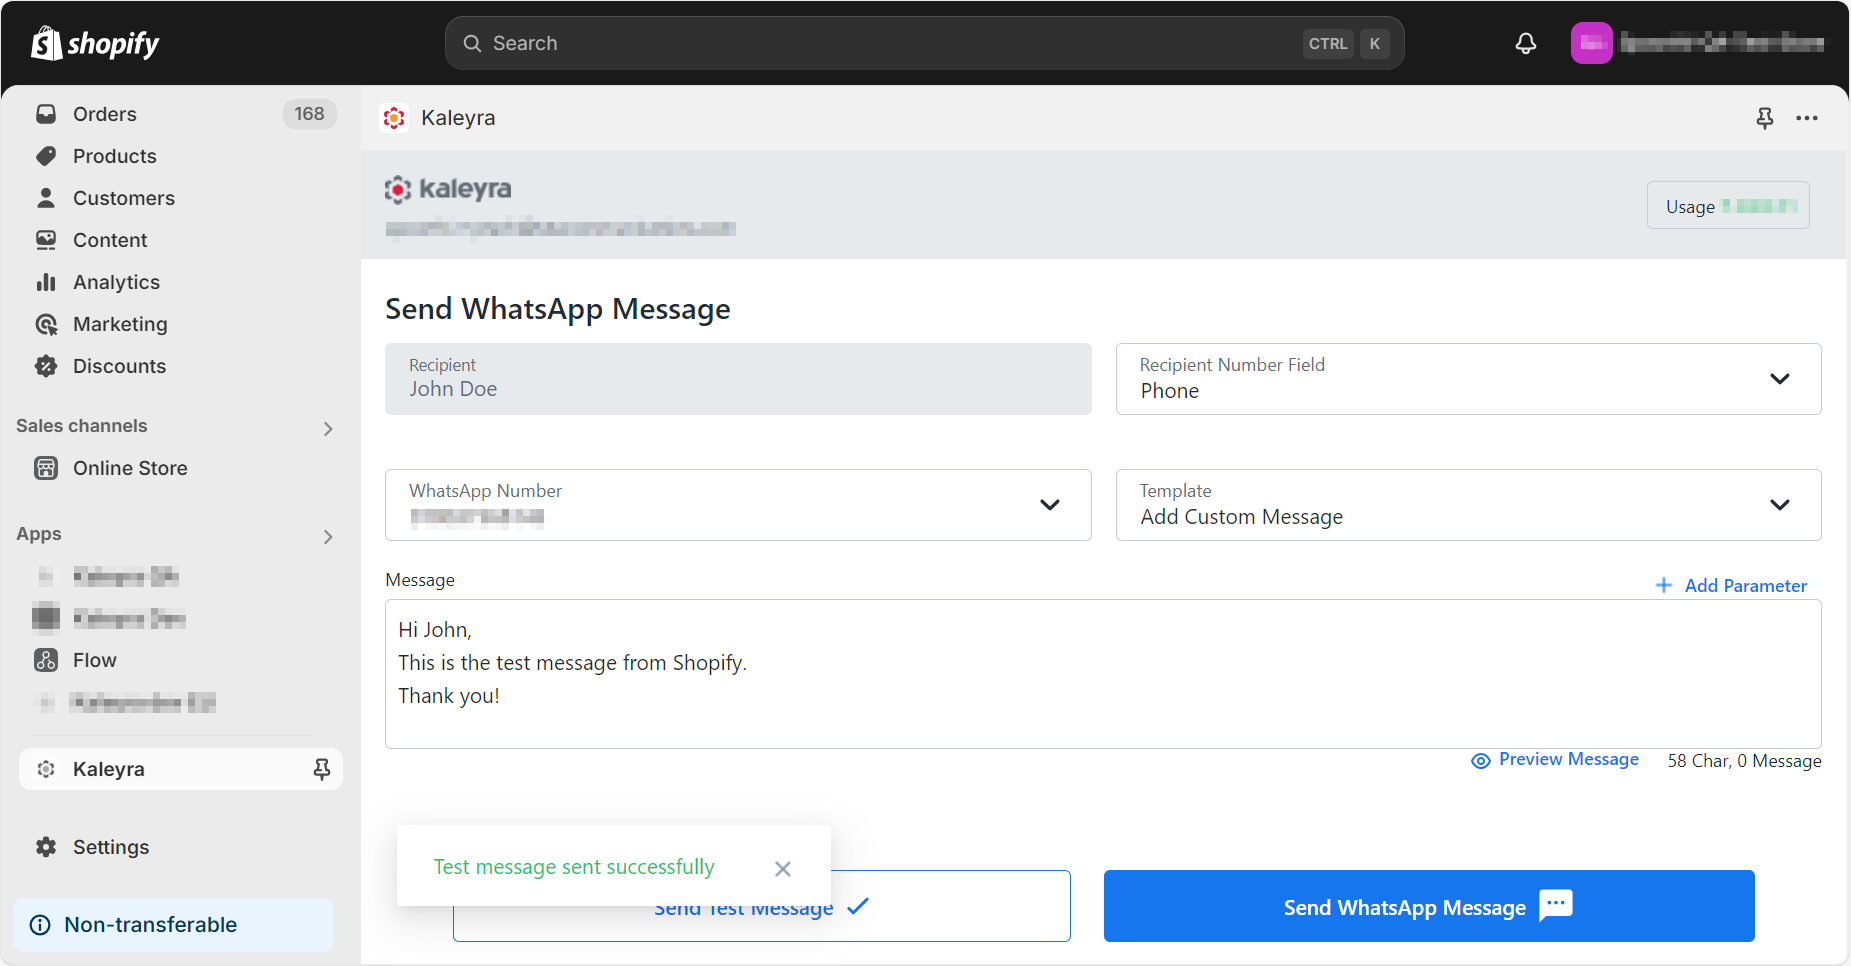
- (Optional) Click Send Test Message to send a test message. In the Send Test Message to field, enter your number with your country code. Click Send Test Message. The confirmation message Test Message sent successfully appear.
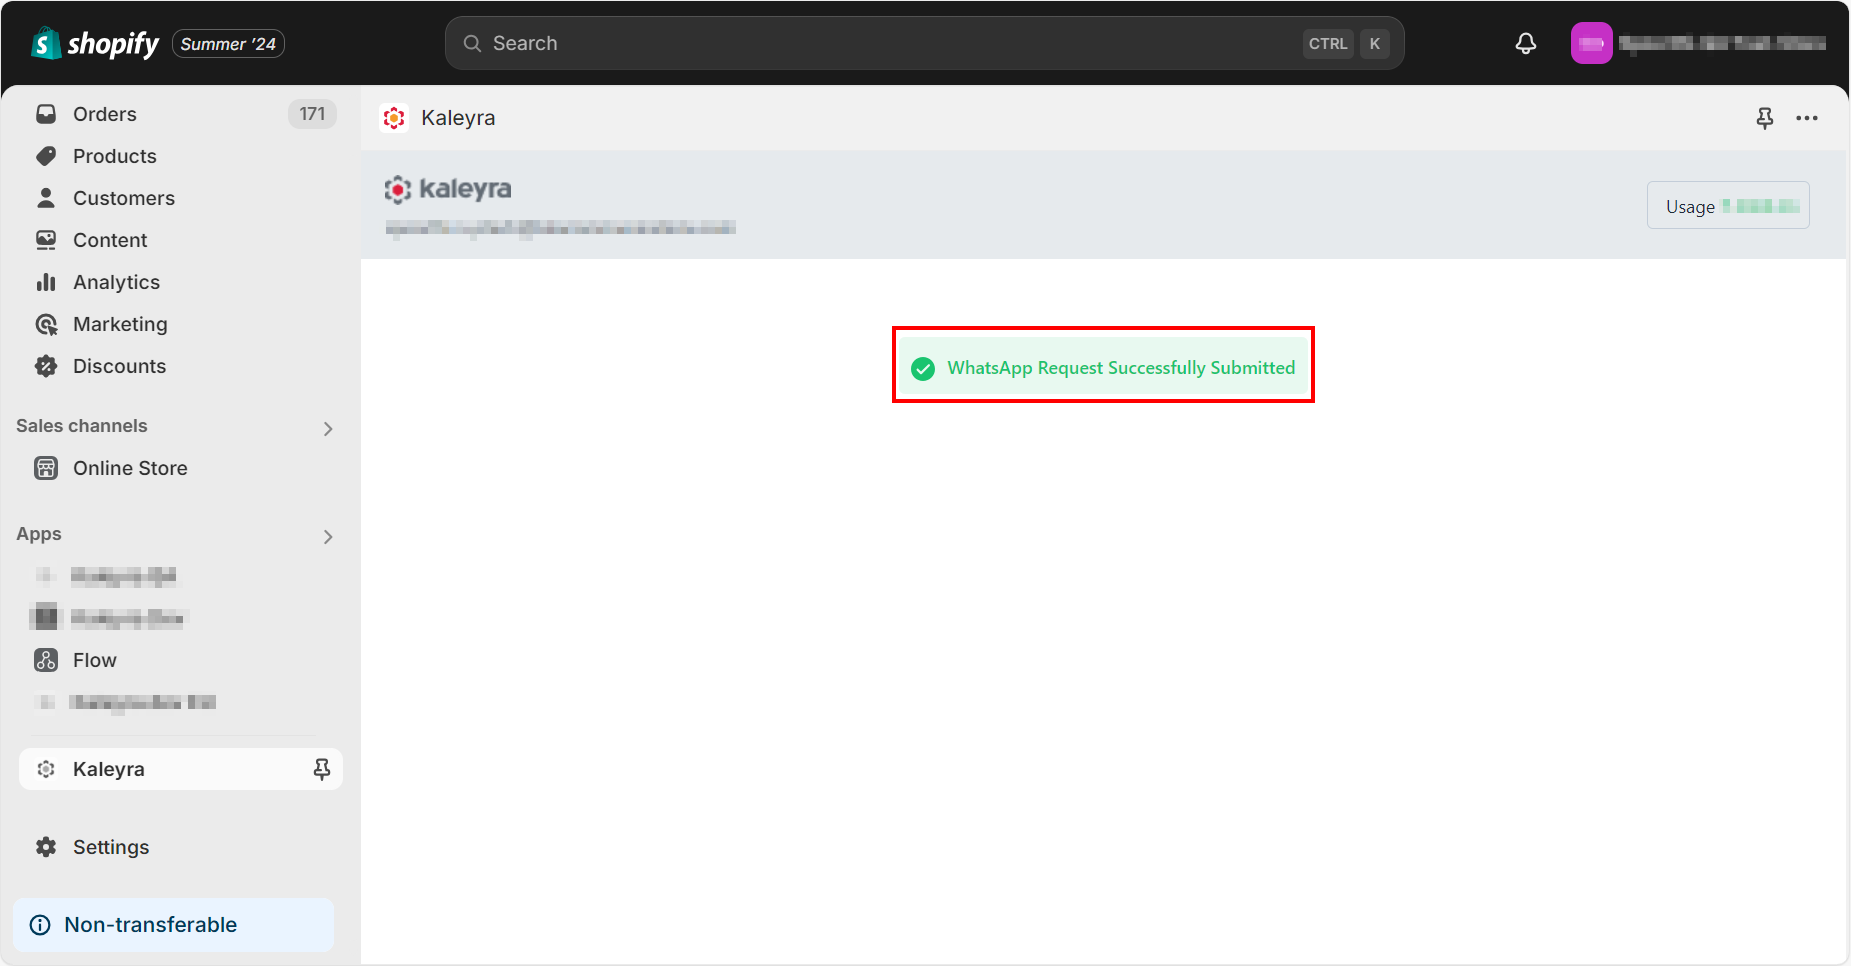
- Click Send WhatsApp Message to send a WhatsApp message.
A confirmation message appears.
You can view the WhatsApp Logs page in kaleyra.io by navigating to Channels > WhatsApp > Analytics > Logs. For more information, see WhatsApp Analytics – Logs.
Updated 12 months ago