Logs
Call logs contain the details of all the calls made using your account.
About Logs screen
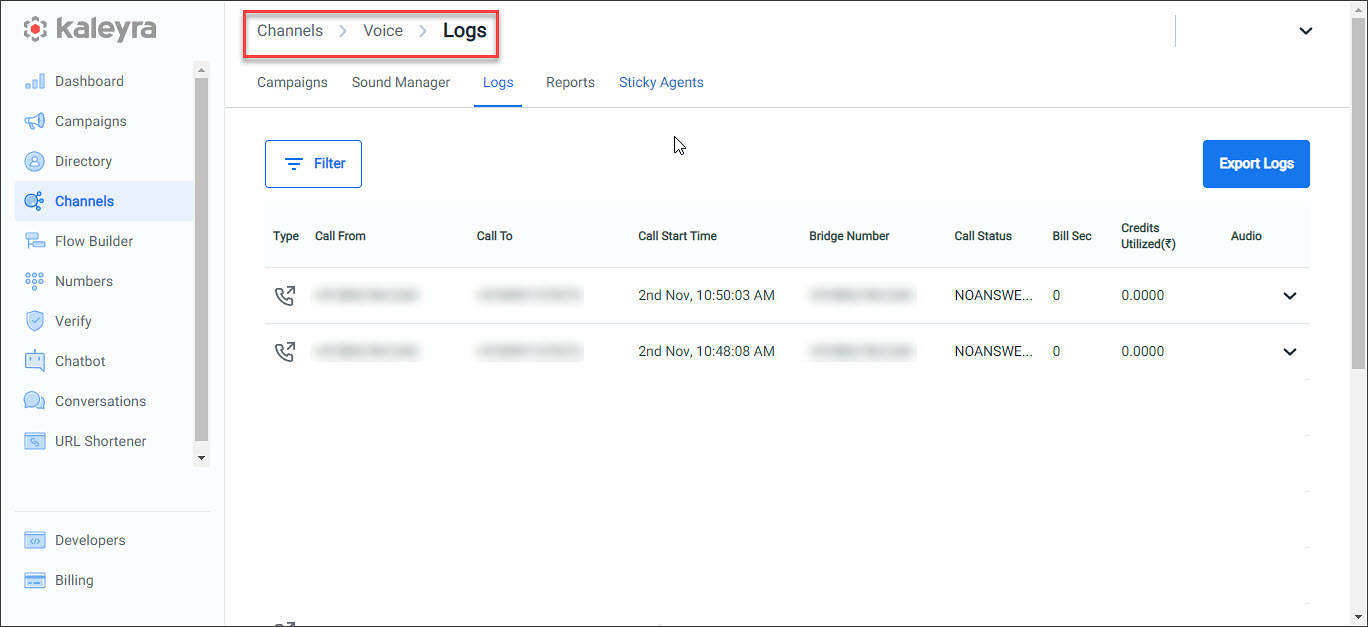
Logs screen lets you access all the call log details for the calls made using your account. You can view details like type of call, call to and call from numbers, time of the call, status of the call, chargeable duration of the call, credits utilized for the call, link to the call recording and so on.
Accessing the Logs screen
To access the Logs screen,
- Log in to Kaleyra.io.
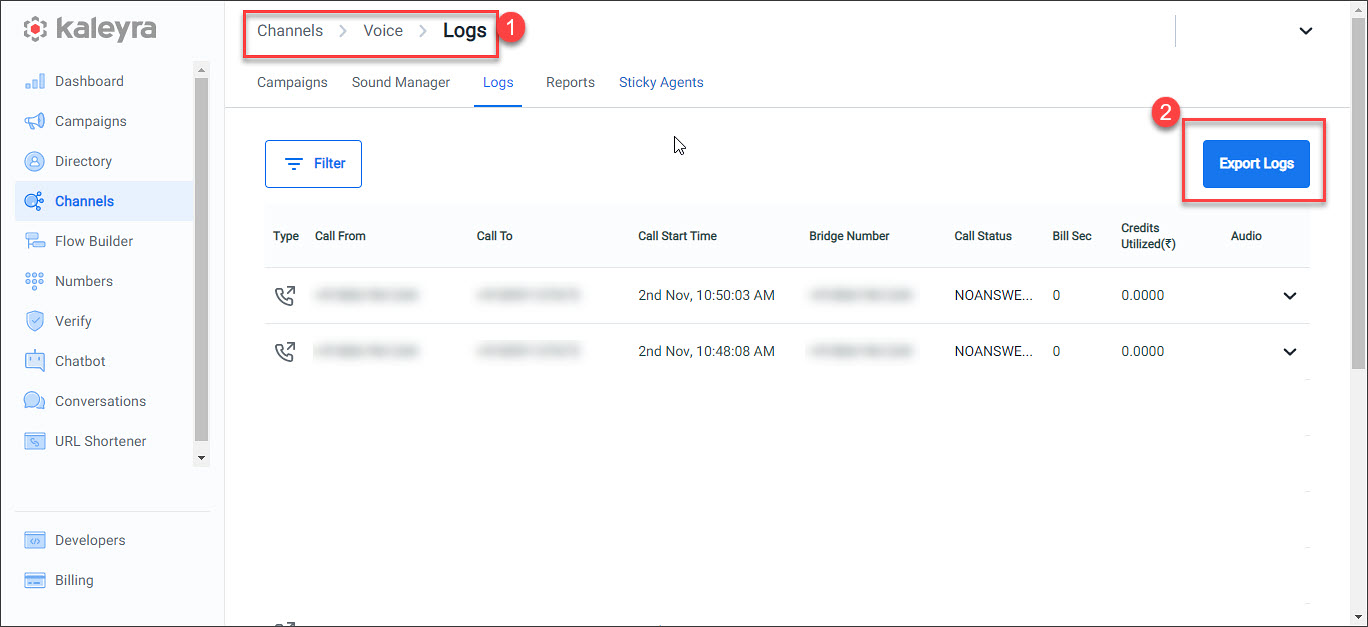
- Navigate to Channels > Voice > Logs.

Columns on the Log screen
The following table provides descriptions for the columns on the log screen:
Column Name | Description |
|---|---|
Type | The type of call.
|
Call From | The number from which the call is received. |
Call To | The number to which the call is made. |
Call Start Time | The call start time as soon as the call is initiated. |
Bridge Number | The DID number that is used to initiate the call. |
Call Status | The status of the call. For example ANSWER, NOANSWR, BUSY, and so on. For more details on the call statuses, refer to https://developers.kaleyra.io/docs/call-statuses. |
Bill Sec | The chargeable duration of the call. |
Credits Utilized(cur) | The credits utilized for the call. |
Audio | The call recordings associated with each call.
|
Call ID | Unique identification of each call. |
Flow execution ID | Unique identification of each flow executed. |
Exporting the call log
You can view and extract logs of up to the last seven days from the current day.
- Log in to the Kaleyra.io account and navigate to Channels > Voice > Logs.
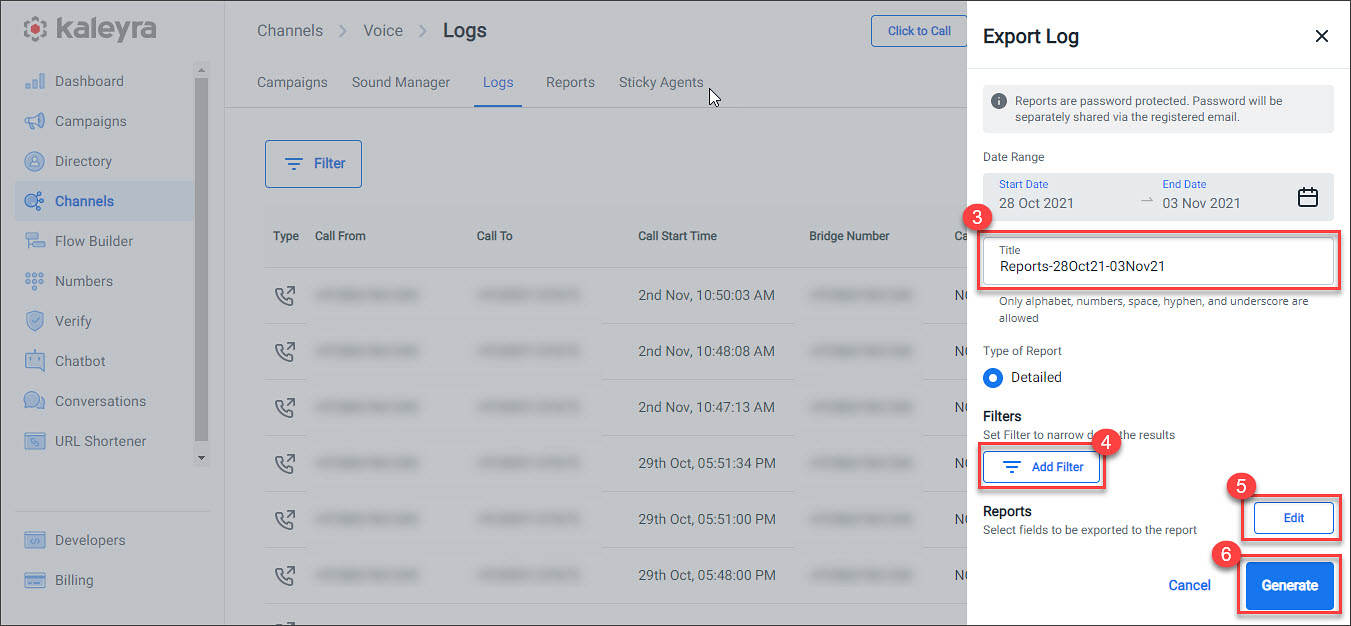
- Click Export Logs to export logs for the last seven days.

- Enter the title for the report to be generated. By default, the system auto-populates this field with the applicable date range.
- Use filters to narrow down the results.
- Click Edit to select fields to be exported to the report. By default, the fields displayed on the Logs screen are selected.
- Click Generate.

Note:
- The exported logs are password protected. You will receive the password separately via the registered email.
- The exported log is a zip file containing the CSV files.
Updated 7 months ago
