Add WhatsApp Templates from UI
To send a WhatsApp template, you should first create and send it for Meta’s approval through kaleyra.io interface. Once submitted, you can check its status in Kaleyra user interface which can be either PENDING, REJECTED or APPROVED.
The following are important reminders and updates to help you understand the template categorization.
Notes:
- Kaleyra supports Marketing, Utility and Authentication template categories.
- Authentication has replaced the previous OTP Templates, but the Utility and Marketing Template remains the same.
- For Authentication category, kaleyra.io supports ‘Copy code’ setup only. With this setup, you can send a one-time password or code along with a copy code button to your users.
To create a new WhatsApp template, follow the below steps:
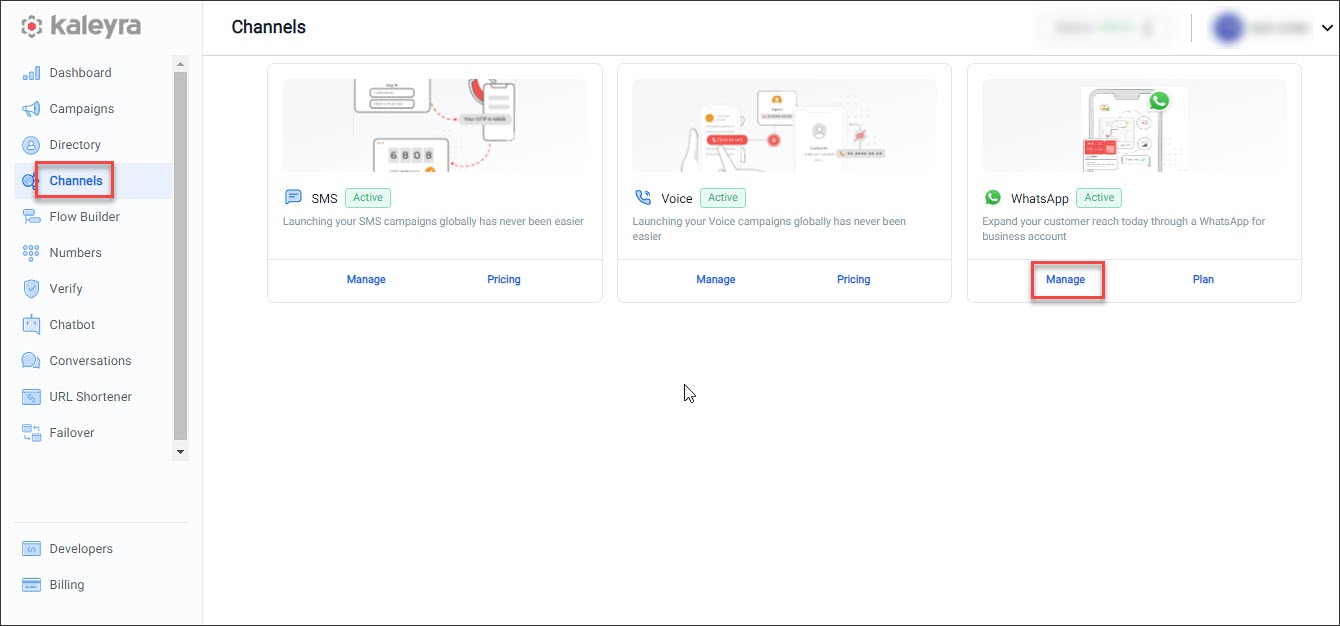
- Sign in to your kaleyra.io account.
- Go to Channels and on the WhatsApp card, click Manage.
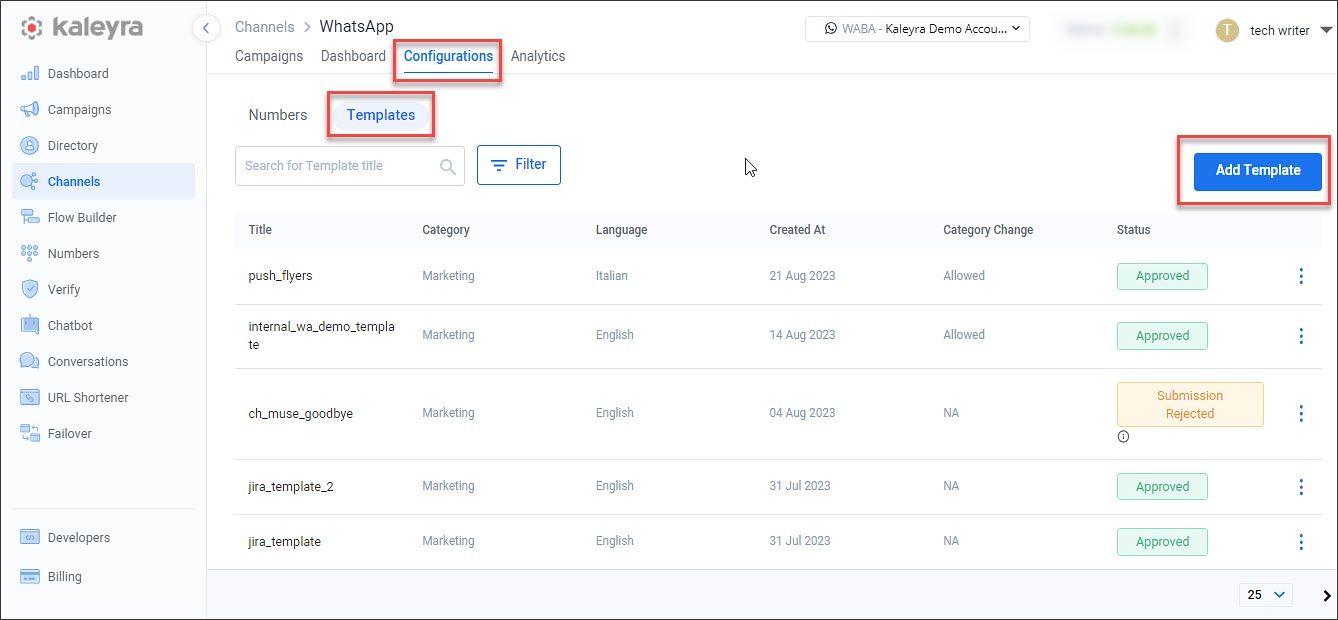
- Click Configurations > Templates and then click Add Template.
The Add New Template page appears.
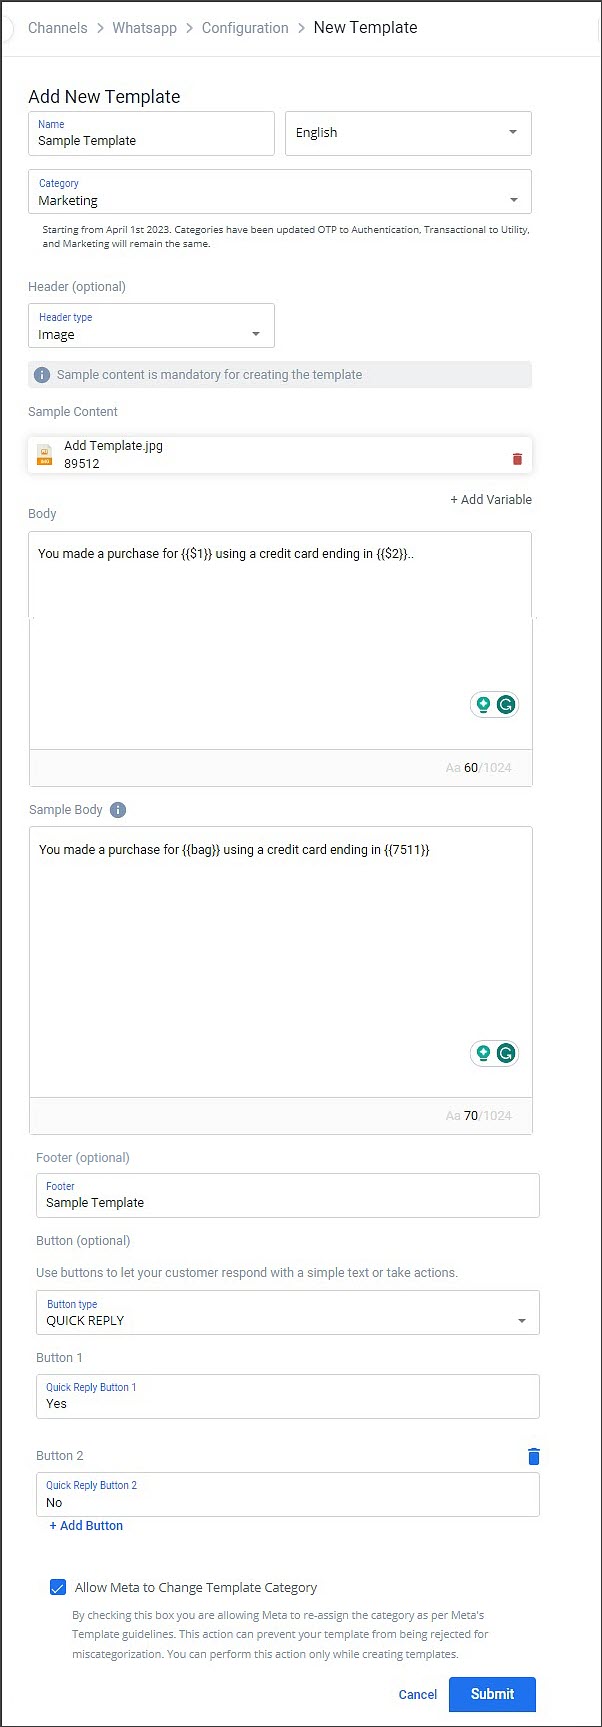
- The Add New Template page has the following fields:
- Name - Add a title to the WhatsApp template. Contain only lowercase alphanumeric characters and underscores (_ ). Other characters or white space are not allowed.
- Language - Select the language of the template from the drop-down list. The default is English.
- Category - Select the category from the drop-down list. Supported categories are Marketing, Utility, and Authentication. For more information see the WhatsApp Template Category page.
Note:Under Authentication category, the Add Security Recommendation and Add expiry time for the codeare optional fields but are recommended.
- Header - Select the Header type from the drop-down list. The options available are Media (Image, Video, or Document), Text, and None. If you are selecting a media type, please attach the supporting image, video, or document in the Sample Content field. This field is optional.
- Body - Enter the template body in the given space. It allows up to 1024 characters and also supports variables.
For example, you made a purchase for {{$1}} using a credit card ending in {{$2}}. - Sample Body - Enter the sample body text based on the Body field by updating the details in the variables.
For example, you made a purchase for bag using a credit card ending in 7511. In the example, {{$1}} variable is updated with "bag" and {{$2}} variable is updated with "7511".
Note:Updating the correct variable in the Sample Body will help speed up the approval of the template as it helps the reviewer understand the use case during the review process.
- Footer - Enter the footer in the text box. This field is optional.
- Botton - Select the Button type from the drop-down list. The supported options are Quick Reply, Phone Number, and URL. For more information on Button type, see Send Interactive Message and Media Template. This field is optional.
- Click + Add Button to add an additional button or the Delete icon to delete a button.
Note:The Allow Meta to Change Template Category checkbox is selected by default. By checking this box, you are allowing Meta to re-assign the category as per Meta's Template guidelines. This action prevents templates from being rejected for wrong categorization. The Allow Meta to Change Template Category checkbox can be performed only while creating templates.
Create Authentication Template Category
To create the Authentication Template Category, perform the following steps:
- Select Authentication from the Category drop-down list. The Message Content section appears.
For more information on the Authentication Category, See Authentication section.
Note:The content for authentication message templates cannot be edited. You can however add additional content from the options below.
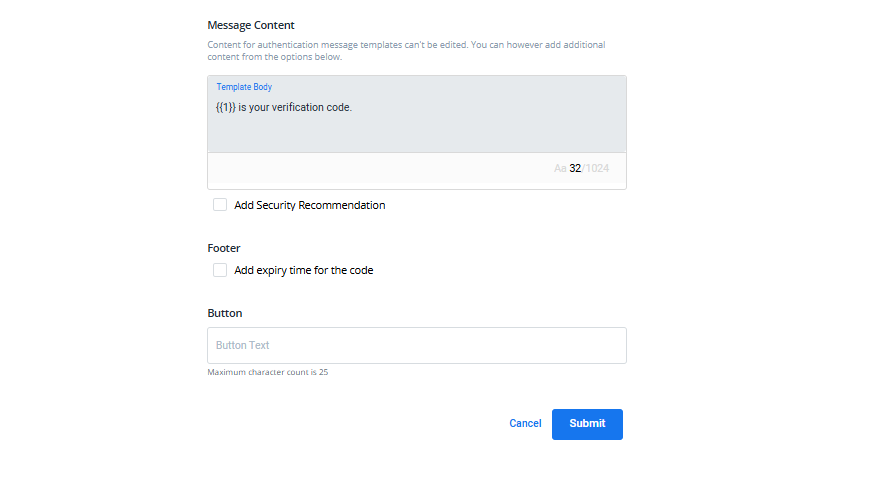
- The Message Content section has the following field:
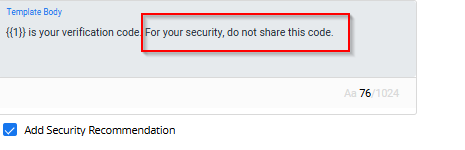
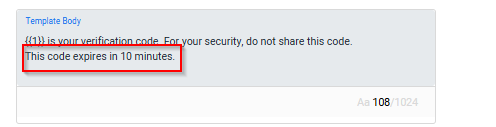
- Template Body - The message content can be changed by selecting the checkboxes Add Security Recommendation and Add expiry time for the code.
Note:The Template Body field cannot be edited.
- Select Add Security Recommendation checkbox. For your security do not share this code message gets added to the Template Body field.
- Footer - Select Add expiry time for the code, the Code Expires in and Time Format fields appears.
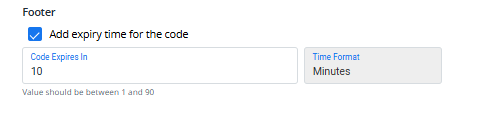
Code Expires in - Enter the time in the Code Expires in field. For example, if you enter 10 minutes in the Code Expires in field, the changes made in the Code Expires in field is reflected in the Template Body field.
Notes:
- The Time Format field cannot be edited, and the value should be in between 1 and 90 minutes.
- The expiration logic for the code is to be taken care of at client’s end. kaleyra.io is not responsible for generating and validating the time period of OTP codes.
- If a message is not delivered within the time frame, you will not be charged, and your customer will not see the message.
- Button - Enter the text in the Button Text field. The entered button text is used as the button label in the WhatsApp message sent to the end user for OTP authentication.
Note:The maximum character count for copy code button field is 25.
- Click Submit to submit the template and initiate the approval process. Your template is now sent for approval. You can see the list of created templates and their status in the Templates tab on the Configurations page.
- Click Cancel to cancel the application and return to the Templates page.
Note:You can also create a callback profile to receive information regarding any update to WhatsApp Template Status. For more information refer to Create Callback Profile for WhatsApp Template Status Update.
Updated 7 months ago