Create a Verify Configuration
You can create a Verify Configuration in Kaleyra.io only if the template is approved.
To create a configuration,
- Sign in to the Kaleyra.io account.
- Click Verify displayed on the left navigation bar.
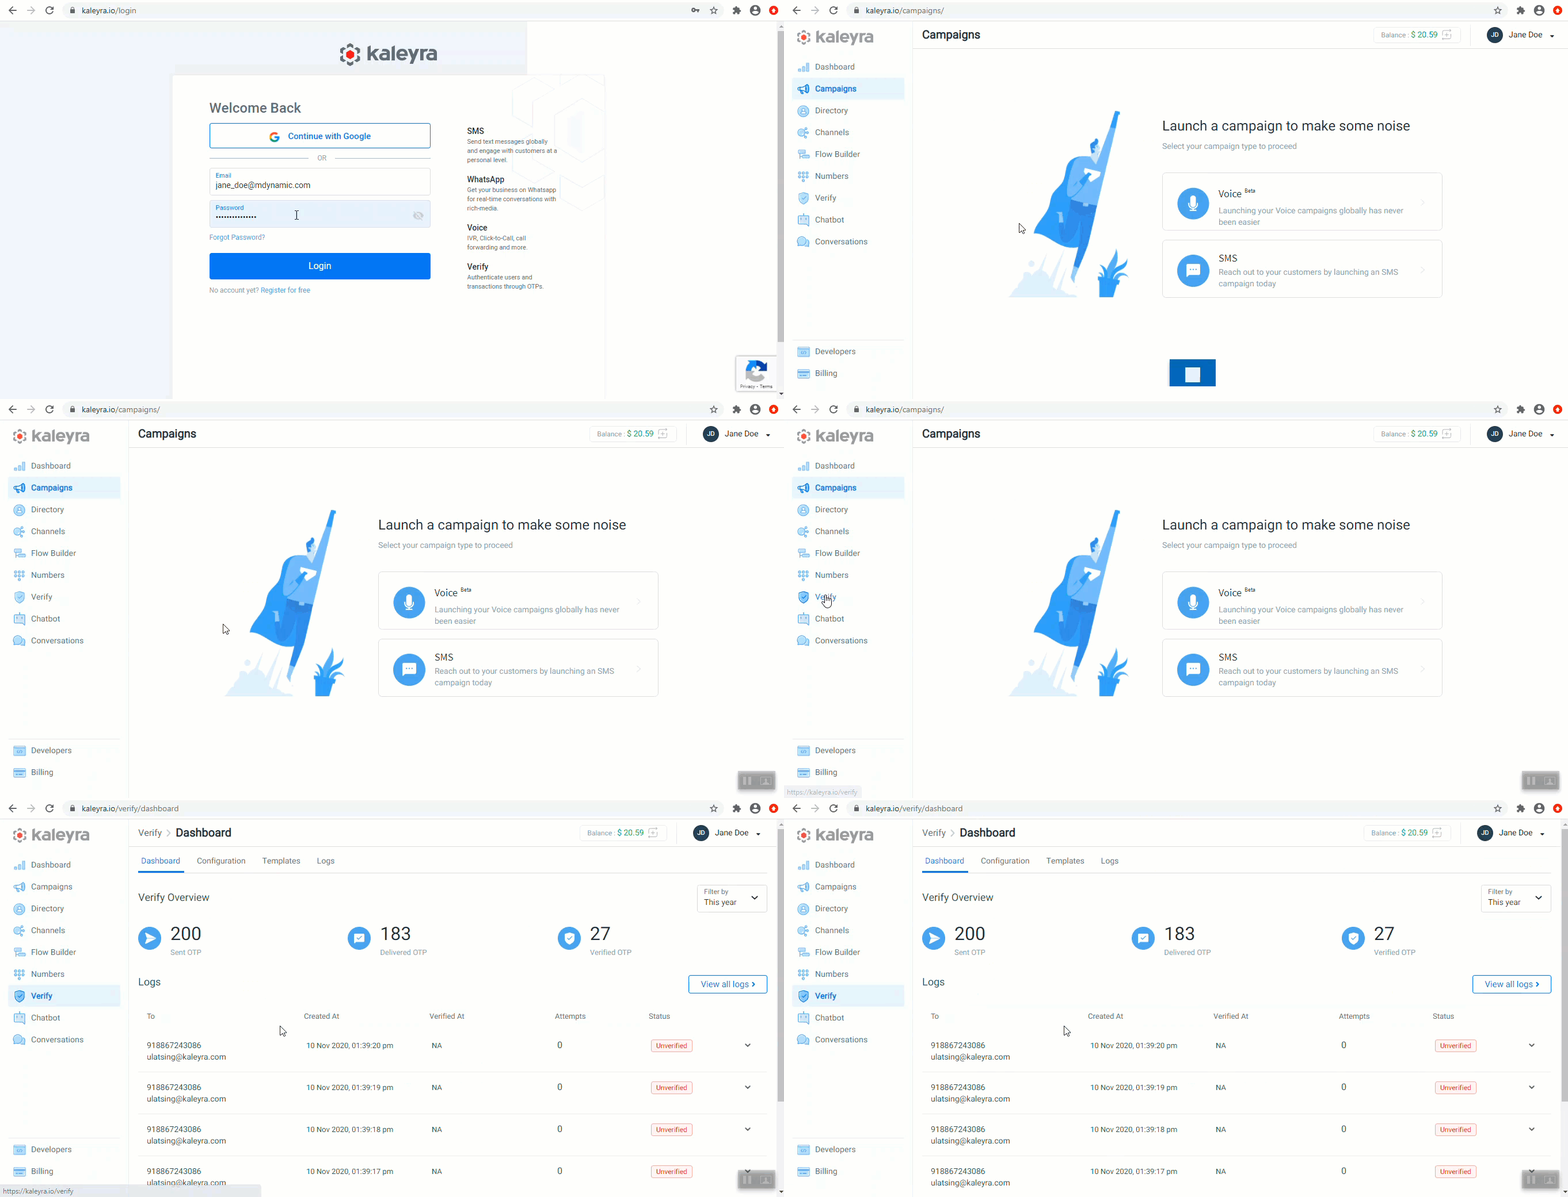
- Click Configuration and click Add Configuration to create a new configuration.
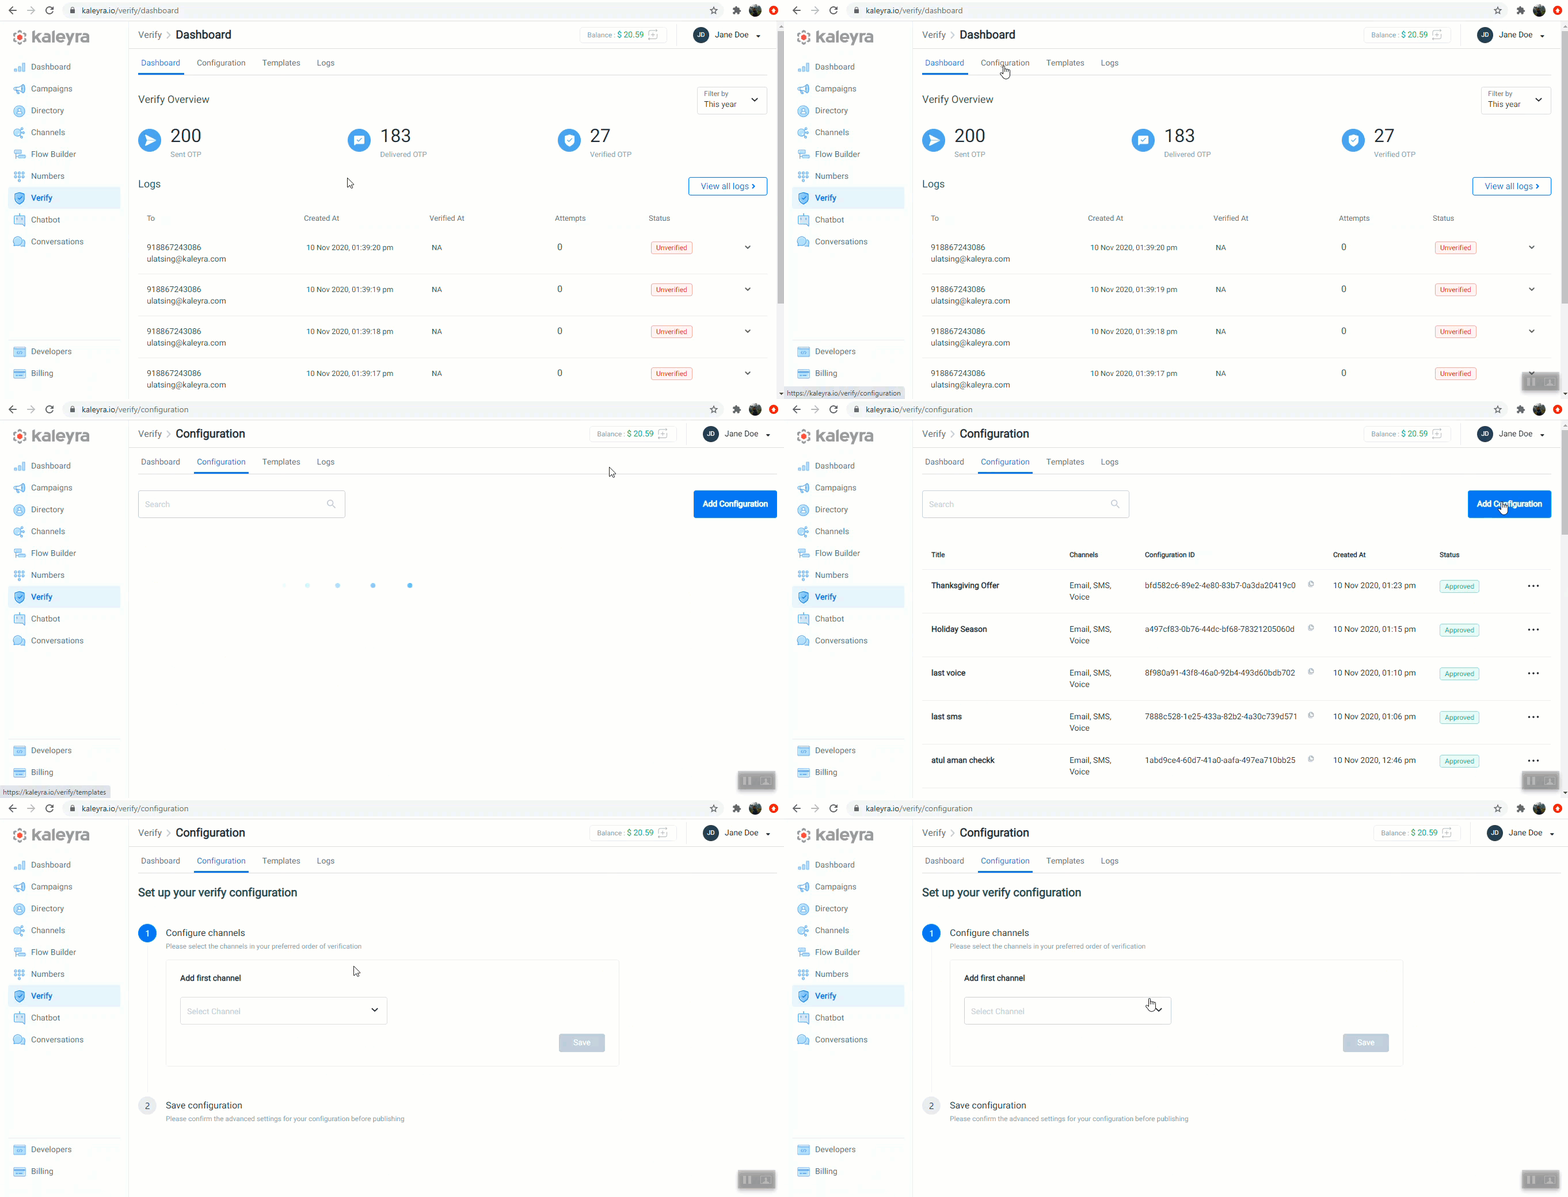
Select the order of the channels through which you want to send the OTP.
- Select the required channel from the Select Channel drop-down menu and perform the following steps.
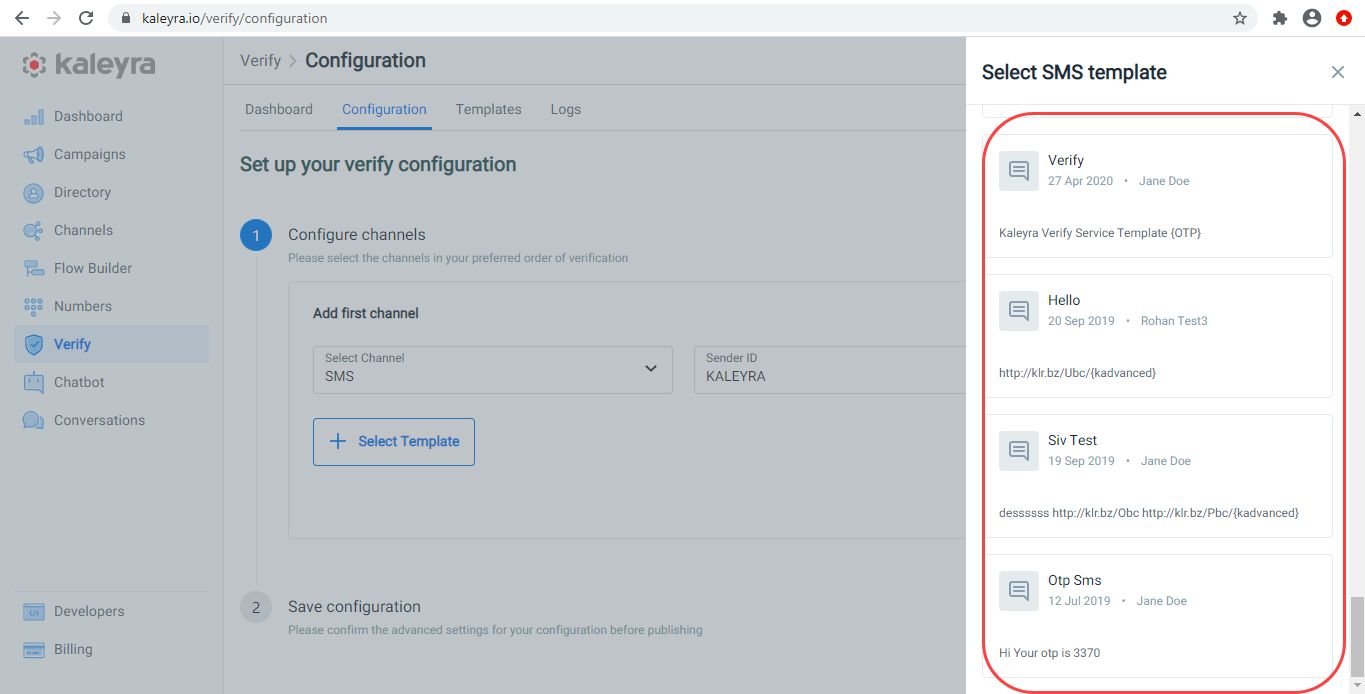
If you select SMS, then:
a. Select Sender ID from the Sender ID drop-down menu.
b. Click Select Template and select the required template from the list displayed on the Select SMS template window.
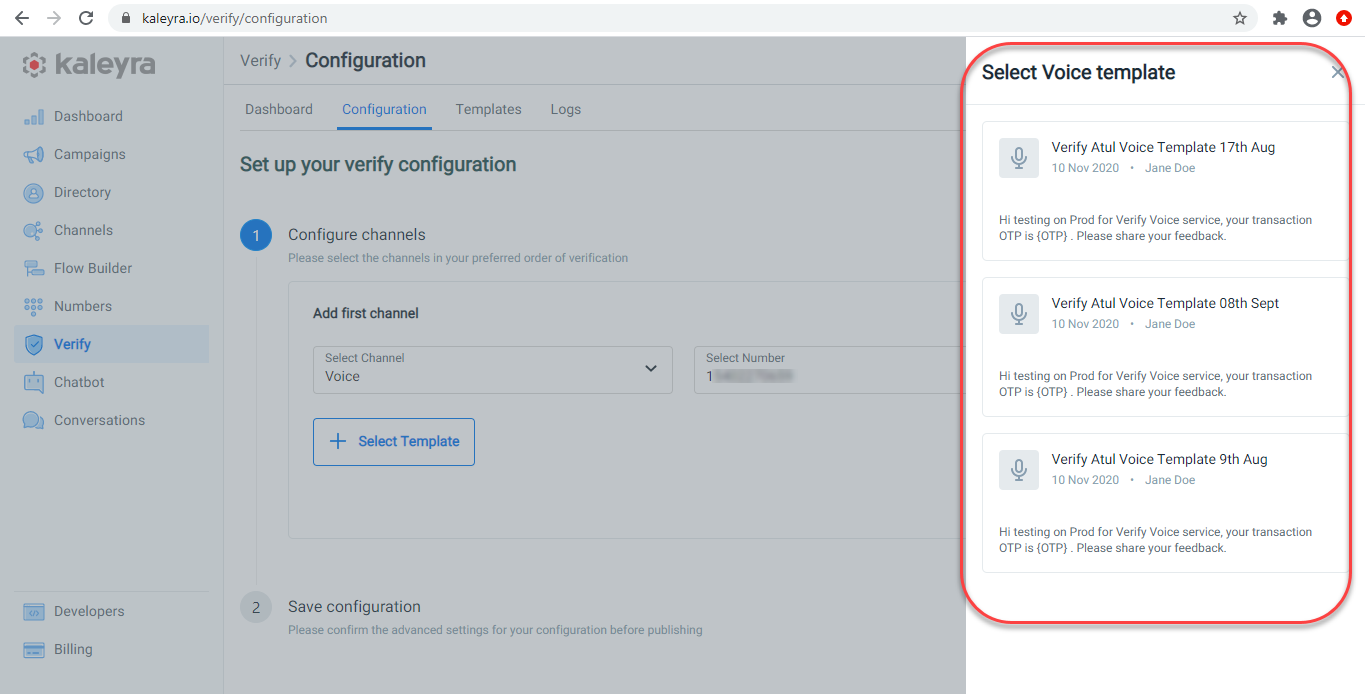
If you select Voice, then:
a. Select the number from which you want to send the OTP from the Select Number drop-down menu.
b. Click Select Template and select the required template from the list displayed on the Select Voice template window.
If you select Email, then:
a. Click Select Template and select the required email template from the list displayed on the Select Email template window.
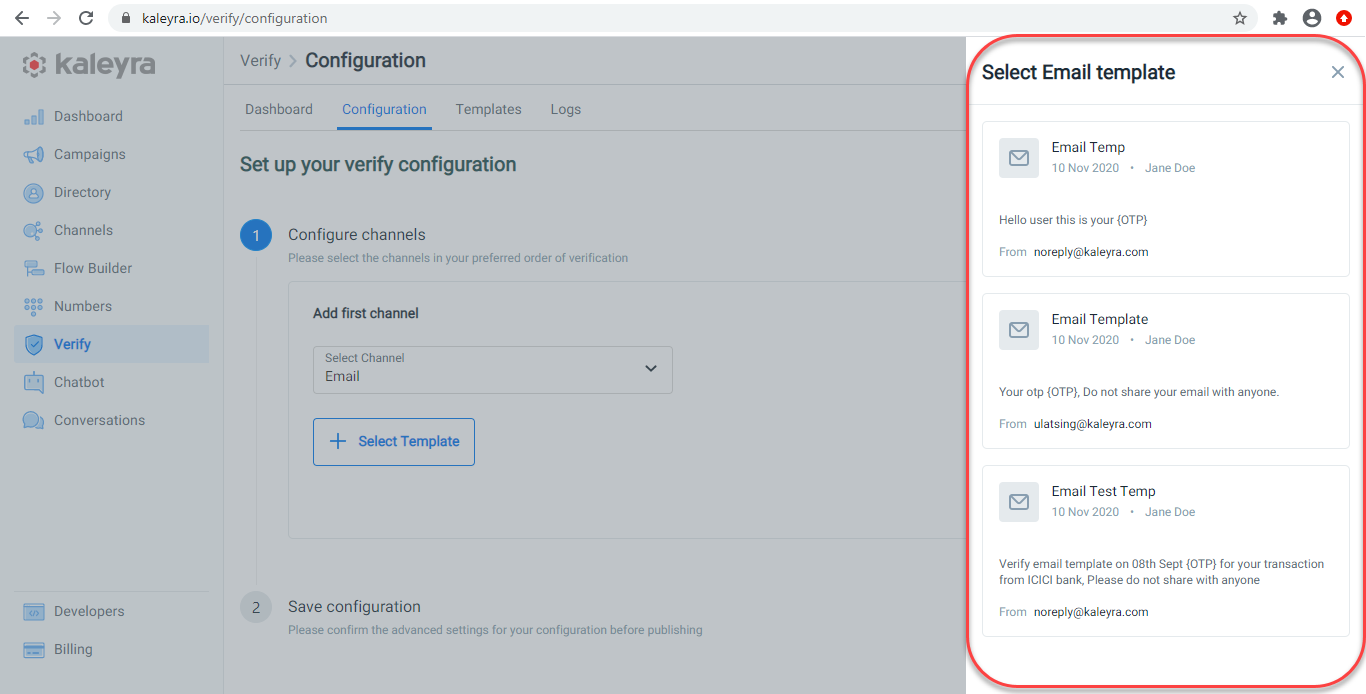
- Click Save to add the first channel.
Note:To Edit or Delete the added channel, hover on ... and perform the following steps:
To edit,
Click Edit, make the appropriate changes, and click Save.
To delete,
Click Delete and then click Delete on the confirmation window.
Now, add the second channel through which you want to send the OTP.
- Click Add new channel to add the second channel.
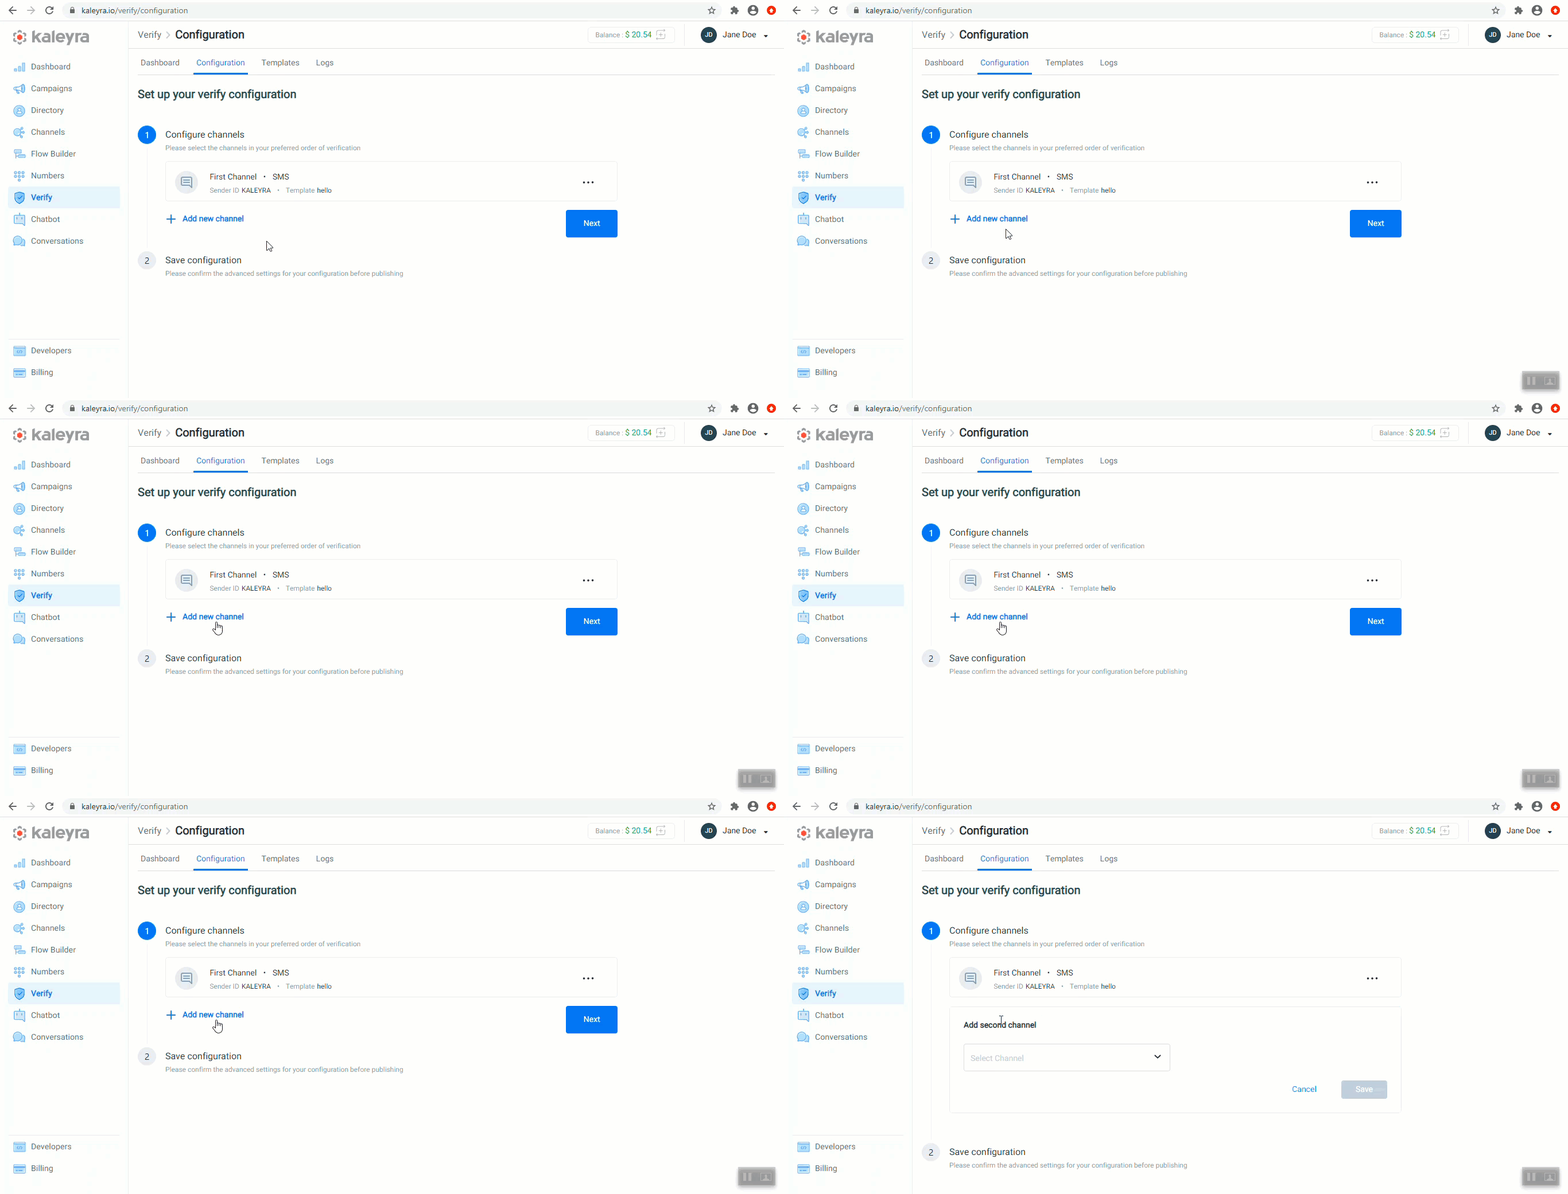
- Select the required channel and repeat the steps for SMS, Voice, or Email, depending on your selection.
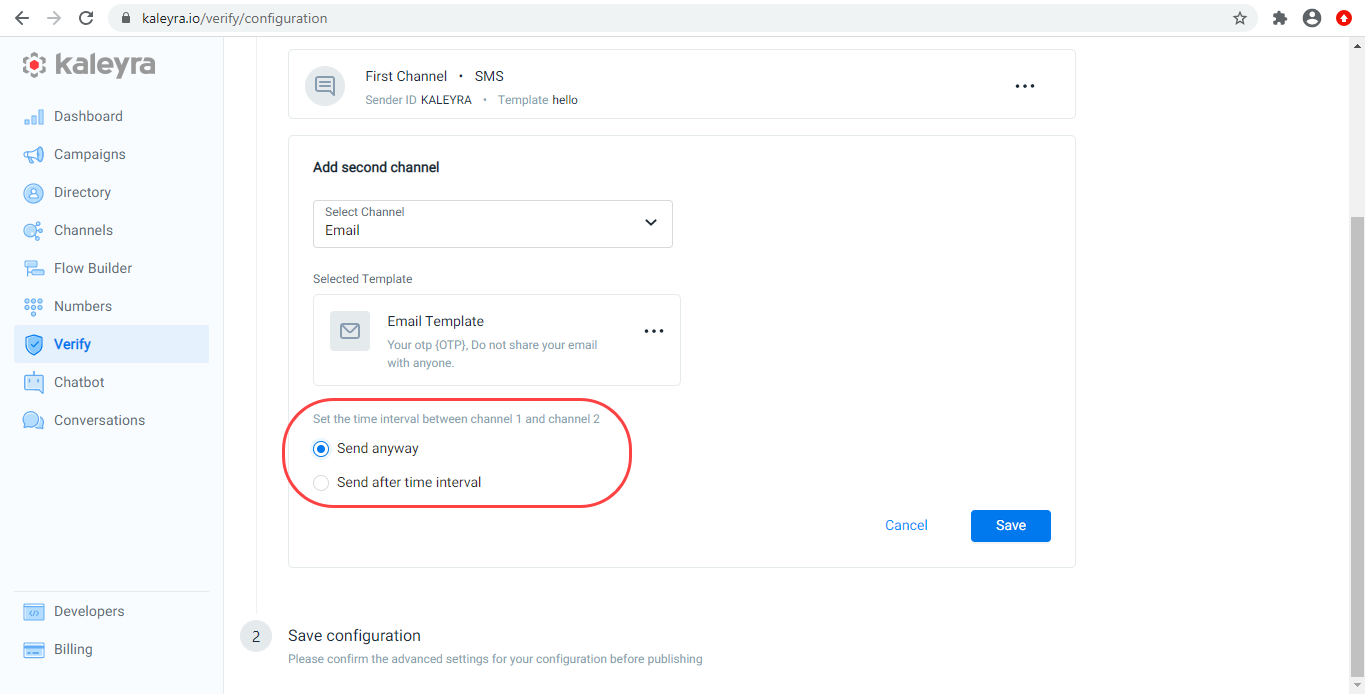
- Select the time interval between the channels. You can select either of the following:
- Send anyway: Select this option to send the OTP through both the channels simultaneously.
- Send after time interval: Select this option and define the time interval. If the user fails to validate the OTP received from the first channel within this turnaround time, then the API will trigger the same OTP through the second channel.
- Click Next.
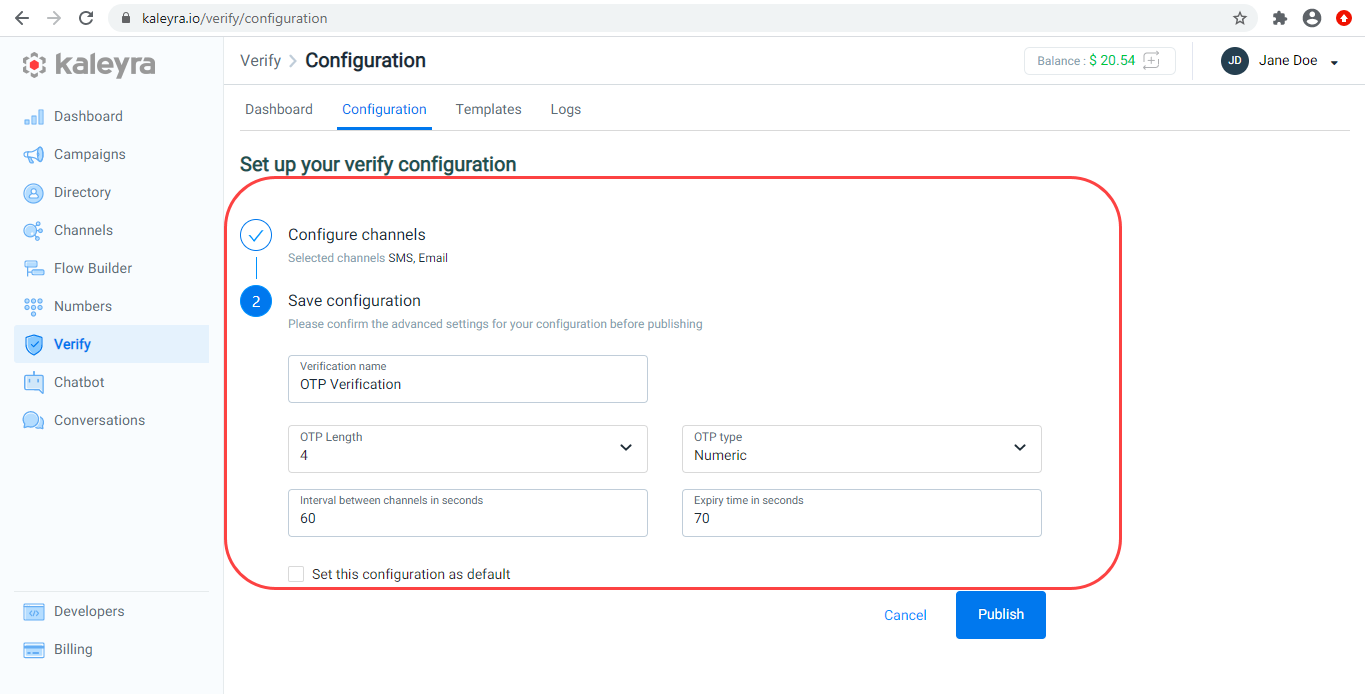
- Define the following settings:
- Verification name: Enter the name of the configuration.
- OTP Length: Set the OTP length here.
- OTP Type: Select the type of the OTP (Numeric or Alphanumeric) from the OTP type drop-down menu.
- Interval between channels in seconds: Enter the time interval between the channels.
- Expiry time in seconds: Define the expiration time of the OTP here. The OTP expires beyond this time, and the user has to request a new one.
- Set this configuration as default: Select this option to set this configuration as default.
- Click Publish.
The Verification Configuration is created successfully, and you can see the same under the Configuration tab.
Configuration ID
Kaleyra.io will generate a unique ID called Configuration ID for every configuration. This ID acts as a reference and executes the configuration as per the settings when you pass it through the generated OTP API.
Generate OTPs
Now that you have configured the verification flow, you should execute the Generate OTP API command with the Flow ID to generate and send the OTP.
Validate OTPs
You can verify the status of the OTP through either Validate OTP API or the Kaleyra.io console. The Dashboard tab in the Verify page displays the real-time data of the number of OTPs sent, delivered, and verified by the users.
Updated 7 months ago
