Create a Zap to send WhatsApp Messages
Use a trigger application and an action application (Kaleyra) on the Zapier platform to create a zap to send WhatsApp messages.
You can create a zap that triggers when new information is added to the trigger application and sends a WhatsApp message to one or more customers. The first step to using Zapier WhatsApp is to create a zap and select an action. Once the action is selected and configured, you will be able to configure the WhatsApp trigger.
Prerequisite for the Zapier WhatsApp functionality
Before you start creating zap to send WhatsApp messages, you need to ensure that you have:
- A Kaleyra.io account.
- Sign up for WhatsApp Business Account.
- Approved WhatsApp number using Kaleyra.io.
Note:For more information, see the Embedded Signup page.
Define a trigger
Triggers are how you can start automated workflows whenever you add or update something in the application.
To create a trigger:
- Log in to Zapier using the link: www.zapier.com.
- Click Create Zap.
The Trigger page appears.
- In the Name your zap field, enter a name for the zap.
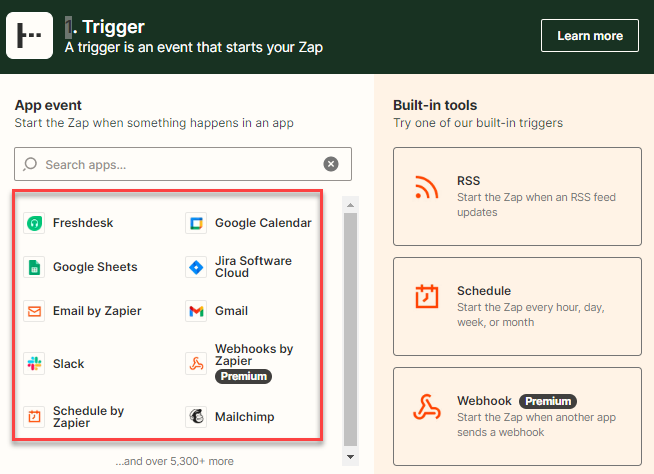
- Select an App event to start a zap when something happens in the app, for example, Gmail.
The Choose app & event section appears.
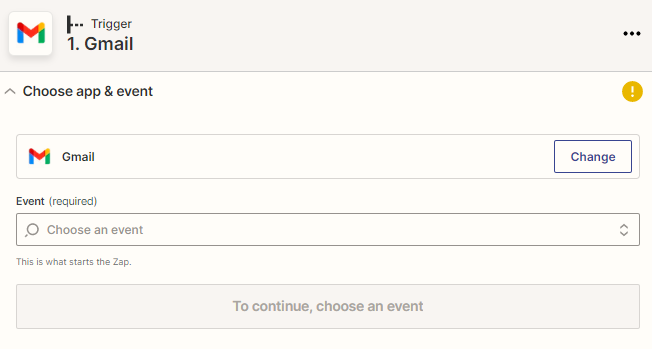
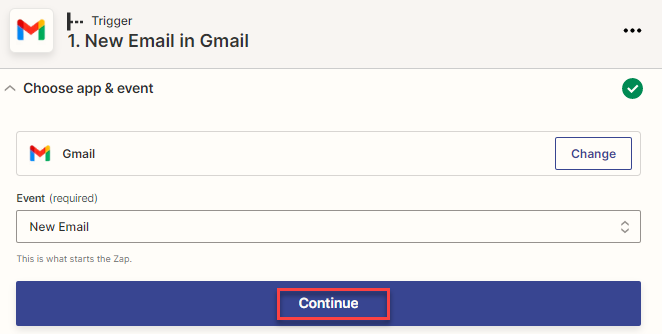
- From the Event list, select an event, for example, 'New Email' and Click Continue.
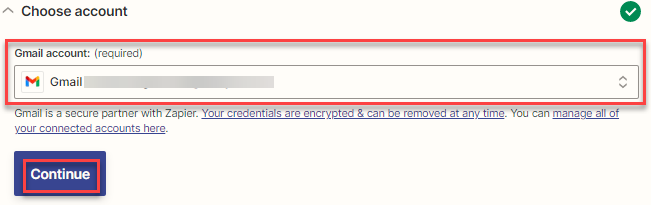
- From the Choose account list, select an account and click Continue.
- From the Set up trigger list, select the required trigger, for example, Label/Mailbox, and click Continue.
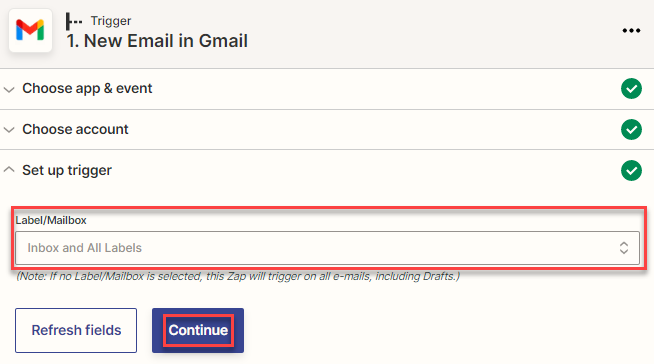
This parameter specifies the location of the App that will contain the trigger event.
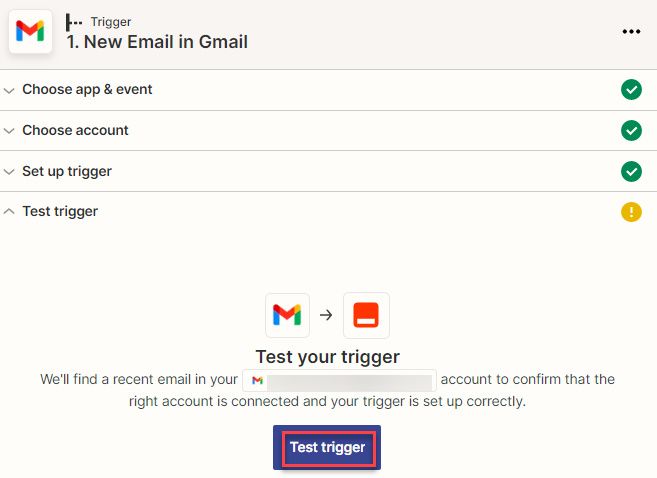
- In the Test Trigger section, click on the Test trigger.
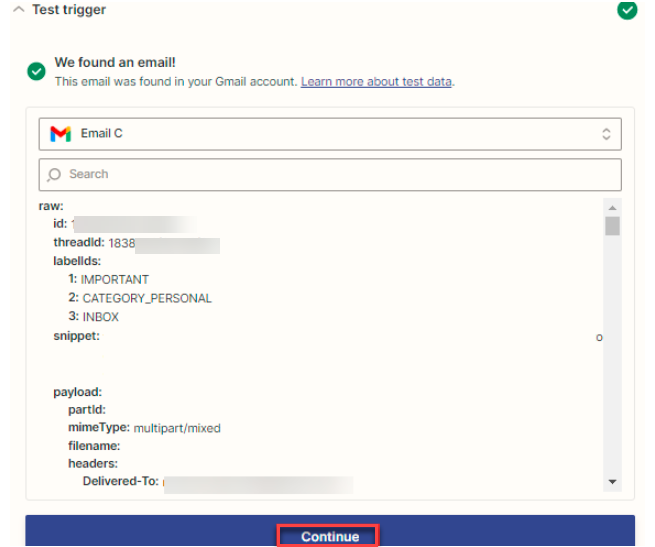
- The following page appears if the test for the trigger is successful. Click Continue to define the action steps.
Define actions
To define an action to send WhatsApp message to one or more mobile numbers when the trigger event takes place.
- To define the action from the Kaleyra app, in the Action section, click the plus (+) icon.

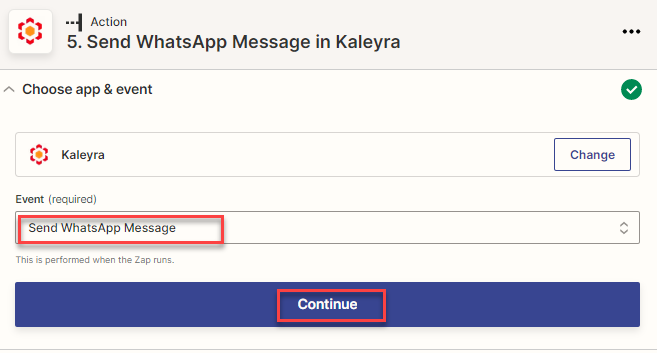
- In the Action section, select the Kaleyra app.
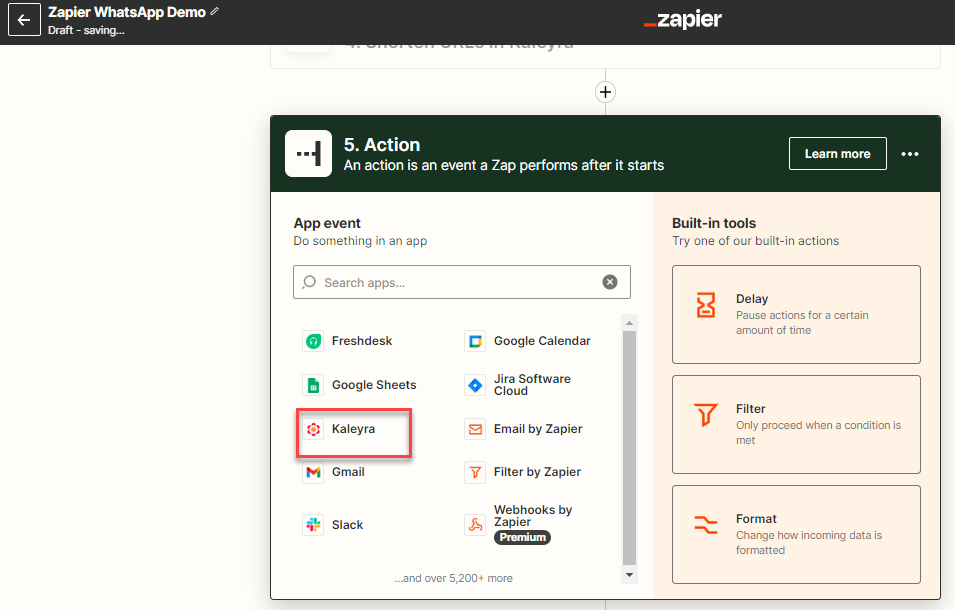
After selecting Kaleyra in the action app, the list of available action events from the Kaleyra app appears.
- From the Event list, select Send WhatsApp Message.
- Click Continue.
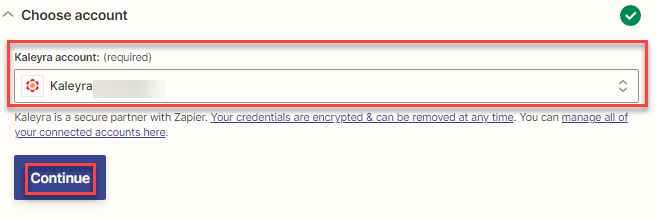
- On the Choose account section, select the Kaleyra account that you have set up and click Continue.
The Set up action section appears.
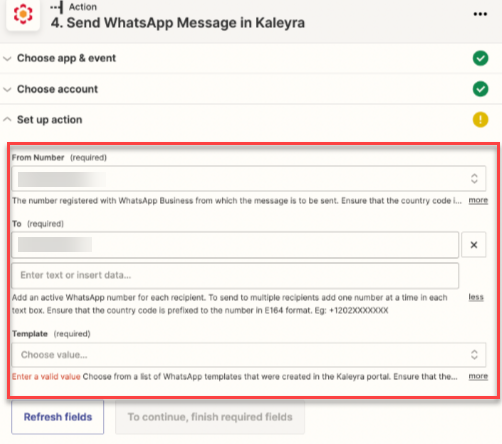
- In the Set up action section, enter/select values in the following fields:
From Number - From the From Number list, select the WhatsApp number that is approved in your Kaleyra account.
Note:Ensure that the country code is prefixed to the number in E164 format. For example, +1202XXXXXXX.
To - Enter the phone number(s) to which you want to send the WhatsApp message when the trigger takes place. You can add multiple phone numbers. If you enter a text value, then the Test Action will throw an error. No error will be displayed in Zapier for an incorrect To number. The validation will be done in the Kaleyra and you will see the error on the Channels>WhatsApp>Analytics page.
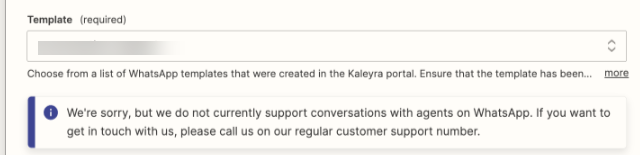
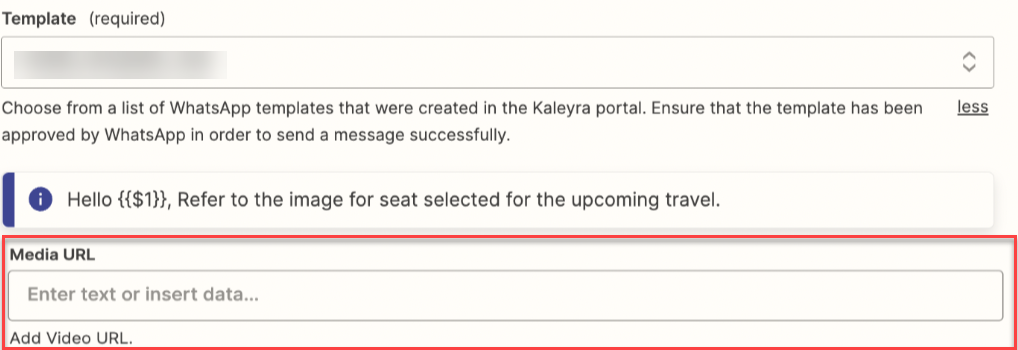
Template - Select a template from your Kaleyra account for the WhatsApp message. You can use any one of the types of templates that are configured. Refer to the Type of WhatsApp Templates section for more details.
Note:Ensure that the template is approved by WhatsApp in order to send a message successfully.
- Click Continue. The Test action section appears.
All the specified details for the WhatsApp message appear in this section.
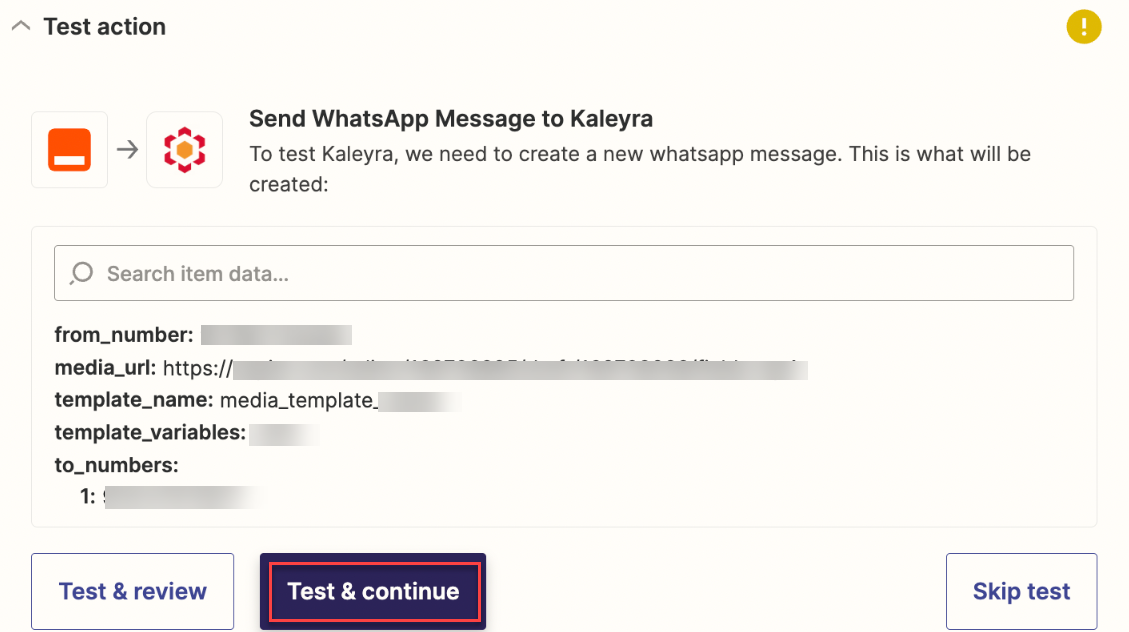
- Click Test & Continue.
If all the specified WhatsApp message details are correct, "Request submitted successfully" message appears.
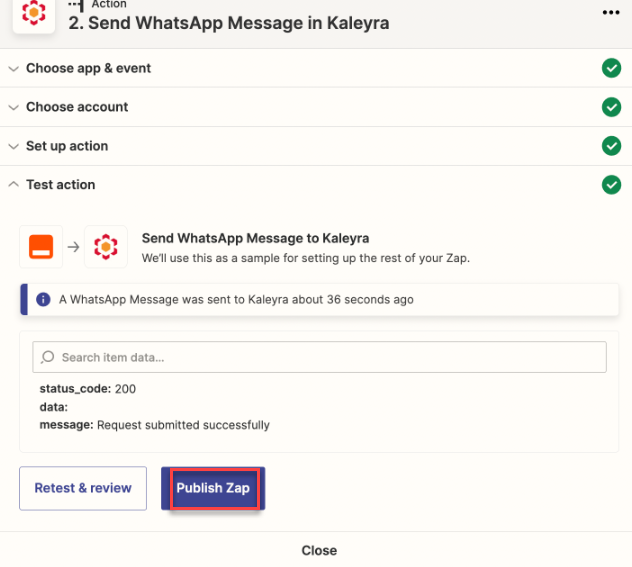
The zap creation is complete.
- Click Publish Zap. The Ready to Publish your Zap? page appears.
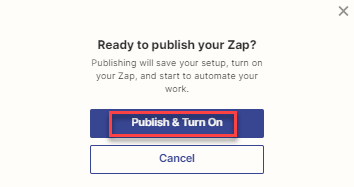
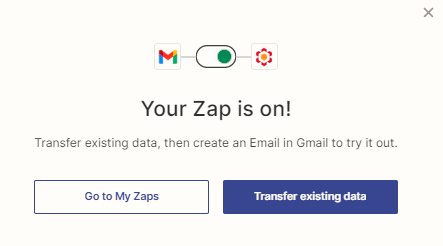
- Click Publish & Turn On. Your Zap is on! page appears.
Type of WhatsApp Templates
Templates are pre-approved collections of text and placeholder variables that you can reuse for multiple campaigns.
Note:For more information about WhatsApp templates and how to create them, refer to WhatsApp Business | Message Templates and Adding WhatsApp Templates.
These are some of the template options that you have while creating zaps.
Template Message without Parameters
This is a standard static template that does not have an option to add variable text.
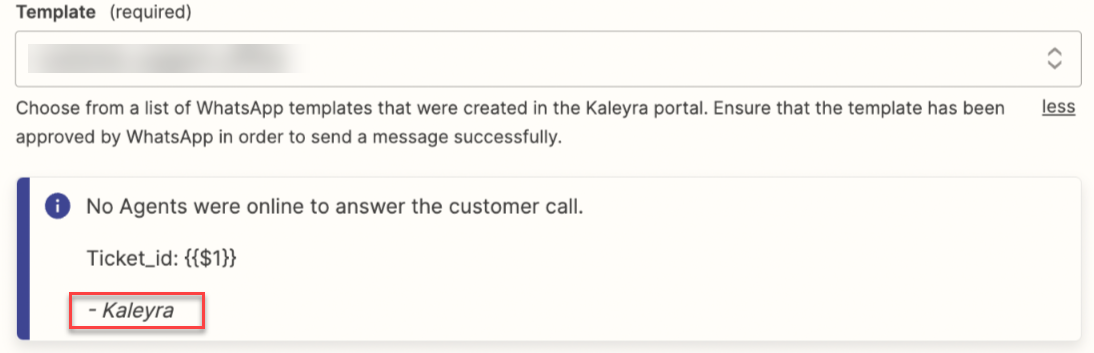
Template Message with Constant Footer
When you use this template, the footer will be displayed at the end of the WhatsApp message in italics.
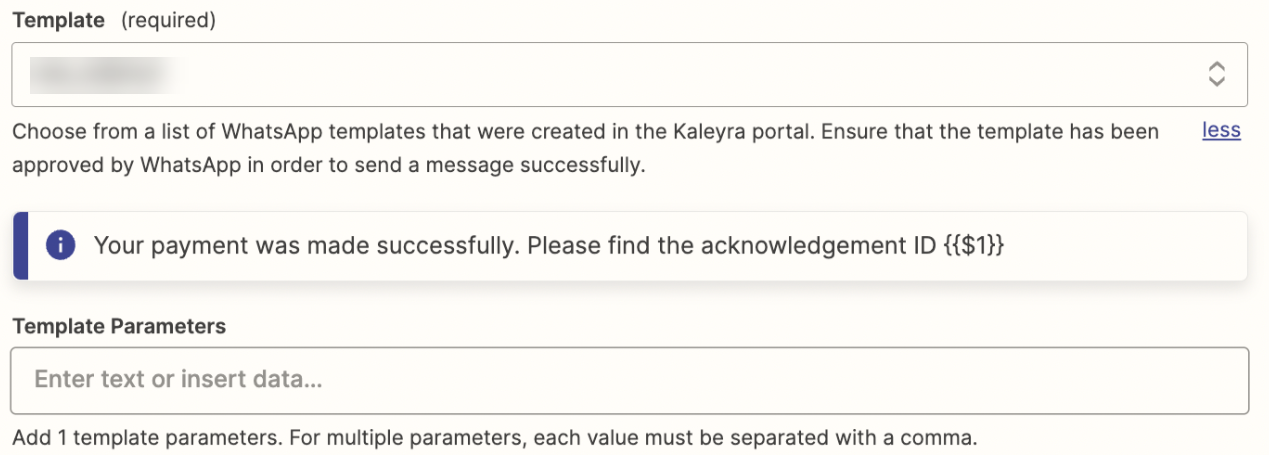
Template Message with Parameters
When you select a template with parameters, the template variables text box will be opened. You need to enter the template variables as comma-separated values.
Note:
- Provide comma-separated values.
- If you add more or fewer variables then the message will not be sent.
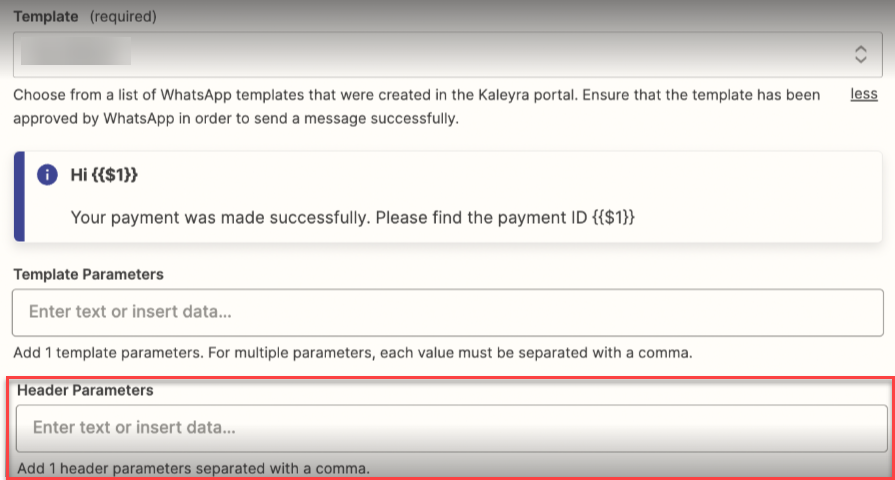
Template Message with Header Parameters
This template contains a variable header value. You need to enter the header parameters as comma-separated values.
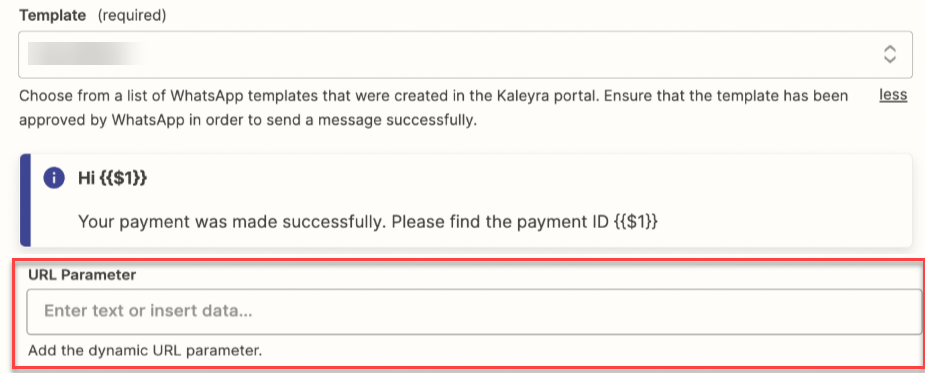
Template Message with URL Parameters
When the template has the URL parameters option a textbox to add the URL will be shown so you can enter the required URL parameter.
Template Message with Media URL
This template lets you add a media URL. The media used in this template can be images, videos, or documents.
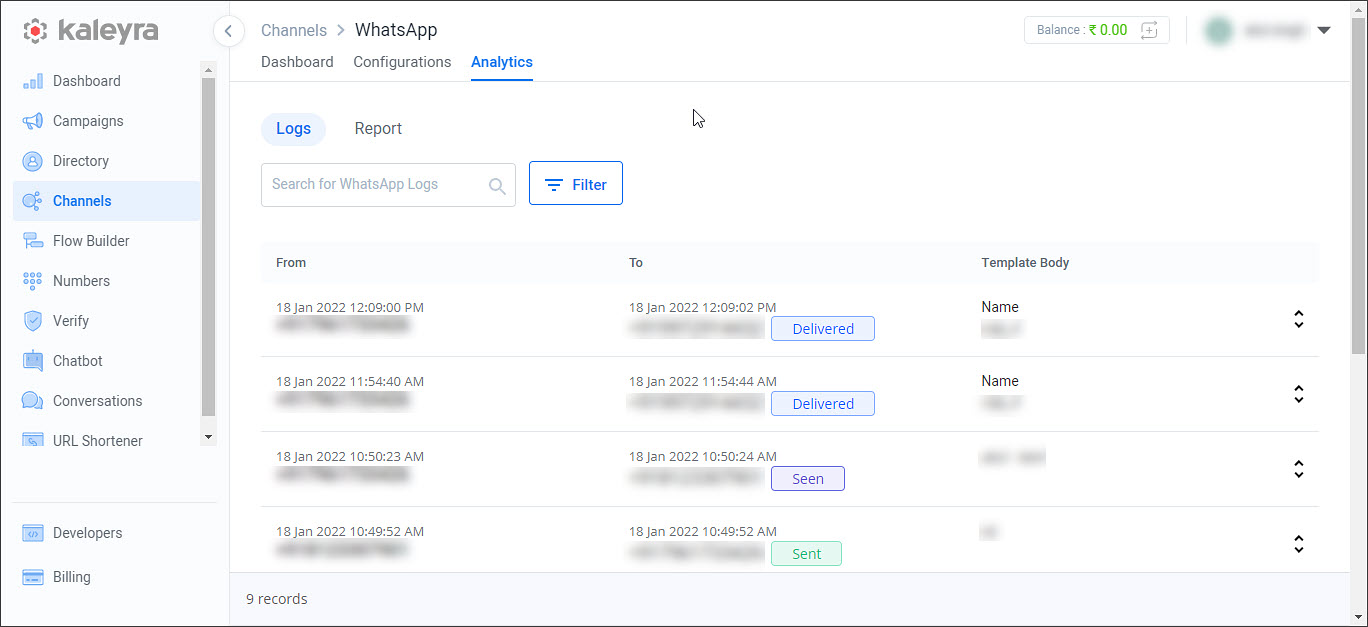
View WhatsApp messages sent by Zapier on Kaleyra.io
You can view the details of the WhatsApp messages sent by Zapier on Kaleyra.io.
To view the WhatsApp messages sent by Zapier:
- Sign in to the Kaleyra.io account.
- Go to Channels, from the WhatsApp section, select the Manage option.
- Select the Analytics tab. The details of the recently sent WhatsApp messages via Zapier are shown.
Updated about 1 year ago