

Create Email Callback Profiles with Dynamic Variables
You can create an Email callback profile within the Kaleyra.io user interface to get information about the Email delivery status. The wizard to set up the callback profile for the Email channel provides a list of dynamic variables specific to the Email channel that you can individually select to get the latest information about your email message that you are interested in.
After successfully creating an Email callback profile, you must use the ‘callback profile ID’ parameter in an Email API request (POST) to fetch the Email delivery information in an endpoint that you specify.
Note:
- If you have more than one Callback Profile created for different channels, make sure you add the correct callback profile Id in the Email API requests.
- A callback profile created for the Email channel cannot be used for other channel API requests.
- Once a callback profile is created for the Email channel, you can only edit the list of dynamic variables you want to receive in the callback from Kaleyra or delete the profile.
To create an Email callback profile:
- Sign in to your Kaleyra platform.
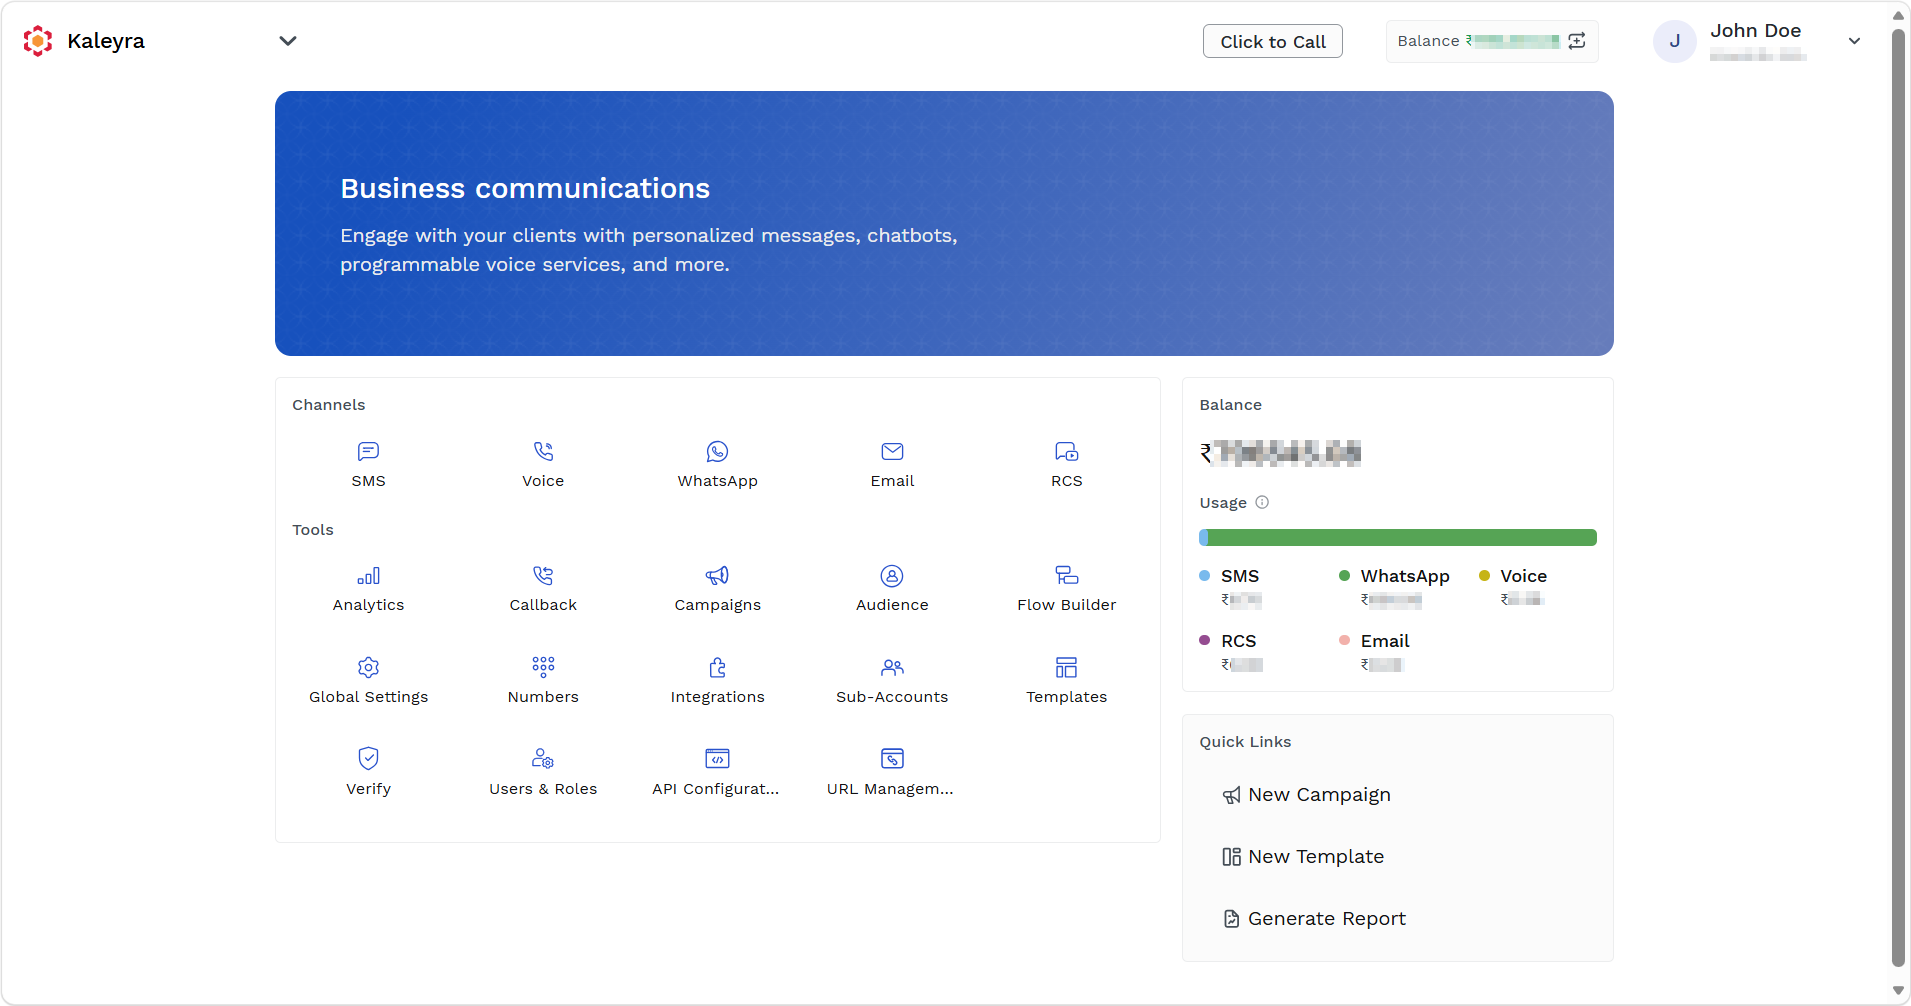
The Business communications page appears.
-
On the Tools section, click Callback.
The Callback Profiles page appears.
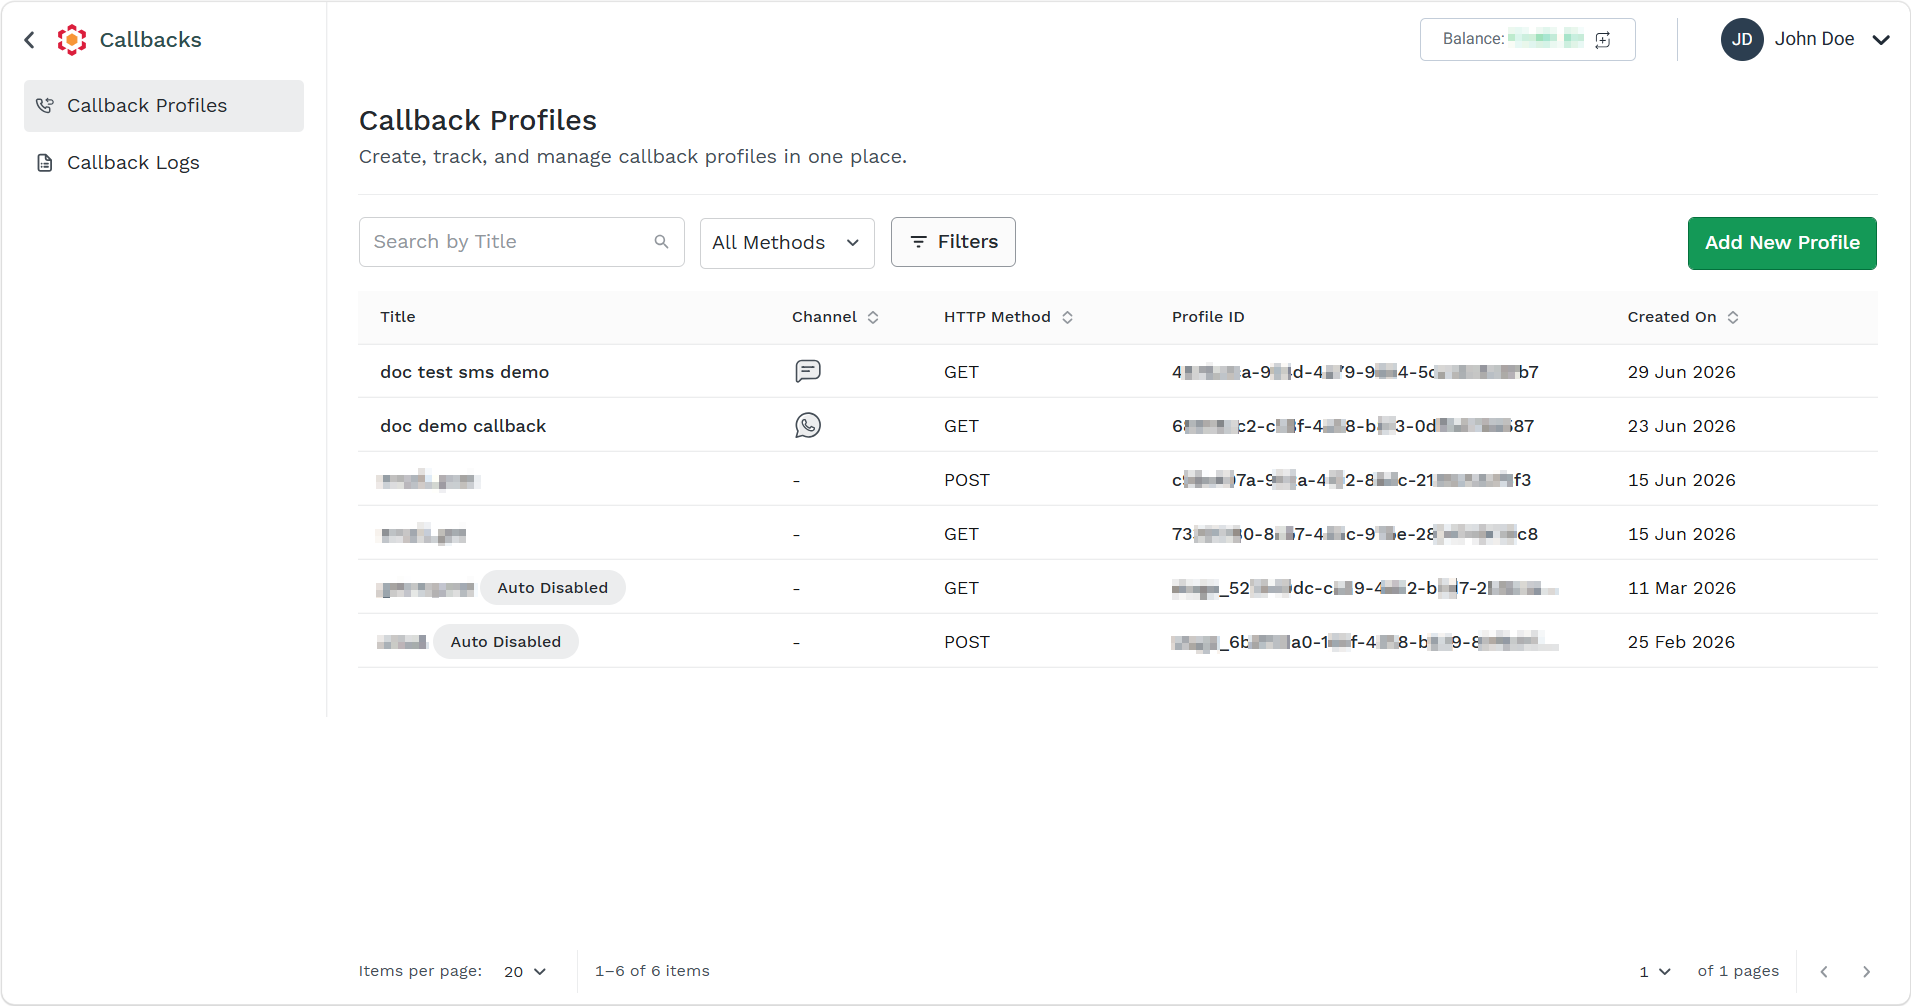
- On the Callback Profiles page, click Add New.
The Add Callback Profile window appears.
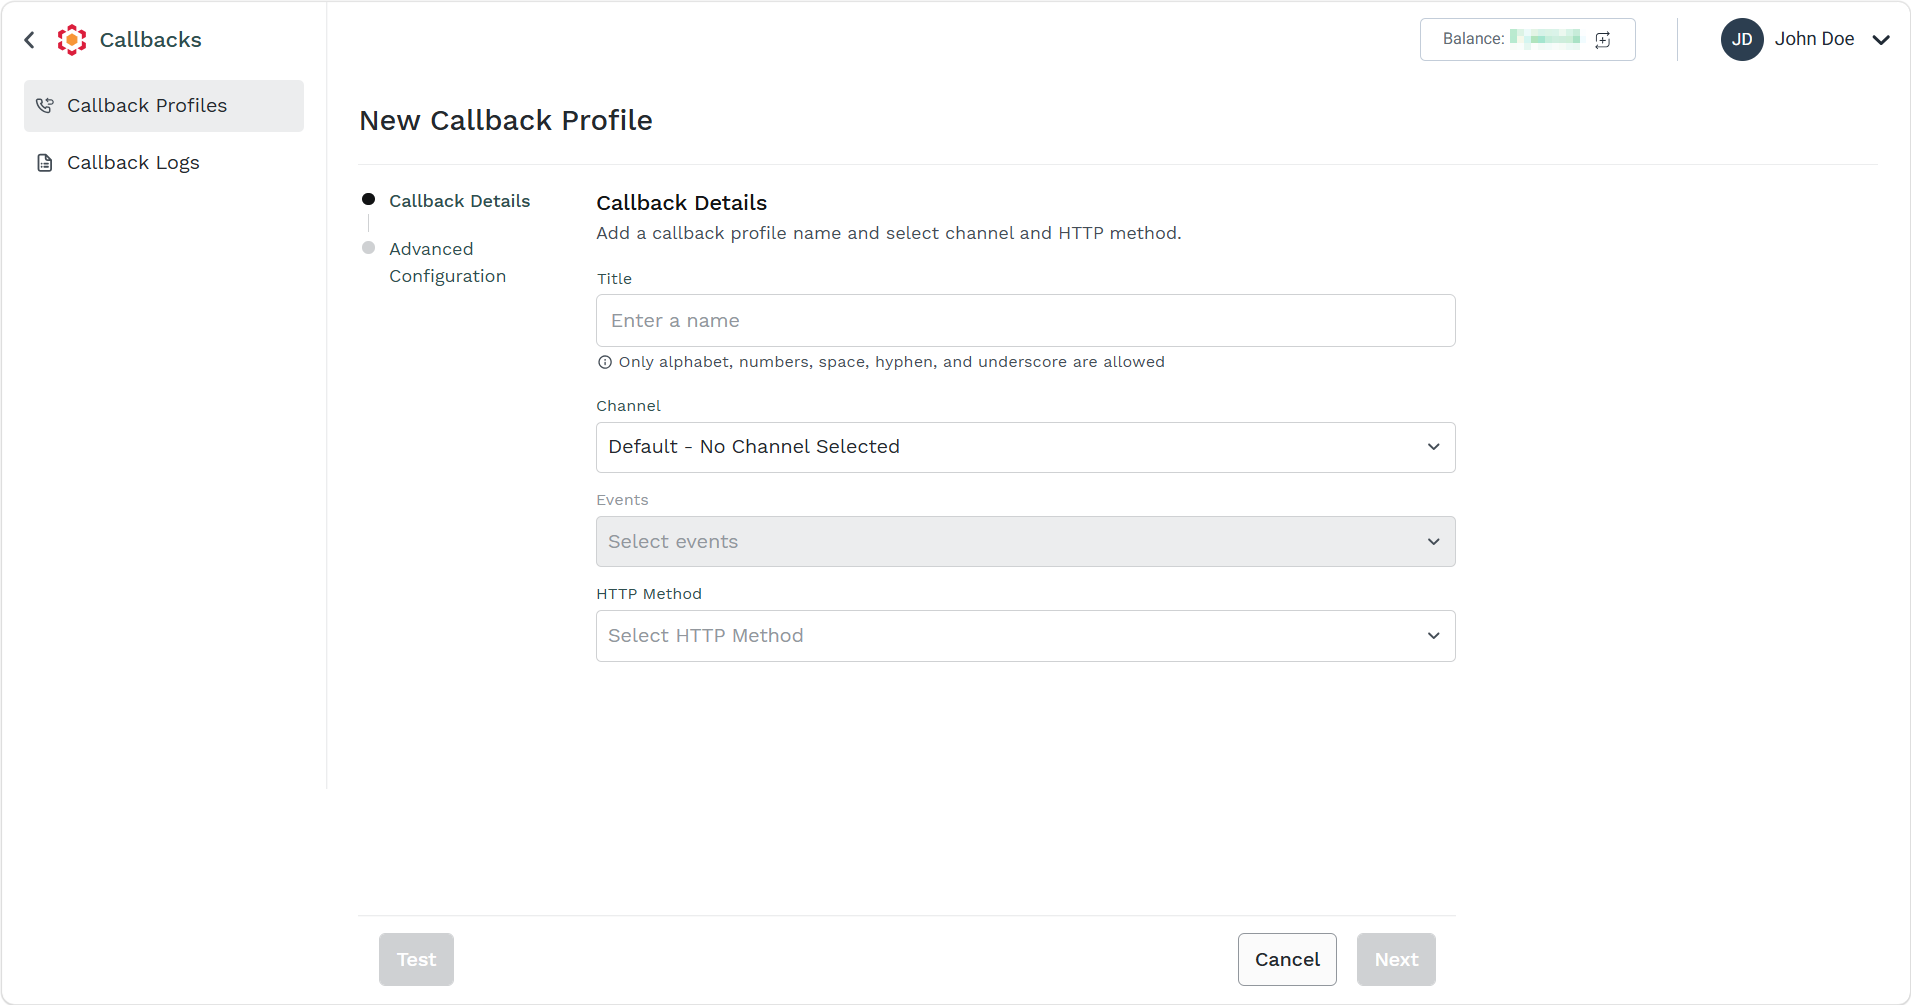
- Perform the following steps to add all the relevant information in the ‘Add callback profile’ page.
-
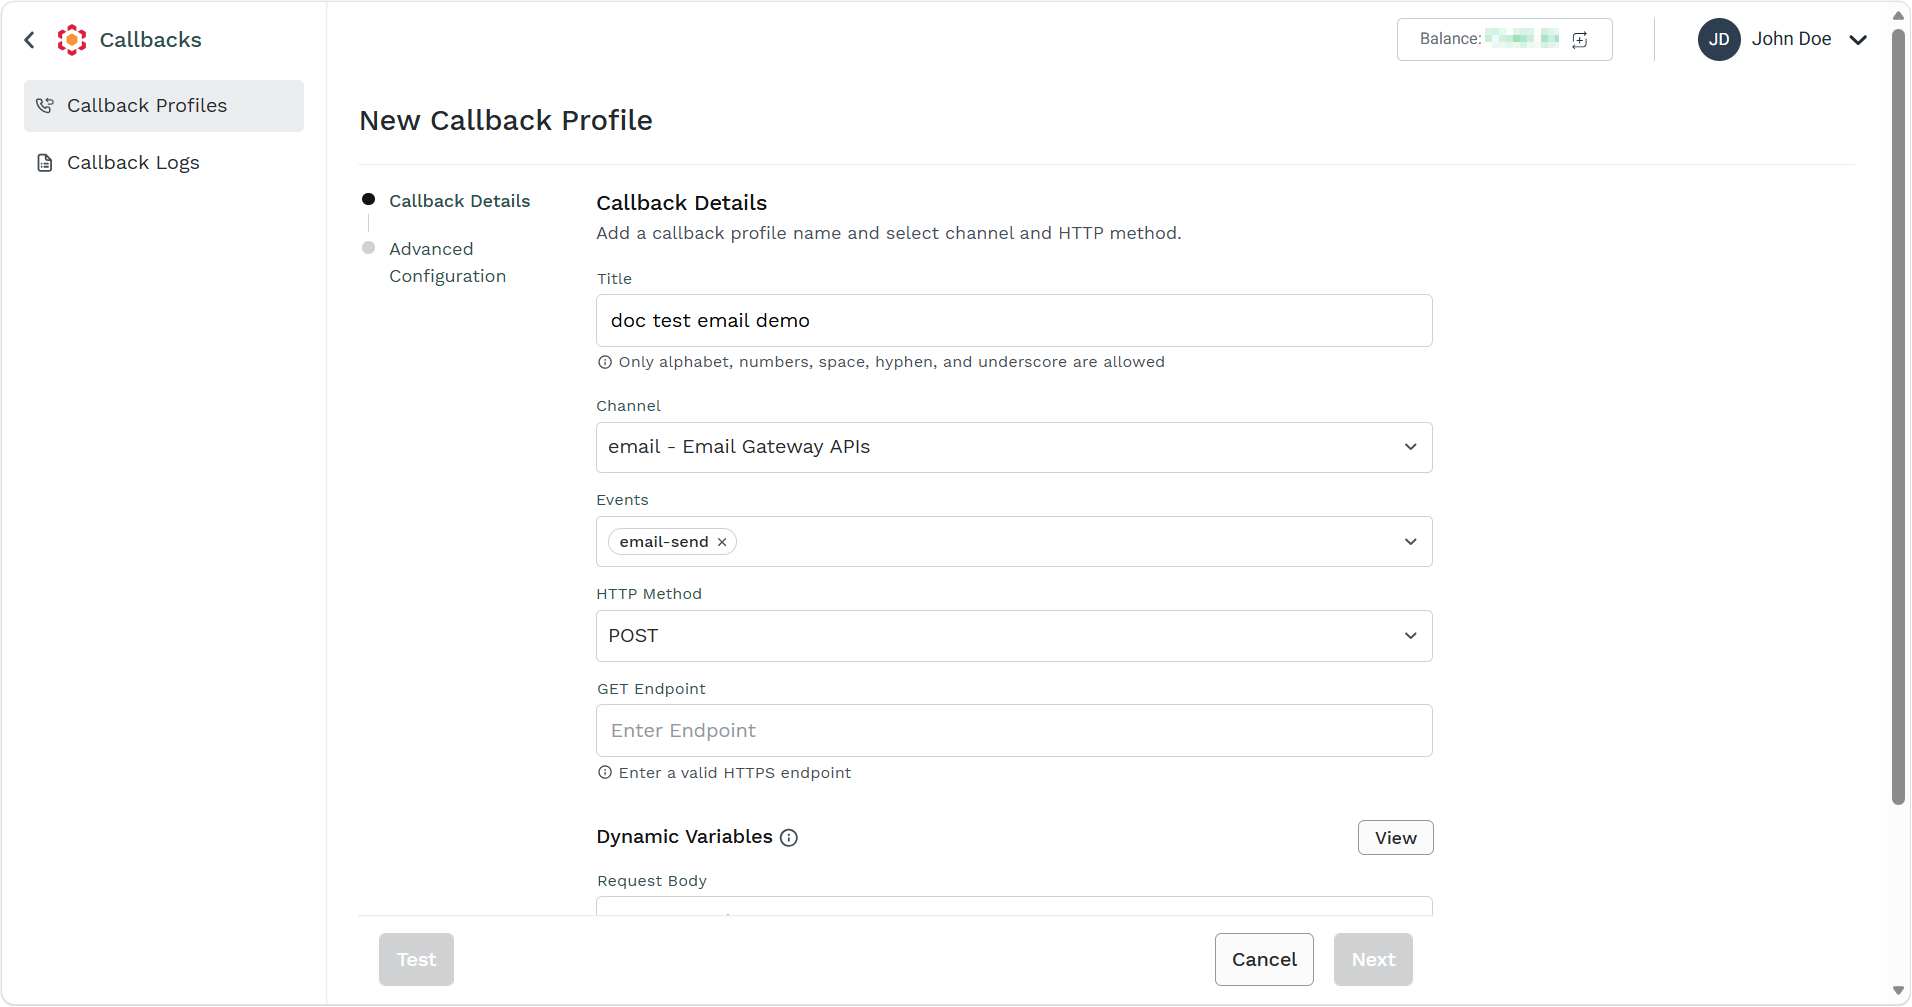
In the Title field, enter a title for the callback profile. This is a mandatory field.
-
From the Select Channel API list, select the option ‘email - Email Gateway APIs’ to create a callback profile to be used to receive back updated information about the email status.
-
Once you select the option ‘email - Email Gateway APIs’ in the previous step, the Events for the selected channel field is automatically set to the option ‘email-send’.
-
In the HTTP Method field, select a method for which the callback is created.
The options are: POST, GET, PUT, and DELETE. -
In the Enter Endpoint field, enter the URL at which the callback information should be received.
-
In the Dynamic Variables field, click View to view and select the dynamic variables for the selected channel. The dynamic variables represent all the possible information that you can retrieve about the email as part of the callback that kaleyra.io will send to your system. You may select all of them, or only the fields you are interested in.
The List Dynamic Variables window appears.
-
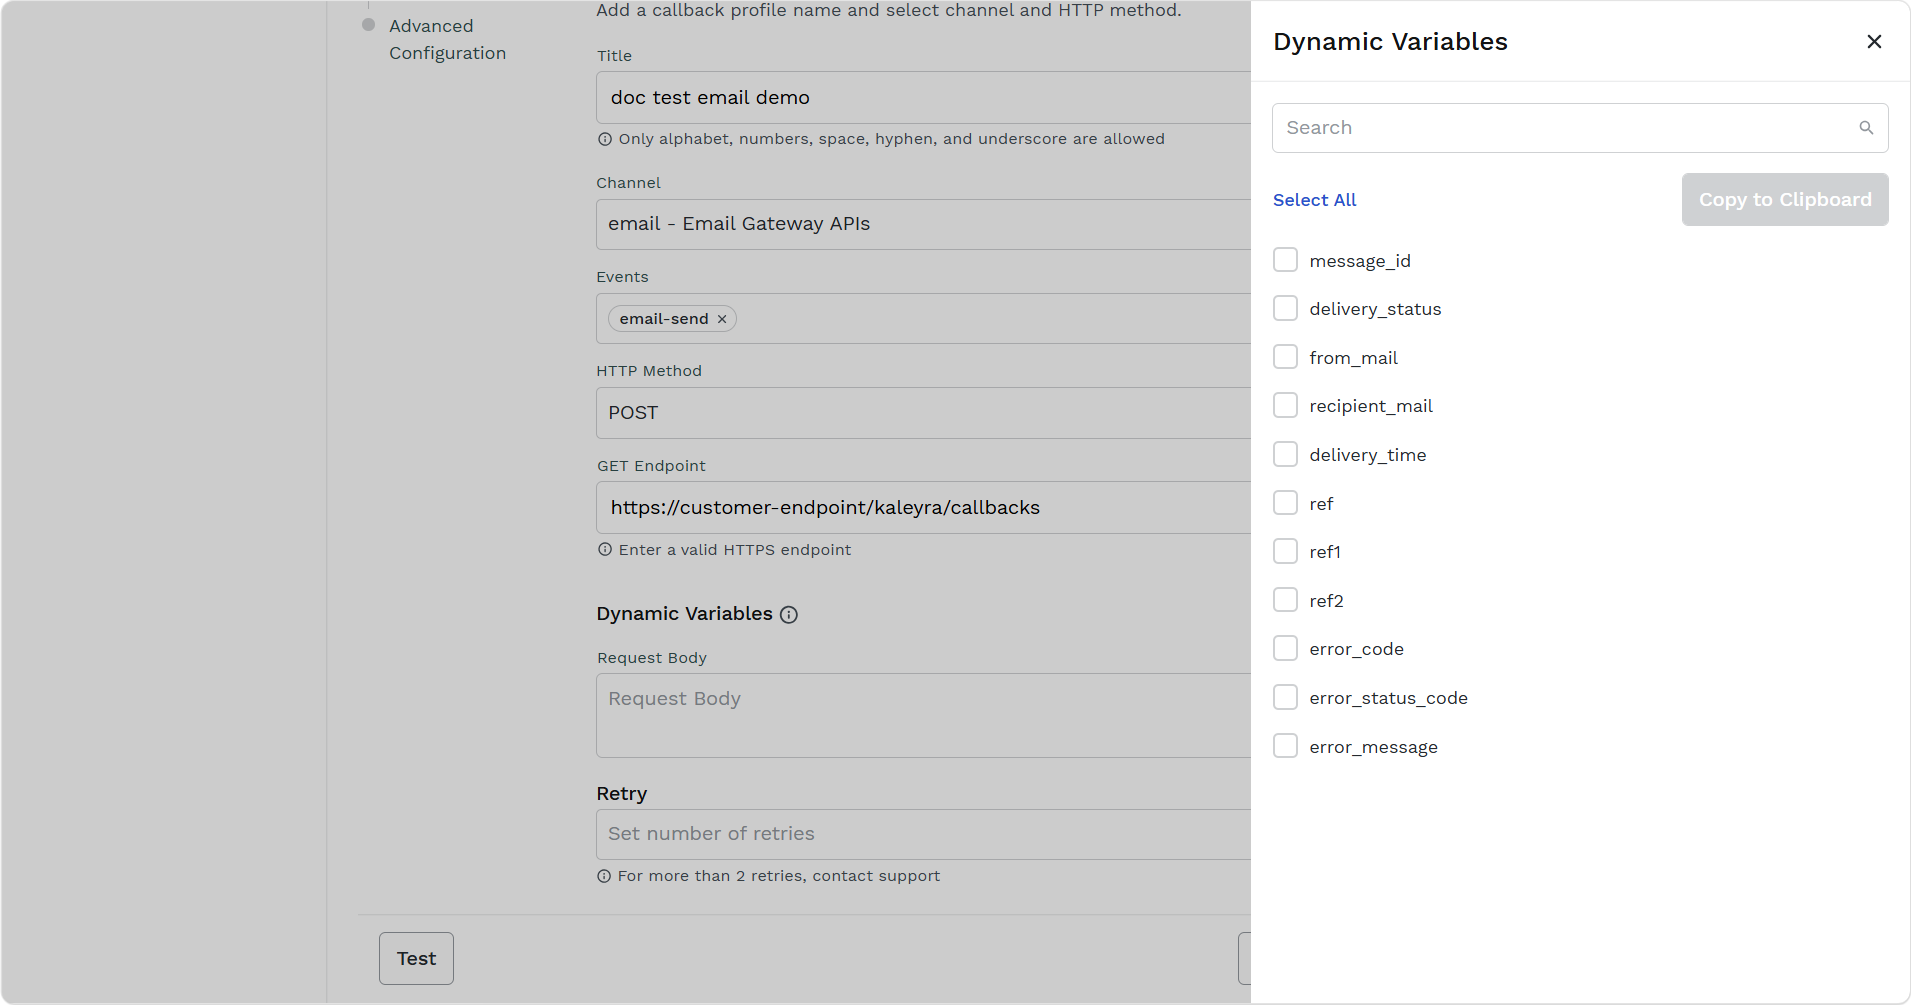
In the List Dynamic Variables window,
- To select all the dynamic variables, click Select All or manually select the dynamic variables check-boxes that you want to receive in the callback sent from Kaleyra to your system.
- After selecting the variables, click Copy to Clipboard.
- Click ‘X’ (CLOSE) on the window to close the window.
- For POST method, using the mouse, right click and paste the dynamic variables in the Request Body field.
- From the Retry drop-down, select the number of retries that Kaleyra Platform will perform in case the first callback receives a failure response or no response from your endpoint. You have the option for 0, 1, and 2. If you select either 1 or 2 retries, then you must enter the Time Interval in secs and the Timeout in milli-secs values. For assistance with more than two retry attempts, you can contact the Support team.
For the Default priority, the Time Interval increases exponentially after each failed attempt. The formula for the delay: Delay = Initial Delay×(2^retry_count).
If the initial delay is 60 seconds and we allow up to 2 retries:
| Retry Attempt | Delay (in seconds) | Cumulative Wait Time |
|---|---|---|
| 1st Try | 60×2^0=60 | 60s |
| 1st Retry | 60×2^1=120 | 180s |
| 2nd Retry | 60×2^2=240 | 420s |
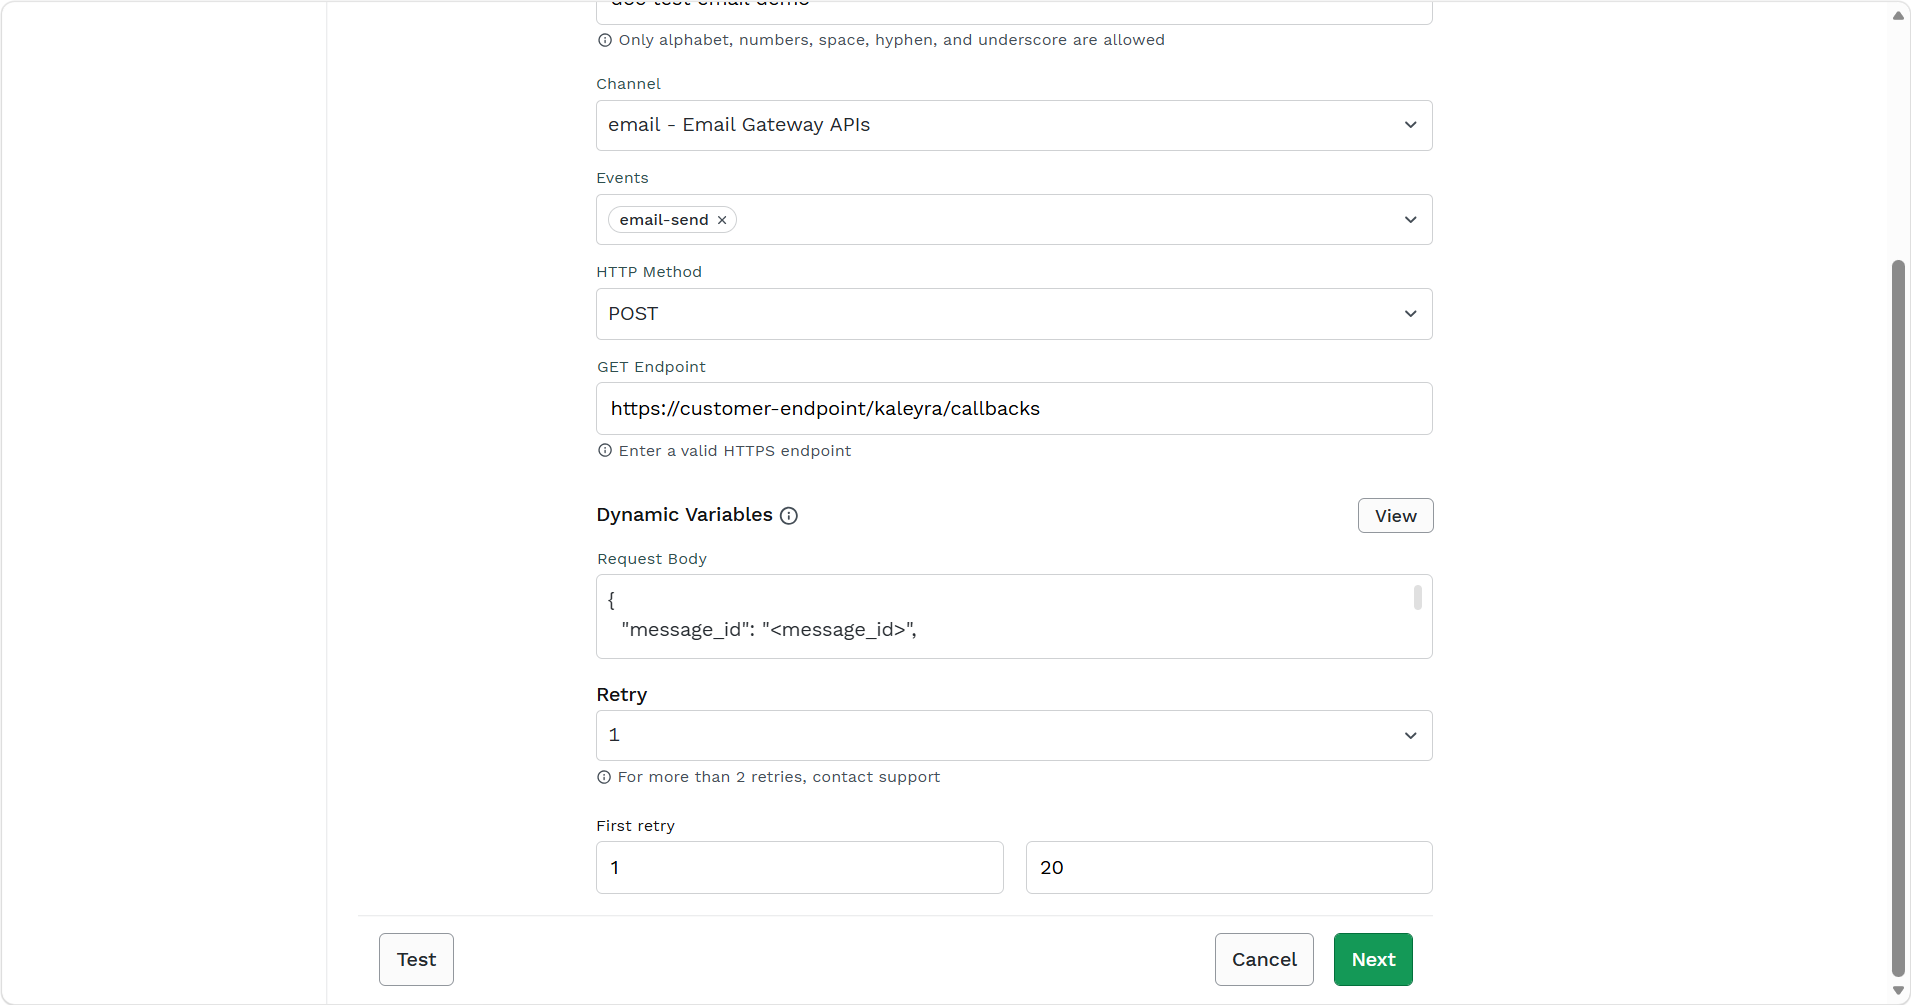
Note:Click Test to send a callback to your endpoint based on the configuration just set in the callback profile to see if the callback is working as expected. The confirmation message Callback profile tested appears in the bottom left of the screen.
- Click Next.
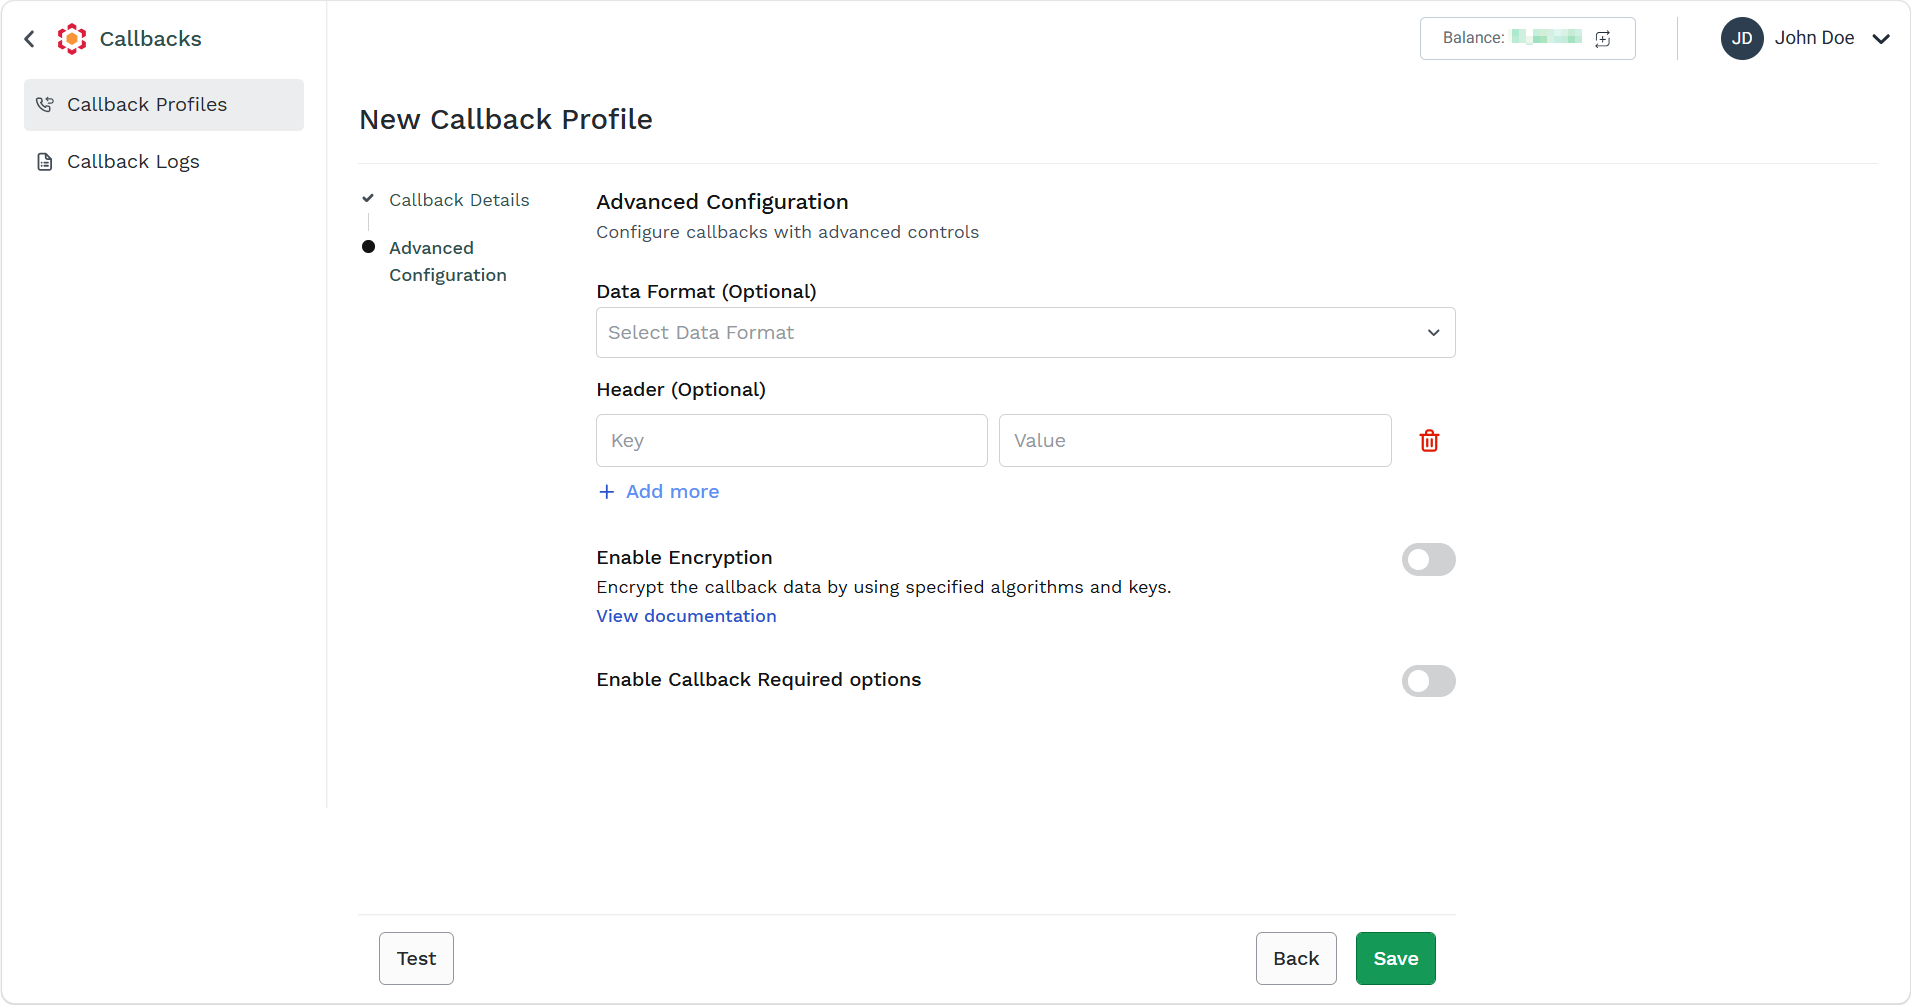
The Advanced Configuration step appears.
-
Perform the following:
- (Optional) From the Data Format drop-down, select one of the following options:
- Form Data - To view the callback data through fields.
- URL Encoded - To view the callback data in URL encoded format. The UEL encoded data can be replaced using special characters and spaces in data with a format that can be transmitted over the internet using URLs.
- JSON - To view the data in JSON format. JSON is a lightweight data format used to store and exchange data between a client (like a browser) and a server.
- In the Header field, enter values as Key-Value pairs.
Use the Header fields to include additional information on the HTTPS request generated by Kaleyra for your system.- Use the Headers field for authentication purposes. For example: API-KEY-based authentication or Basic authentication. For more information on basic authentication, see Basic Authentication.
- Use the Headers field to indicate how the callback response should be presented using the “Content Type”.
- Click the Enable Encryption toggle button. The fields related to encryption are displayed. This is an optional field. The Algorithm, Key, Initialization Vector, and Parameters fields appear. To know more about these fields, see Callback Encryption.
- (Optional) From the Data Format drop-down, select one of the following options:
-
Click Save.
The confirmation message appears and the callback gets listed to the Callback Profile page.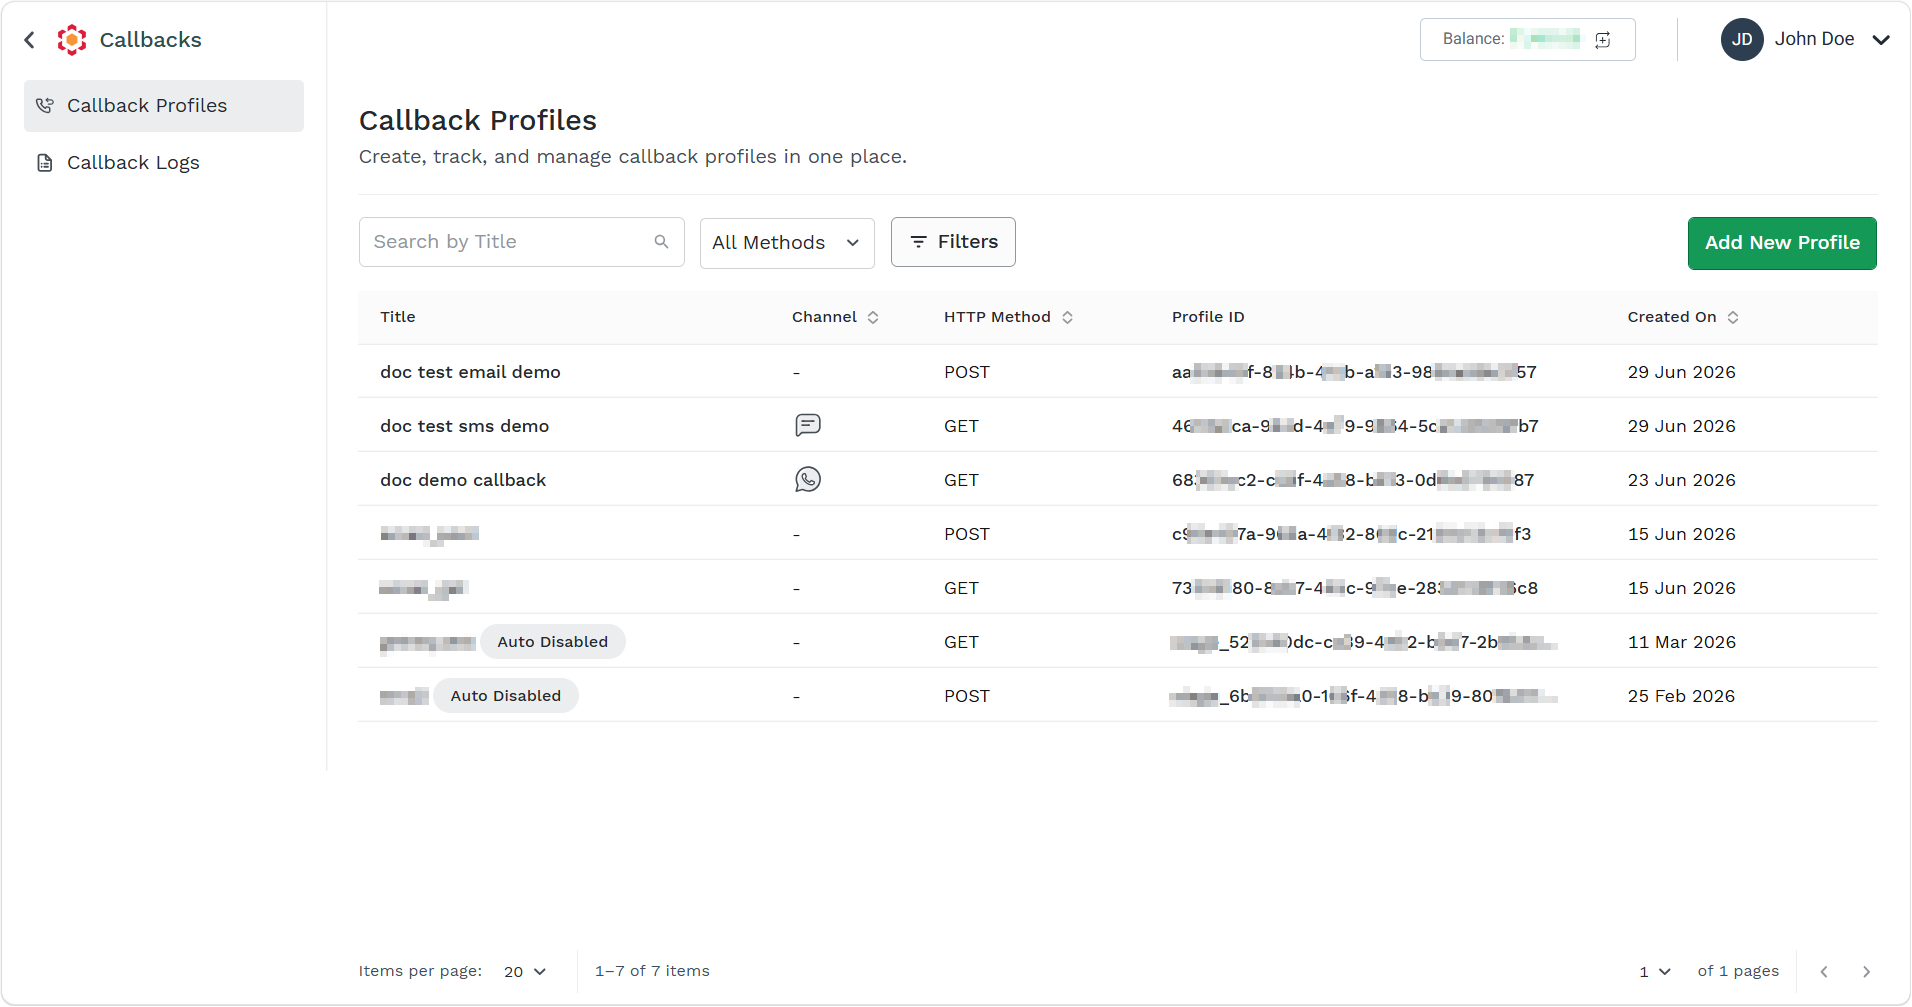
The following table shows the field descriptions on the Add Callback profile window.
| Column | Description | Example |
|---|---|---|
| Title | The name of the Email callback profile. You can use the callback title for searching the callback profiles. | email_callback_profile |
| Selected Channel API | The channel for which the callback profile is created. | email - Email Gateway APIs |
| Events for the selected channel | The events of the selected channel for which the callback information is obtained. The relevant information for the selected event will be received using the callback. | Email Send |
| HTTP Method | This section provides the options to select the HTTP methods for the Email channel APIs | \- |
| Select Method | Only the POST method is supported. Note: .The dynamic variables get added in the body of the JSON request for the POST method. | POST |
| Enter endpoint | This is the URL to which the callback data is returned. | <https://webhook.site/xxxxdcb3-a524-47e9-8eac-ef4cee045635> |
| Dynamic variables | All the relevant dynamic variables for the Email channel are listed here. You can select the dynamic variables for which you want to receive the values through the callback. Note: See the table below for dynamic variables descriptions | "delivery_status": "<delivery_status>" "from_mail": "<from_mail>" |
Enable form data or urlencoded Headers Form data | The header information should be given as a key-value pair. Form data headers are used for complex data while submitting forms with file uploads. URL Encoded headers are used for simpler text in HTTP requests with the data encoded in key-value pairs. Note: Use these fields to add any additional HTTP headers and related values you want to receive in the callback. Use Headers for authentication purposes or to indicate how the callback response should be presented using the content_type. | api-key:xxxx51f2c0ac28bb395016083d40axxxx |
| Enable Encryption | This toggle button is to enable encryption for the callback information. When this option is enabled, the callback data is encrypted. Use this feature to secure the callback data. | For information on encryption algorithm and the related fields for this feature, see: Callback Profiles page. |
| Enable Callback Required Option | This option is not applicable to the Email channel. | NA |
The following table shows the dynamic variables for Email channel and their descriptions with examples.
| Column | Description | Example |
|---|---|---|
| message_id | The unique identification number of the email. | 64702e3a-7596-47a1-bc50-fa4bbf9b0f9d:1 |
| delivery_status | .The delivery status of the email sent. (see below for the full list of possible statuses). | Bounce |
| from_mail | The from address of the email. | [email protected] |
| recipient_mail | The recipient's address for the email. | [email protected] |
| delivery_time | The time at which the email is delivered. | 2023-09-29T11:23:35.586Z |
| error_code | The error code in case of an error in the email delivery. | 550 Note: This error code is different from the error codes that Kaleyra assigns to the API request errors that are shown in the API Response. |
| error_status | The error status in case of an error. | 5.1.1. |
| error_message | The error message of the error that occurred during the email delivery. | 550 5.1.1 The email account that you tried to reach does not exist. |
Email delivery statuses
The following table shows the Email delivery statuses and their descriptions.
| Status | Description |
|---|---|
| Blocked | An email request is marked as 'blocked' by Kaleyra for the reasons such as, the usage of unapproved templates, too many mails to a specific mail id in a short span of time. |
| Bounce | An email delivery status is ‘bounce’ when the recipient address is incorrect. |
| Deferred | When an email bounces not because of an incorrect recipient address but for other reasons, such as the recipient’s inbox is full, the email status is ‘deferred’. |
| Delivered | When an email is delivered to the recipient. |
| Accepted | When an email is accepted by Kaleyra and it is in processing. |
| Failed | An email is marked as ‘failed’ due to insufficient balance or an internal error. |
| Open | When an email is opened by the recipient. |
| Suppressed | If the recipient address is in the suppression list, then for that recipient email delivery status is ‘suppressed’. |
Updated 6 days ago