Sticky Agents
Connect a specific customer to a dedicated agent every time.
About Sticky Agents
The Sticky Agents feature enables you to connect a specific customer to a dedicated agent every time a customer calls. This feature is very useful in scenarios where customers have issues that need more than one call to resolve. This helps in improving your customers’ call experience and leads to a faster point resolution. Having a dedicated agent in such scenarios will be a time-saver for both the customers as well as the agents as the agent will be aware of the case history.
How does the Sticky Agents feature work?
When the Sticky Agents feature is enabled in the call forward widget, Flowbuilder. For any customer's call that is received, the system first checks the call history of the past seven days from the current day. If any call record is found that matches the customer-agent pair the system connects the customer to the same agent. If there is no call history found, then the system checks for any sticky agent with the customer number and connects to the same if found and available. Customer call is distributed randomly among the agents if none of the scenarios matches.
NoteFor any call initiated,
- The system will first check for the existing sticky agent, if found, then the call is forwarded accordingly.
- If point 1 fails, the system checks for the previous seven-day call history and forwards the call in case of history found.
- If points 1 and 2 fails, the system will forward the call to an available agent.
If a sticky agent is found and previous call history is also available, the sticky agent will get the priority.
Add a Sticky Agent
To add a new sticky agent:
- Log in to your Kaleyra.io account and navigate to Channels > Voice > Sticky Agent.
- Click Add Sticky Agent.
- In the Title field, enter a name that will help you identify the sticky agent.
- In the Customer Number field, enter the phone numbers of the customers with country codes. You can add up to ten phone numbers that are comma-separated.
- In the Agent Number field, add the phone number of the agent with country code.
- Click Save.
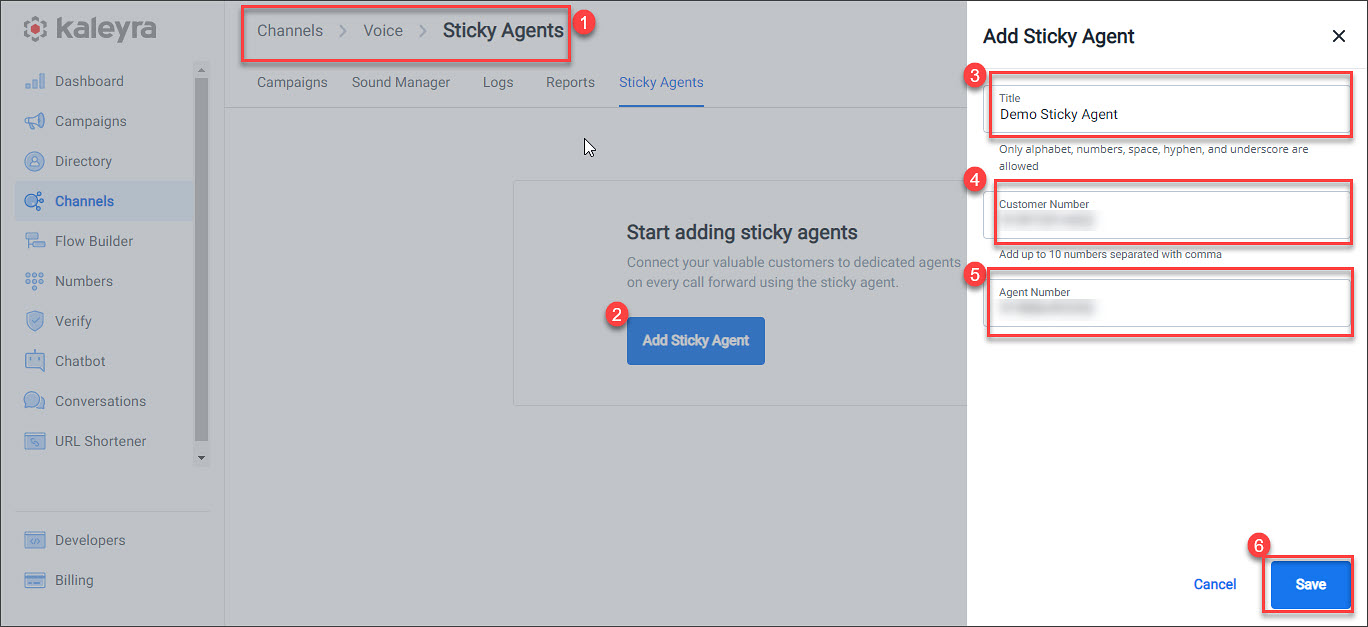
Sticky Agents screen
Once the Sticky Agents have been added, the screen displays the below details:
| Column Name | Description |
|---|---|
| Title | Title of the sticky agent |
| Customer Number | Phone number of the customer. |
| Agent Number | Phone number of the agent. |
| Last updated on | Date when this information was last updated. |
| Status | Status of the sticky agent such as active or inactive. If the status is disabled, the sticky agent will be inactive. |
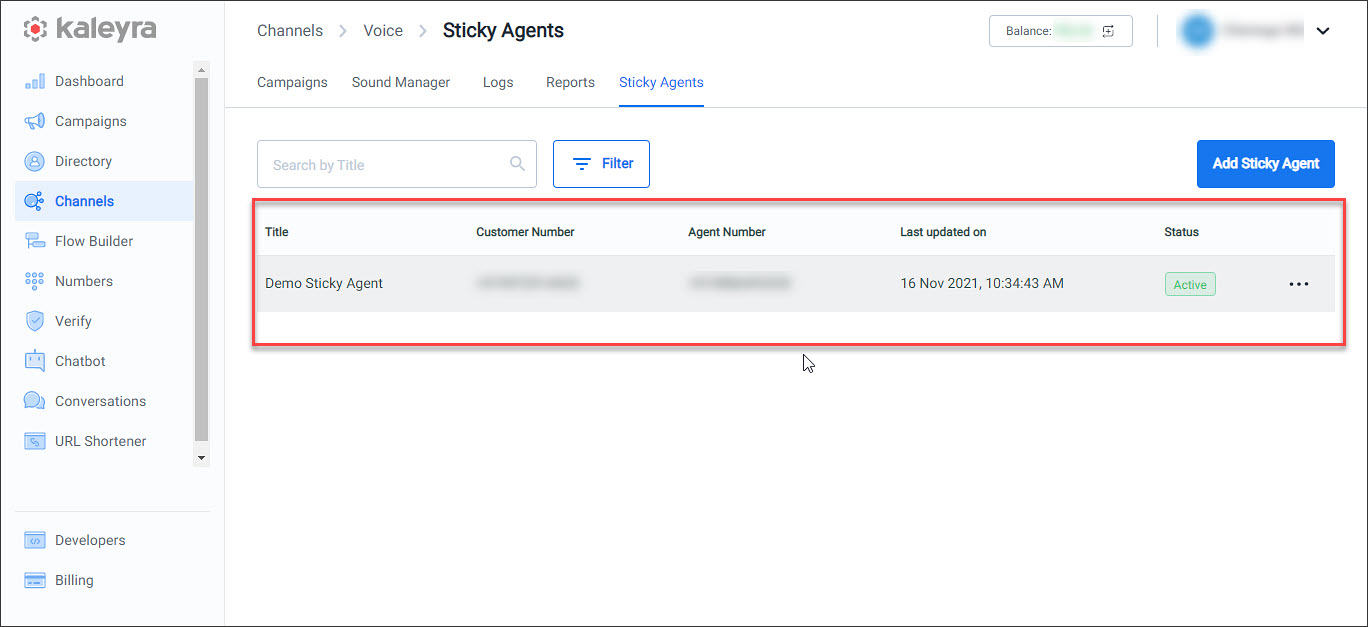
Edit a sticky agent
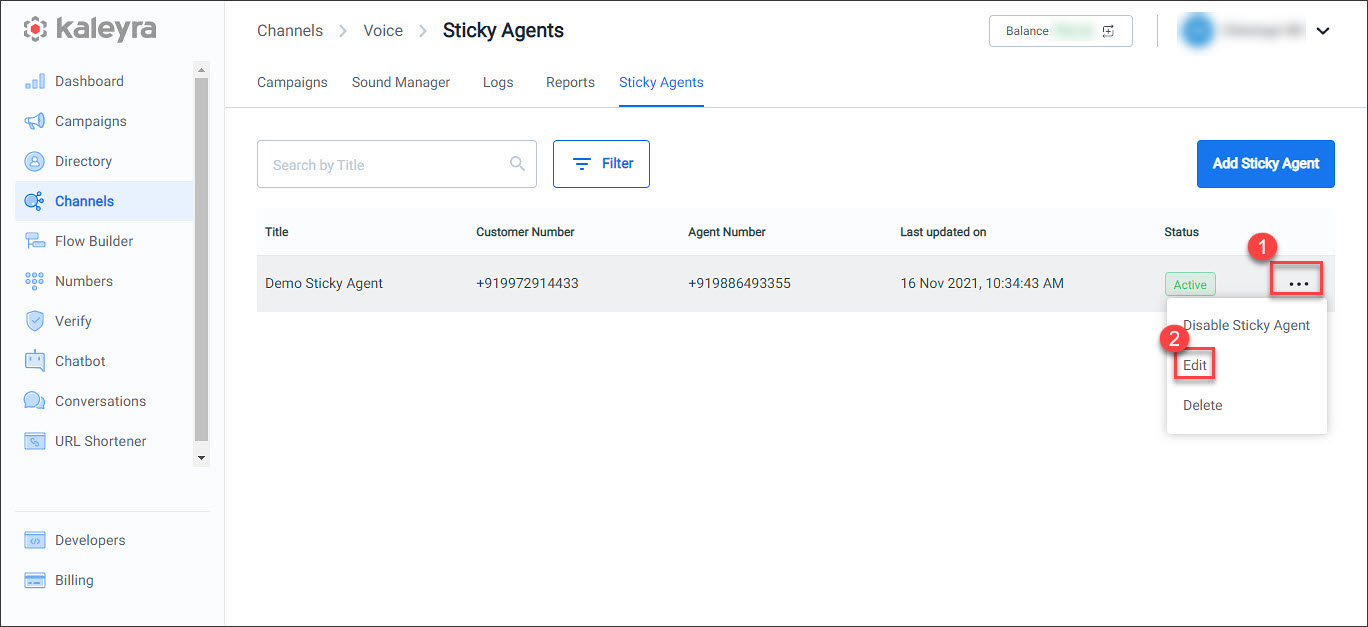
To edit the details of an existing sticky agent:
- Hover over the row that you want to edit and click the ellipsis.
- Click Edit. The Edit sound file page appears.
- Make the necessary changes.
- Click Save. You can view the updated changes on the Sticky Agents screen.
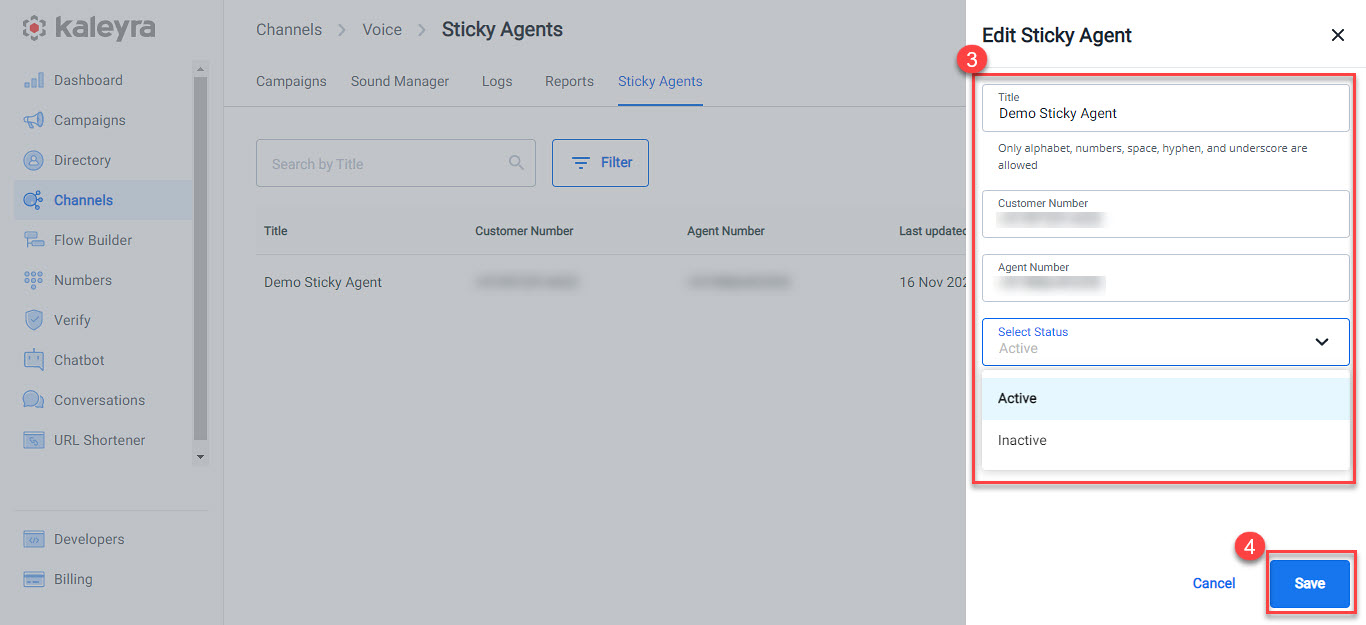
NoteIf you change the Status to Inactive, the sticky agent will be disabled.
Disable a sticky agent
If you do not want to delete the sticky agent but only want to disable it so you can use it in the future:
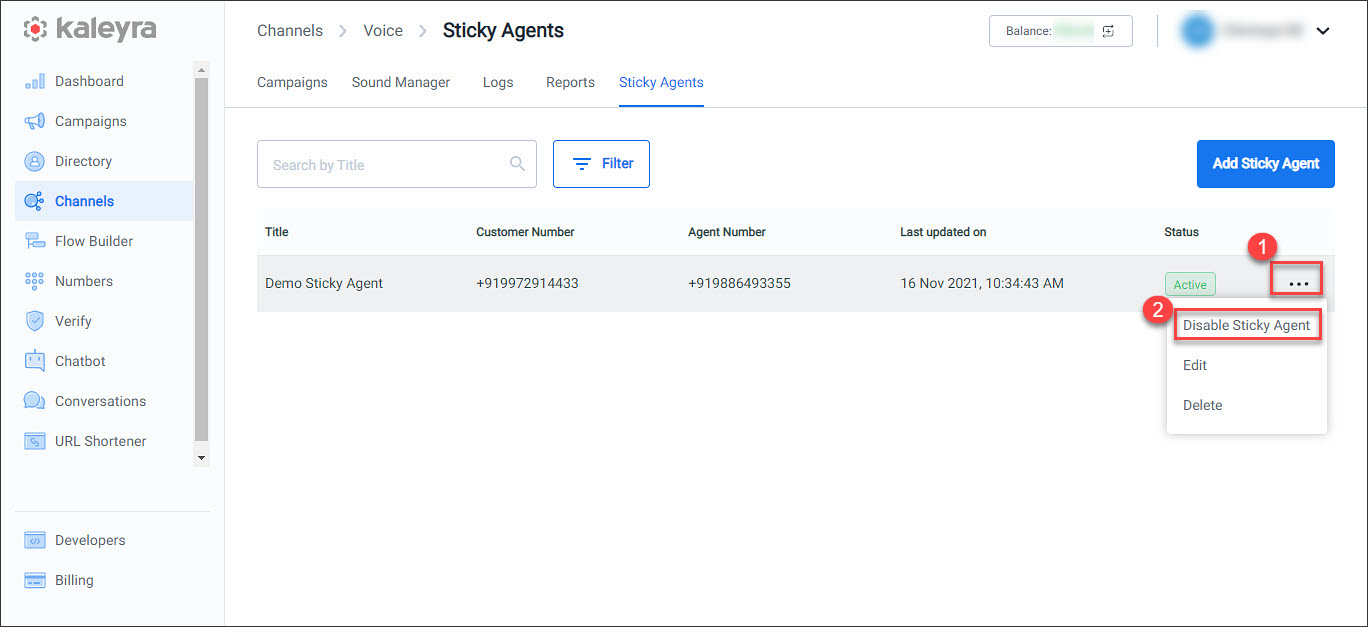
- Hover over the row that you want to disable and click the ellipsis.
- Click Disable Sticky Agent. The status of the sticky agent will be updated to Inactive.
Delete sticky agent
To delete the sticky agent:
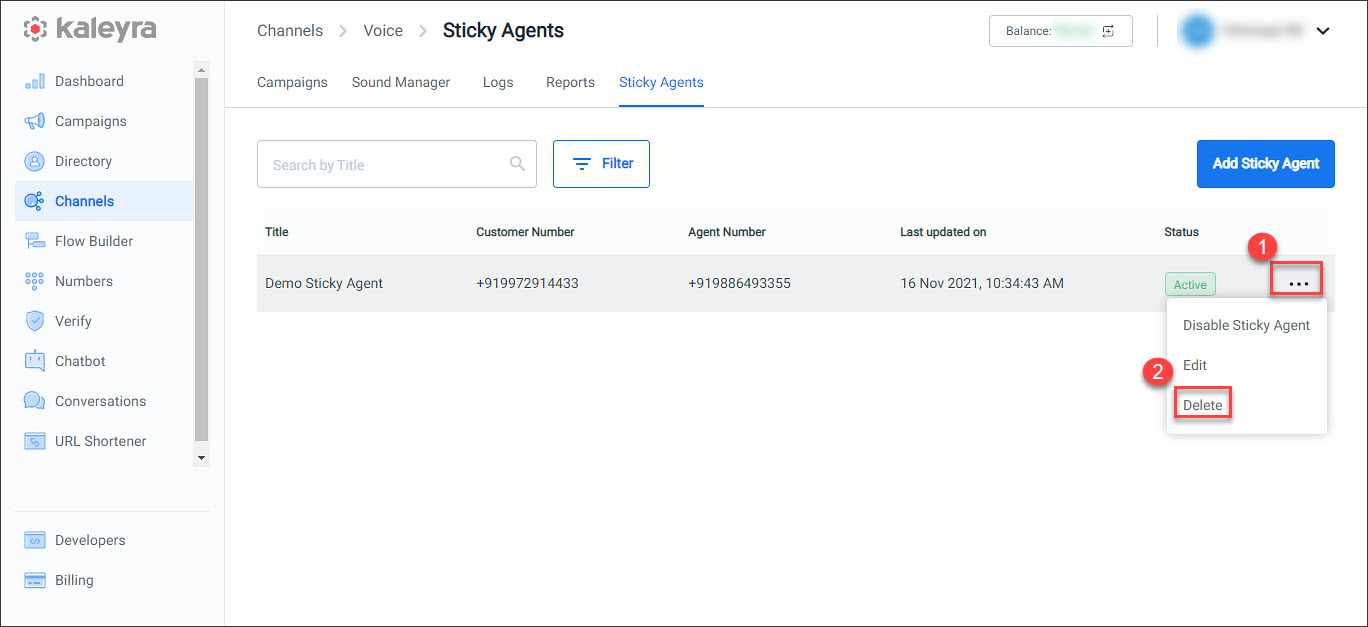
- Hover over the row that you want to delete and click the ellipsis.
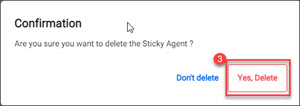
- Click Delete. A confirmation message is displayed.
- Click Yes, Delete to delete the sticky agent.
Updated 7 months ago
