Launch an SMS Campaign
With quick campaign processing time and minimal effort, the SMS campaign feature serves as an effective mode of communication to achieve your business goals. With its 'easy-to-use' interface, the SMS campaign feature facilitates sending bulk SMS as efficiently as the SMS APIs.
Prerequisites
The following are the prerequisites to launch your SMS campaign:
- Complete the KYC process. For more information on the KYC process, see the Complete the KYC Procedure page.
- Ensure that you have sufficient credits to launch your SMS campaign.
- Ensure that you have a valid Sender ID. To more information, see Create Sender ID using API or Create a Sender ID from Kaleyra platform.
- Ensure that you have a valid Template ID. Sending SMS using template is currently supported only in the IN region; in other regions, templates can be used only when sending a campaign through the Kaleyra platform. For more information on how to create an SMS template, see Create an SMS Template.
Note:You can launch an SMS campaign from the left menu bar from the Channels menu > from the SMS card, click Manage > and then Campaigns tab. You will be redirected to Campaign page and then follow step 3 from the Launch an SMS Campaign topic.
Launch an SMS Campaign
To Launch your SMS campaign, perform the following steps:
-
Sign in to your Kaleyra platform.
The Channels page appears.
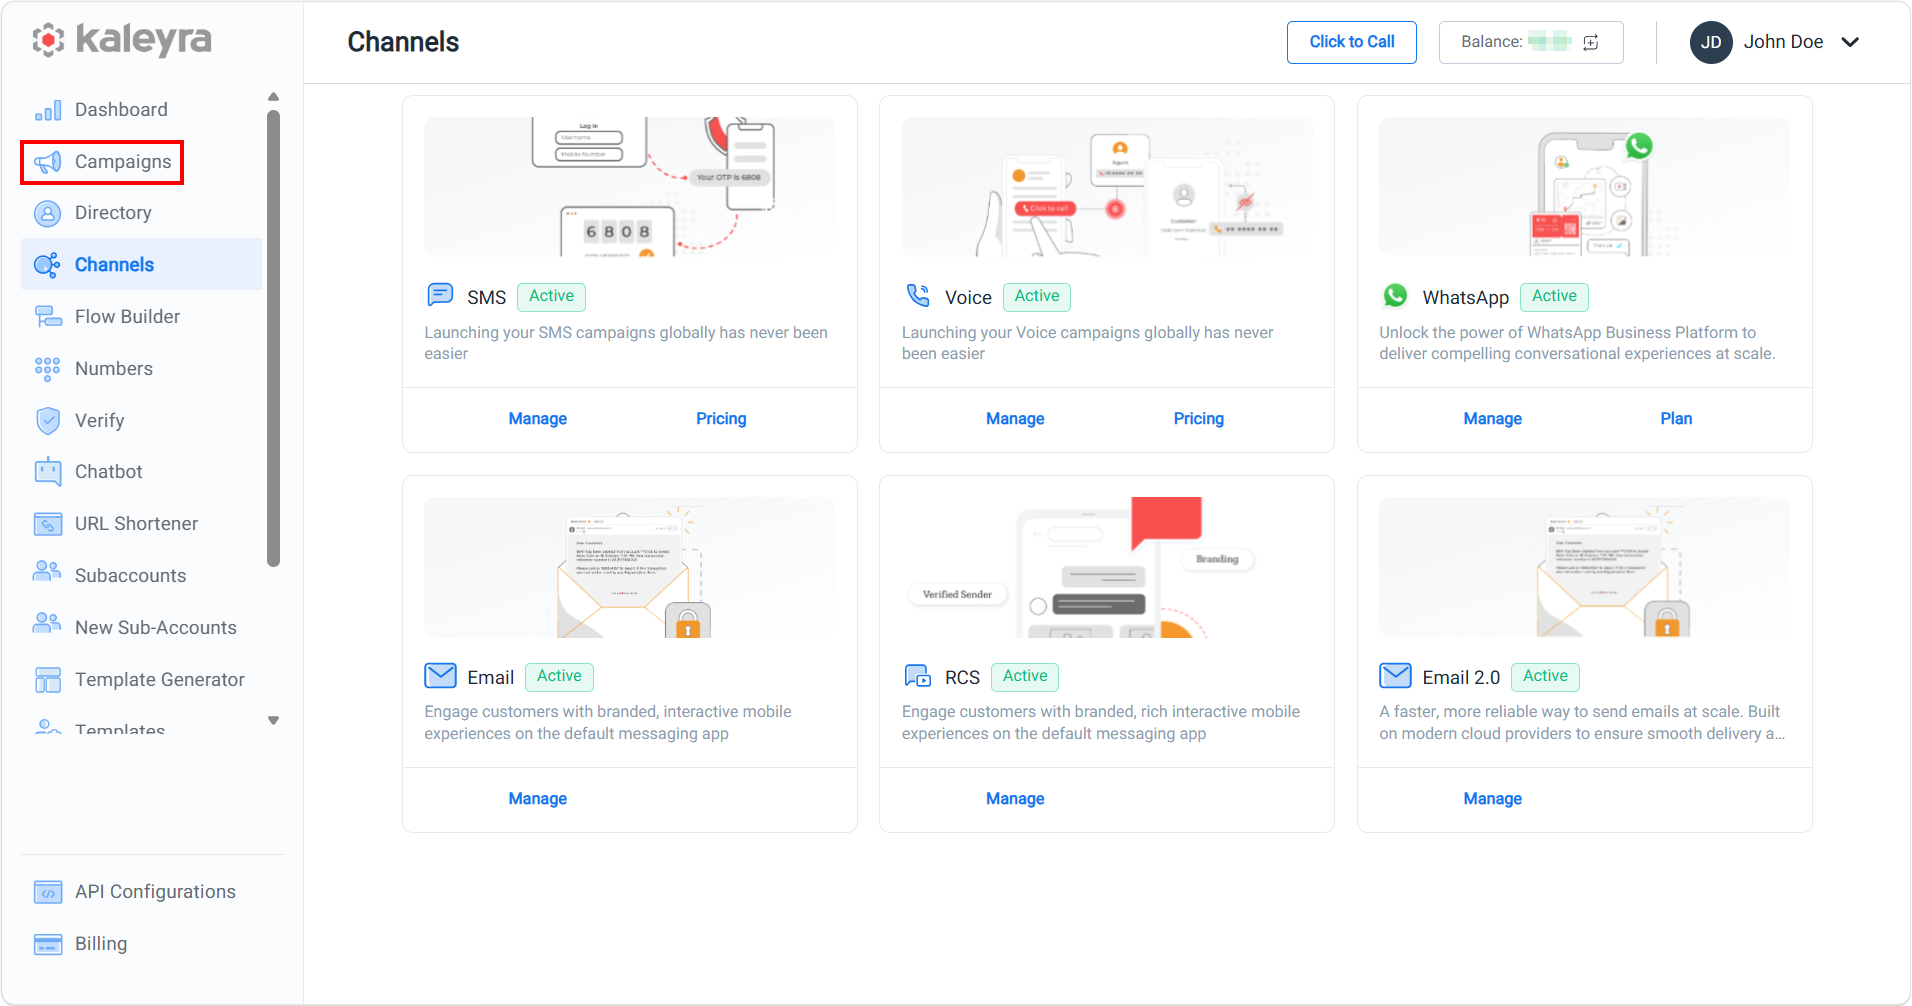
- On the left menu bar, click Campaigns.
The Campaigns page appears.

- On the Campaigns page, click the New Campaign drop-down.
The supported Campaigns channel appears.
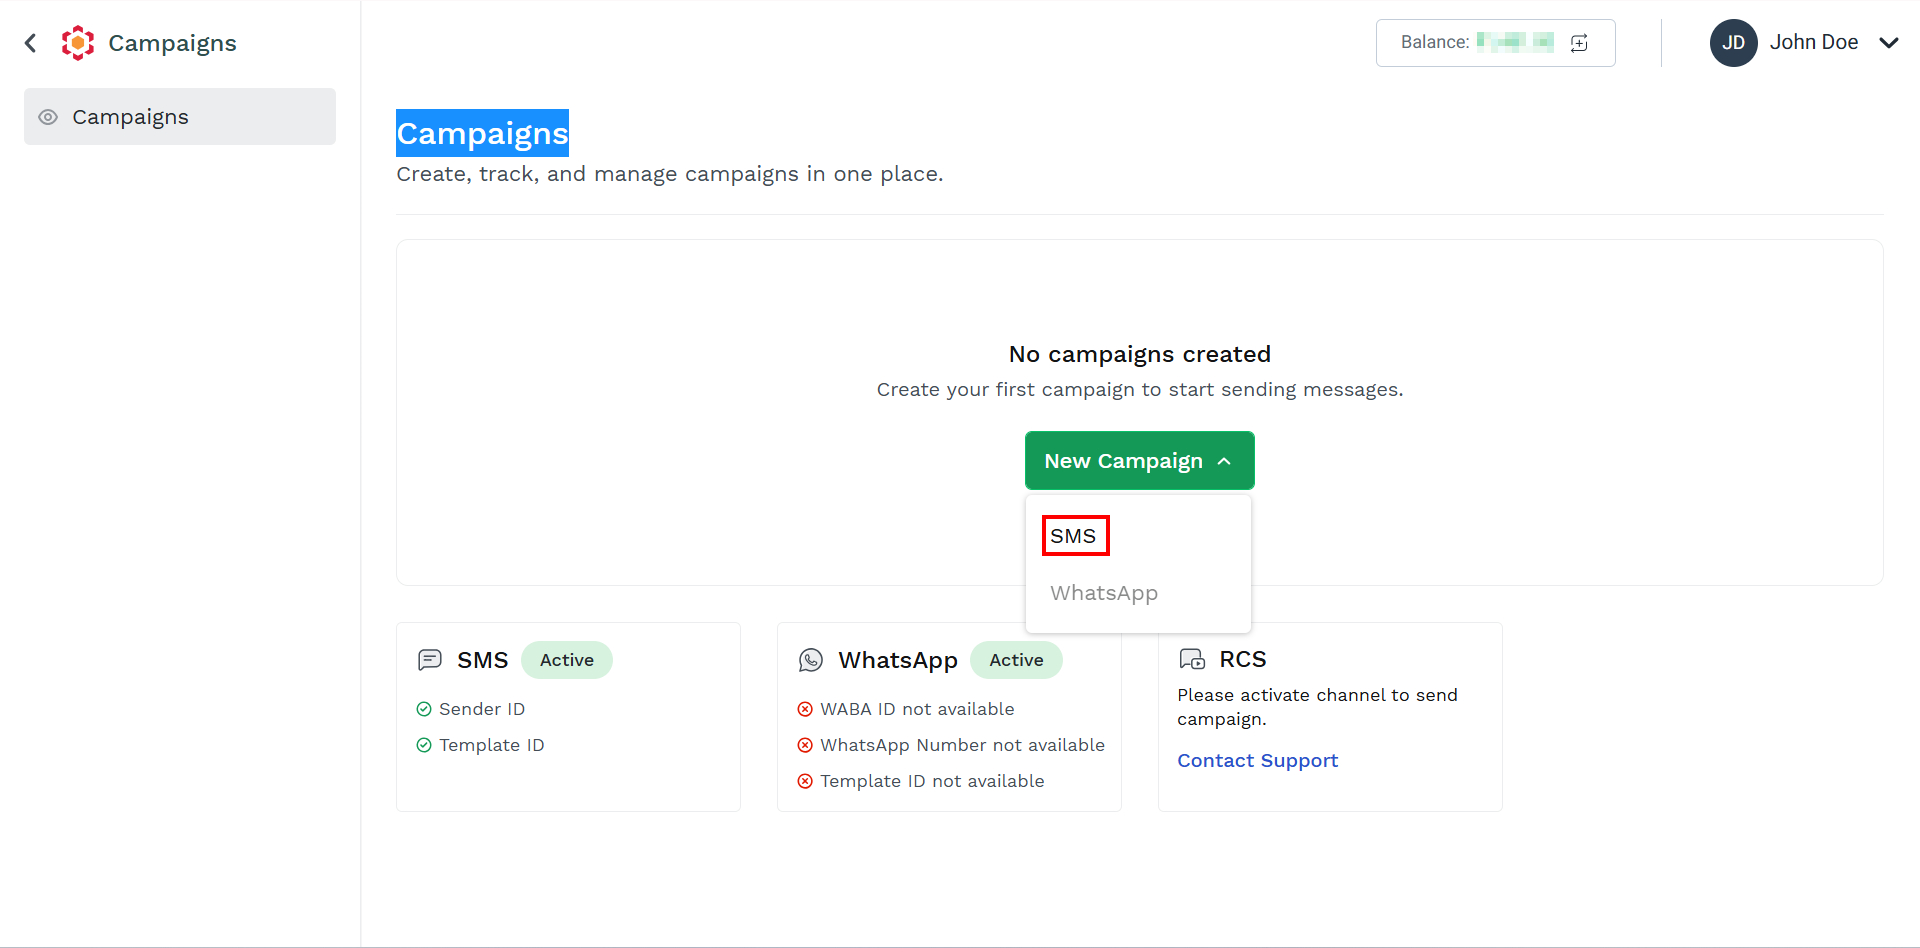
- Select the SMS option.
The New SMS Campaign page appears.
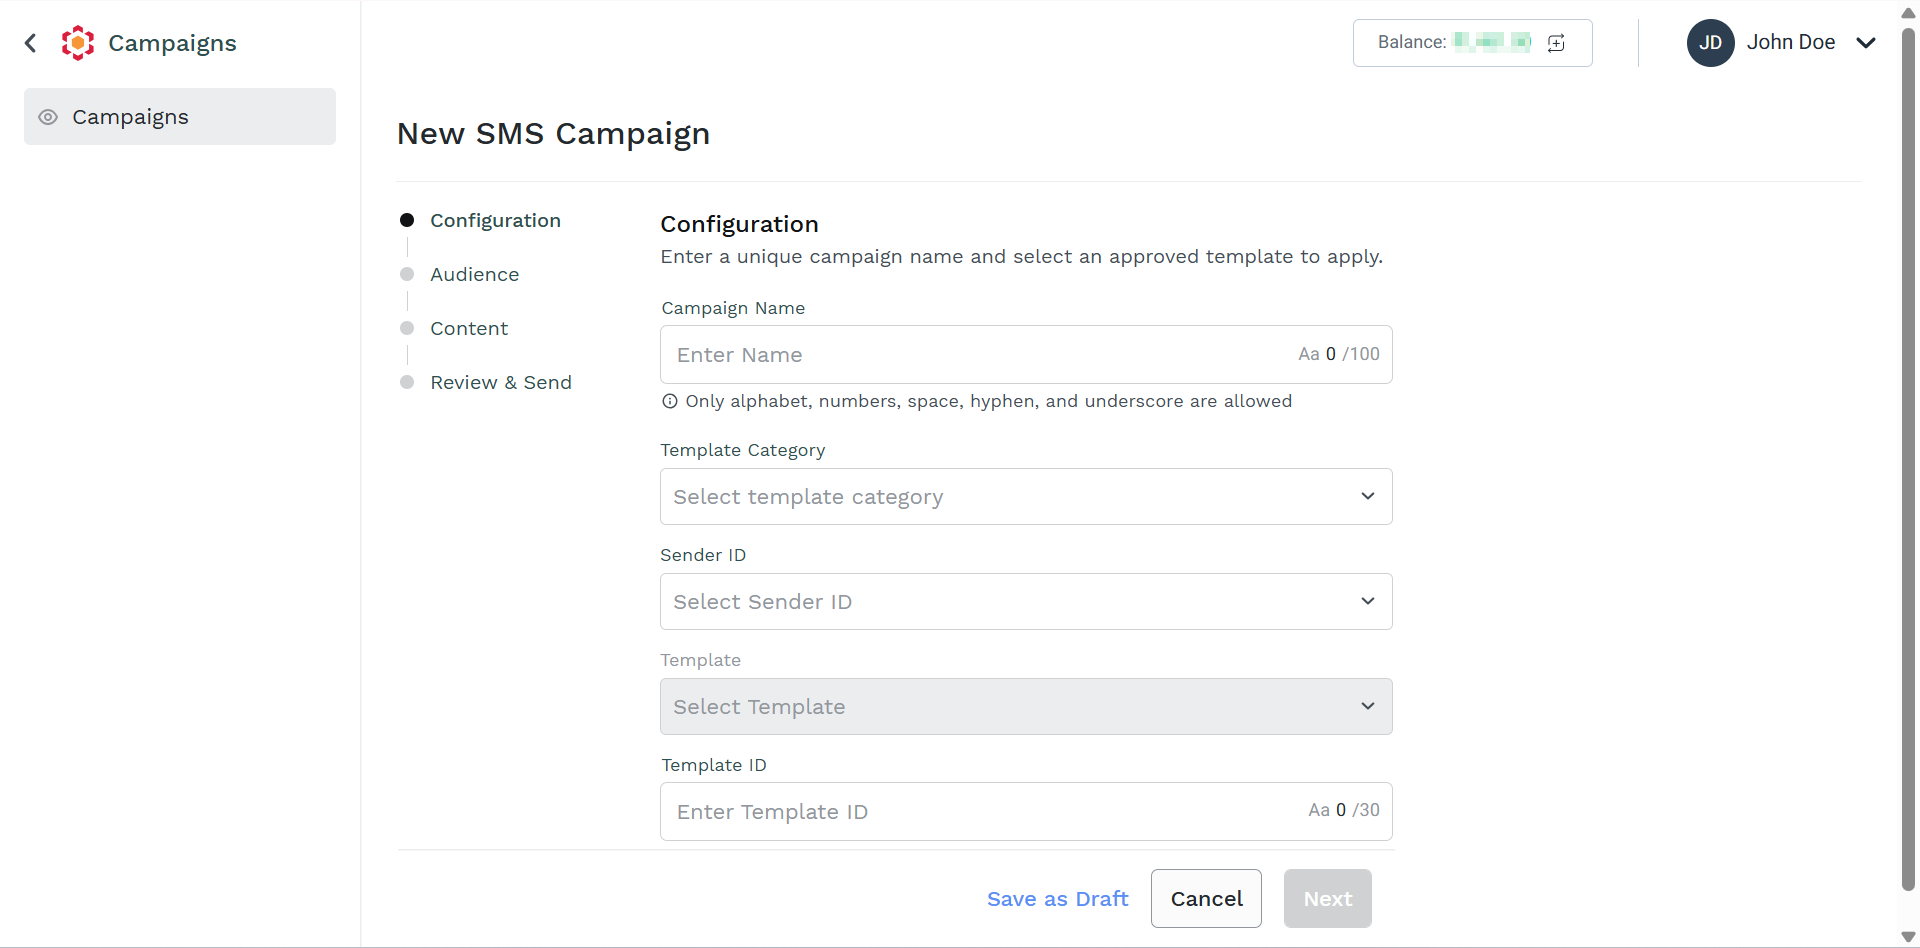
-
In the Configuration step, perform the following:
- In the Campaign Name field, enter the name of your Campaign.
- Click the Template Category drop-down, and then select one of the following options for IN region:
Marketing
Marketing SMS is text messages to communicate offers, updates, and reminders to customers mainly used for marketing purposes.
Transactional
A transactional SMS is a non-marketing automated text message that companies send to support their audience along the customer journey. Among the most common transactional SMS types are order confirmations, welcome text messages, and shipping updates.
Transactional DND
You can deliver the Transactional DND messages to all recipients, irrespective of their Do-Not-Disturb (DND) status. Also, you can use these messages for sending order and booking alerts and informational messages to registered customers.
OTP
OTP SMS is one of the Smart Pin families and is a system to send to your mobile phone a "one-time password" for your all approval/verification for transaction/login/payment purposes.
M2M
Machine-to-machine communication (M2M) is two machines used for communicating or exchanging data without human interfacing or interaction. This includes serial connection, powerline connection (PLC), or wireless communications in the industrial Internet of Things (IoT).
- Click the Sender ID drop-down, select the sender ID from which the messages need to be sent. Ensure that you have at least one approved Sender ID, if not, refer to the Create a Sender ID page for more information.
- Click the Template drop-down, select the template using which the content if the messages need to be sent. You have the option to use the Custom Template for creating a custom message for the campaign.
- The Template ID gets populated automatically based on templated ID associated with template.
-
Click Next.
The Audience step appears.
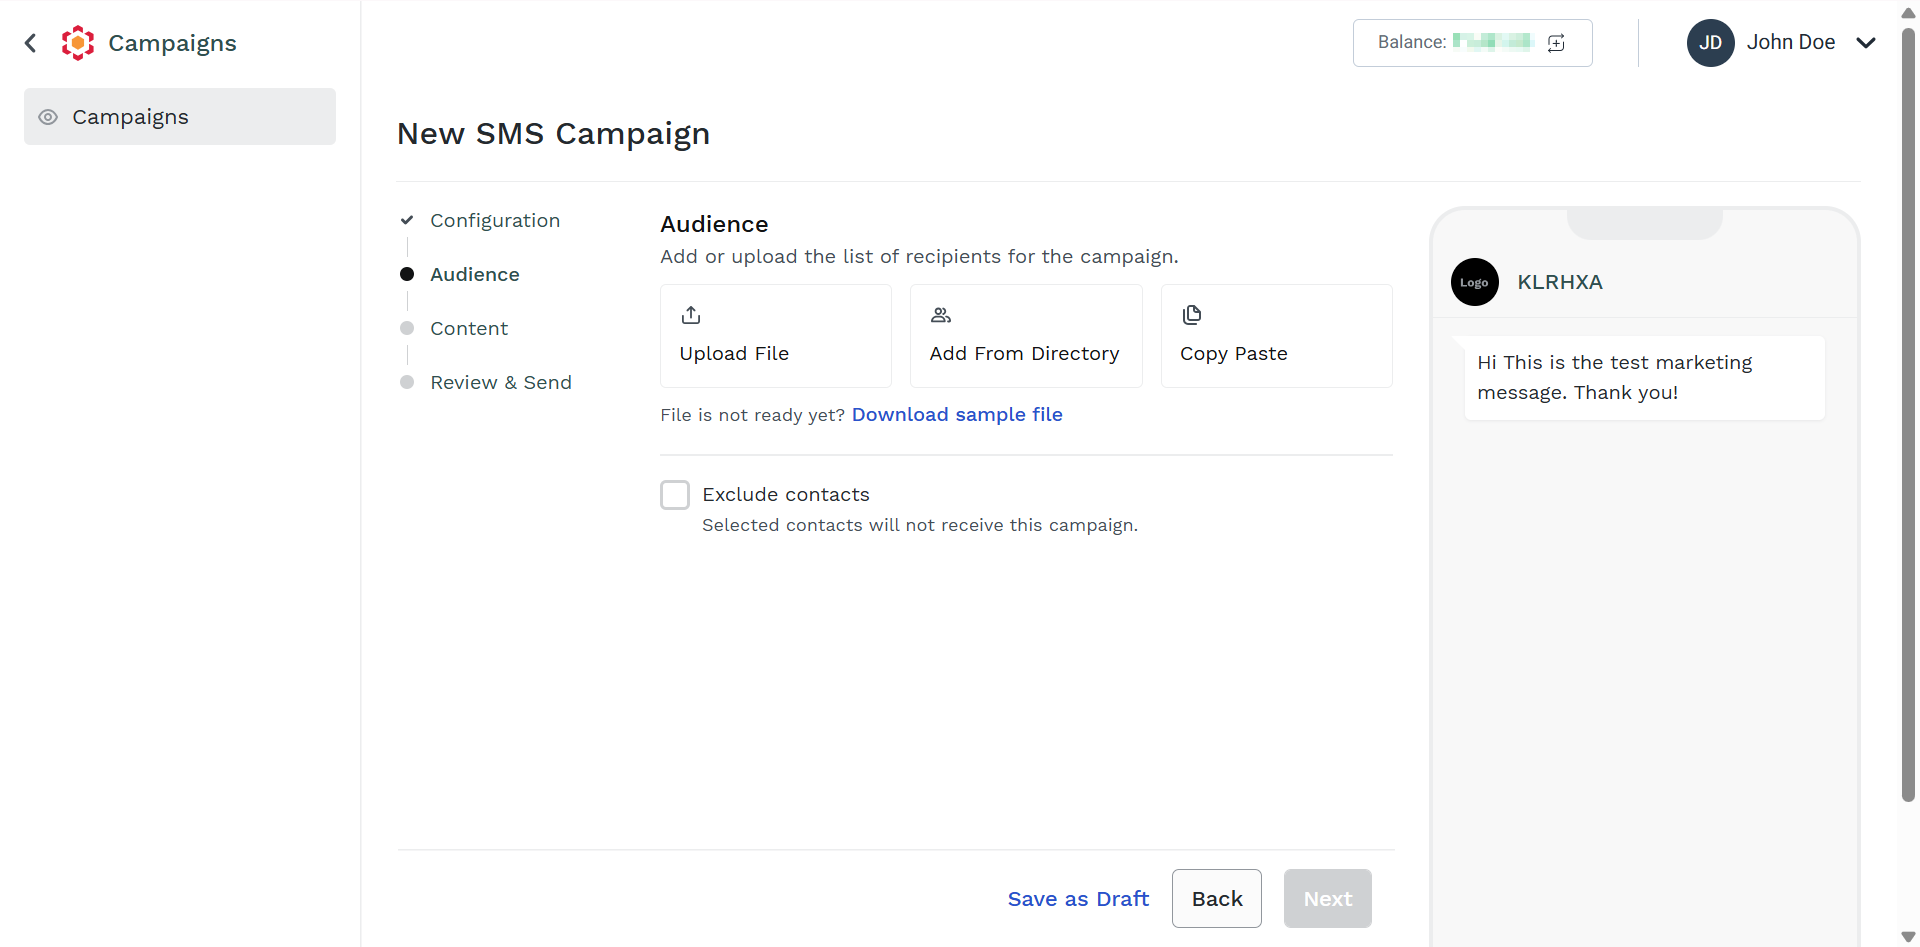
- Add the audience using the following methods:
- Upload File - You can upload the contacts to whom you want to send message using the spreadsheet. For more information, see Add Contacts by Uploading a File.
- Add From Directory - You can add the contacts from the Kaleyra platform directory. For more information, see Add Contacts from Directory.
- Copy Paste - You can manually enter the contacts or copy and paste the list of phone numbers separated by comma. For more information, see Copy Paste the Contacts.
- (Optional) If you want to exclude any number from the campaign list, select the Exclude contacts checkbox and use the following methods:
- Upload File - You can upload the contacts to whom you want to send message using the spreadsheet. For more information, see Add Contacts by Uploading a File.
- Add From Directory - You can add the contacts from the Kaleyra platform directory. For more information, see Add Contacts from Directory.
- Copy Paste - You can manually enter the contacts or copy and paste the list of phone numbers separated by comma. For more information, see Copy Paste the Contacts.
- Click Next.
The Content step appears.
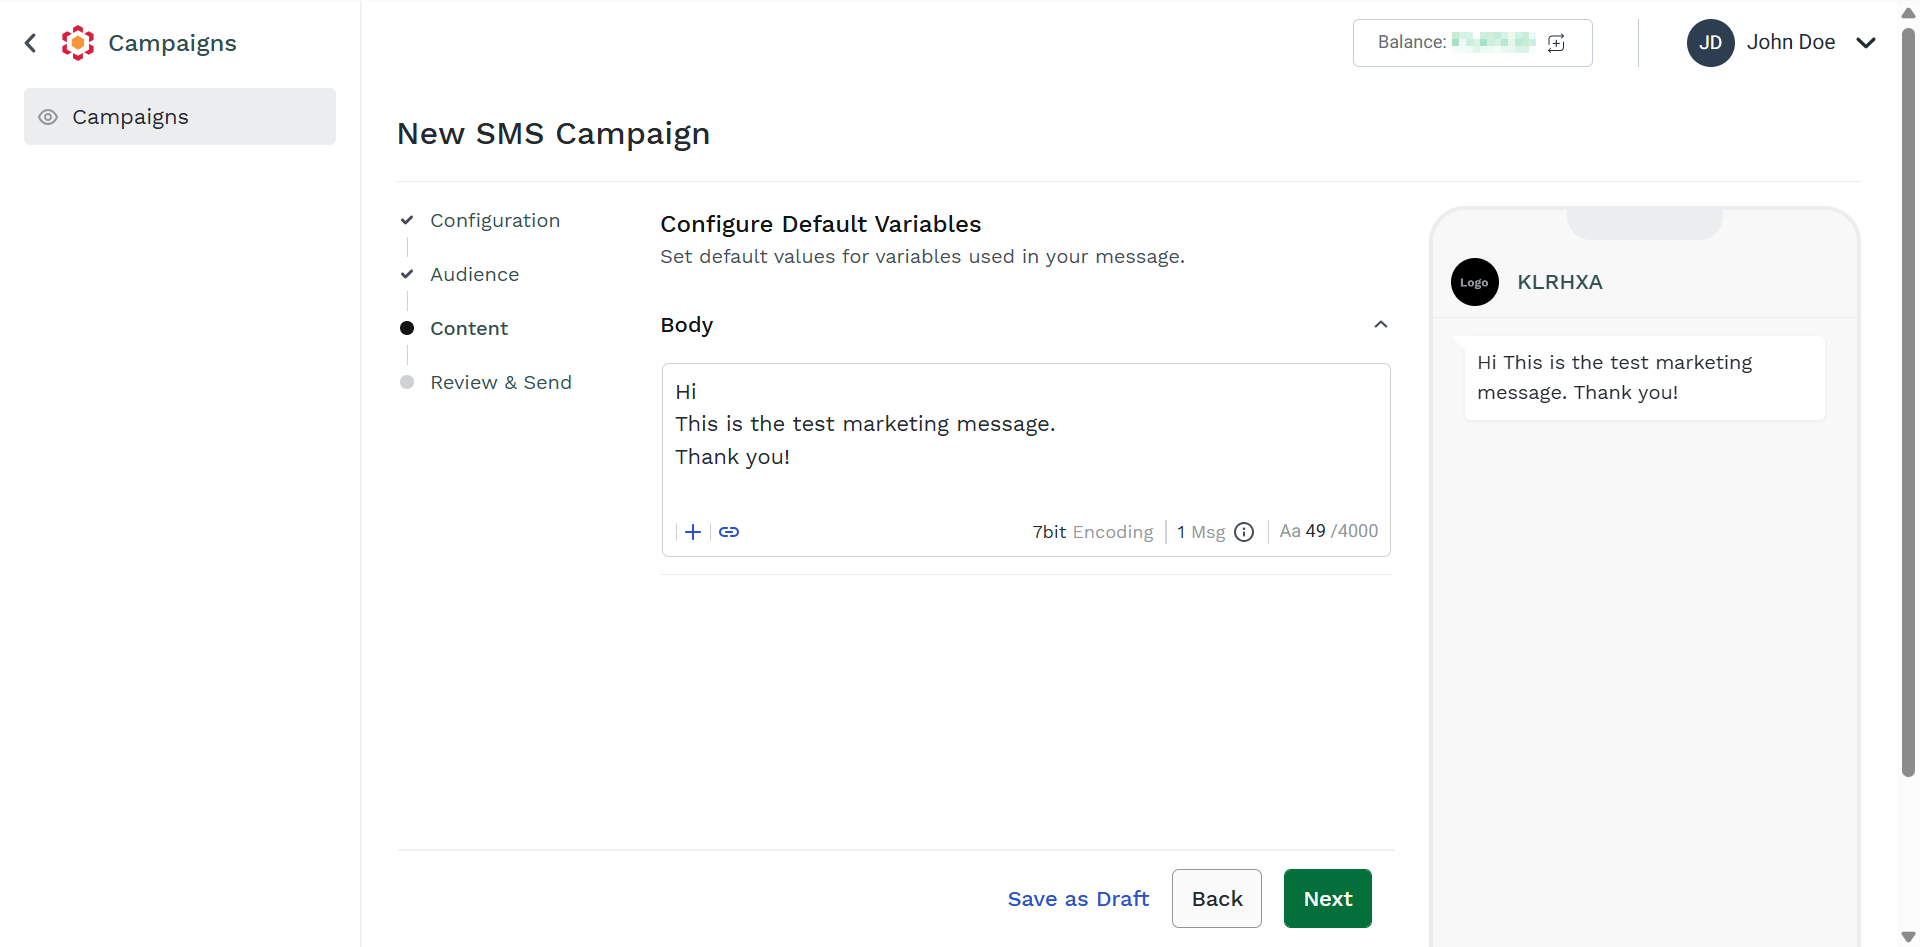
- In the Body field you can prepare the text of your SMS campaigns using one or more of the following actions:
- Enter text manually.
- Insert URL or Upload file. For more information, refer to the Insert Links or Upload a File section.
- Set Default Variable if your text has dynamic parts. For more information, refer to the Set a Default Variable section.
Note:
- The preview of the content added in this field is visible in the preview section.
- You can view the length of the SMS by clicking on
in the bottom of the text body section.
- In the bottom of the preview section, toggle Show Preview with sample data to preview the campaign message when at default variable data in the available.
- Click Next.
The Review & Send step appears.
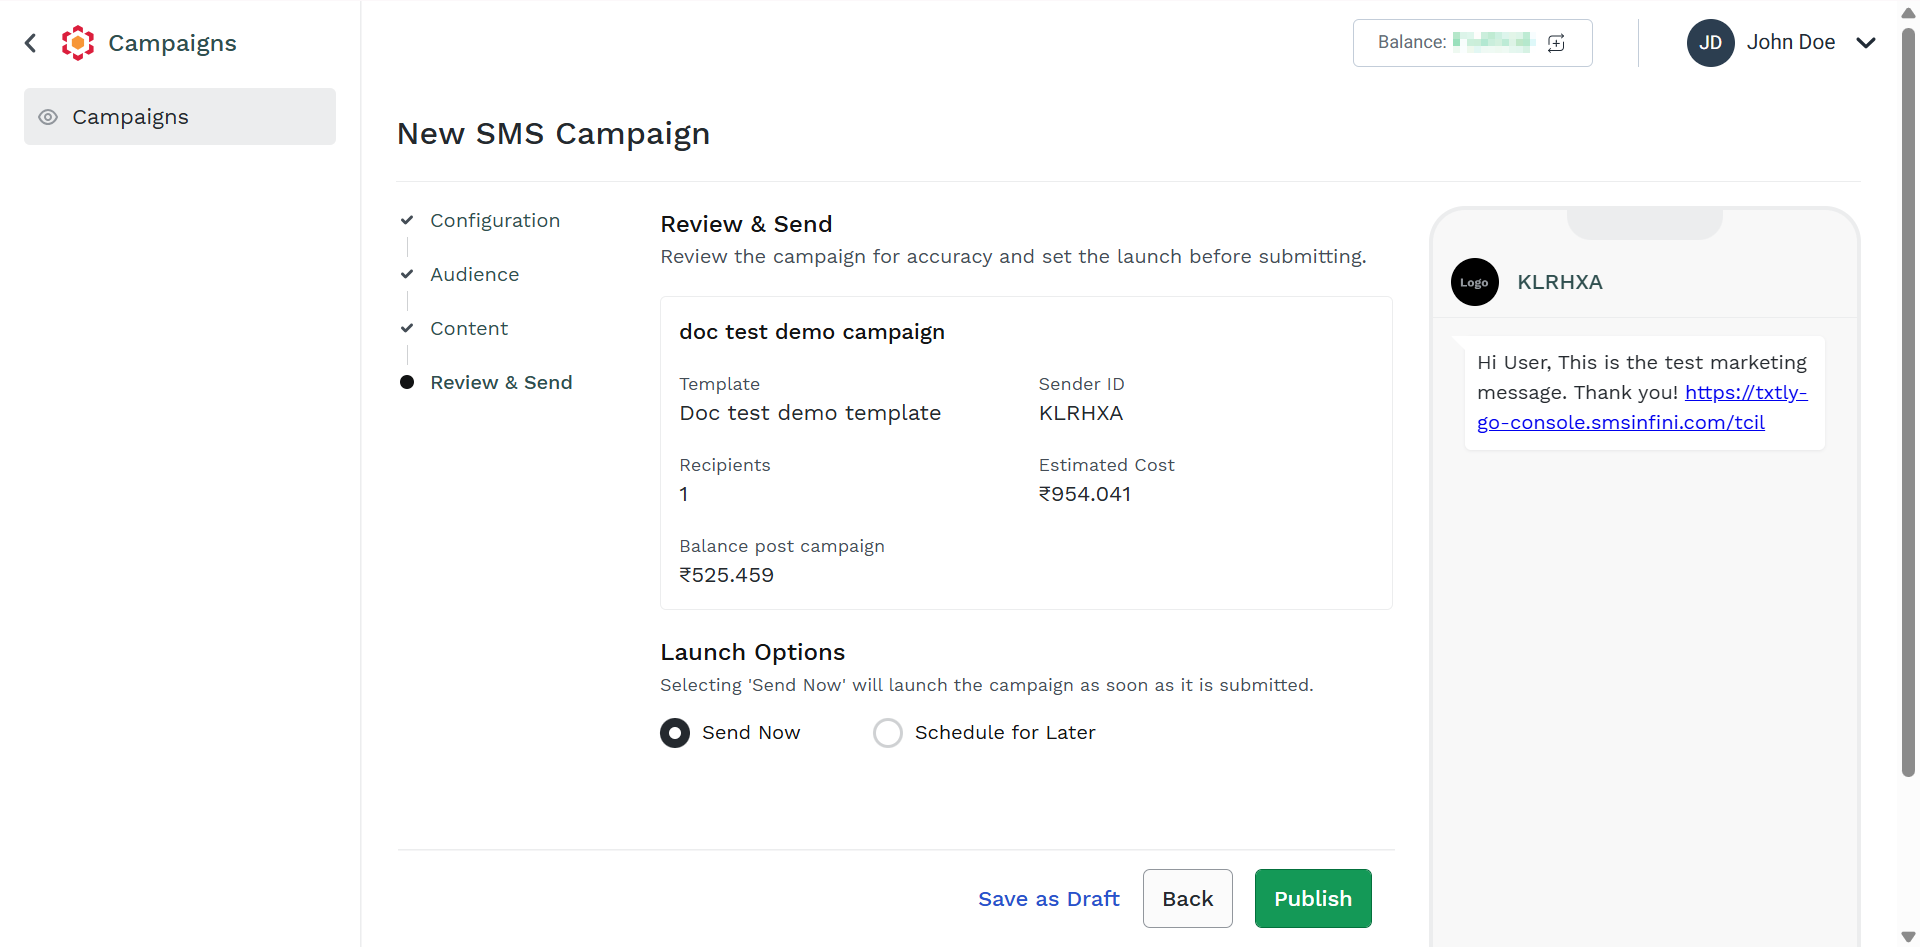
- Once the draft is ready, click Send Now to you can send the message immediately or click Schedule for Later to schedule it for later. For more information, refer to the Schedule the Campaign section.
The confirmation screen appears and the campaign gets listed in the Campaigns page.
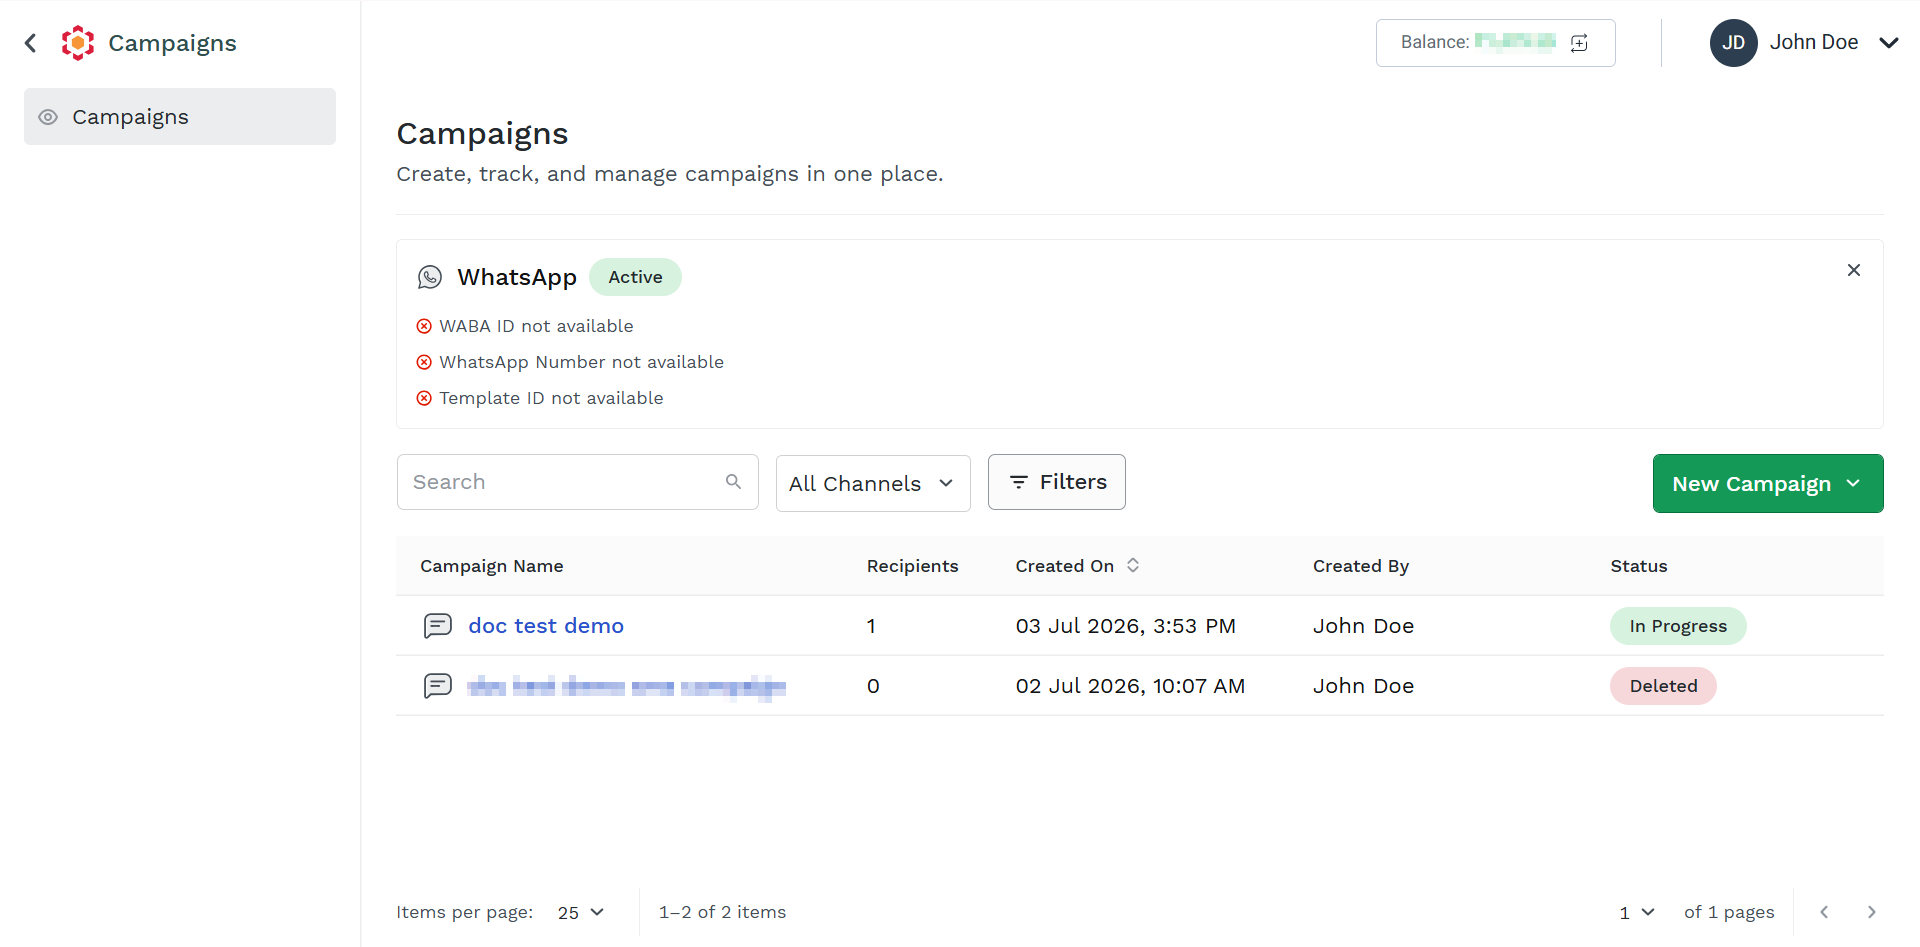
The following table contains the SMS Campaign Delivery Status and the corresponding tooltips:
| Status | Tooltip |
|---|---|
| Submitted | Messages have been submitted to carriers/operators. |
| Scheduled | The Campaign is scheduled to send messages at a later date or time. |
| Draft | The Campaign has not been submitted or scheduled yet. |
| Failed | Messages were unable to be submitted to carriers/operators (either partially or completely). |
| In Process | Messages are currently being sent to carriers/operators. |
| Completed | Messages have been submitted to carriers/operators. |
| Cancelled | The Campaign was cancelled. |
| Deleted | The Campaign was deleted. |
Updated 22 days ago