Configure Receive Message
Receive Message feature allows you to managed incoming SMS (aka MO SMS) sent by your end-user to your configured business number and trigger specific actions based on the configurations like Auto Reply, Forward, Trigger URL, Subscribe, and Unsubscribe based on having a specific keyword in the message text or as a default options.
You need to configure either a dedicated Long Codes or Short Codes to receive incoming SMS from end users.
To configure a number for the Receive Message feature, perform the following steps:
- Sign in to your Kaleyra.io account.
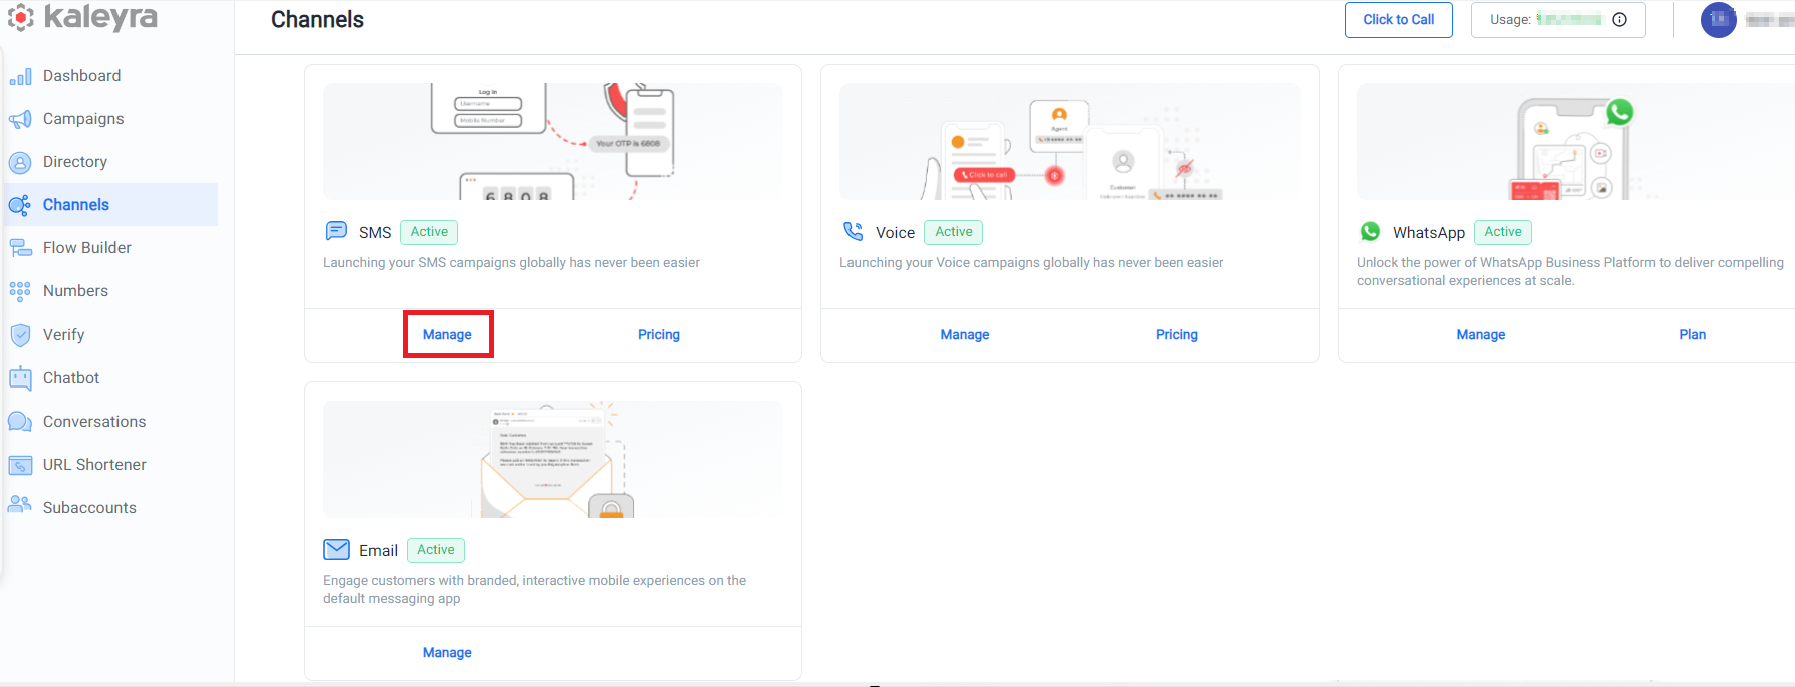
- Go to Channels and on the SMS card click Manage.
The Sender ID tab details appear.
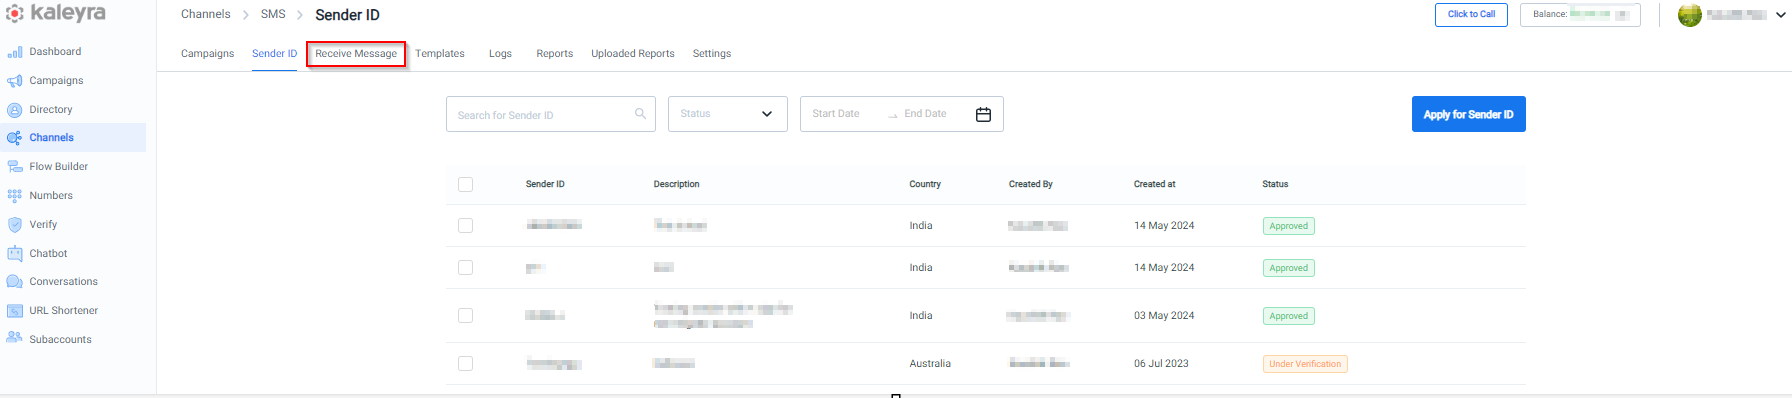
- Click Receive Message tab.
The list of Receive SMS Configurations page appears.
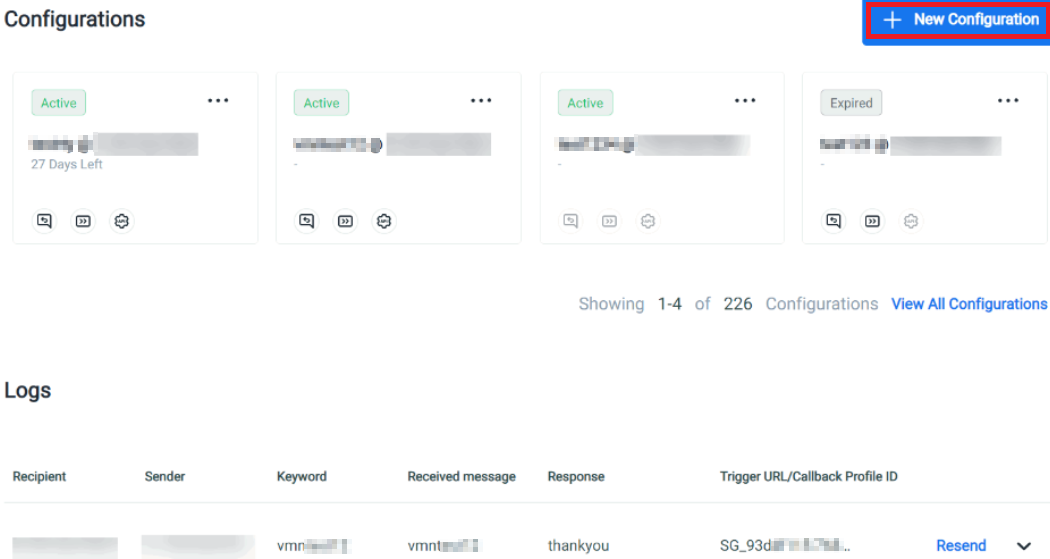
- Click + New Configuration. The New Configuration page appears.
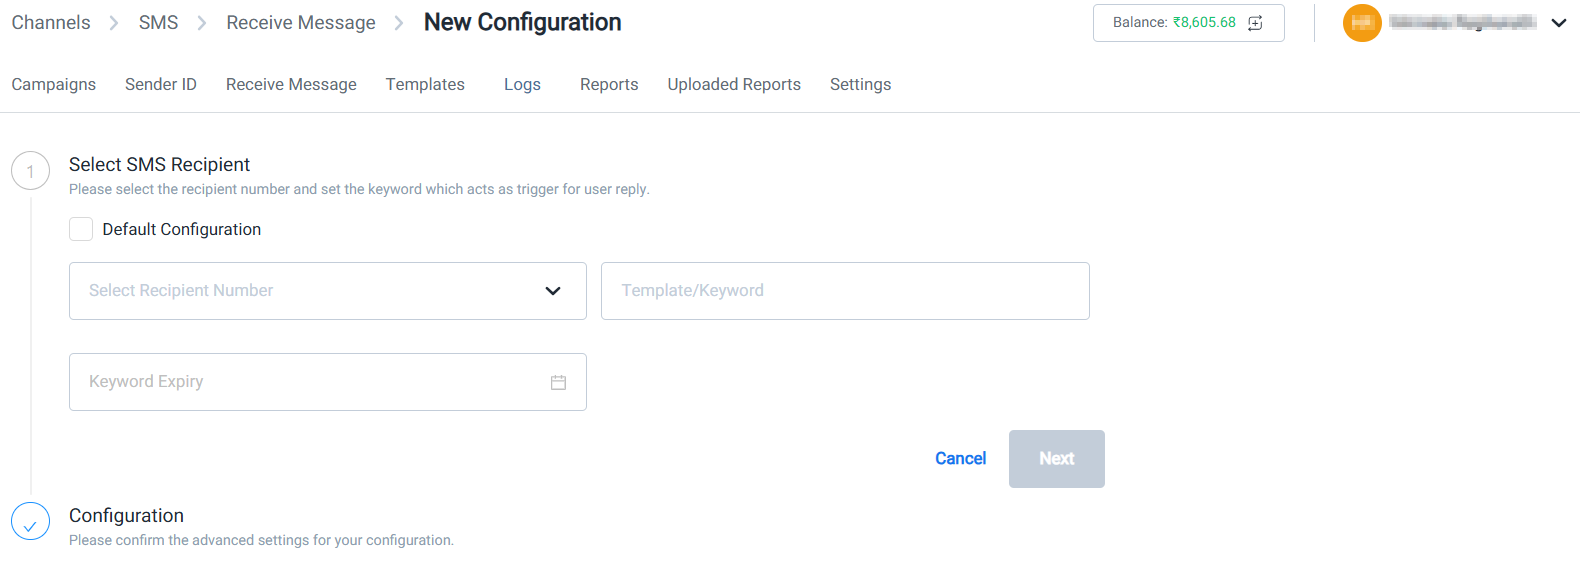
- In the Select SMS Recipient section, enter the recipient VMN details in the following fields.
- Select Recipient Number - Select the recipient number from the drop-down list. Once you subscibe the number from the Numbers tab, the same will be automatically reflected in the select recipient number drop-down list. For more information on how to subscribe a number, see Subscribe Number page.
- Template/Keyword - Enter the template or keyword. The template/Keyword field is used to define:
- A single keyword like “HELP” or “STOP”.
- Or a text pattern that starts with a keyword.
- A Keyword is a specific word or phrase that an end-user includes in their SMS message, which triggers a predefined action in your Kaleyra configuration.
- Template refers to the expected format or pattern of the message that includes the keyword.
- Keyword Expiry - Select the keyword Expiry from the Calander. The keyword expiry format is
YYYY-MM-DD; HH:MM:SS.
Notes:
- From the Select Recipient Number drop-down, if you are selecting a shared short code, then the Default Configuration option gets disabled.
- A shared short code can be used by multiple unrelated business organizations, but the keyword associated with any given shared short code cannot be shared by multiple accounts. So, in case you configure a keyword for a shared short code that is already in use by another organizations, the configuration will not be saved.
- If theDefault Configuration checkbox is selected, then the Template Keyword field gets disabled. The Default Configuration is the default one, while Template and Keyword are non-default ones.
- If the Keyword Expiry date is passed:
- You can still save the configuration — no error will be thrown while saving.
- The keyword becomes inactive.
- Any incoming SMS containing that keyword will not trigger any configured actions (like Auto Reply, Subscribe, etc.).
- The request will be rejected for that configuration.
- In the Configuration section, you can confirm the advanced settings of your configuration. The configuration section has the following options:
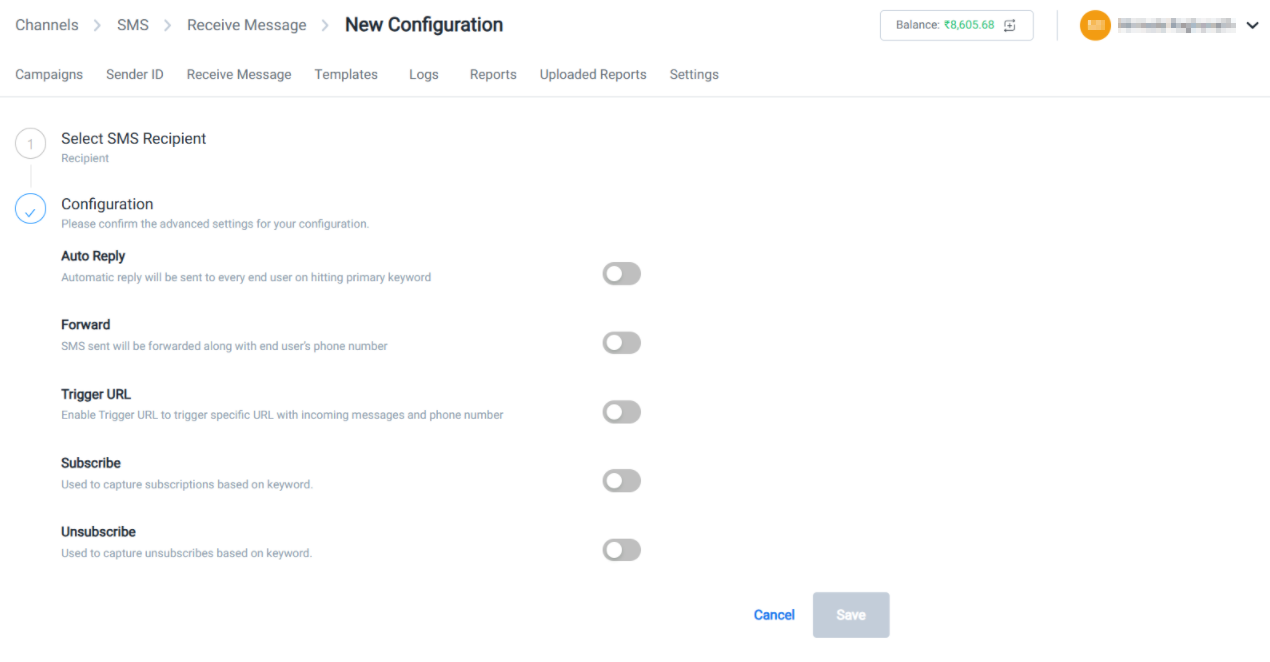
Auto Reply
- Select the Auto Reply toggle button where automatic reply will be sent to every end user on hitting primary keyword.
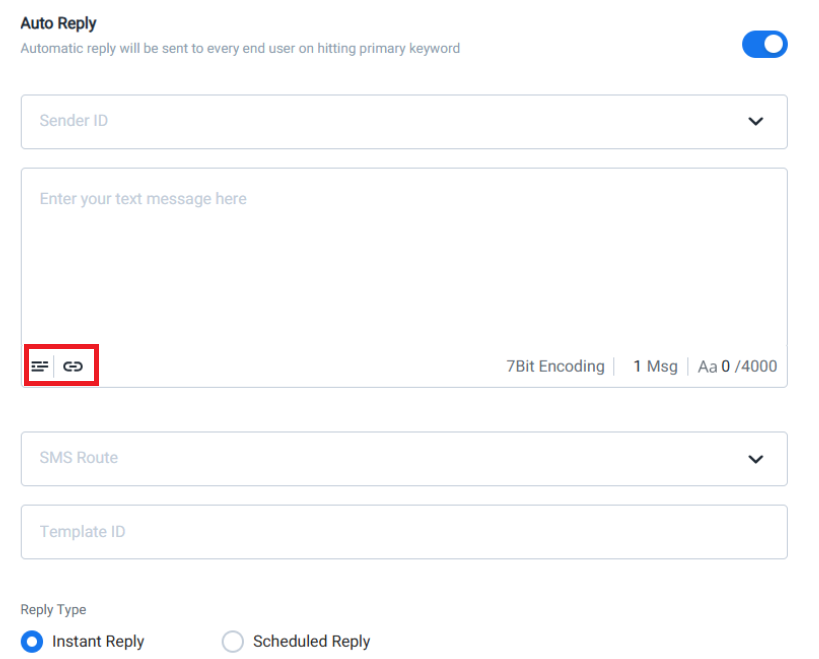
The Auto Reply toggle button has the following fields:
- Sender ID - Select the Sender ID from the drop-down list. For more information on how to create a Sender ID, see Create a Sender ID page.
- Message Content - Enter your text message in the text box.
- Click Select Template icon. The Select Template page appears.
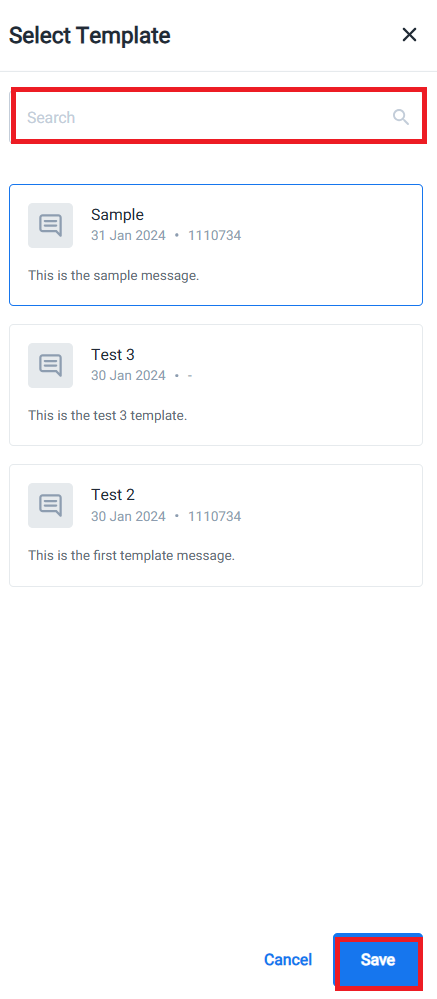
Note:You can select the template from the existing Select Template page or search any template from the available options.
- Click Save to save the template.
- Click Select URL icon. The Select URL page appears.
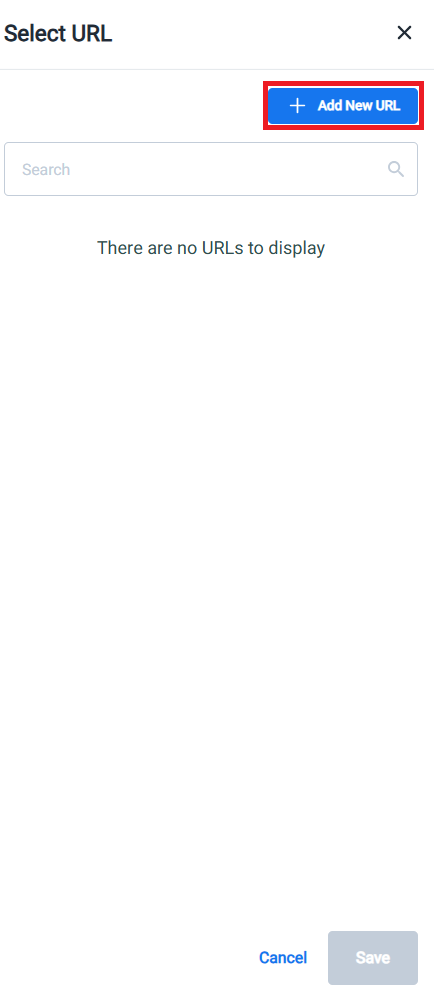
- Click + Add New URL. The Add New URL page appears.
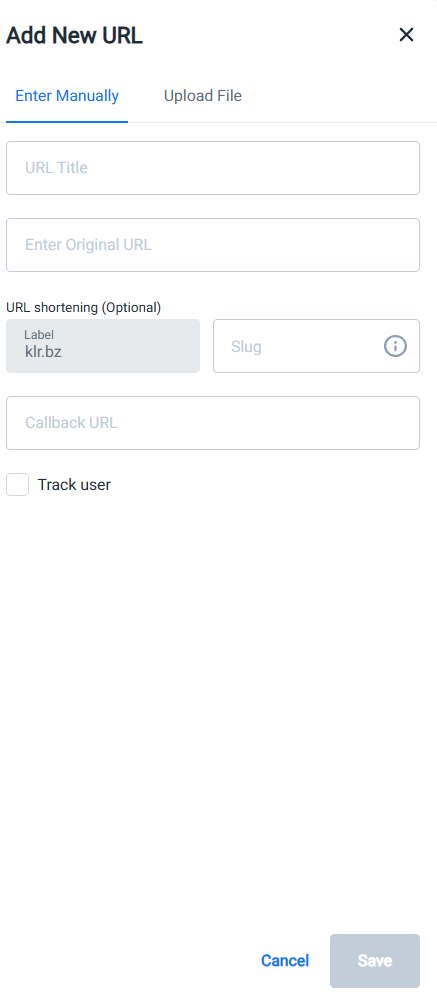
Note:For more information on how to Add New URL and Upload File, see Add URL or Upload File to Short URL.
- SMS Route - Select the SMS Route type from the drop-down list. The supported route types are Marketing (MKT) and Transactional (TXN) for India region.
- Template ID - The DLT template ID used to send the message. This option is required only for accounts with Registration Country set to India.
- Reply Type - Select the Reply Type as Instant Reply or Scheduled Reply.
- Instant Reply - Select Instant Reply to receive an immediate response for the SMS message.
- Scheduled Reply - Select the date and time from the Calander. The date format is
YYYY-MM-DDand the time format isHH-MM-SSFor example,2025-04-17 18:35:20.
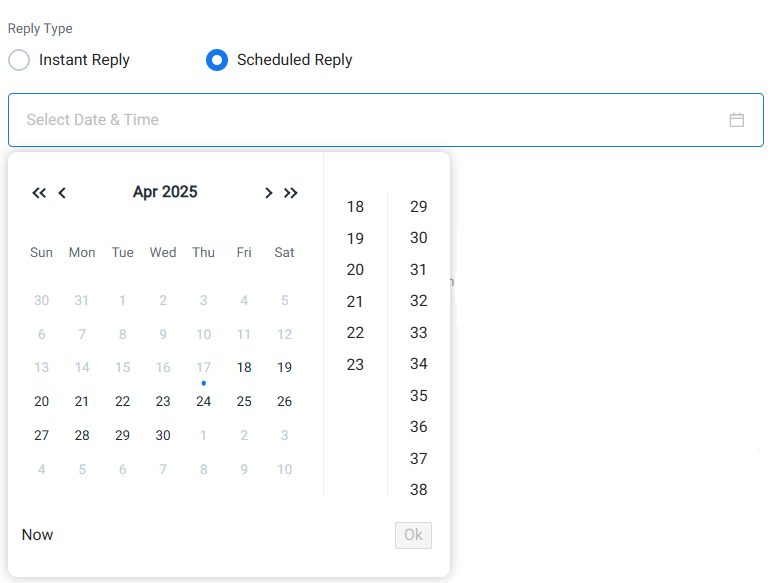
Note:You can select current and future date and time.
Forward
- Select the Forward toggle button where the SMS sent will be forwarded along with end user’s phone number.
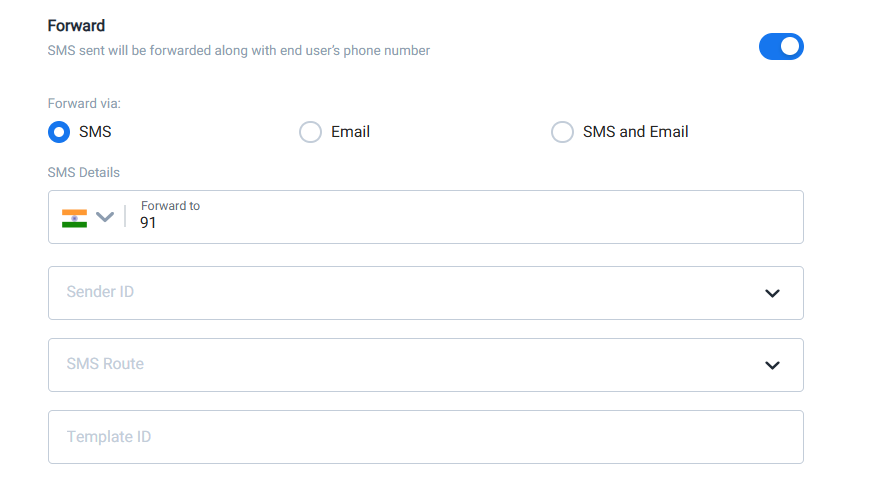
Note:By default, the SMS option will be selected.
You can forward the message using the following options.
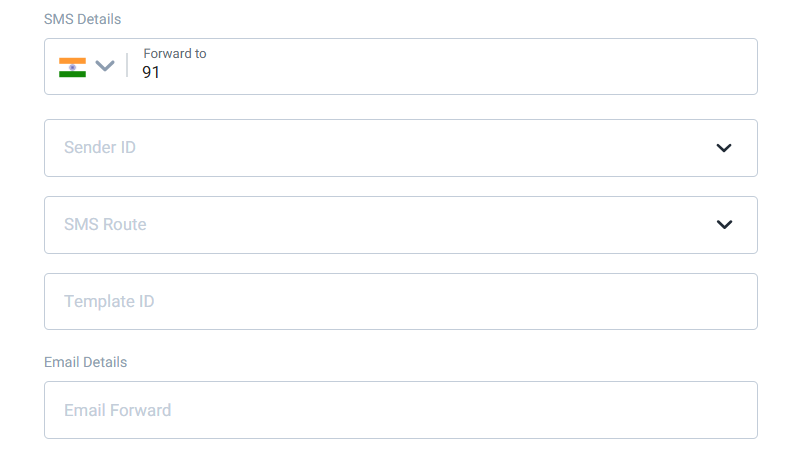
a. SMS - Select SMS option to view the SMS Details section.
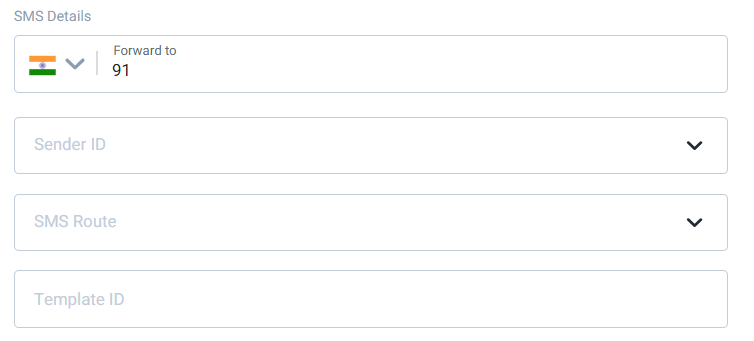
The SMS Details section has the following fields:
- Forward to - Specifies the mobile number you want to forward to.
- Sender ID - Select the Sender ID from the drop-down list. For more information on how to create a Sender ID, see Create a Sender ID page.
- SMS Route - Select the SMS Route type from the drop-down list. The supported route types are Marketing (MKT) and Transactional (TXN) for India region.
- Template ID - The DLT template ID used to send the message. This option is required only for accounts with Registration Country set to India.
b. Email - Select Email option to view the Email Details section.

The Email Details section has the following field:
- Email Forward - Enter the email address you want to forward. For example, [email protected].
c. SMS and Email - Select SMS and Emailoption to forward the received message both to a mobile number via SMS and to an email address of your choice.
Note:For more information on the SMS Details and Email Details fields description, see point 8 (a and b), respectively.
Trigger URL
- Toggle the Trigger URL option to enable Trigger URL to have the incoming message sent to the specific URL with text and end-user phone number.
.
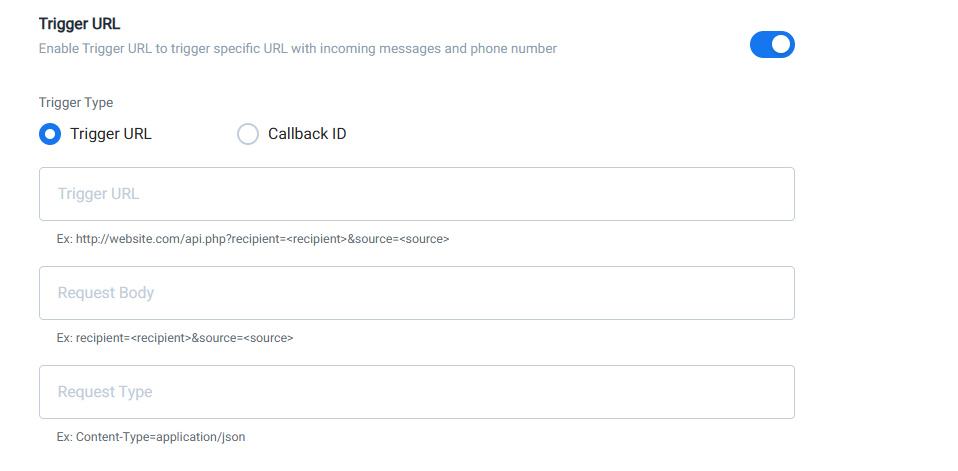
The Trigger URL has the following section:
Trigger Type - The Trigger Type is of two types: Trigger URL OR Callback ID.
a. Trigger URL - Specifies the trigger URL. For example, <http://website.com/api.php?recipient=<recipient>&source=<source> For more information, see Create Callback Profile for Incoming SMS Messages.
b. Request Body- Enter the request body for the POST and GET methods that includes the recipient and source of the end user. For example, recipient=<recipient>&source=<source>
c. Request Type- Specifies the request type for the content. For example, Content-Type=application/json
OR
Callback ID - Select this option, if you already have a callback profile created.
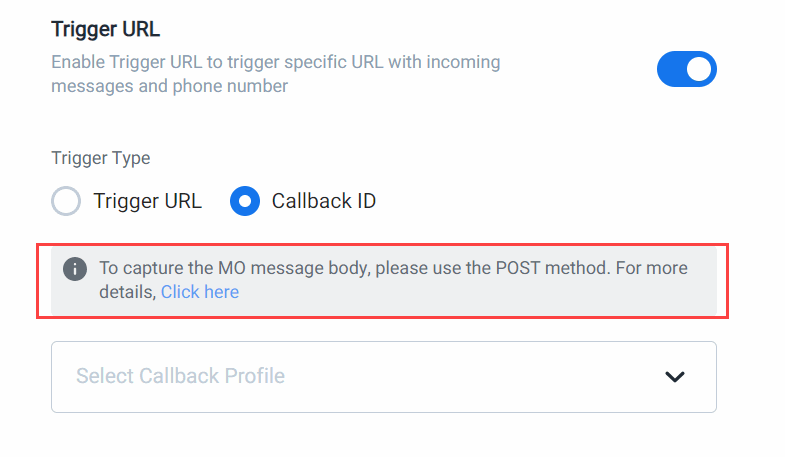
Note:Make sure to refer to a callback ID created for the POST method to capture the MO message body.
For more information on how to create callback profiles, see Callback Profiles
Subscribe
Select Subscribe toggle button to set the VMN with the specified keyword as subscribe configuration. A recipient will still receive messages if that number is utilized in a campaign even if it is not subscribed or unsubscribed. You only need to provide the brand with the option to collect explicit subscription or unsubscription, but it is up to the brand to use this information.
Unsubscribe
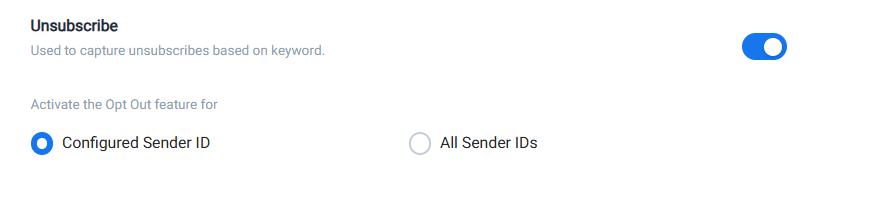
Select Unsubscribe toggle button to set the VMN with the specified keyword as unsubscribe configuration. The Unsubscribed end-user will not receive any more messages from either the configured sender ID or from all sender ID according to your configuration.
Note:
- You can select eitherConfigured Sender ID or All Sender IDs toggle options in a single configuration.
- If the Configured Sender ID option is selected, then the unsubscribe action applies only to the specific Sender ID(s) that you have explicitly configured in your system.
- If All Sender IDs option is selected, then the unsubscribe action applies to all Sender IDs associated with your account or service.
- Click Saveto save your changes.
- Click Cancel. A confirmation message Are you sure you want to close the form? appears.
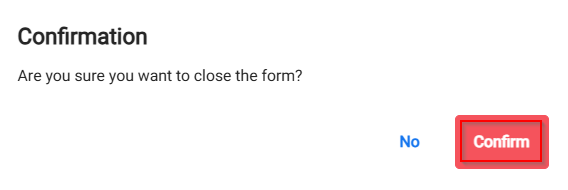
- Click Confirmto be redirected to the Receive Message page.
- Click No to remain on the New Configuration page.
Note:
- The forwarded SMS messages are listed on the Channels > SMS > Analytics page.
- Based on the keyword and the actions that you have defined on the configuration page for a VMN, it is up to the brand to use this information to provide or not to provide t
Updated 2 months ago