Send SMS through Campaign Canvas
You can send an SMS through Campaign Canvas from the ORACLE Eloqua application.
To send an SMS through Campaign Canvas, perform the following steps:
- Login to ORACLE Eloqua account.
- Select Campaigns from the ORACLE Eloqua menu bar and then click Create a Multi-Step Campaign. The Template Chooser page appears.
- Select Blank Campaign and then click Choose button. A blank page appears where you can drag and drop elements to start building your campaign.
Notes:
- To test a trial account, create a segment with just one number added. This should be the same number that you have registered on Kaleyra.io.
- If you have completed KYC and registered your Sender ID, then you can choose a segment of your choice and build the steps as required.
- Add Kaleyra Send SMS action to the canvas.
- Click Kaleyra Send SMS action and right-click Configure to create the content of your message.
Note:If you have logged out from Configuration page and want to login again. Click the Edit option. You can login to Kaleyra page either by entering the username and password OR by entering API key and SID. For more information, see View API Key and SID page.
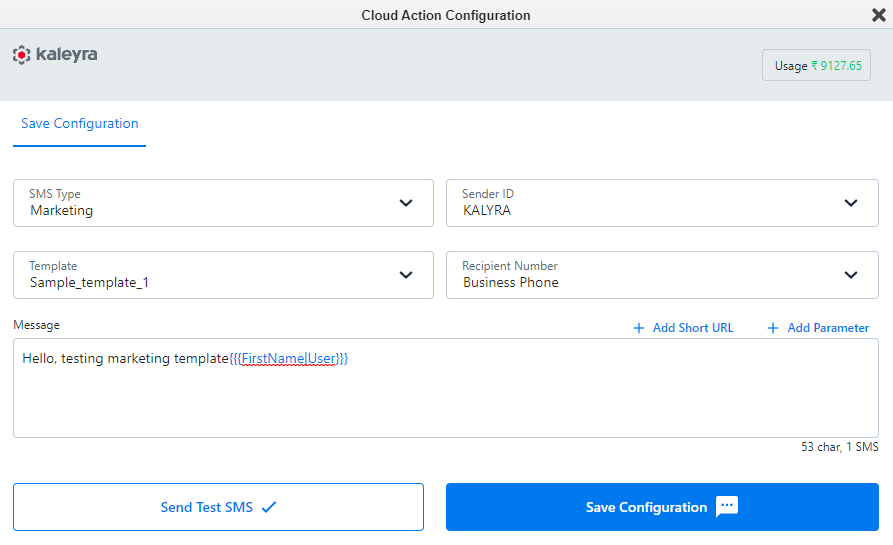
The Cloud Action Configuration page appears.
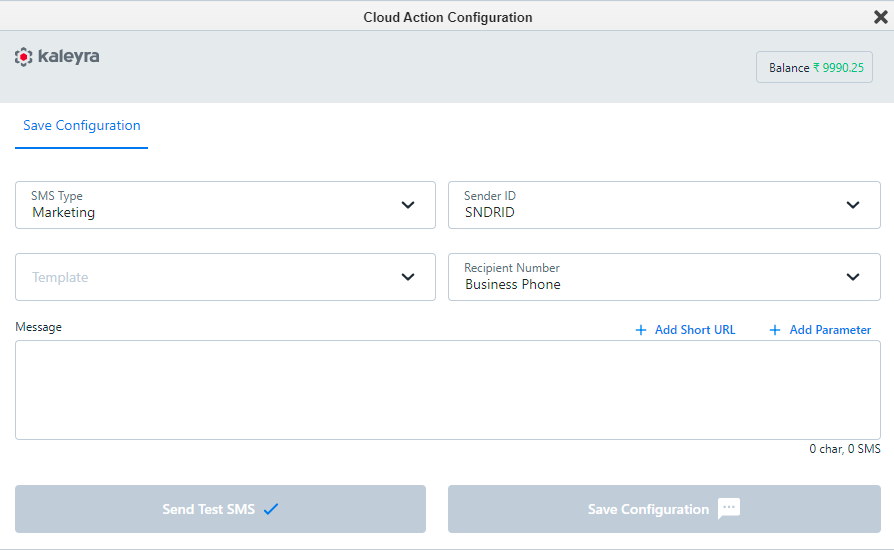
Perform the following actions:
- SMS Type - You can choose SMS Type as OTP, Marketing, or Transactional depending on the regulations of their country.
- Sender ID - Specifies the approved Sender ID.
- Template - Select from a list of pre-registered templates.
- Recipient Number - Supports two types of recipient phone number fields - Business Phone and Mobile. Select as required.
- Message - You can compose a message in multiple ways:
- Use static message content through a template or compose a message directly.
- Insert dynamic parameters to your message content using the Add Parameter feature.
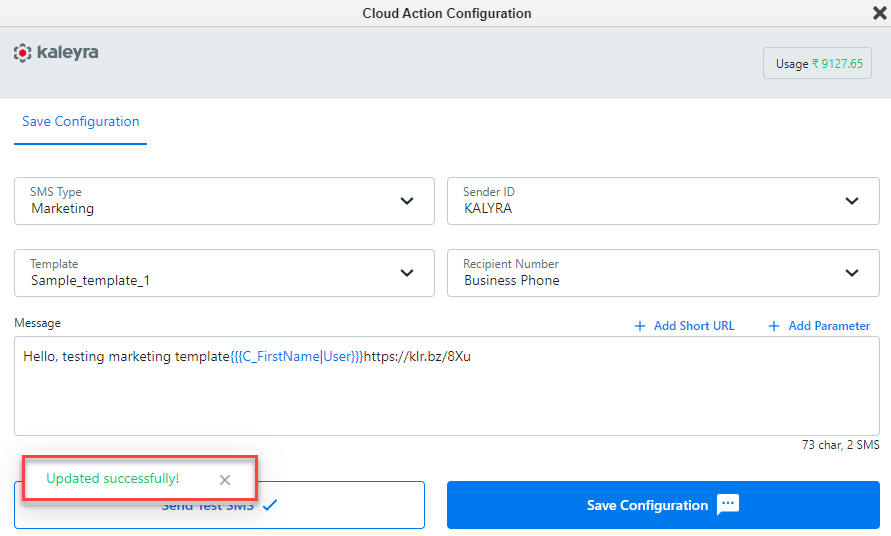
- +Add Short URL
i. Click on the + icon OR Add Short URL link.
ii. Click {#AddURL#}. The Parameter Data Type section appears.
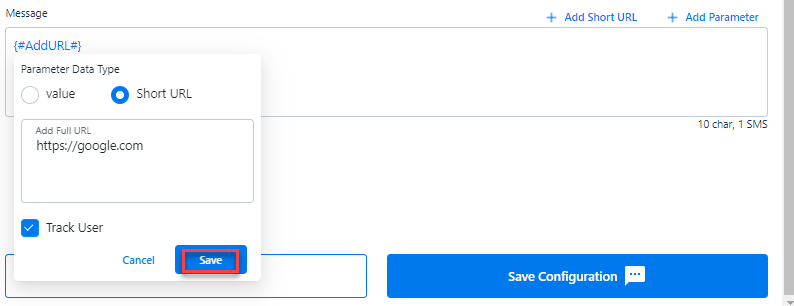
iii. Select Short URL option and enter the URL in the Add Full URL field.
iv. Track User - you can find "{kadvanced}" at the end of the URL in the Message field, if the tracker user option is enabled then click Save.
The updated URL will be displayed as a short URL in the Message field.
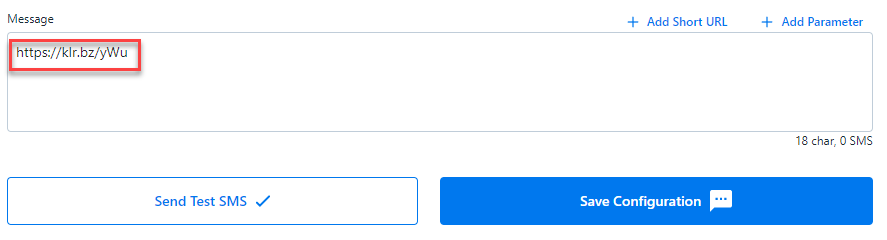
Note:Ensure you add HTTPs.
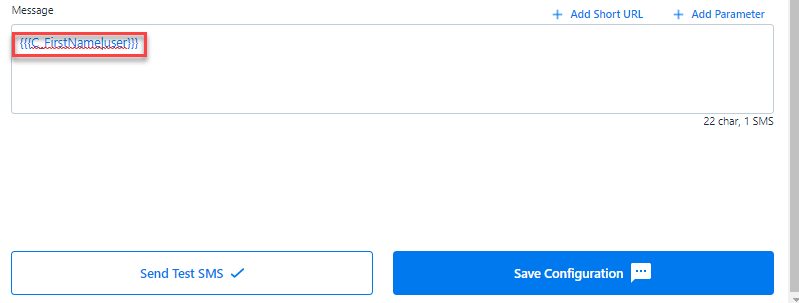
- + Add Parameter
i. Click on the + icon OR Add Parameter link. The Add parameter consists of three open and close curly braces {{{}}}.
ii. Click curly braces {{{}}}. The Parameter Data Type section appears.
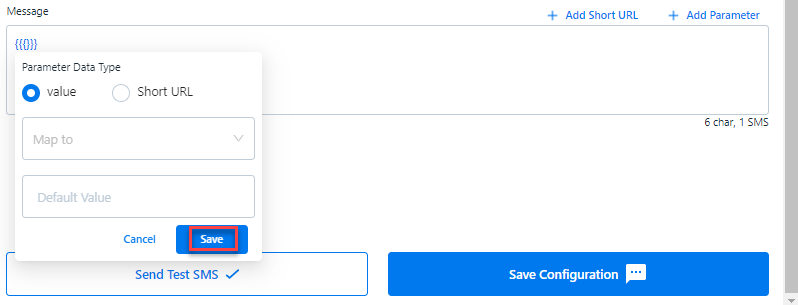
iii. Select value option and then click the arrow next to Map to field to view the list. Supported fields are Contact Personalization and CDO Personalization.
iv. Default Value - Enter the default value and click Save.
The added parameter will be displayed in the Message field.
Note:If the added parameter has no value, then it will return to the Default Value in the Parameter Data Type section.
- Click Send Test SMS to send a test SMS message to a number.
- Click Save Configuration . The "Updated successfully!" message appears.
- Verify and activate the campaign to trigger.
Updated about 1 year ago