Configure Kaleyra.io WhatsApp on WebEngage
To configure the Kaleyra WhatsApp on WebEngage, perform the following steps:
- Login to WebEngage account.
- On the left navigation bar, click Data Platform.
The Integrations, Data Management, and Upload Data options appear.
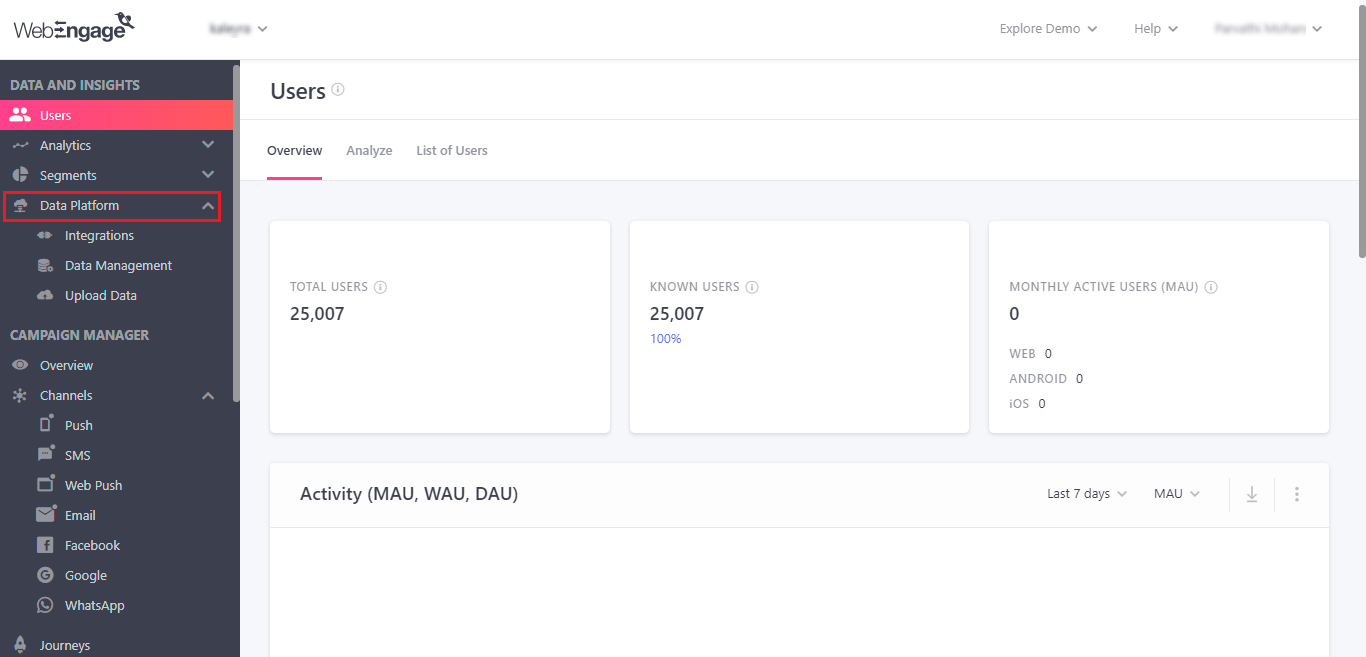
- Click Integration.
The Integrations Status page appears.
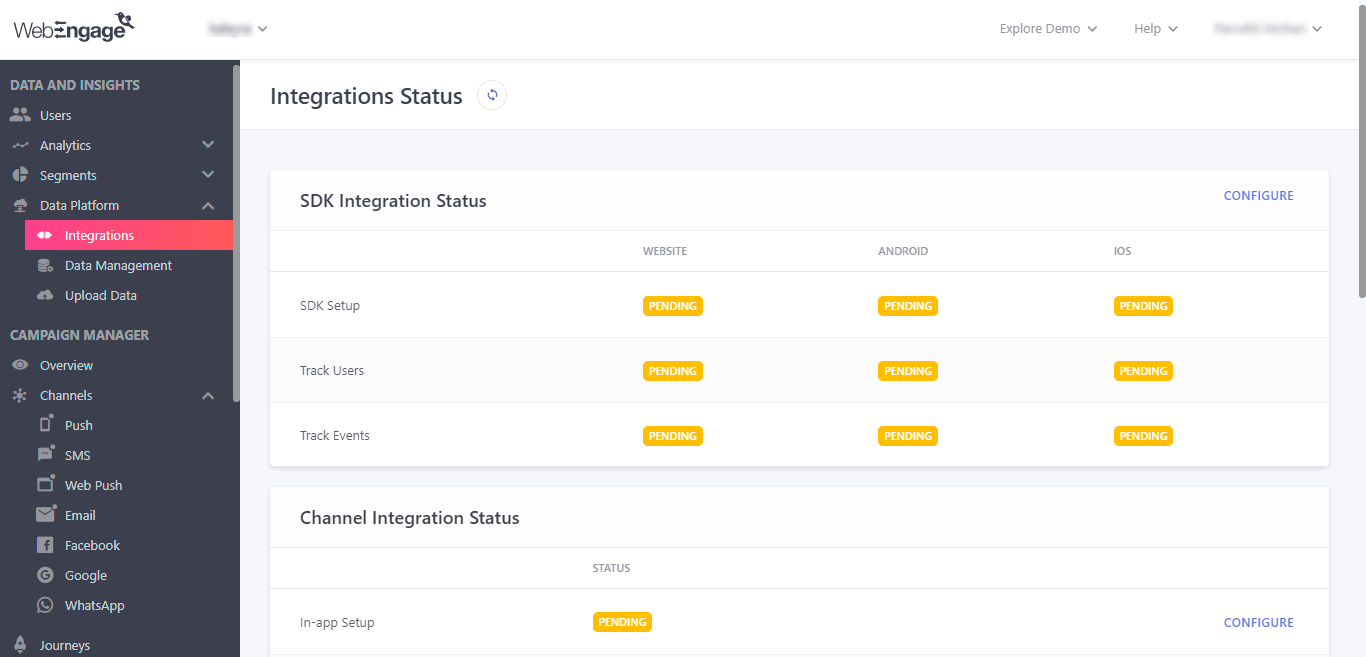
- In the Channel Integration Status section, click Configure next to WhatsApp Setup.
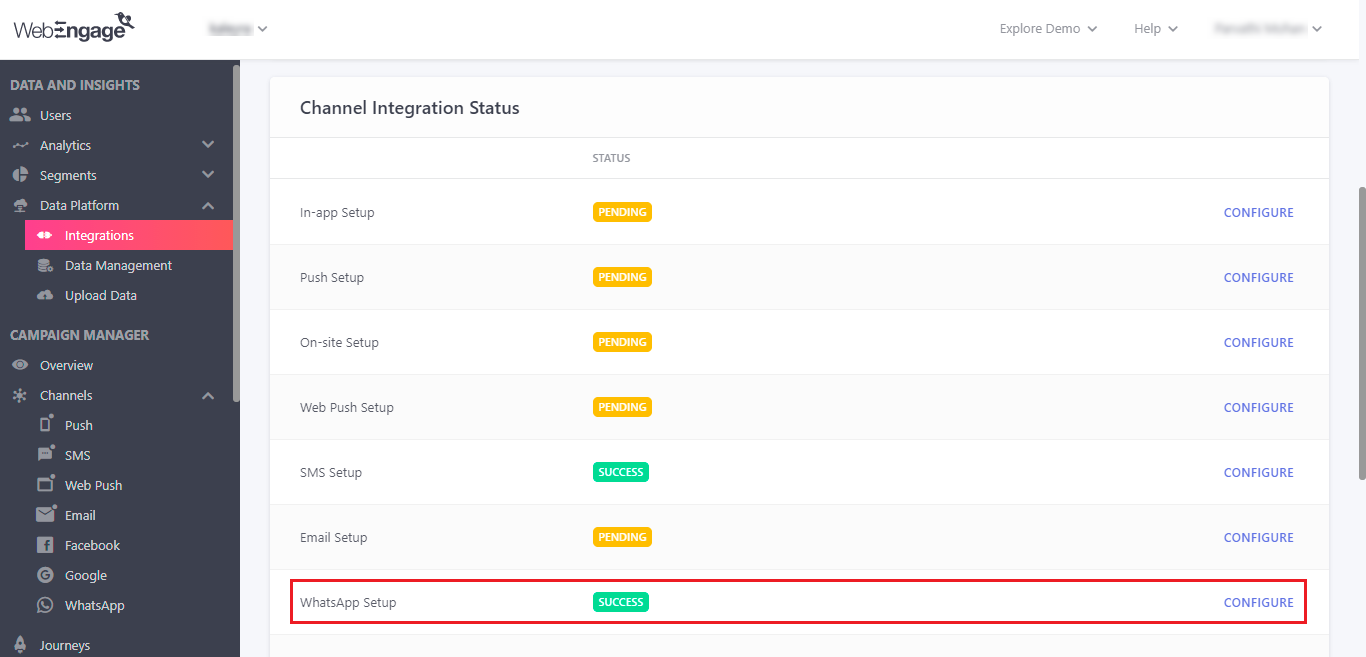
The Channels page appears.

- In the Available WhatsApp Service Providers (WSP) section, click Kaleyra to configure your WSP.
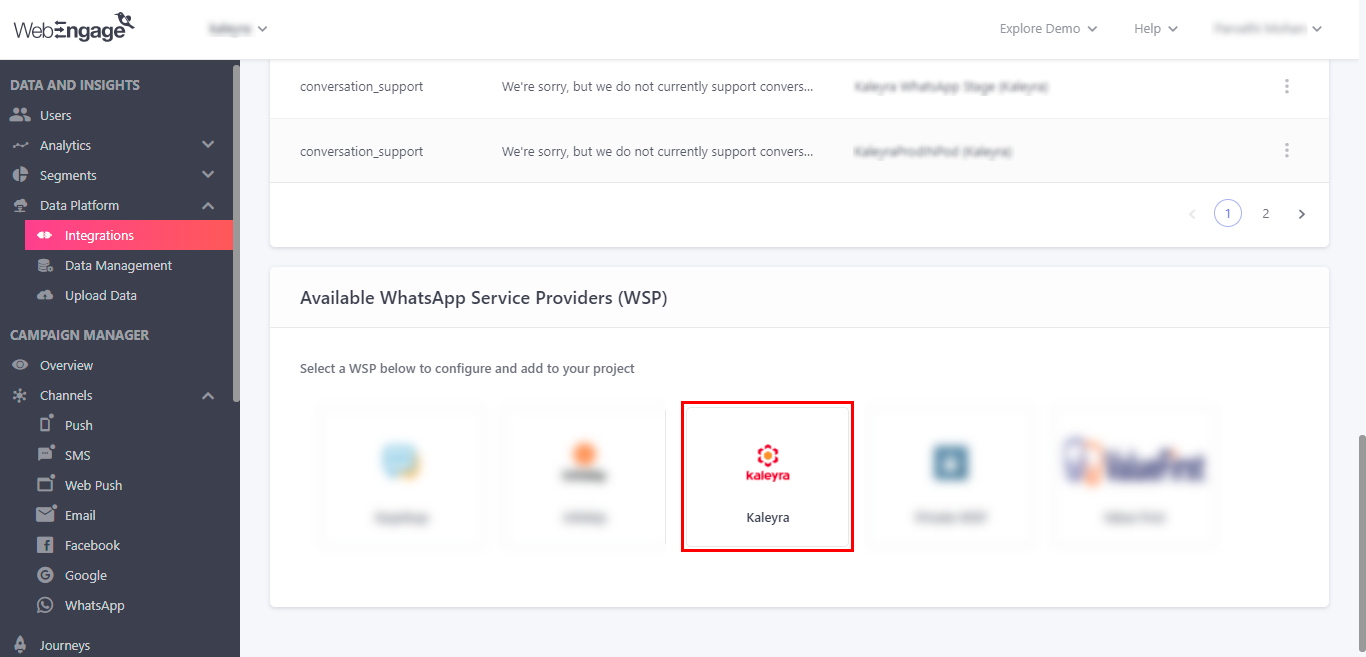
The Add WhatsApp Service Provider (WSP) page appears.
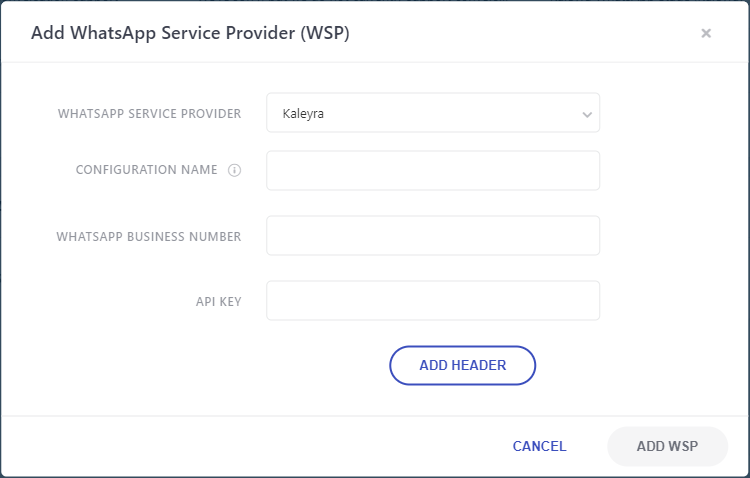
- The Add WhatsApp Service Provider (WSP) page has the following options:
a) CONFIGURATION NAME - Enter the WSP configuration name you wish to provide.
Note:You can enter the configuration name which can help you in identifying the WhatsApp account on WebEngage.
b) WHATSAPP BUSINESS NUMBER - Enter your WhatsApp business number from your Kaleyra account.
Notes:
- To get the active WhatsApp number, login into your Kaleyra account, navigate to Channels, WhatsApp Manage, and then the Configuration tab. Use the WhatsApp number that you want to use to configure for WSP.
- Do not leave any space in between the WhatsApp business number.
c) API KEY - Enter the API key from your Kaleyra account. For more information on how to view API Key, see View API Key and SID.
- Click ADD HEADER.
The Custom Headers fields appear.
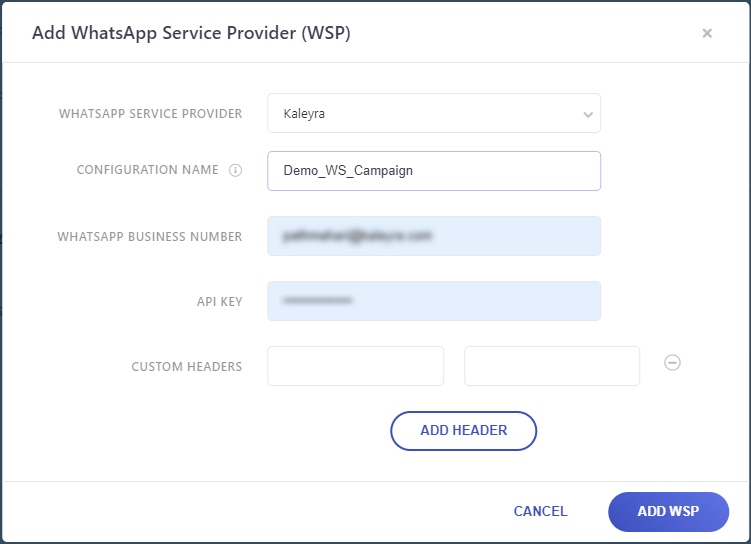
Note:You need to enter the parameter and its details in the CUSTOM HEADERS section. For more information about API Key, SID, and API Domain see the API Details section of the View API Key and SID page.
- Enter the following parameters information:
- sid - As the key and the SID details associated with your account as the value.
- kaleyra-host - As the key and the API base URL details associated with your account as the value. For example,
https://api.kaleyra.io
- Click Add WSP.
A confirmation message appears.
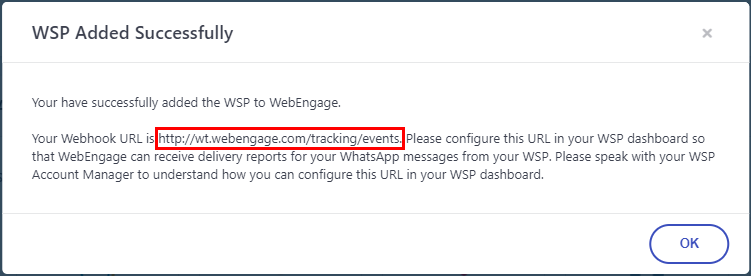
- Copy the Webhook URL for your WSP profile.
Note:The existing user can view the Webhook URL from the configured WSP profile, in the Your WhatsApp Service Provider (WSP) List section from the Action column, click the ellipsis, and then click View Webhook URL.
- In the Your WhatsApp Service Provider (WSP) List section, from the Action column, click the ellipsis next to your configured WSP, and select Edit.
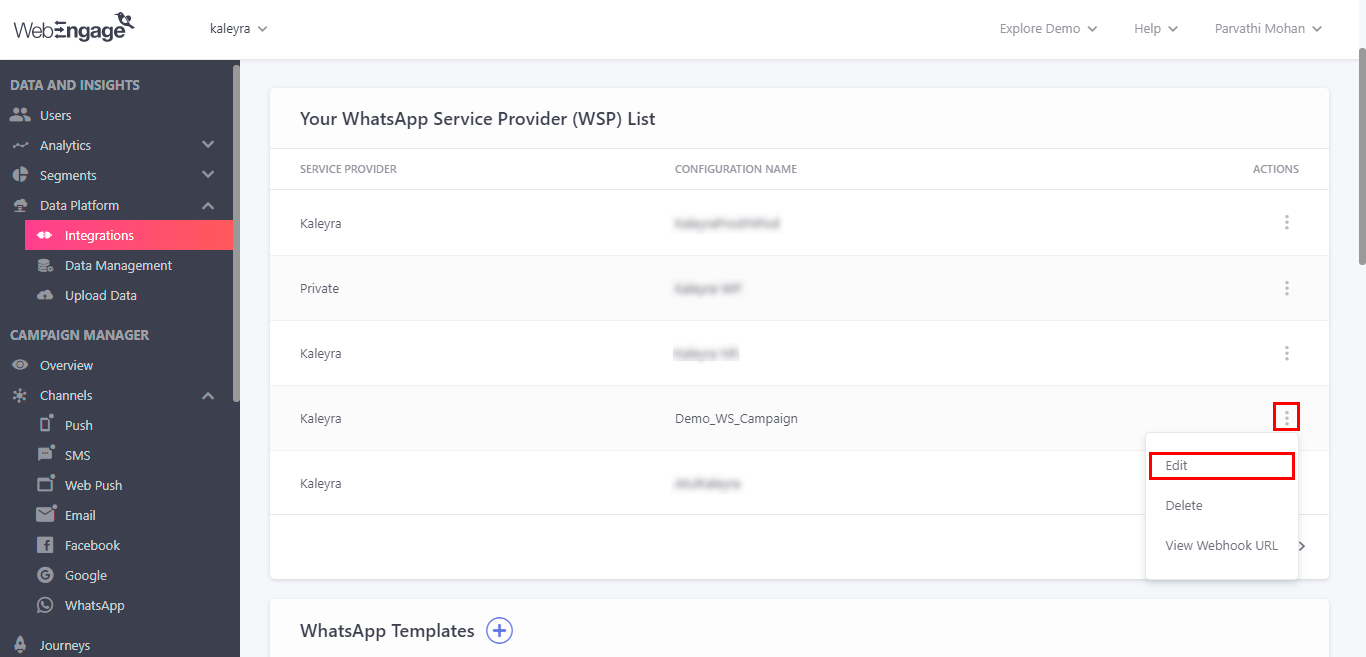
The Edit WhatsApp Service Provider (WSP) page appears.
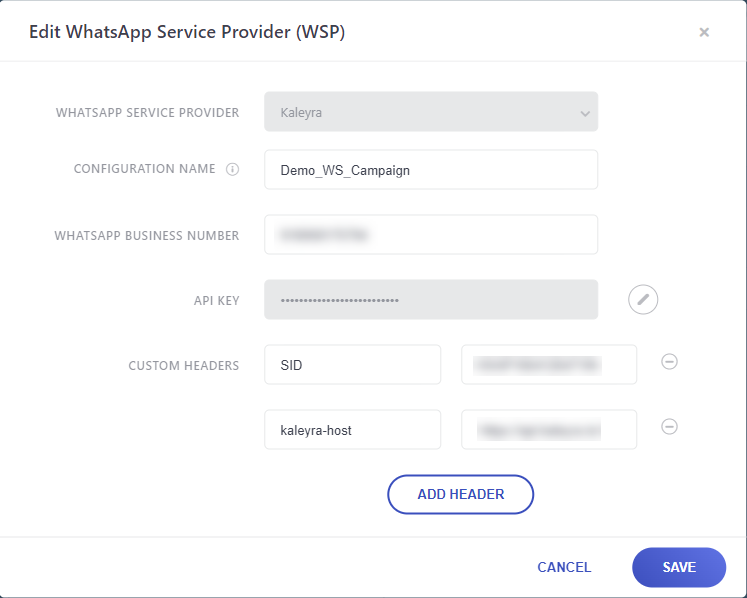
- Click Add Header.
A new header field appears.
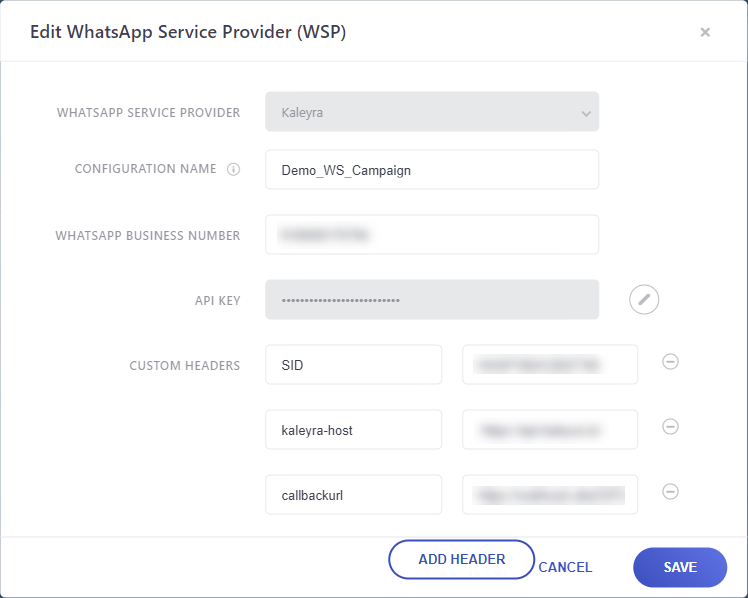
- In the first field, enter callbackurl, and then paste the Webhook URL that was copied earlier.
- Click Save. A confirmation message appears.
Updated about 1 year ago