Voting
The Voting template enables you to collect the votes and keep a running count based on keywords or message text after the keyword in a single MO. Voting helps you get opinions and engage mobile users with simple and easy steps.
There are following two types of voting:
- Voting By Keyword - A keyword needs to be set up for each voting option.
- Voting By Answer - One keyword is set up and votes are taken by the text. For example, KEYWORD VOTE. This option is best when there are many categories available for voting.
How does voting work?
A voting program has to assign to a parent campaign with other settings, for example, the start and end dates. You need to select the short code to which mobile users send their messages and the list to manage participants of the program.
For the Voting by Answer type, enter at least one keyword. For the Voting by Keyword type, enter a keyword for each voting option, which will be used to tally votes. You have the option to add more keywords.
To set up voting, perform the following steps:
- Log in to the Communicate Pro account.
The communicate pro home page appears.
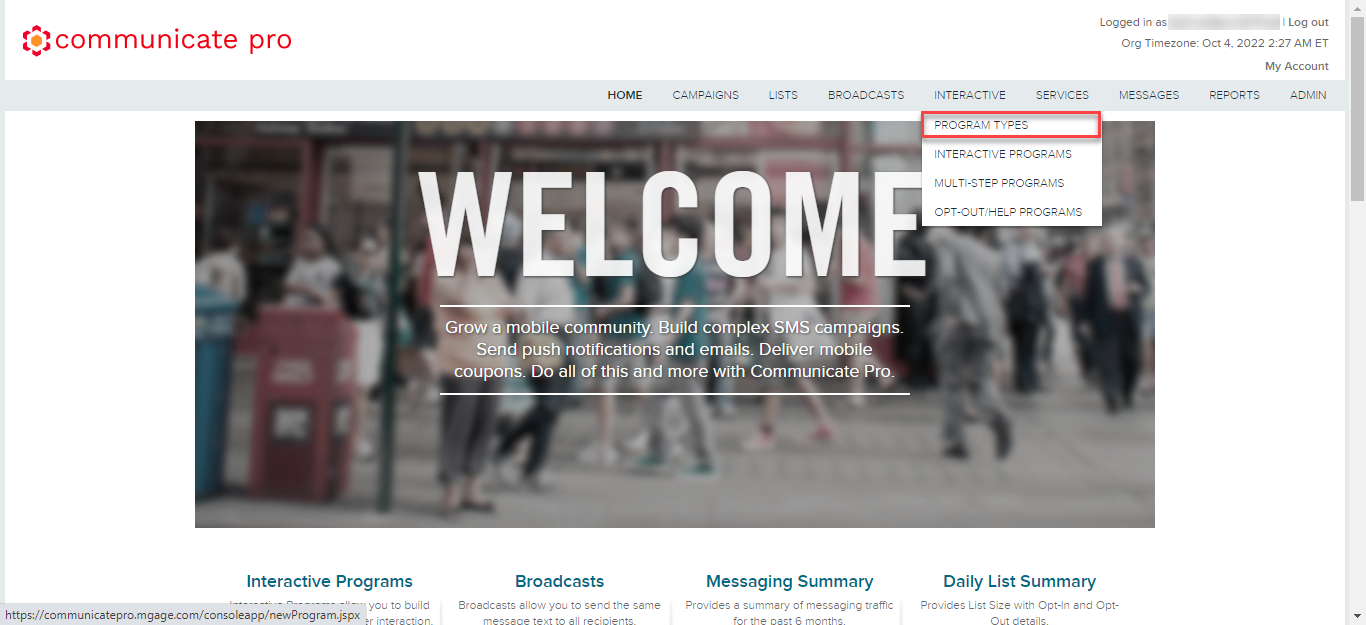
- From the top menu bar, hover over INTERACTIVE, and then select PROGRAM TYPES.
The Interactive Programs page appears.
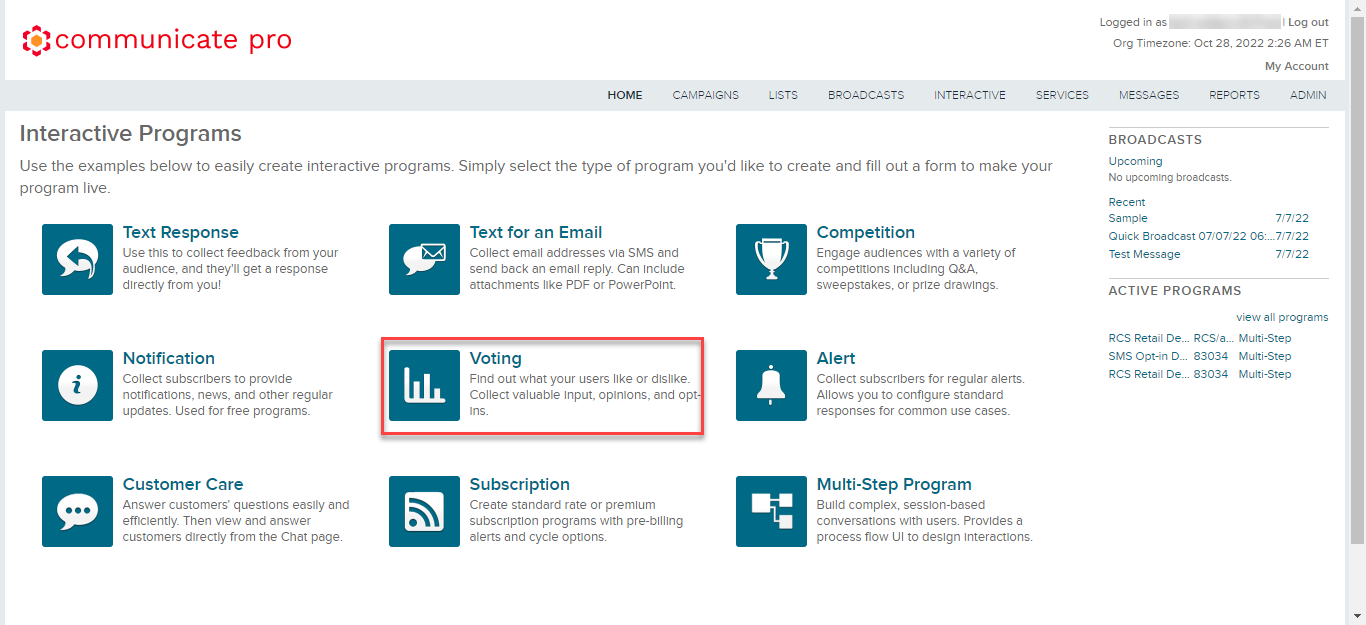
- Click Voting.
The Voting page appears.
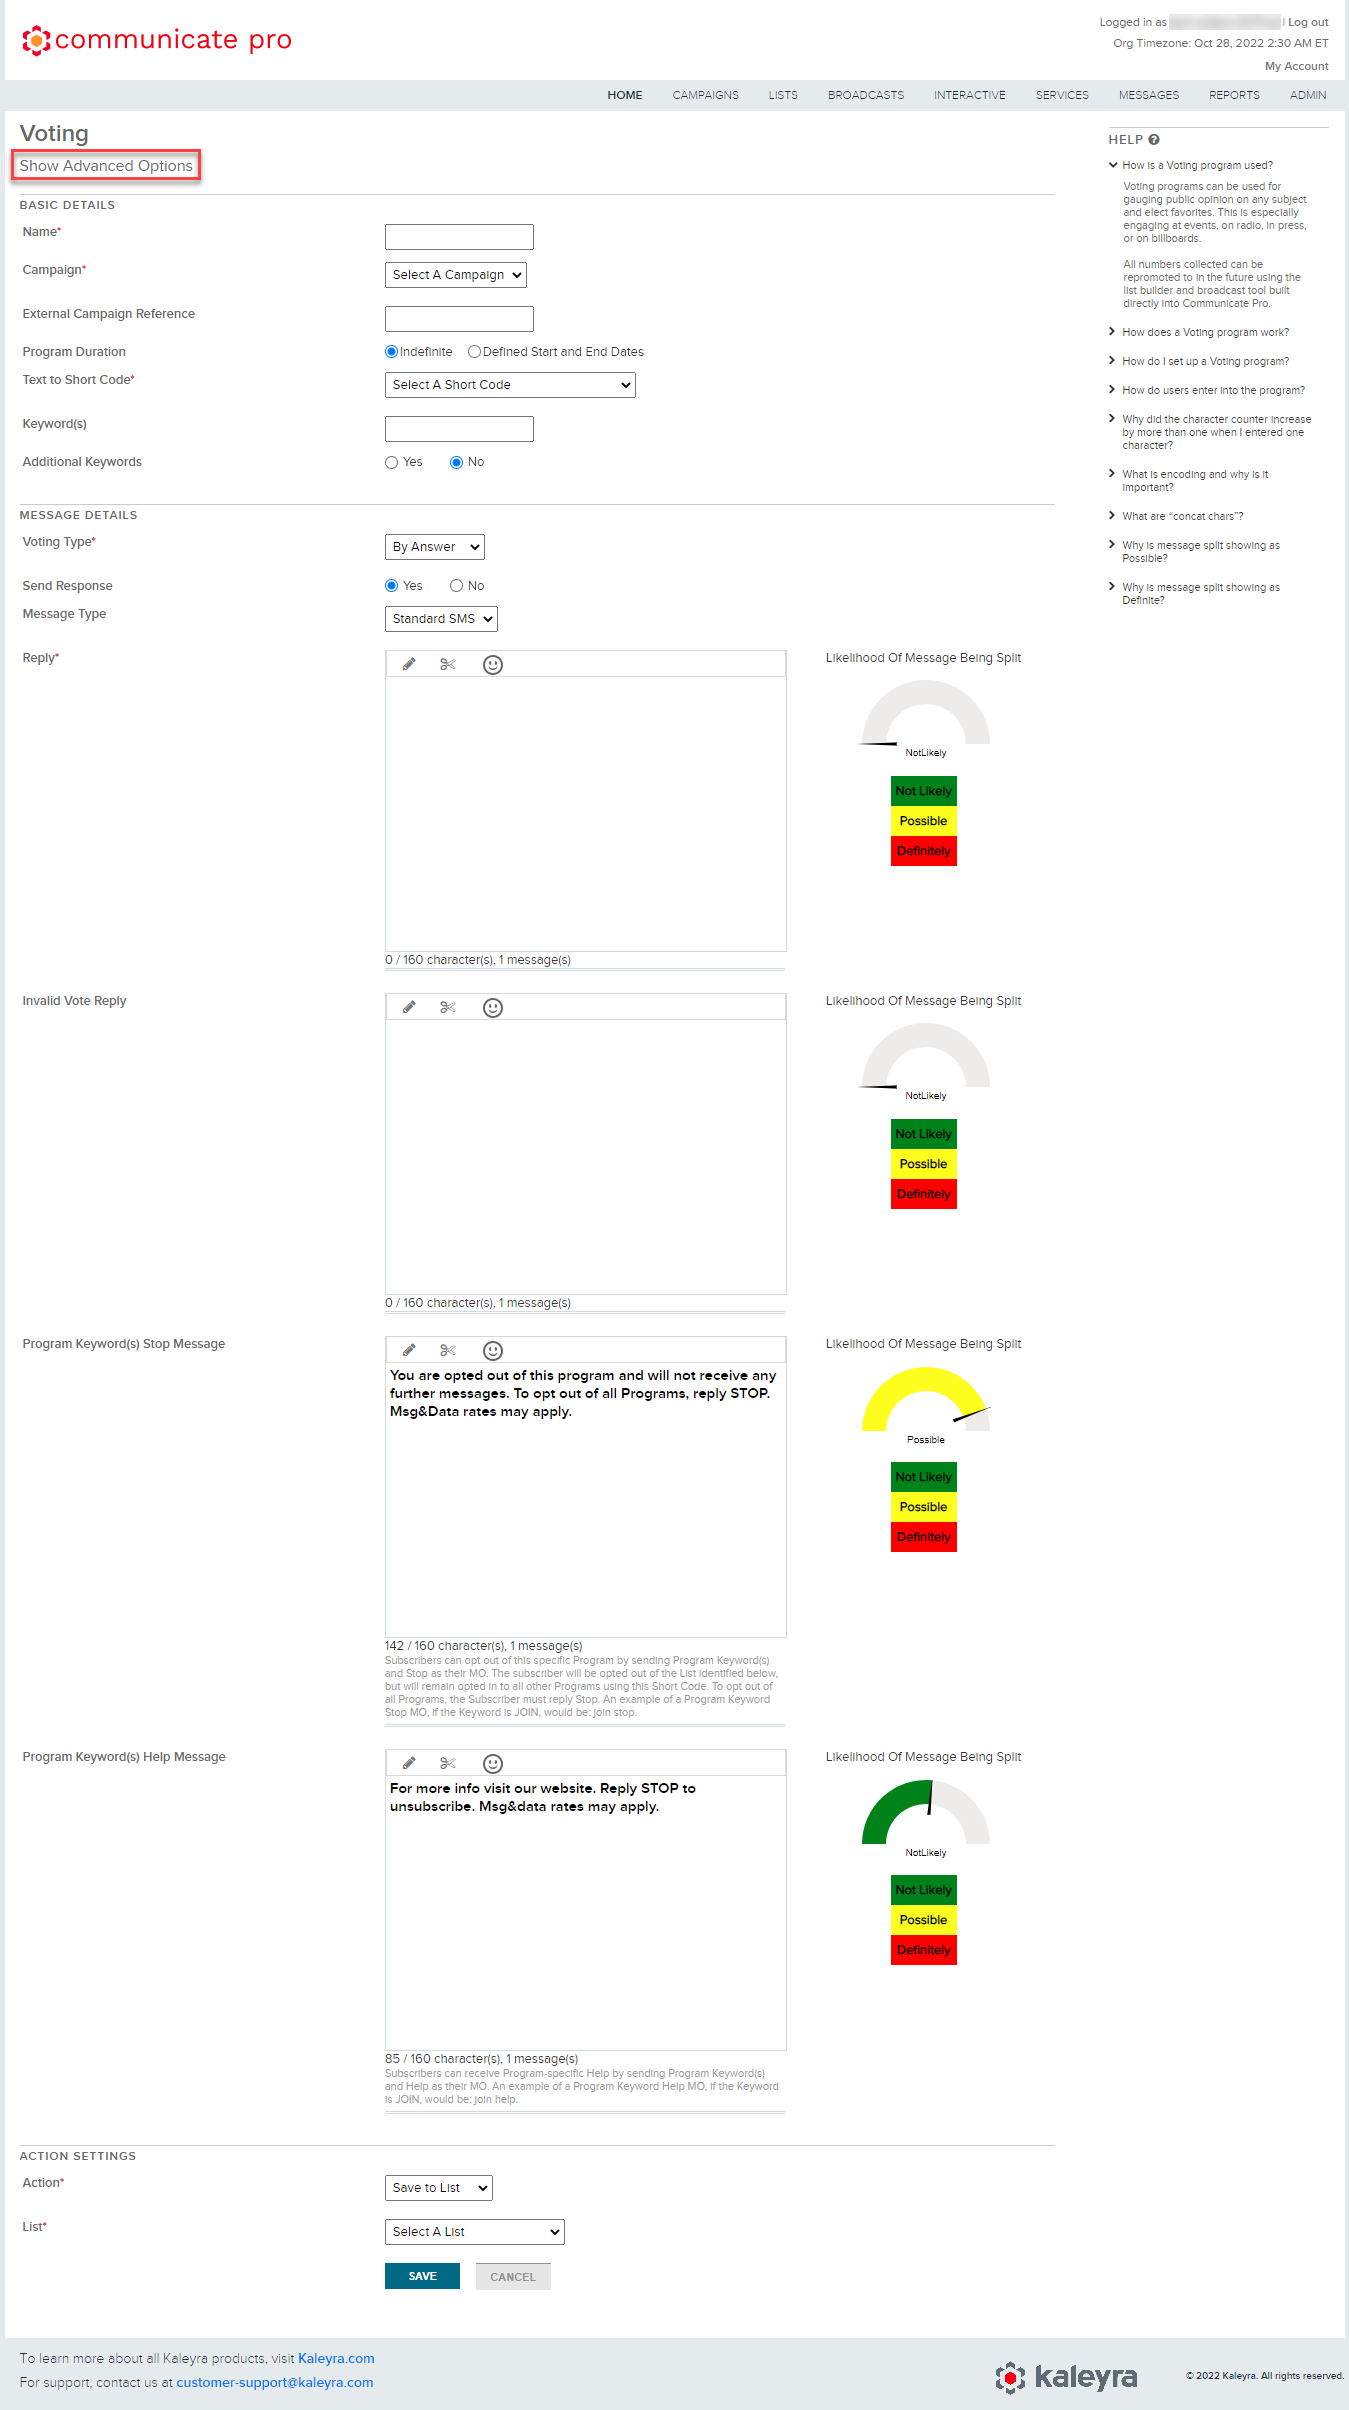
- Click Show Advanced Options to view advanced options.
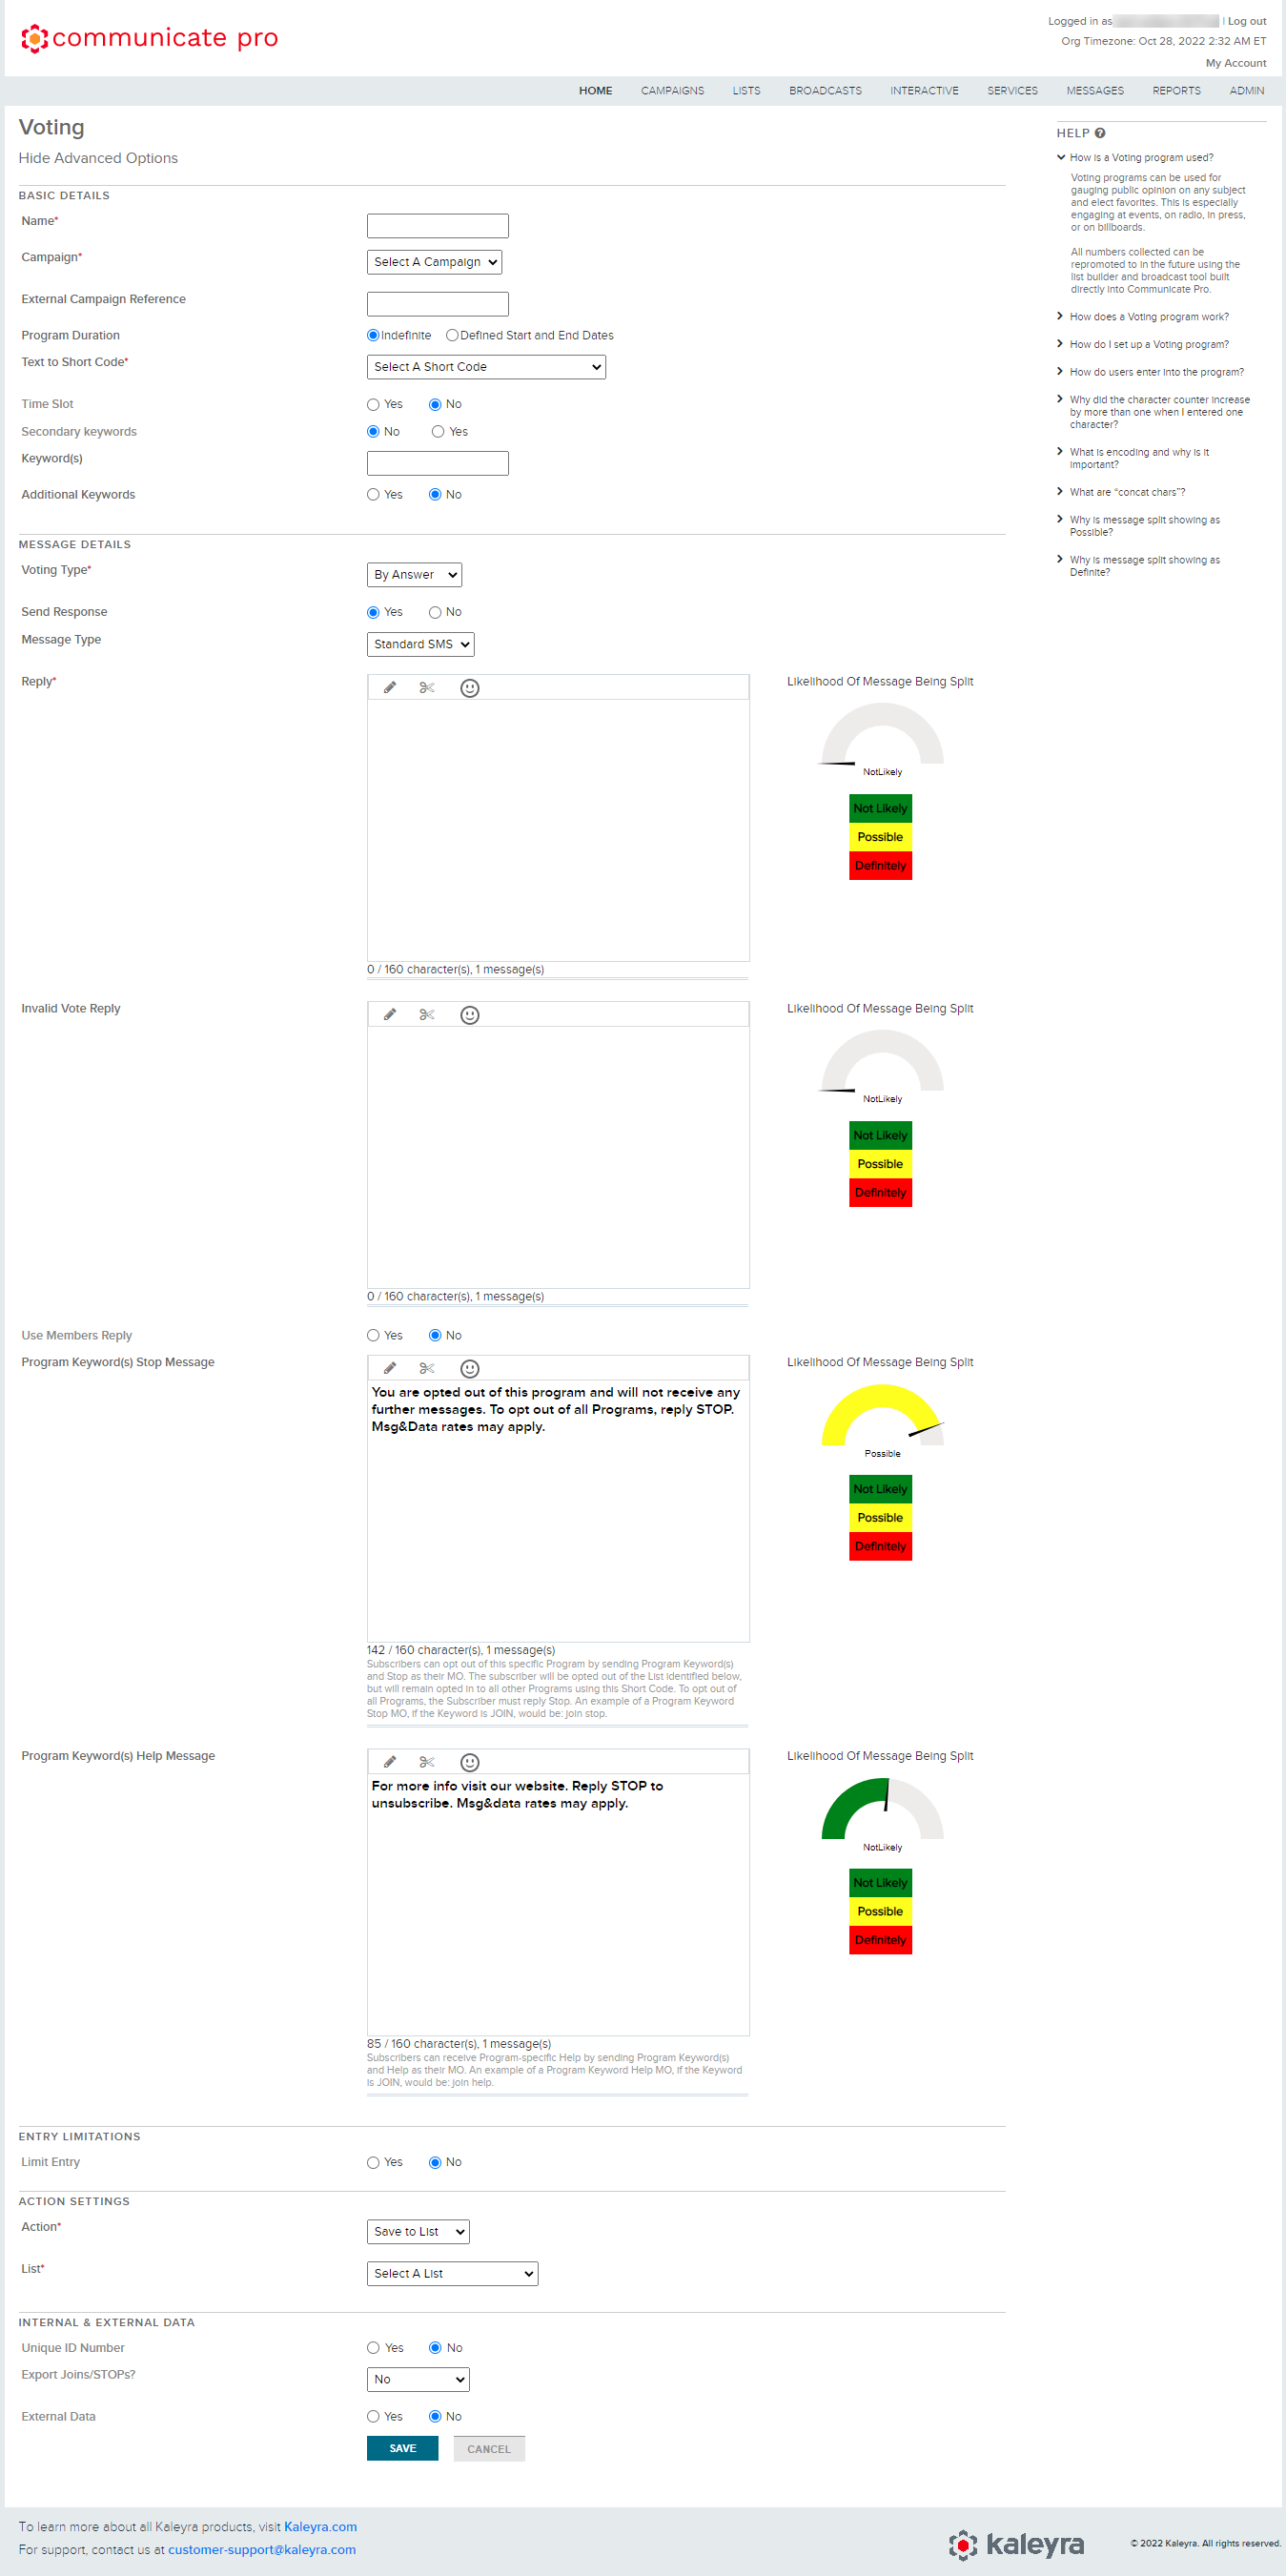
The advanced options field appears.
-
In the BASIC DETAILS section, perform the following steps:
- In the Name field, enter a name for the voting program.
- Click the arrow next to the Campaigns field, a list of options appears, select a campaign.
- (Optional) In the External Campaign Reference field, enter the external campaign reference.
- (Optional) The duration enables your messengers during which they can interact with the program. From the Program Duration option, select any one of the following:
- (Default) Indefinite - To keep the text response active for an indefinite time.
- Defined Start and End Dates - The start and end time are important to competitions as they define defines the window during which entries will be accepted. After the end time, the winner pool will be considered complete and the winner selection feature will become available. In the Start Time & Date fields, enter the time and start date. In the End Time & Date fields, enter the time and end date.
- Click the arrow next to the Text to Short Code field, and a list of options appears, select the text to short code for the text response.
- From the Time Slot option, select one of the following:
- Yes - To define the time interval when the competition is in the active stage. Enter the time from and to with the correct format when the competition will be active.
- (Default) No - Not to define a time slot when the competition will be inactive.
- From the Secondary keywords option, the default is No, select Yes, if you want to add a secondary keyword for the competition. The secondary keywords provide you with an option to use them as the secondary keywords for the competitions.
- In the Keyword(s) field, enter the keywords that will help you in sending the short code to your user based on these keywords. Based on your selection of Secondary keywords, an additional field is available for secondary keywords.
- If you want to add additional keywords for a text response, from the Additional Keywords option, select Yes, and enter the keywords in the box that will help you in sending the short code to your user based on these keywords.
-
In the MESSAGE DETAILS section, perform the following steps:
1.
Updated 12 months ago