Complete the Know Your Customer (KYC) Procedure
Enter your KYC details
Know Your Customer (KYC)
Know Your Customer (KYC) is a mandatory verification procedure to identify and validate the customer’s business transaction details. Every business that deals with financial transactions must follow the KYC procedure for its future customers. In order to be compliant with the applicable guidelines to start providing the telecommunication services, Kaleyra conducts a ground-level KYC verification procedure.
The Preferences page of the Kaleyra.io application captures the KYC details from the customers. The KYC details include all the necessary information and the necessary documents (for Indian customers) that help the Kaleyra Operations team to verify that the customers’ company identity details are valid.
Complete the KYC procedure
After successfully creating an account on Kaleyra.io, you must complete the KYC procedure in order to start using any of the channel services fully. Without completing the KYC verification, you will have only limited access to the features available on the platform.
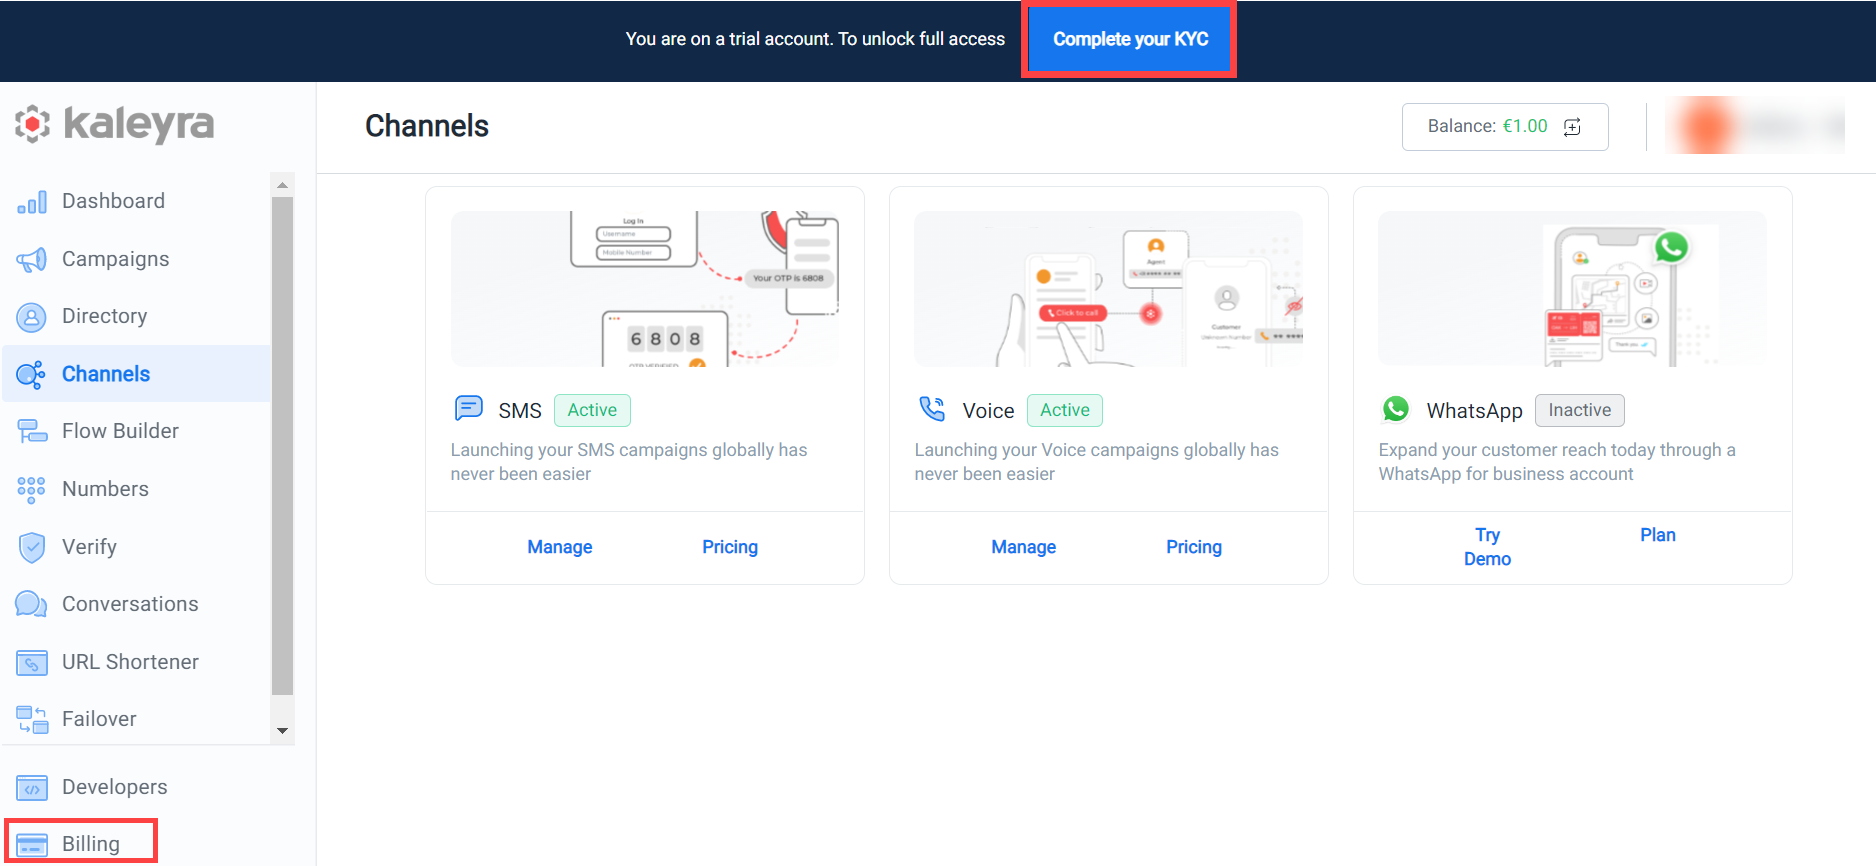
Until you complete the KYC process, the Kaleyra.io application shows a message prompting you to complete it as shown. You will also receive an email that reminds you to take the necessary steps for successful completion of the KYC procedure.

Note:The company details that you have to submit for the KYC procedure depend on the country that you have specified during the account registration on Kalyra.io.
To complete the KYC process:
- Log in to your Kaleyra.io account.
- Go to Billing and click the Preferences tab.
Or,
Alternatively, click the Complete your KYC button in the Kalyera.io application.
The Preferences page appears.
The fields on this page are as per the country that you have specified during the registration process.
A sample Preferences page is shown.
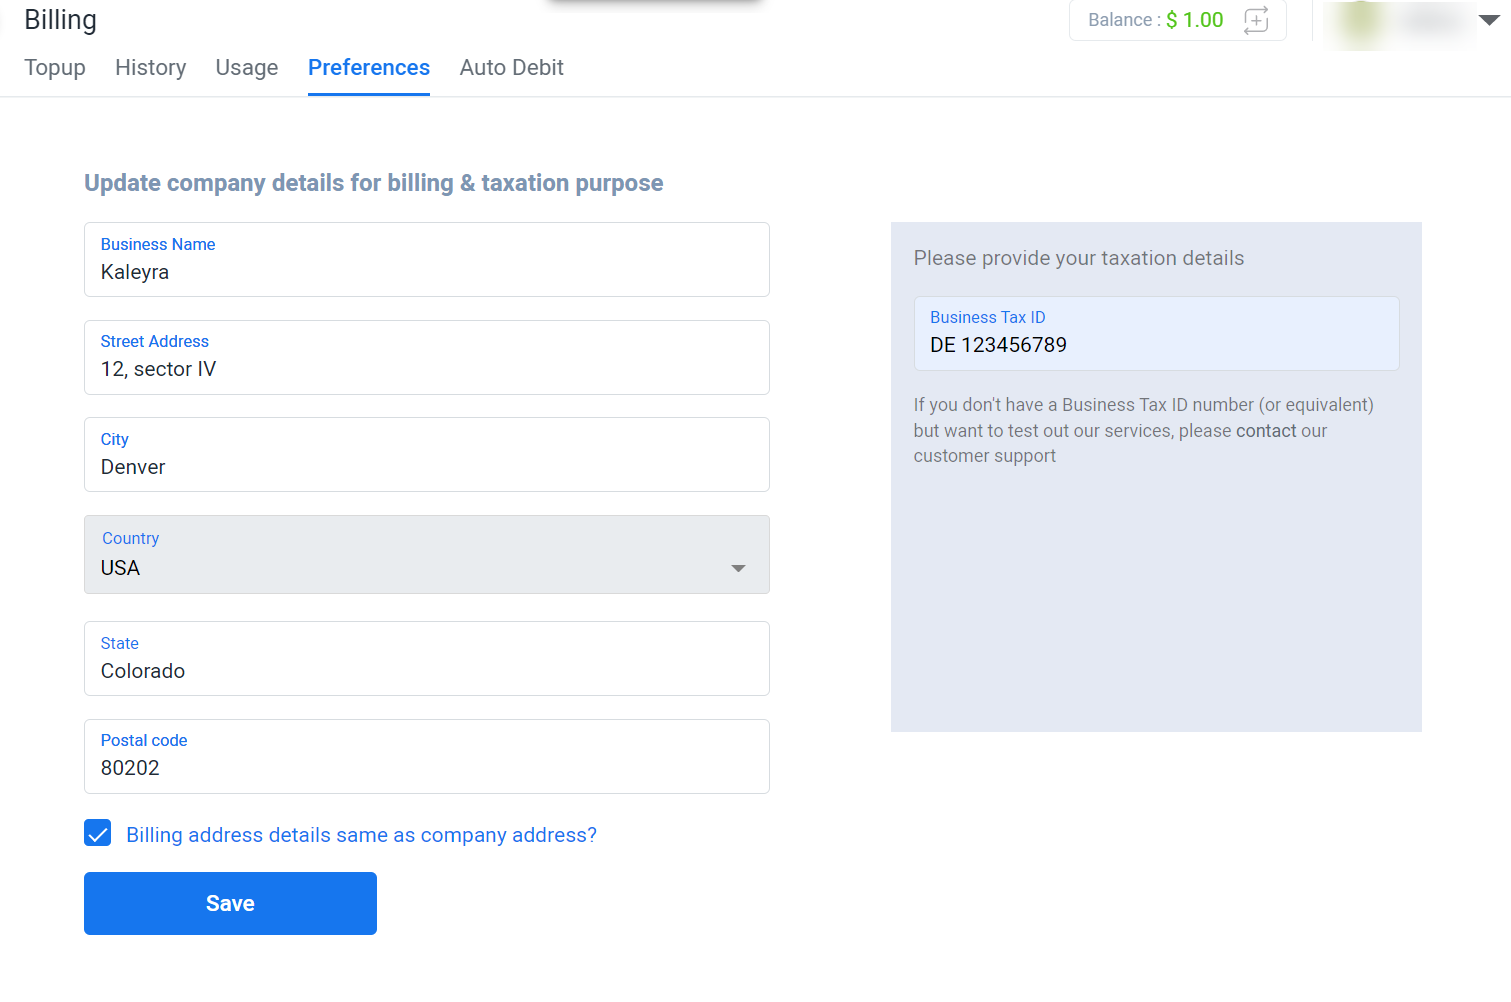
- Enter the values in the fields, Business Name, Address, City, State (if applicable), and Postal code.
The Country name that you have entered during registration appears in the Country field. - By default, the Billing address details same as company address? option is selected.
You can clear this option to update the new billing address. - Provide the relevant taxation details.
The fields to capture the relevant billing and taxation information vary as per the country that you have specified.
Note:
- If you are an Indian customer, upload the relevant KYC documents in the box provided. Also, enter the DLT Registered Information, if you want to tag the DLT ID to the account.
- Read the following sections for more details.
- Click Save.
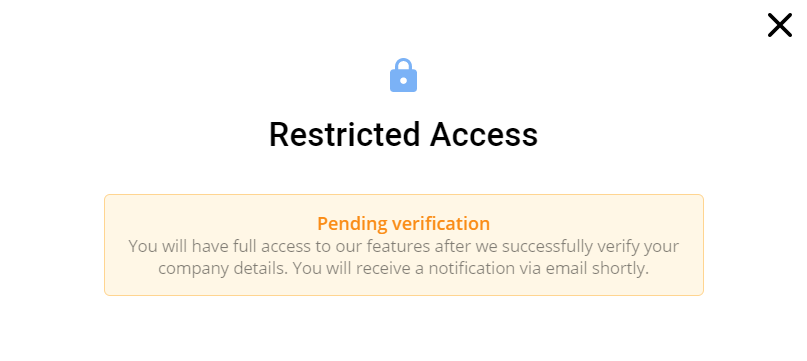
The following message appears.
After you provide all the information and the documents(if applicable) for verification, the verification procedure is taken up by the Kaleyra Operations team.
KYC for different countries
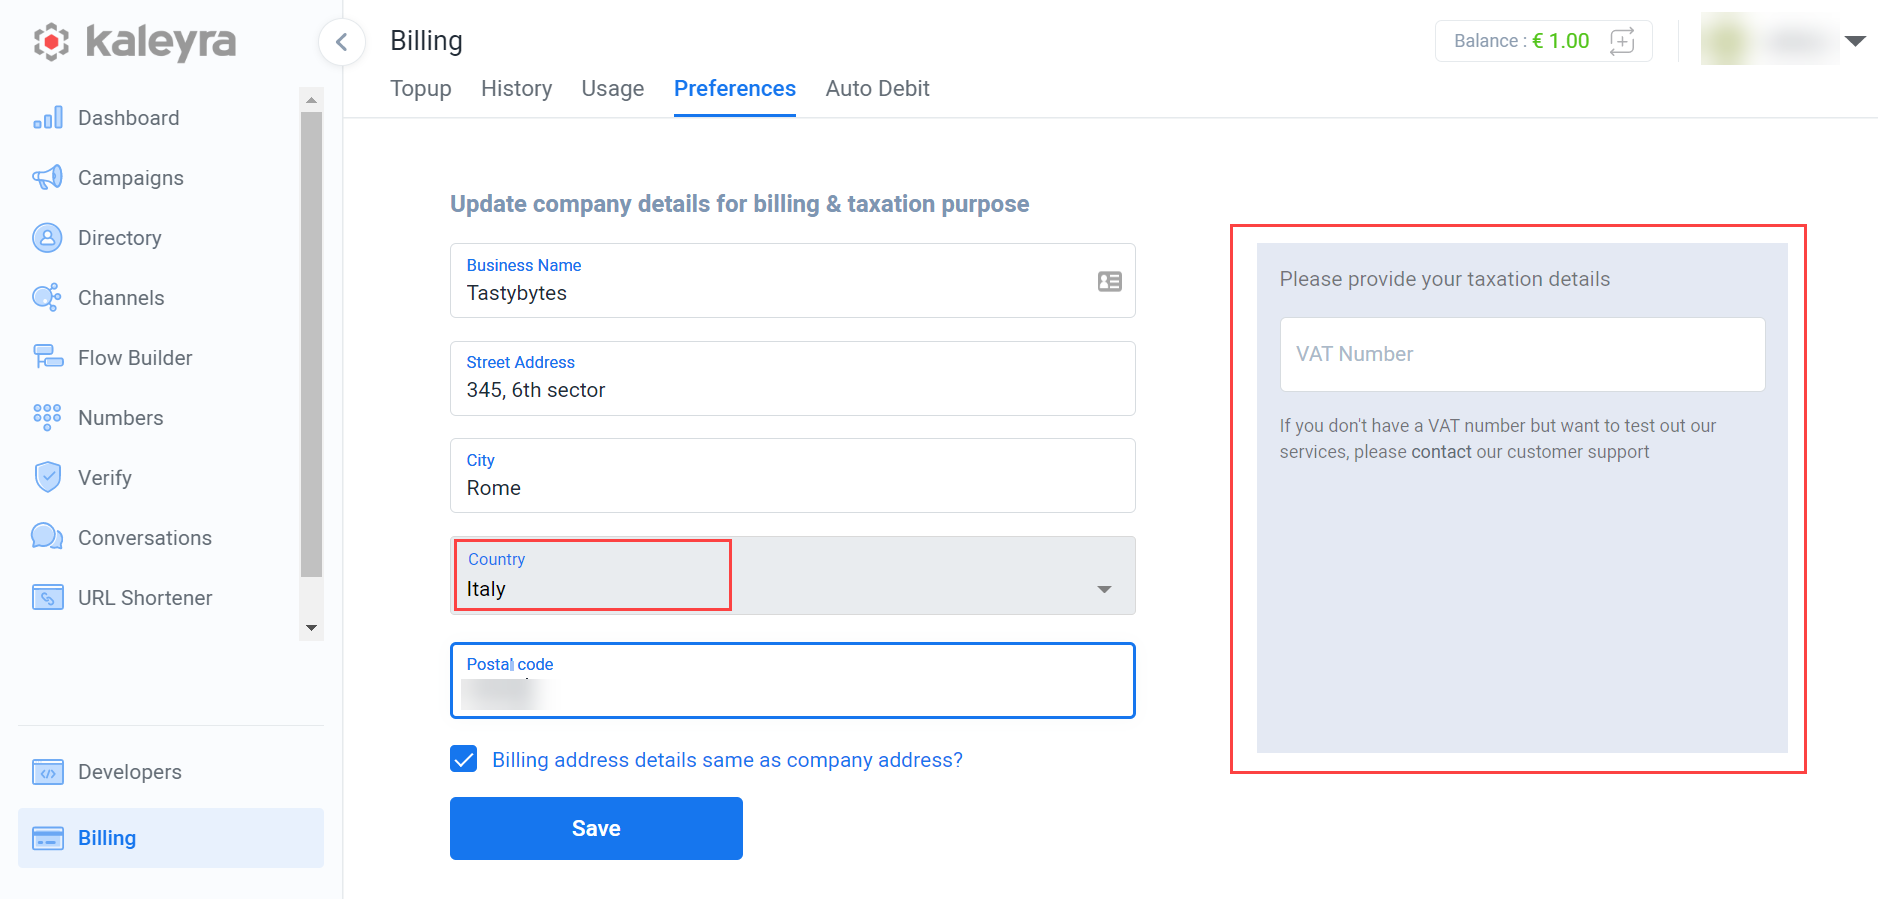
On the Preferences page, the company name and the address fields are similar for all the countries. However, the taxation details fields(right side of the page) vary based on the country.
The Preferences page for different countries/regions are shown as examples in the following sections.
Italy and the European Union
You must provide a valid VAT number. The VAT number is then automatically verified on the ‘VAT Information Exchange System’ (VIES) page for KYC verification.
When you provide the VAT registration number (registered with VIES) of your company, the Pending verification message is displayed.
The KYC verification is taken up by the Kaleyra Operations team.
India
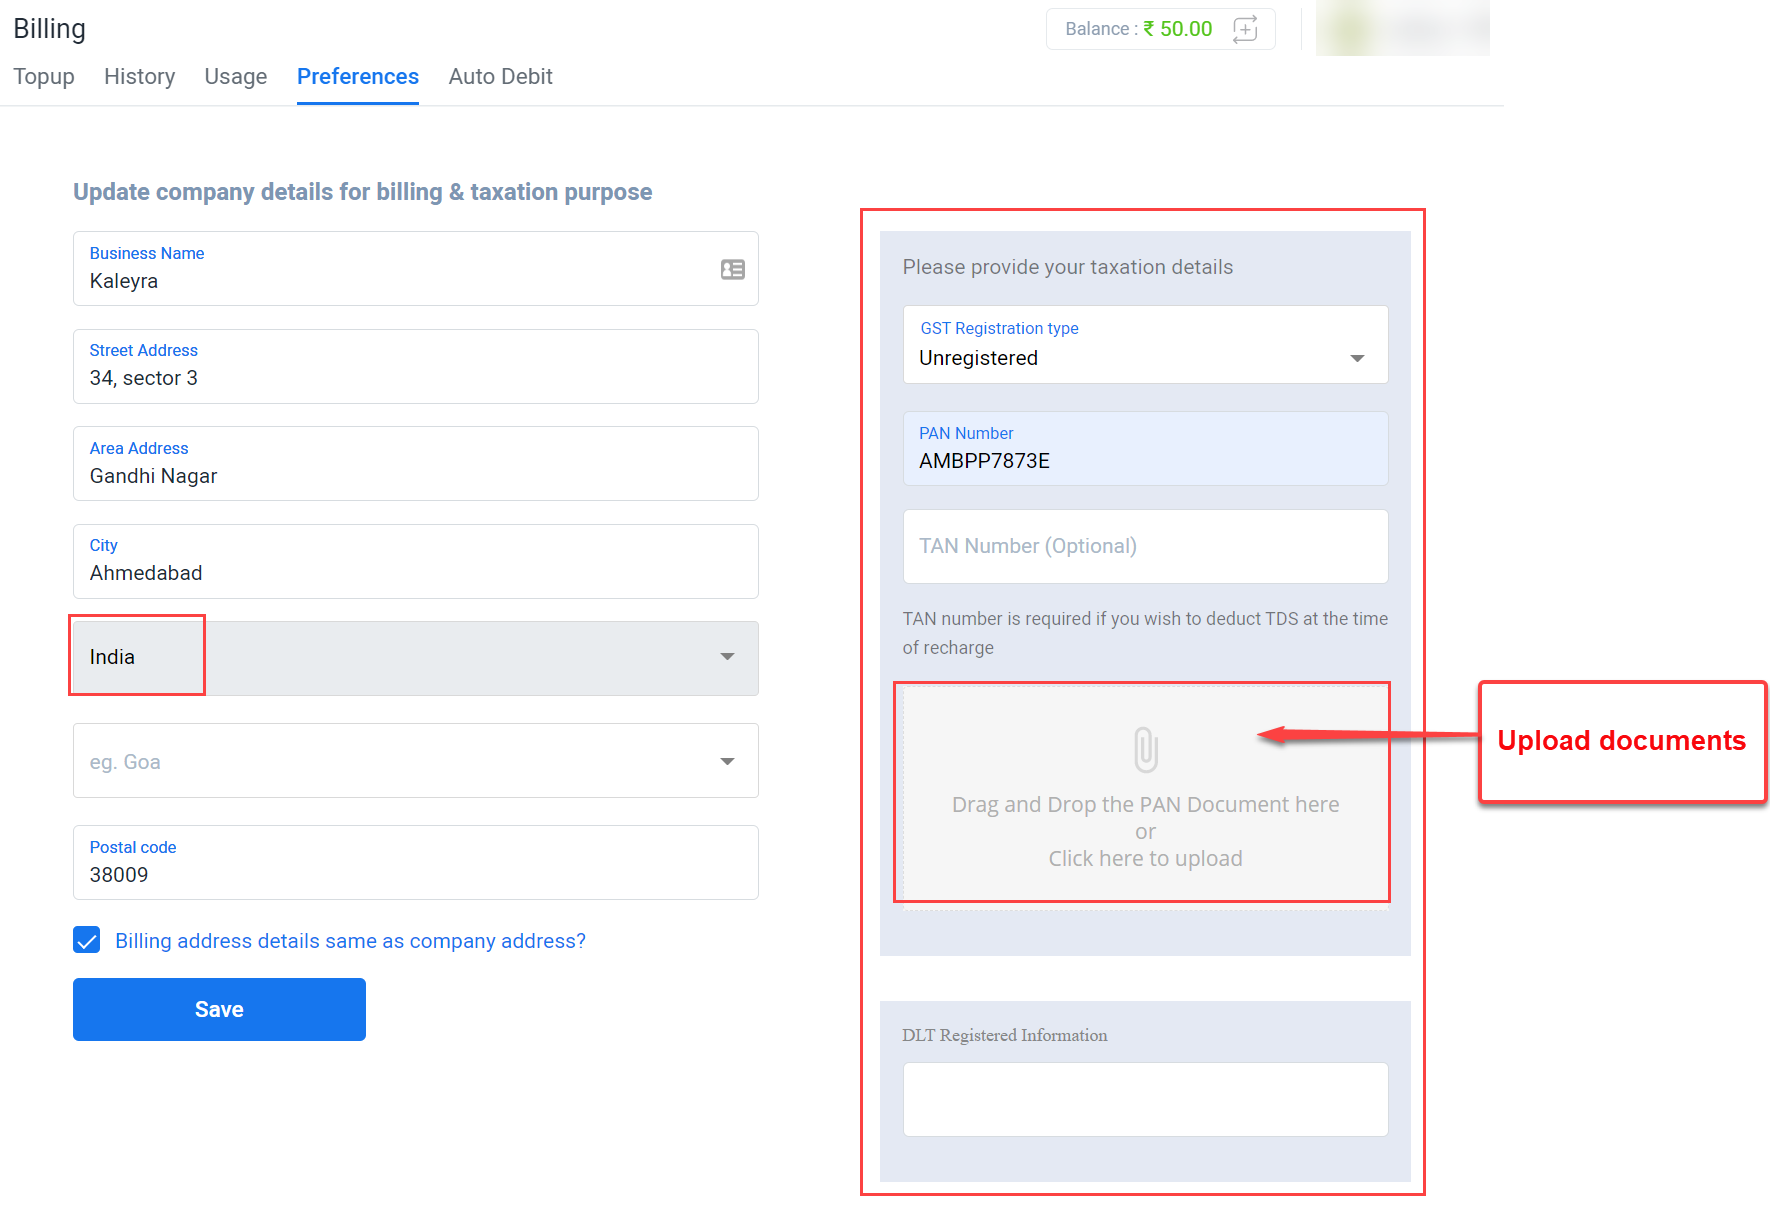
India KYC billing and taxation details are of two types, GST registered and GST unregistered.
After selecting the GST Unregistered or GST Registered option, add the company PAN Number, TAN number, and upload all the necessary documents.
If your company is GST unregistered, you must upload the following documents:
- Company PAN card copy
- Company Incorporation certificate
- DLT Registration Information (optional)
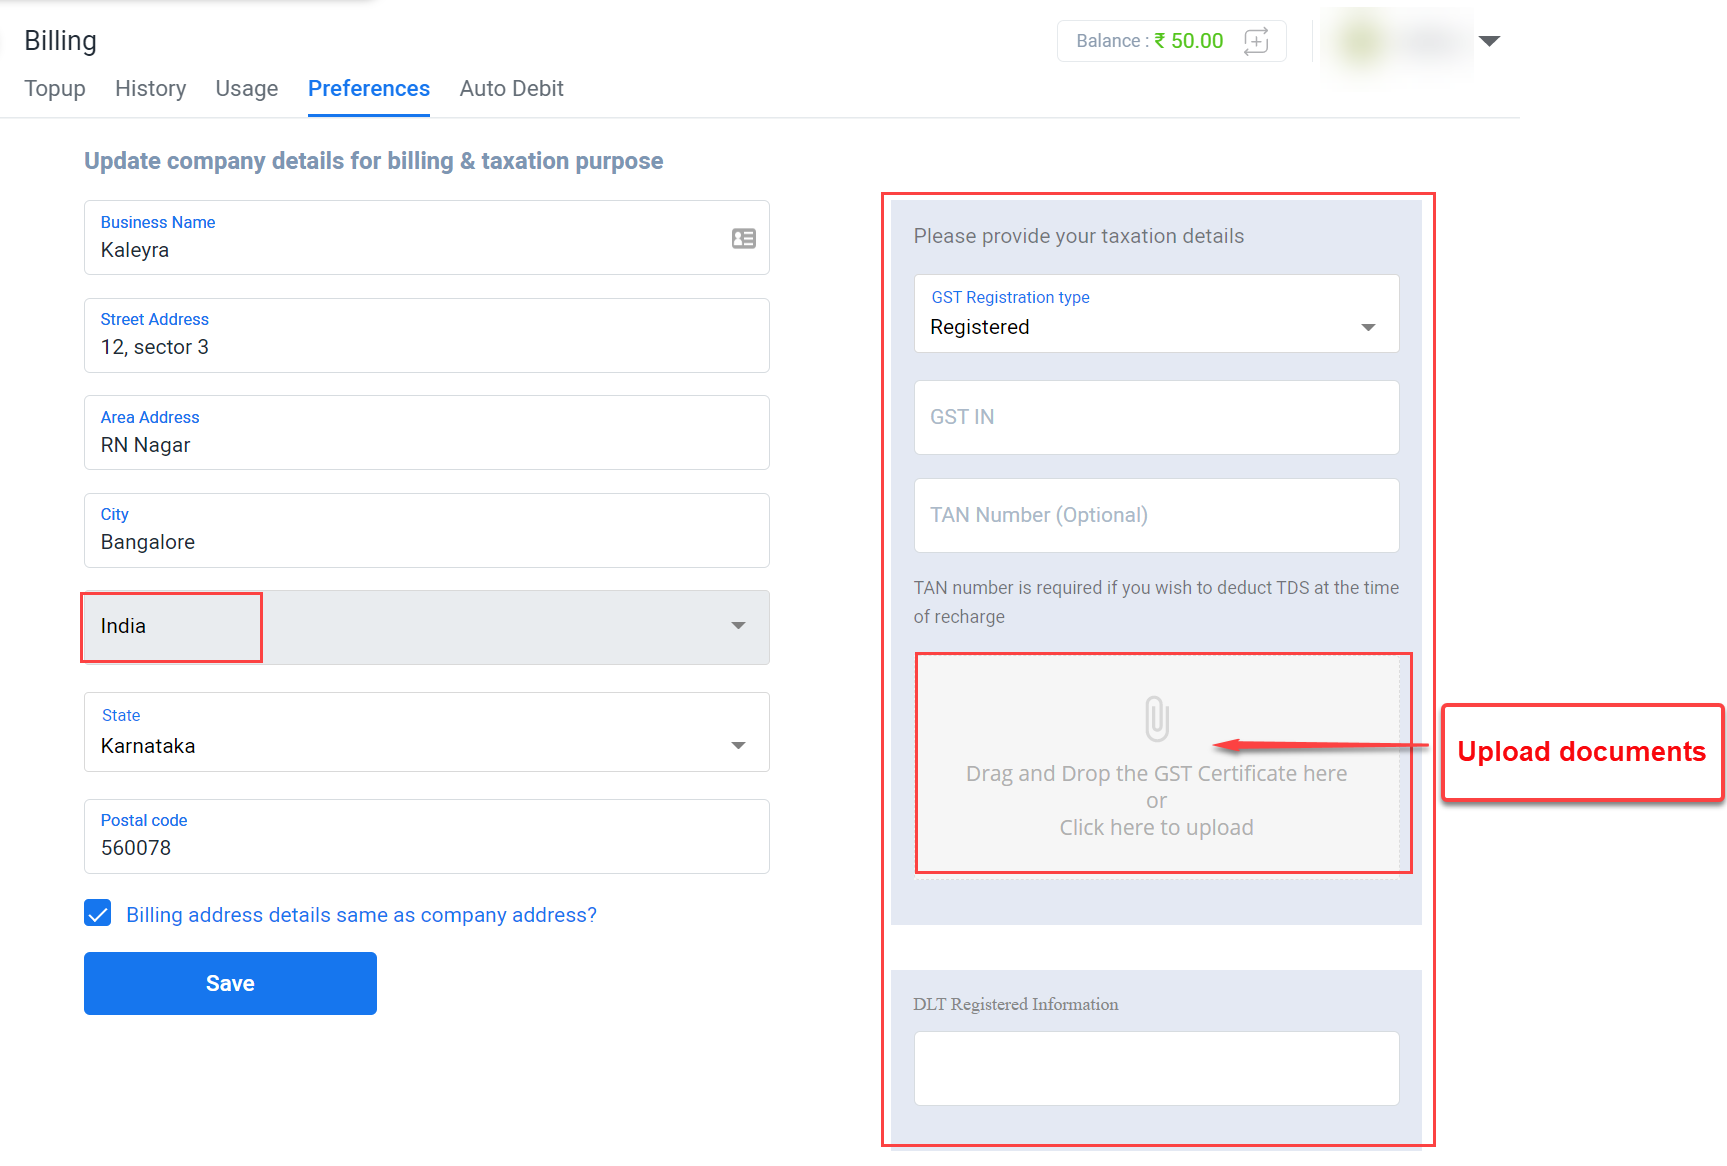
If your company is GST registered, you must upload the following documents:
- Company GST certificate (if your business is registered under the GST Act)
Company PAN card (company registered PAN) - Company Incorporation certificate (company registration details in case PAN or GST information is not available)
- DLT Registration Information (optional).
After uploading all the documents, the Pending verification message(as shown for Italy) is displayed.
The KYC verification is taken up by the Kaleyra Operations team.
USA and the rest of the world
You must provide the Business Tax ID number for KYC verification.
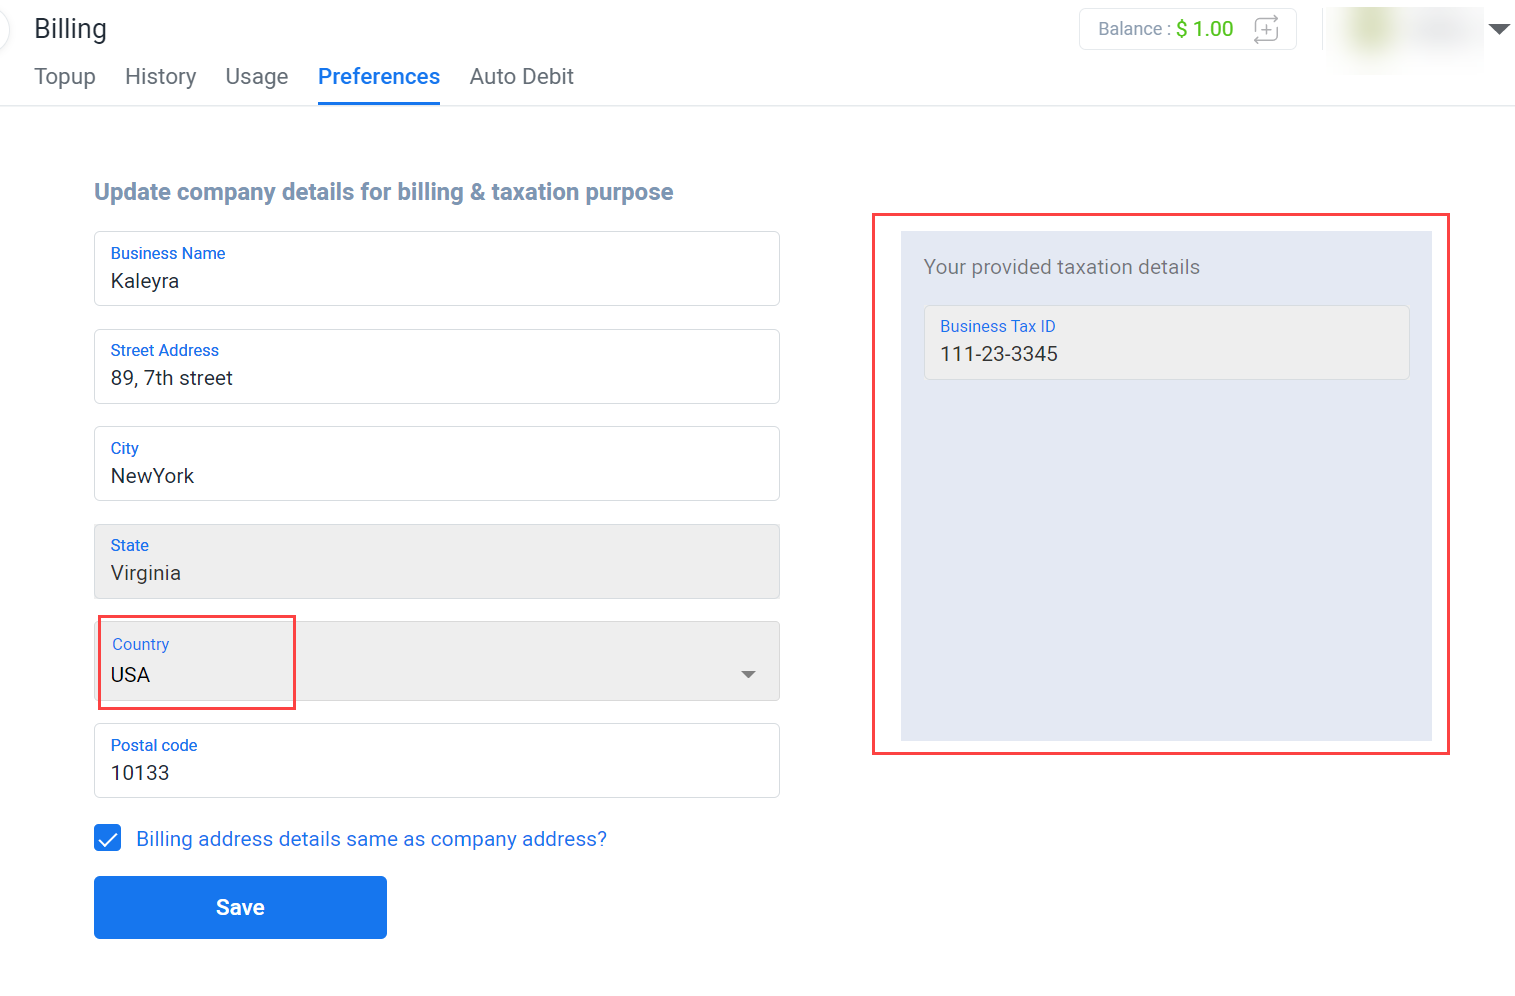
When you provide the valid Business Tax ID number, the Pending verification message is displayed.
The KYC verification is taken up by the Kaleyra Operations team.
KYC verification procedure
The KYC verification procedure is taken up by the Kaleyra Operations team after you provide all the necessary details along with the required KYC documents.
- When the verification procedure starts, the KYC verification is in the ‘In Progress’ status. An email is sent to your registered email address about the ongoing verification procedure. Contact the Kaleyra support team for further action, if necessary.
Note:If you are an Indian customer, to add any additional/new KYC documents as suggested by the Kaleyra support team to complete the pending verification, you can go to the Settings > Documents page and upload the remaining KYC documents.
- If the KYC verification procedure fails, the Kaleyra.io dashboard shows a message stating the ‘KYC verification has failed’. An email will be sent to your registered email address about the failed verification. Contact the Kaleyra support team for further action.
Note:If you are an Indian customer and the KYC verification has failed, you can go to the Billing > Preferences page again and upload the correct documents.
Note:For any clarifications during the KYC verification procedure, please contact your Kaleyra representative or write to our Customer Support team.
Upload more KYC documents
On this Documents page, the documents that you have already submitted for the KYC procedure from the Billing > Preferences > Billing page are shown. Additionally, if there are more documents that you need to submit, you can upload them on this page.
To know more about the list of documents that you need to submit to complete the KYC procedure successfully, you can contact the Kaleyra support team.
Uploading KYC documents is applicable only for Indian customers.
To upload any additional/new KYC documents:
- Sign in to your Kaleyra.io account.
- Click on the profile name and click Settings.
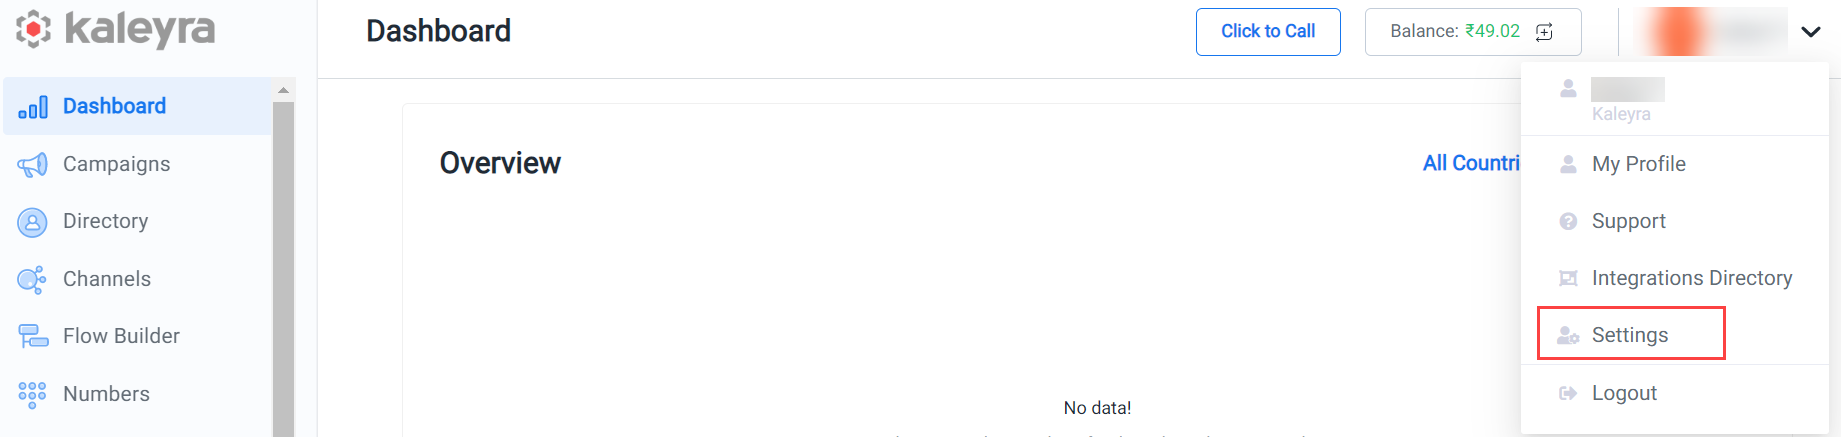
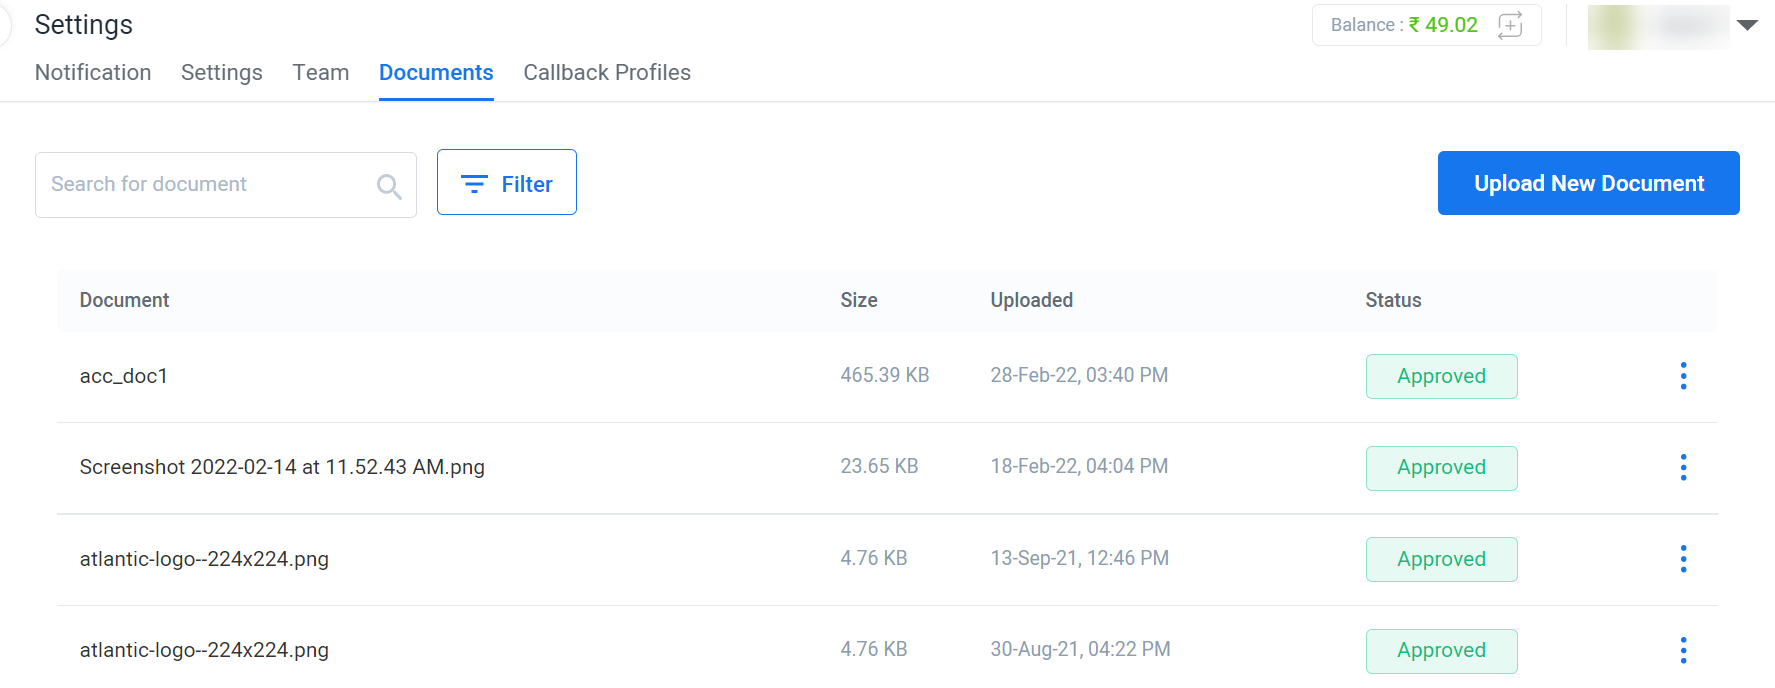
- After selecting the Settings option on the Accounts menu, go to the Documents tab. All the documents submitted for the account are shown.
- To upload any new document for the KYC verification process, click Upload New Document.
The Upload Documents window appears.

- Enter Title to the documents you are about to upload.
- Click Click here to upload and select the documents. You can drag and drop the documents or upload them in the box provided.
- Click Save Changes. Your KYC documents are now uploaded.
When the Kaleyra team successfully completes KYC verification procedure for your account, you can fully use all the channels’ features on the Kaleyra.io application.
Updated 12 months ago