Publish a Databot

After you have unpublish the databot flow, you can publish them again with the following options:

  • Edit the Autoresponder message (Welcome Message, Goodbye Message, and Error Message)
  • Change the senders' numbers
  • Update the API Key.

📘

Note:

You can also publish the databot flow from the Overview page. Hover over the unpublished Databot flow, click the ellipsis, and a list of available options appears. Select the Publish Chatbot option and then follow step 3 of this section.

To publish a databot chatbot, perform the following steps:

  1. From the Chatbot's Overview, click and open the databot flow you want to publish.

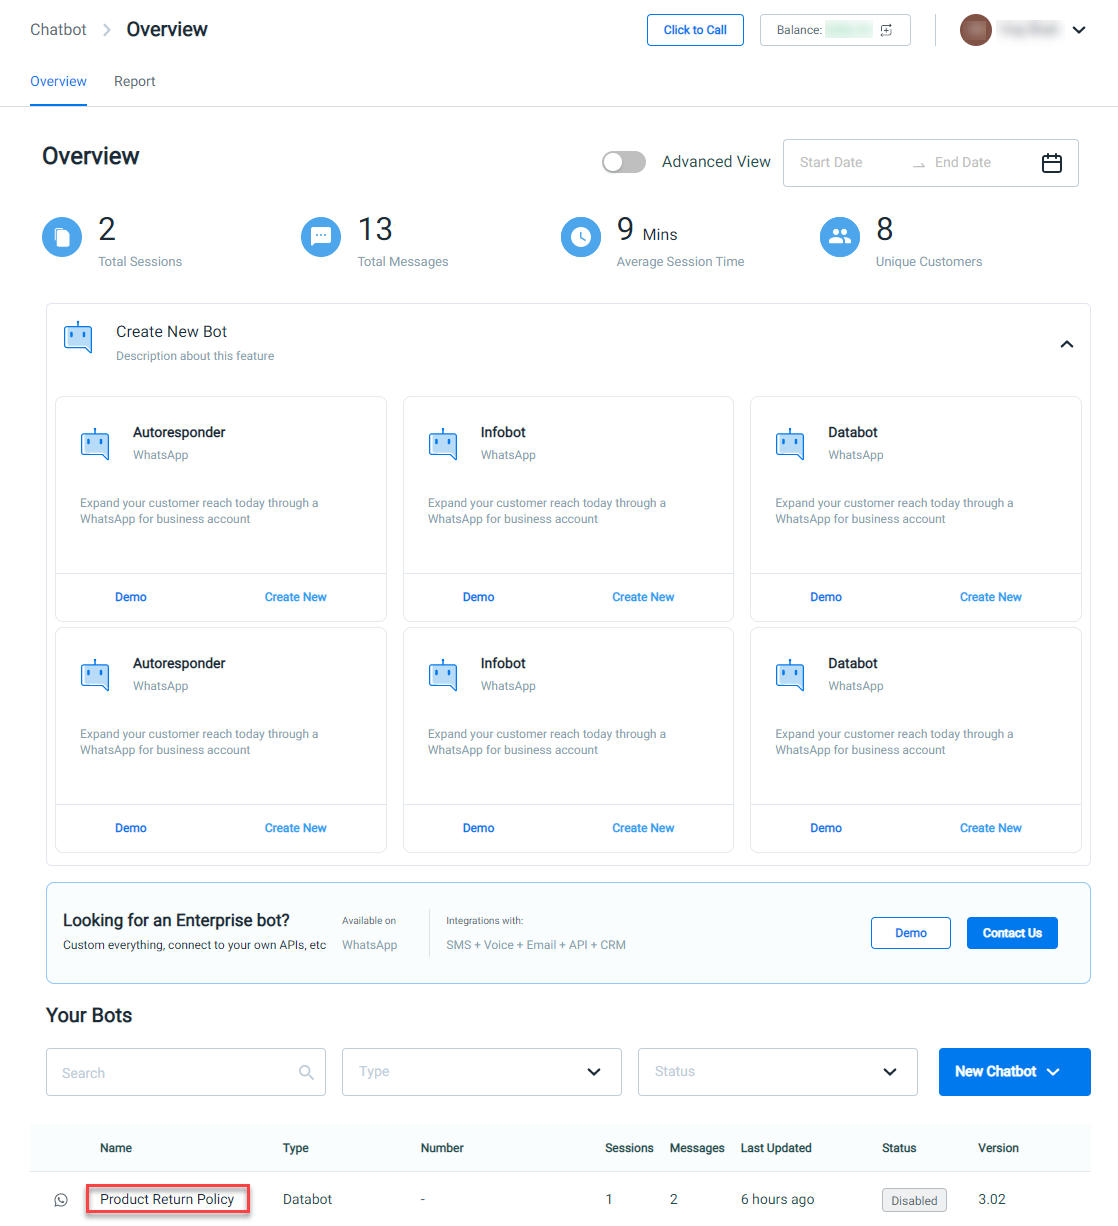
The Databot's Chatbot details appear.
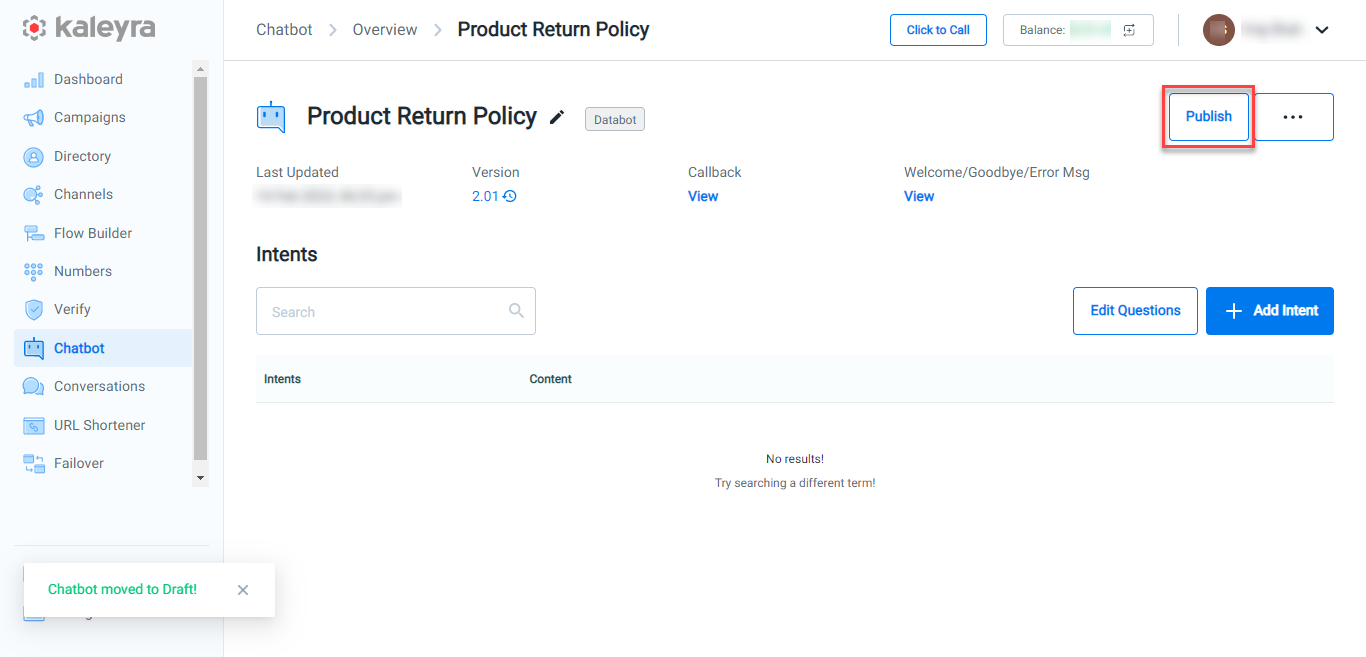
  1. Click Publish.
    The Edit Message appears on the right pane of the page.
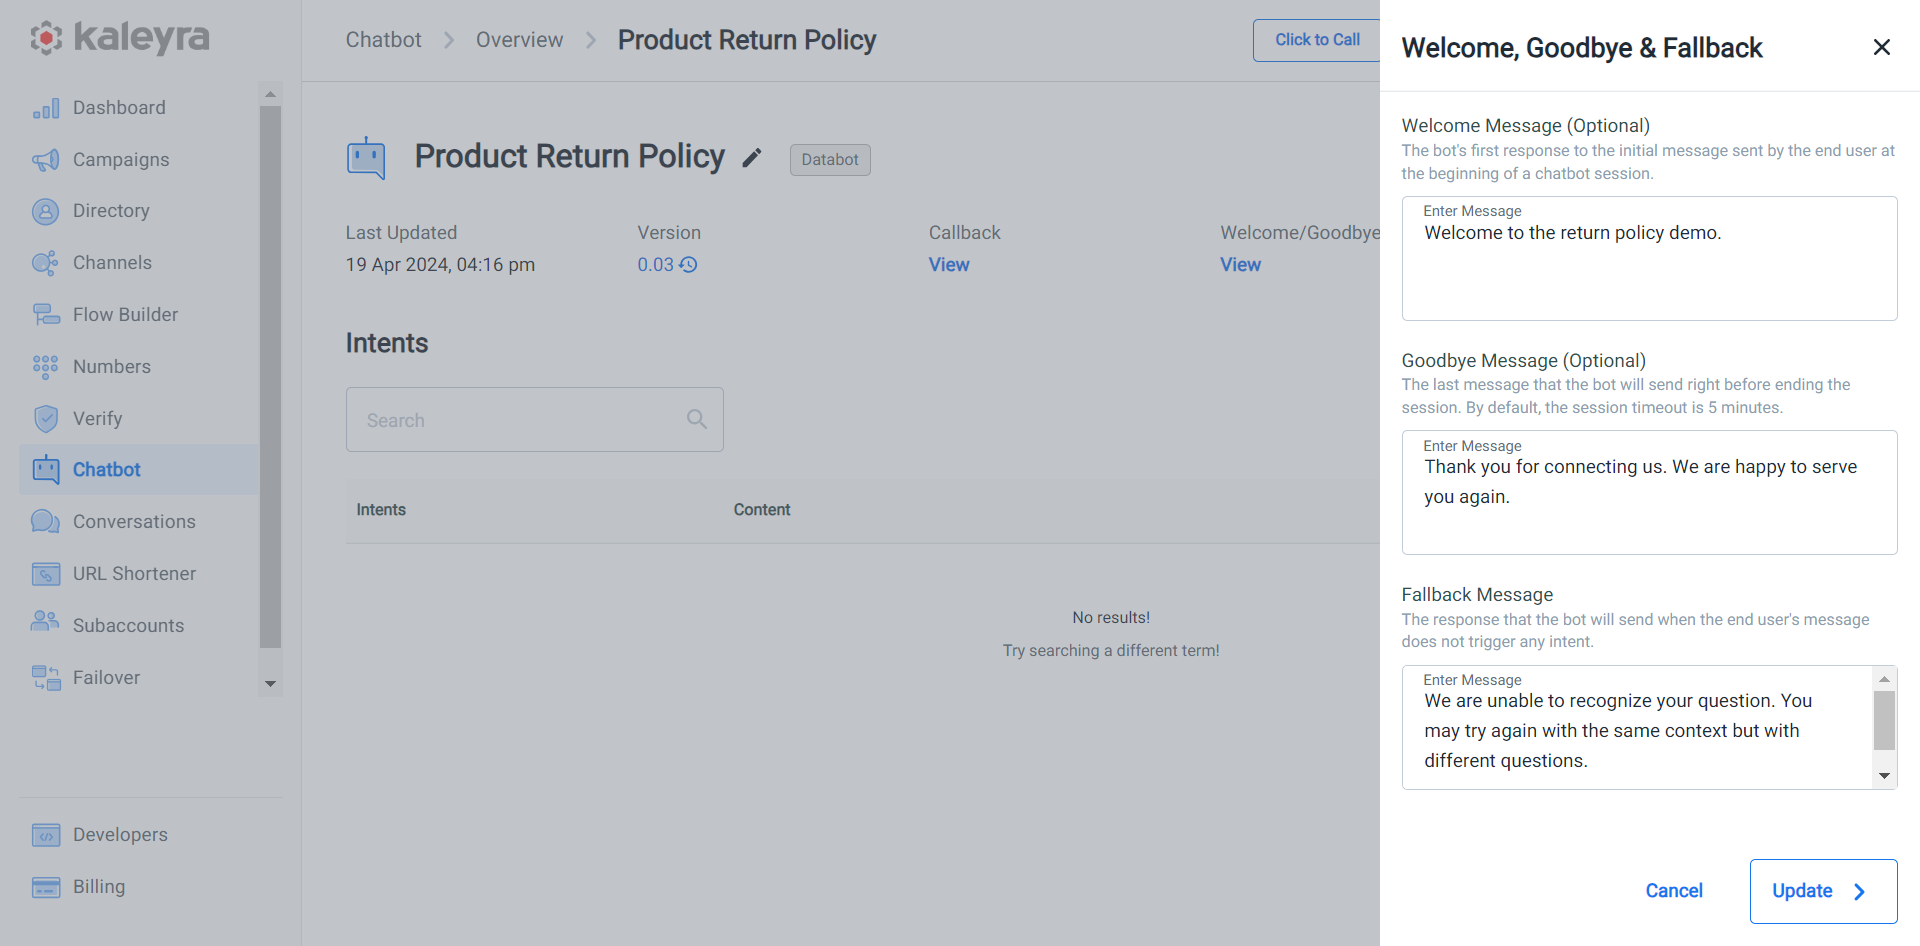
  1. If you want to edit the message, click the field edit the message and then click Update.
    The Chatbot Configuration appears on the right pane of the page.
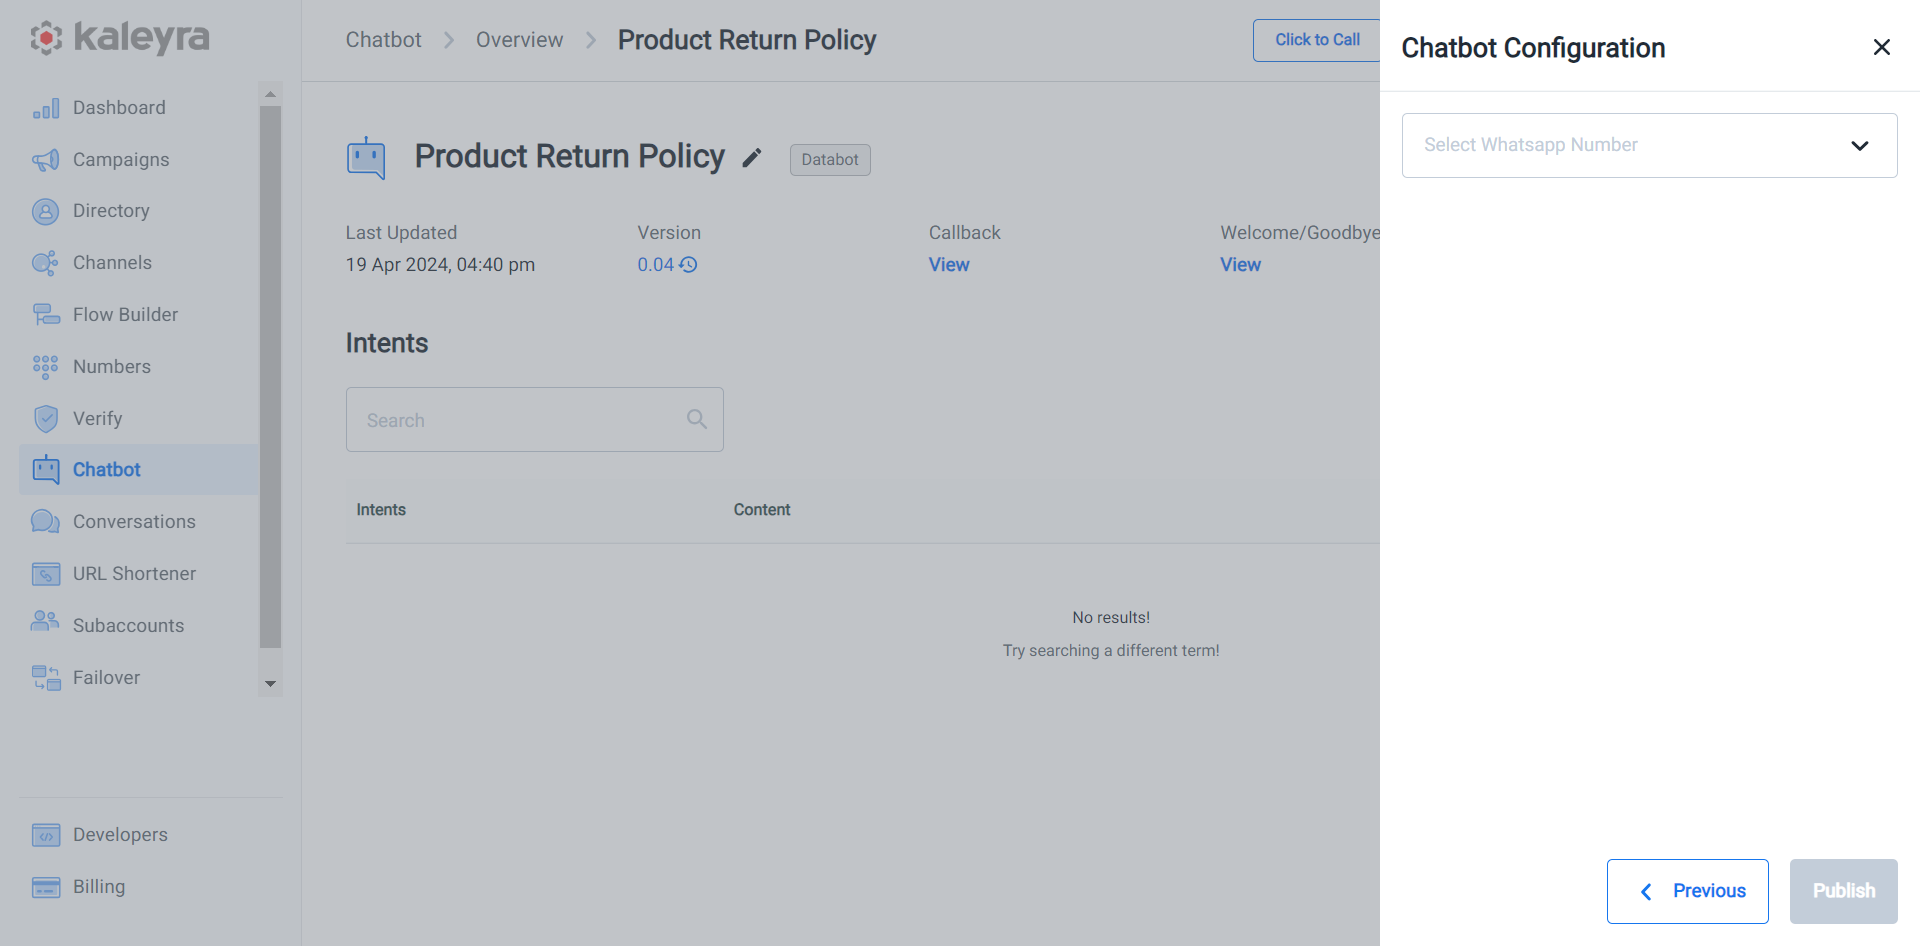
  1. In the Chatbot Configuration pane, perform the following steps:
    1. Click the arrow in the Select WhatsApp Number field and a list of approved WhatsApp number list appear. Select the sender number from the dropdown field. This is the number to that your databot will be connected. For more information about how to add a WhatsApp number, see Adding WhatsApp Number.
    2. (Optional) Click the arrow in the API Key field and a list of API keys appears. Select an API key from the dropdown list. For more information about API Key, see View API Key and SID.
  2. Click Publish.

📘

Notes:

After publishing the databot chatbot, you can select one of the following options by clicking the ellipsis on the right side of the page:

  • Rename Chatbot - The Edit Chatbot Name pane appear on the right side of the page. Update the databot name and click Update. Also, you can rename it by clicking the pencil icon next to the infobot name.
  • Edit Message - The Edit Message pane appears on the right side of the page. Update the databot message and click Update. Also, you can edit it by clicking the pencil icon next to the databot message.
  • Reset to Previous Version - The confirmation message Are you sure you want to reset to the previous version? appears, click Yes to revert to the previous version. Once, you are reverted to the previous version, you can not restore to the current version.
  • Add Intent - You can add intent to the existing Databot. For more information, see Step 4 of Create a Databot.

Once the databot is in the unpublished stage, you can select one of the following options by clicking the ellipsis on the right side of the page in addition to Rename Chatbot, Edit Message, Reset to Previous Version, and Add Intent:

  • Delete Chatbot - The confirmation message Are you sure you want to delete this Chatbot? appears, click Yes to delete the chatbot.