Send MMS using Oracle Responsys Programs
You can create programs on Oracle Responsys to use the send MMS feature. The program enables you to automate the MMS feature for specific dates and times. For more information about programs, see Programs.
To create Oracle Responsys program, perform the following steps:
- On the Oracle Responsys home page, click the side navigation icon.
The available functionality list appears.
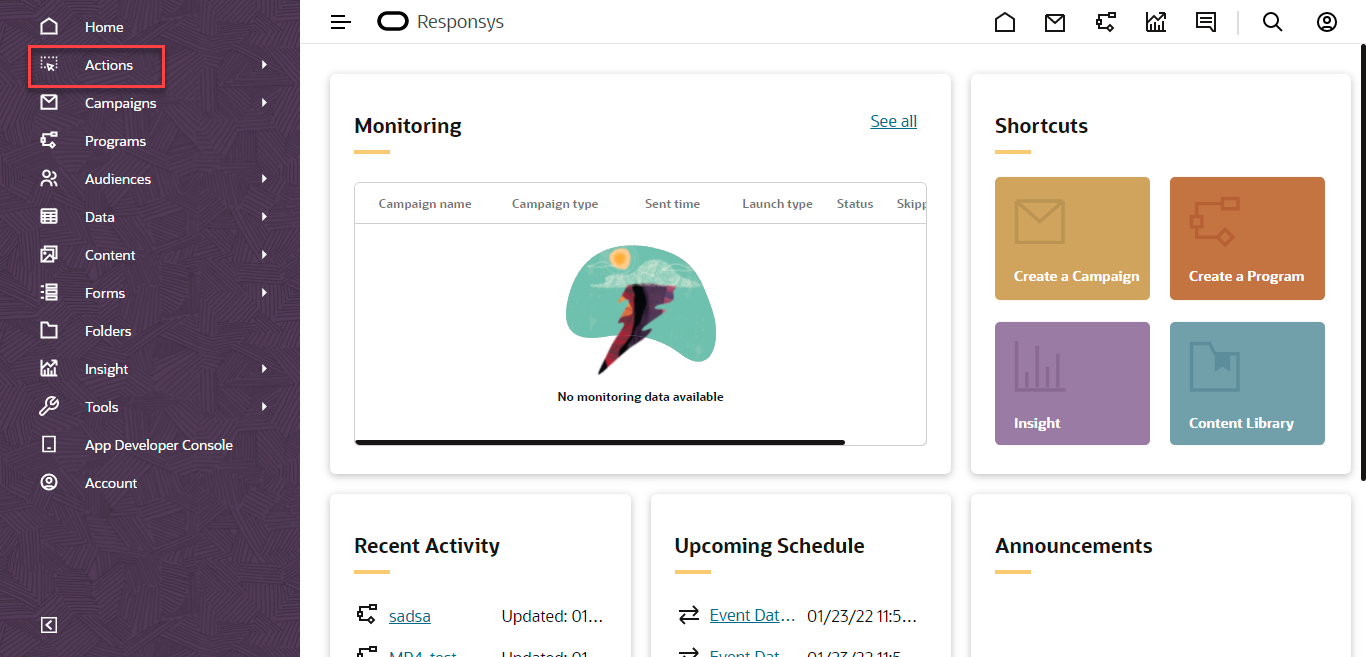
- Click Actions.
The available actions list appears.
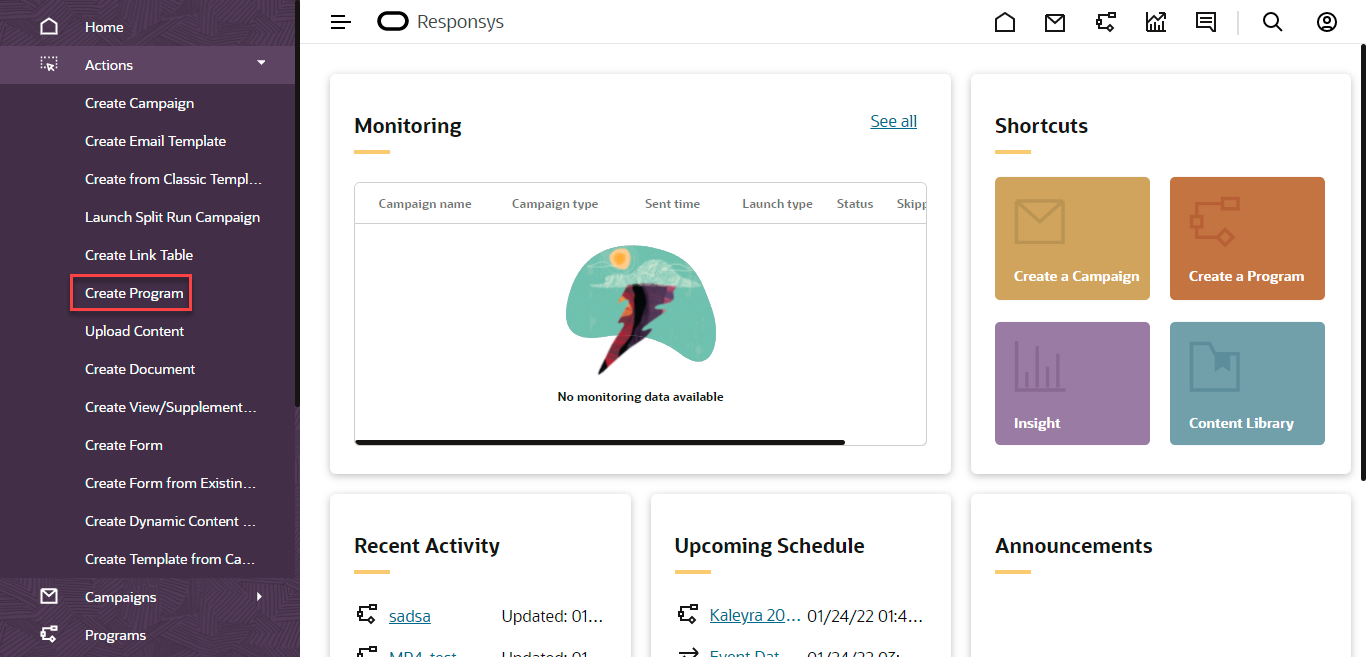
Note:You can open the Create Program in a new tab, using the Programs option available in the left pane.
- Click Create Program.
The Create Program opens in a new tab.
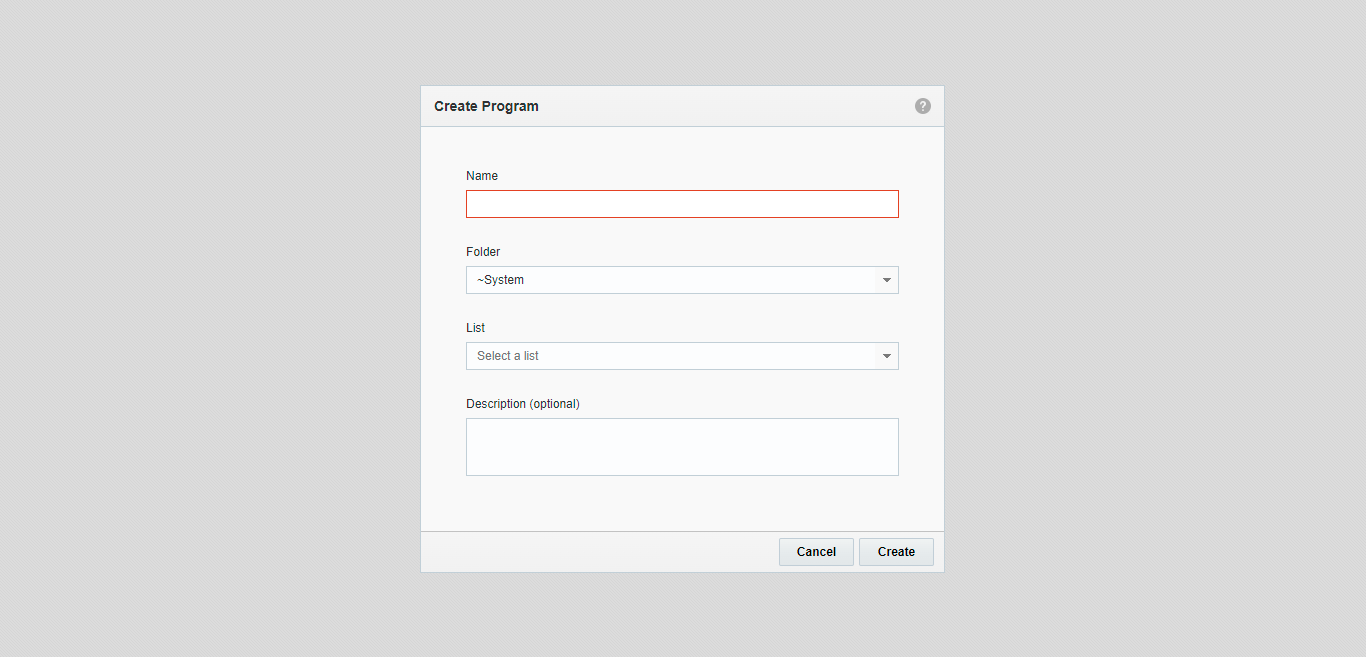
- Perform the following steps:
a. In the Name field, enter the program name.
b. In Folder, select the folder you wish to map the program.
c. In List, select the data source for the program you wish to create.
d. (Optional) In the Description field, enter the description for the program. - Click Create.
The Program Designer page appears.
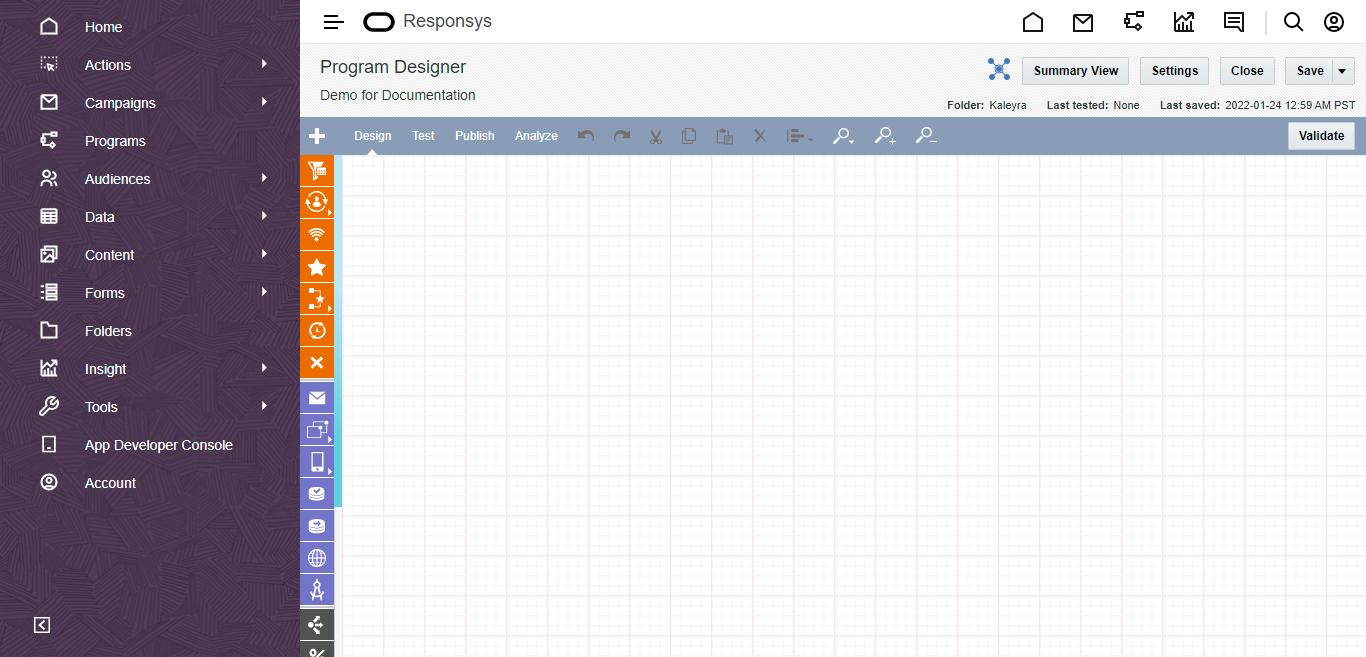
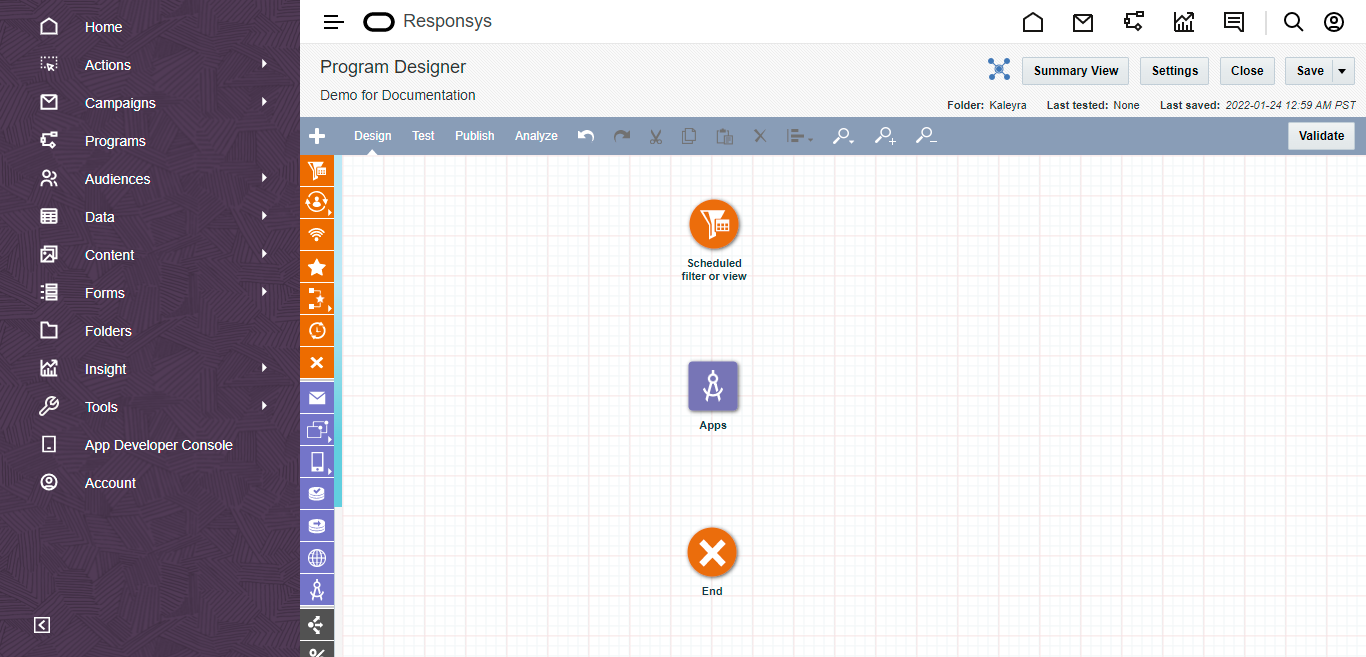
- Drag elements from the palette of the Program Designer onto the canvas.
For example:
If you wish to schedule a program using an application, you need a scheduler, an application, and terminate or end the program.
Notes:
- Hover over the elements to get detailed information.
- For more information on the Program using step-by-step methods see, Getting started with Program.
- Hover over the cursor over the first element, grab the small square that appears on the bottom side of the icon, and drag and connect the line to the next element.

- Right-click the selected elements, select Properties to configure the properties of each element.
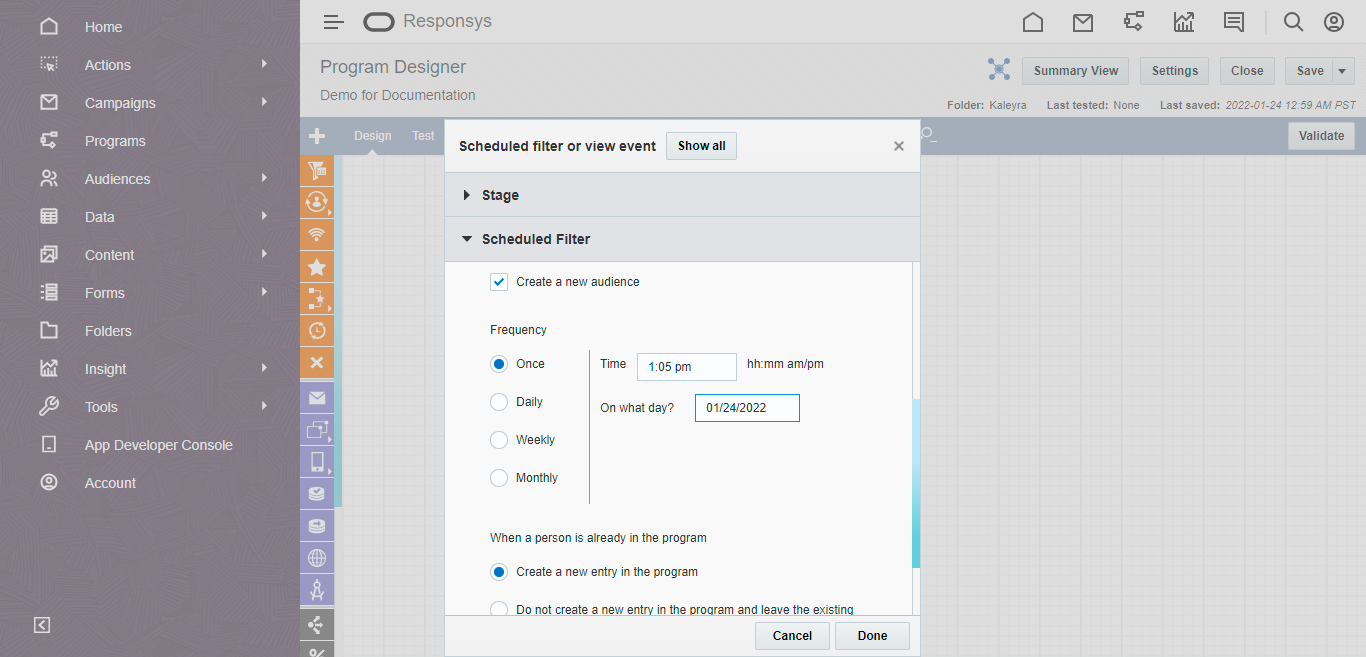
Example 1: To configure Scheduled filter or view properties, perform the following steps:
a. In the Description field, enter the description for the scheduled filter.
b. Click to expand or view the Scheduled Filter section fields.
c. Select Run Filter and click Select.
d. On the Folder list, select Kaleyra, and on the Filter list, select a filter.
e. From the Frequency section, select the frequency of the MMS message.
g. Click Done.
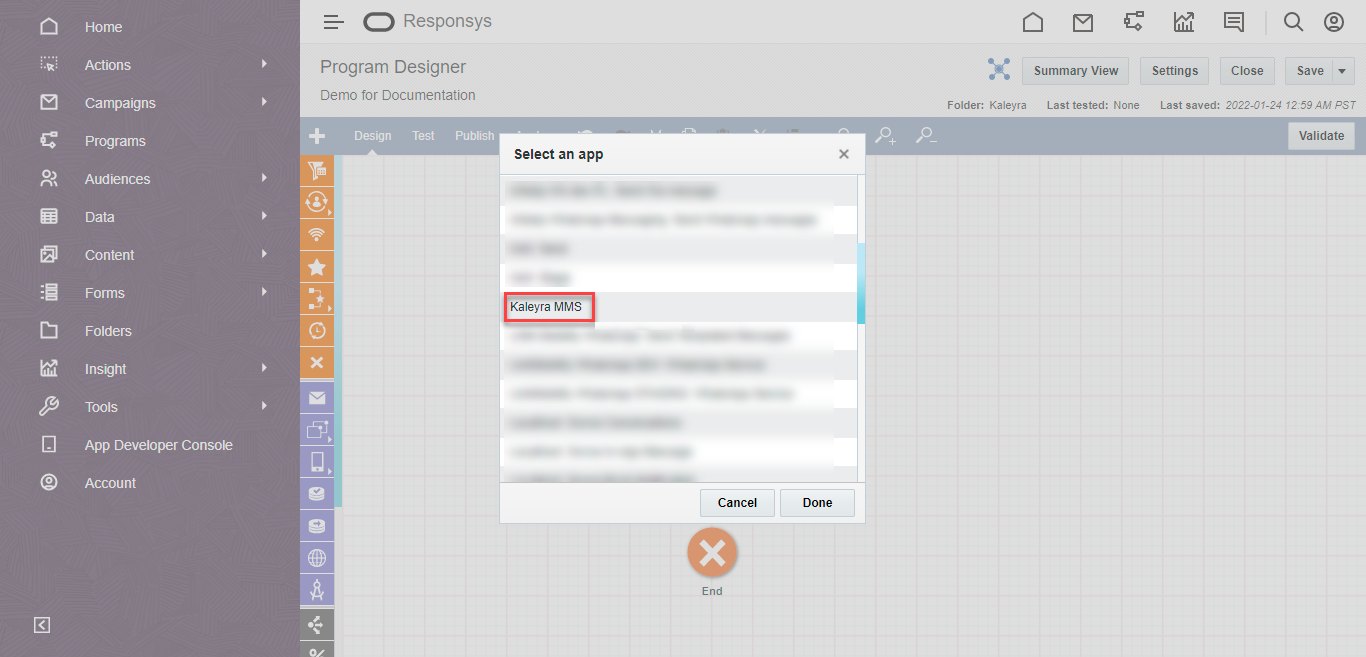
Example 2: To configure Apps properties, perform the following steps:
a. From Select an Apps from the list, select Kaleyra - Send MMS.
b. Click Done.
The Send MMS Configuration appears.
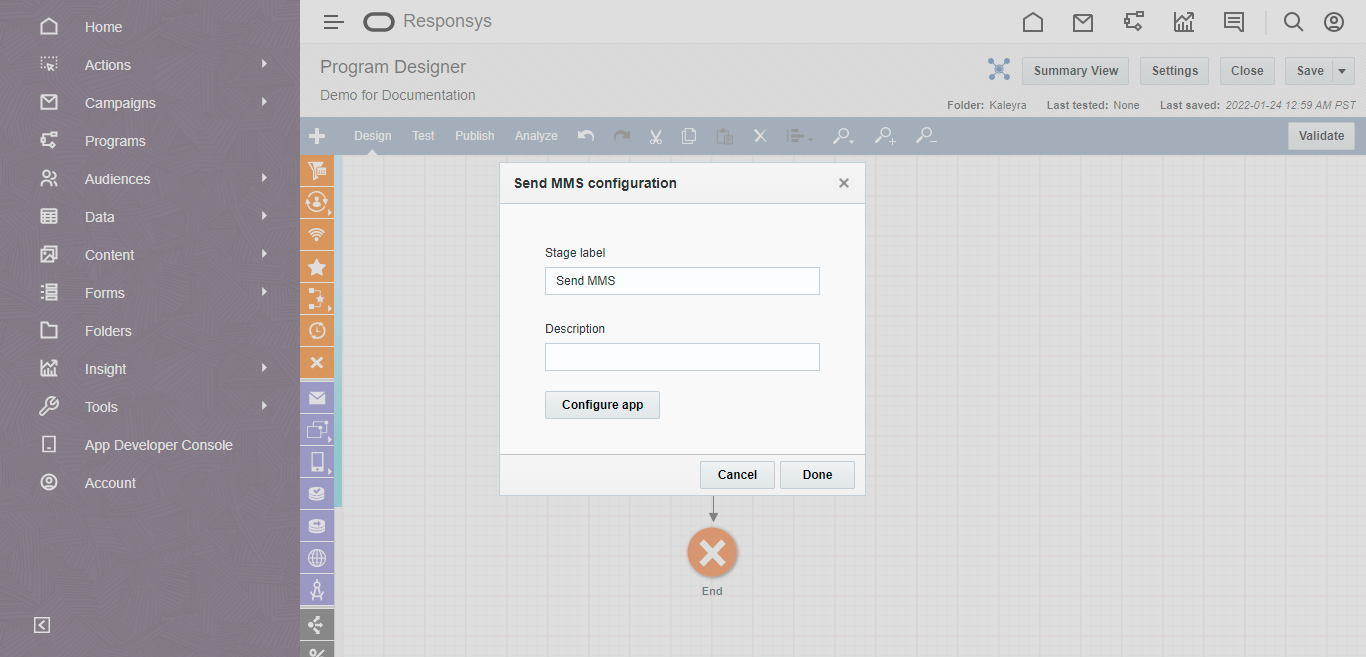
c. In the Description field, enter the description for the program.
d. Click Configure app.
The App Configuration appears.
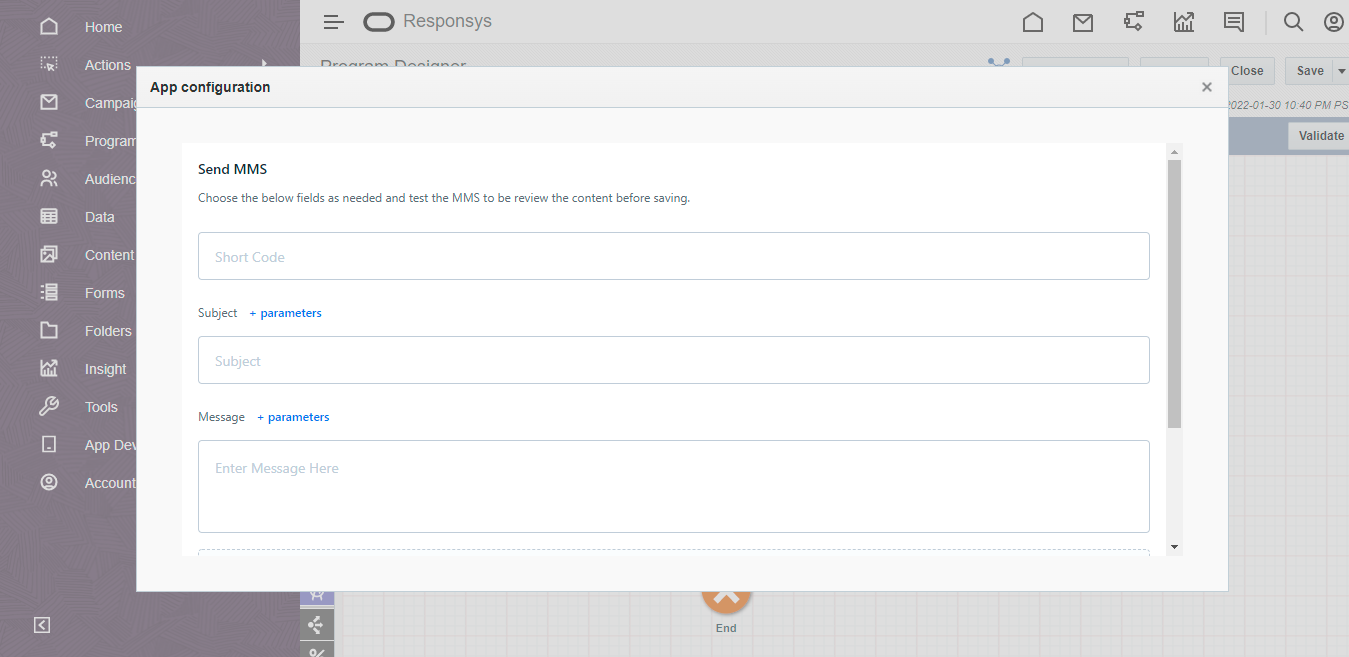
f. In the Short Code field, enter the sender ID which you wish to send MMS.
g. In the Subject field, enter the subject of your MMS. You can have a maximum of 150 characters for the Subject field.
Note:Click parameters. Select the parameters list to insert dynamic parameters in the Subject and Message contents.
h. In the Message field, enter the MMS message. You can have a maximum of 500 characters for the Message field.
i. Click Select image from Responsys library to select the media file from Content Library. For more information on how to upload media in the content library, supported files, and file size, see Content Library Overview.
Note:The maximum supported MMS media file size is 2 MB.
j. Click Send Test MMS, enter your Mobile number, and then click Send to test the MMS. OR, click Save MMS Setting.
k. Click x to close App Configuration.
Note:You must update your email address to get notifications related to any blocker or failure while validating the MMS in the settings. To update the email address, perform the following steps:
- On the top right click Settings.
- On the Setting page, expand Options.
- In the Enter email address to receive notification about this program field, enter your email address.
- Click OK.
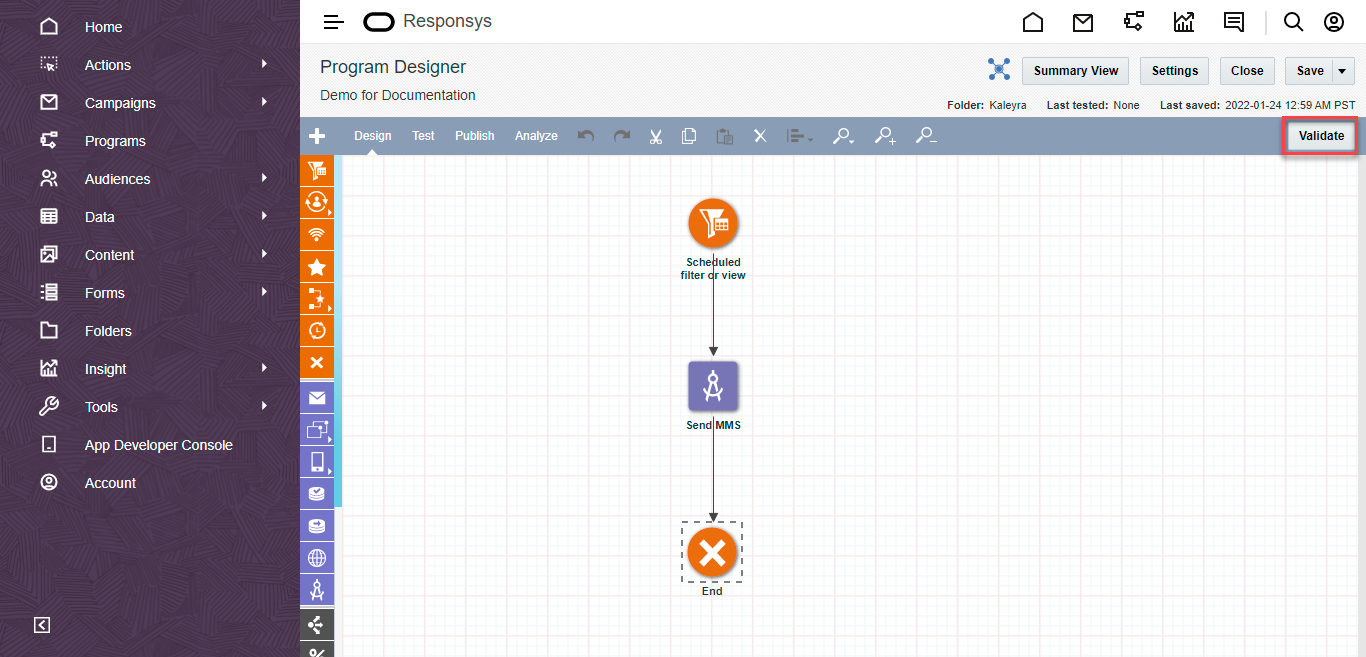
- After successfully configuring the App configuration, on the top right click Validate.
The program is valid and may be published message appears.
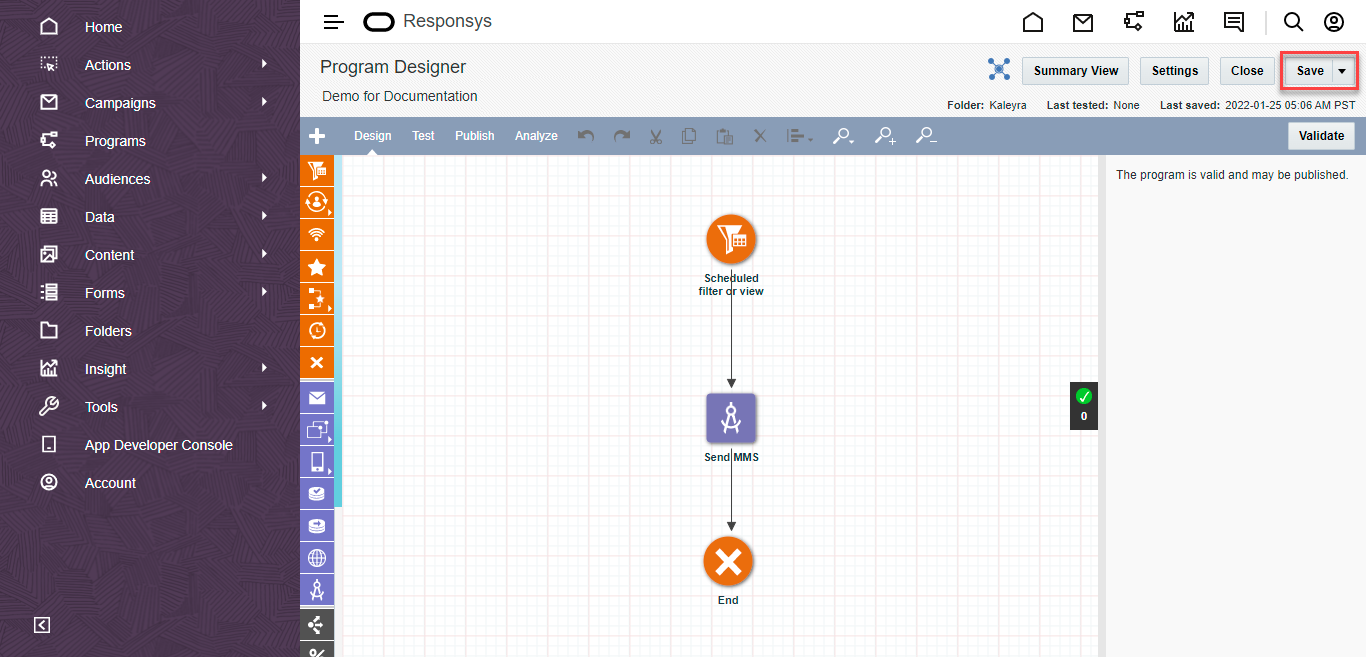
- On the top right click Save. The program gets saved.
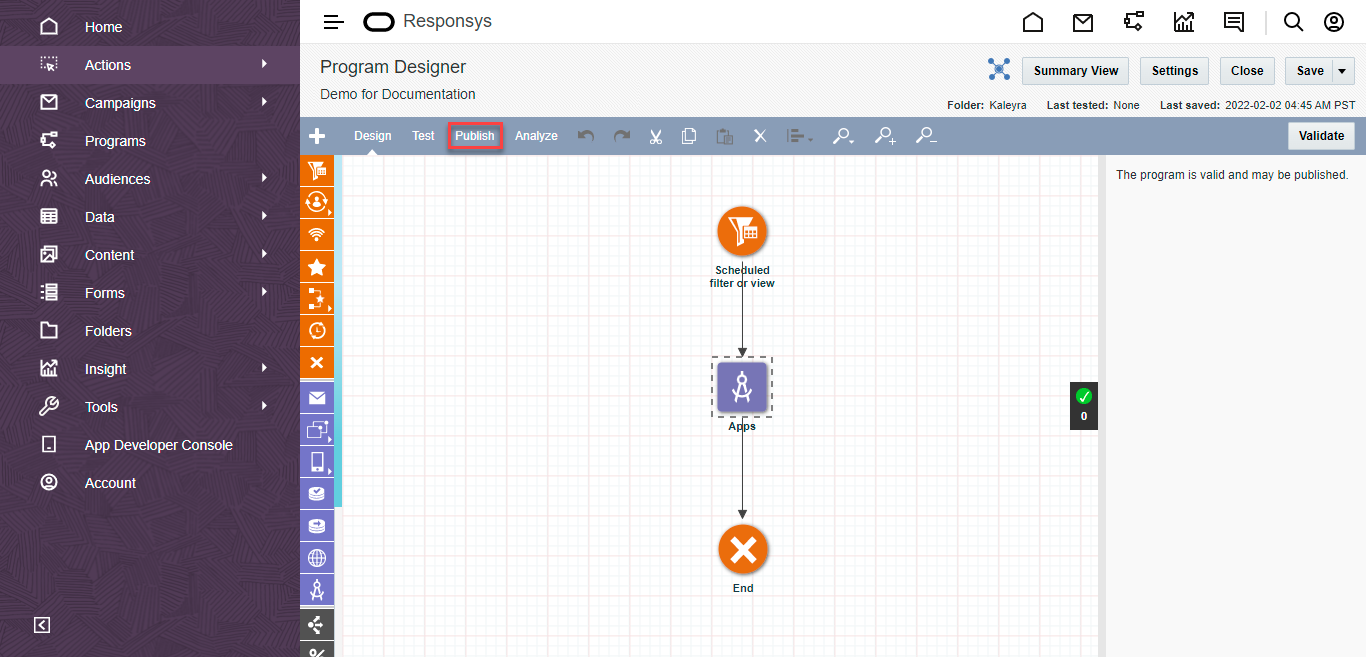
- Click the Publish tab.
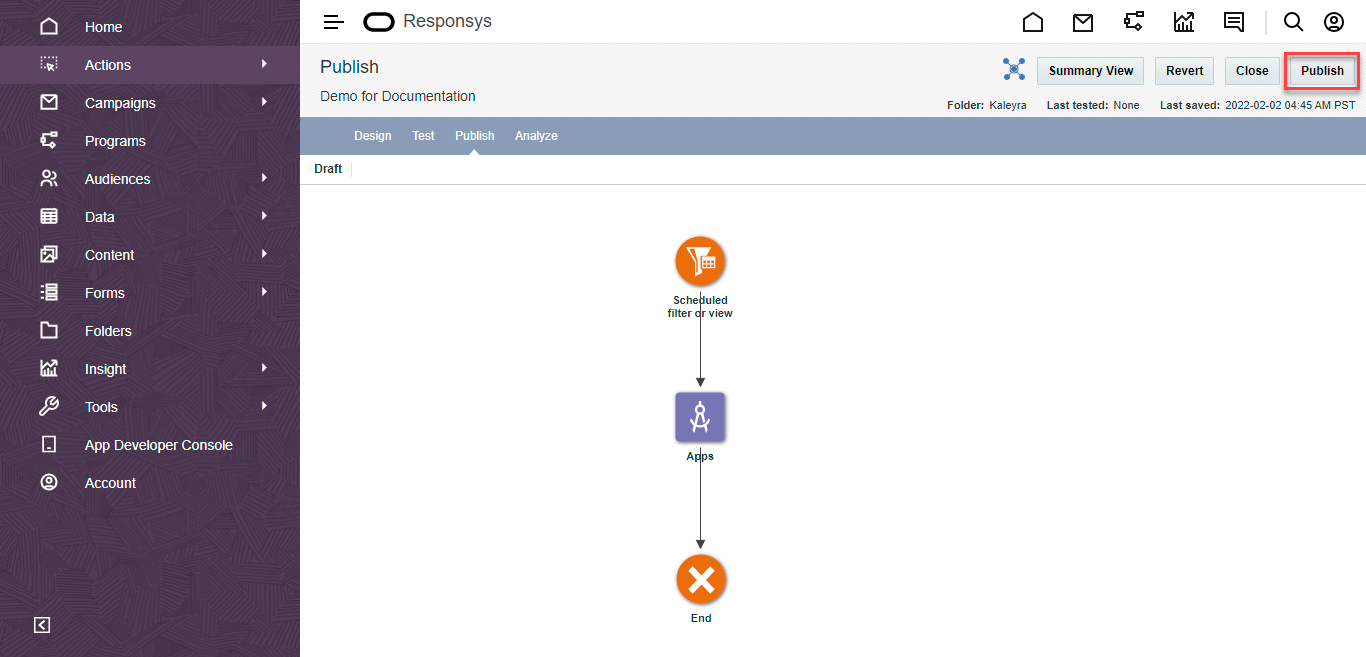
- On the top right, click Publish. A confirmation message appears.
- Click Yes. The MMS message is ready to be delivered at the scheduled time and date.
Note:For any assistance or queries related to your Kaleyra MMS account, contact Kaleyra support team.