Deliver Mobile Wallet Coupons
To Create a coupon for mobile wallet:
- Log into Communicate Pro US.
Access Coupons via Services --> Coupons.
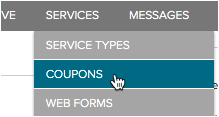
- Click Create New Coupon:

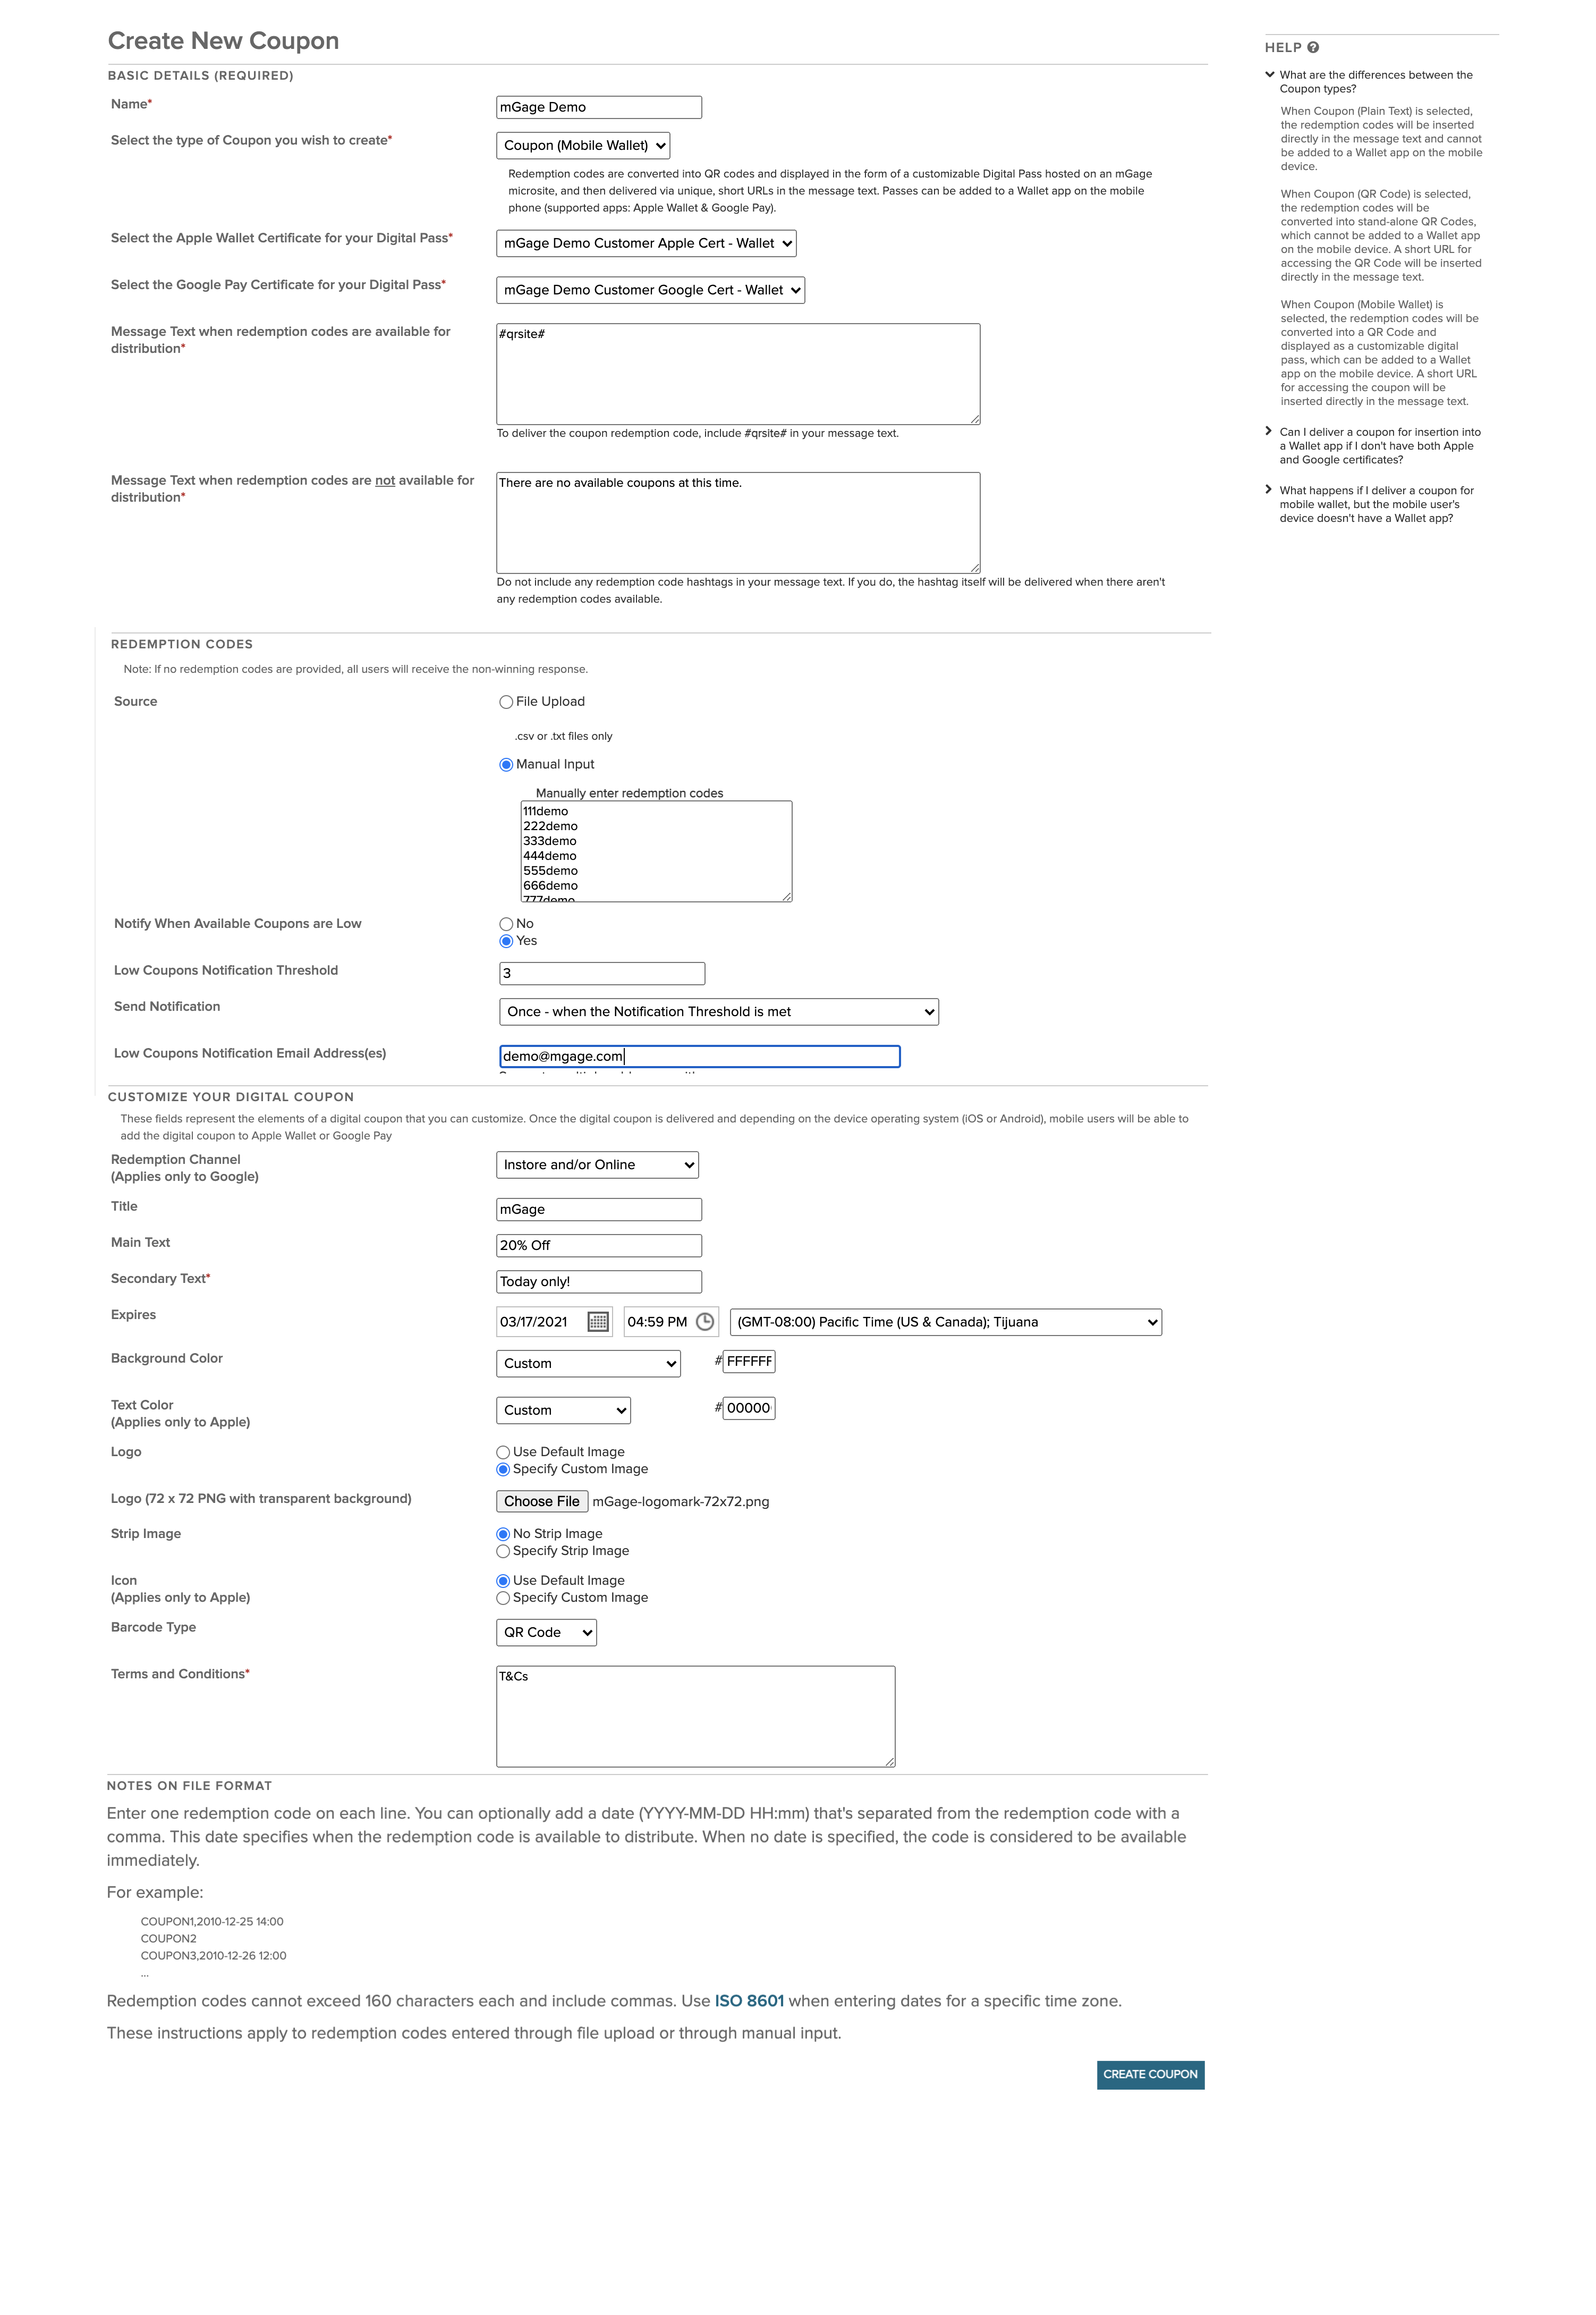
- Complete the following fields; then Save the Coupon.
- Name: Provide a name for the Coupon. This name will be used to identify the Coupon when configuring Programs and/or Broadcasts.
Coupon Type: Indicate the type of Coupon that will be created. NOTE: there are 3 types and Users will have the ability to create any of these 3 as long as the type is enabled for the Organization.
The types are: Plain Text, QR Code and Mobile Wallet.
Depending on the type selected, different options will be presented on the screen. This guide covers the creation of Mobile Wallet Coupons and how to deliver these from Communicate Pro. - Apple Wallet Certificate for your Digital Pass: When Coupon (Mobile Wallet) is selected, users will have to select either an Apple Wallet or Google Pay Certificate for the Digital Pass. If you do not have an option to select an Apple Wallet Certificate, contact your TPM to get a certificate provisioned.
Google Pay Certificate for your Digital Pass: When Coupon (Mobile Wallet) is selected, users will have to select either an Apple Wallet or Google Pay Certificate for the Digital Pass. If you do not have an option to select a Google Pay Certificate, contact your TPM to get a certificate provisioned. - Message Text when redemption codes are available for distribution: Refer to the text beneath the field and enter what is indicated (this varies by type of coupon being created).
Users should enter #code# for Plain Text coupons.
Users should enter #qrcode# for QR Code coupons.
Users should enter #qrsite# for Mobile Wallet coupons. - Message Text when redemption codes are not available for distribution: This field indicates what message will be delivered to mobile devices when there are no redemption codes available. Do NOT enter any of the hashtags referenced above in this field.
- Redemption Codes: Provide redemption codes either by uploading them or by keying them manually into this section.
- Notify When Available Coupons are Low: Users can elect to be notified when the available coupons start to run out. To use this feature, Users must indicate:
Low Coupons Notification Threshold - determines the number at which the notifications begin. - Send Notification - determines when the notifications will be delivered: either once when their threshold is reached, or each time a coupon is used once the threshold is reached.
- Low Coupons Notification Email Address(es) - determines where the notifications will be sent.
- Redemption Channel - Indicates if the mobile wallet coupon is for redemption Instore, Online, or both; or as a Temporary Price Reduction. This selection will apply to Google Pay passes only.
- Title - Will appear to the right of the logo.
- Main Text - This represents the coupon offer and will be the largest text on the coupon.
- Expires - Indicates when the coupon will expire.
- Background Color - The background color of the coupon.
- Text Color - The text color for the coupon. This will apply to Apple passes only.
Logo - A 72 x 72 .png image that will be displayed in the upper left corner of the coupon. - Strip Image - A 624 x 246 .png image that must have a transparent background. The Main Text and Secondary Text will be overlaid on top of the logo. If you do not want the text overlaid on top of this image, you can design the image up so it is right justified and it will appear on the right hand side of the coupon. This is not a required field.
- Icon - A 58 x 58 .png image that will be displayed on the device lock screen for notifications associated with the pass. This will apply to Apple passes only.
Show coupon code in plain text underneath QR code - Users can opt to display the redemption code in plain text beneath the QR Code. NOTE - redemption codes will not be displayed on the preview page. - Barcode Type - Users can select from a number of barcode types, such as QR Code, PDF417, Aztec, Code128, or can choose not to display a barcode by selecting none.
- Terms and Conditions - Provide terms and conditions for subscribers by entering them into the space provided.
Once the coupon is created, users will be able to see the details provided and preview the coupon. The coupon can be edited at any time.

NOTES:
- The preview image is a preview for the microsite landing page only and not an exact replica of what will appear on the digital pass that will be generated when the user clicks to add the pass to GPay or Apple Wallet.
- The digital pass will not be generated UNTIL the user clicks to add the pass to GPay or Apple Wallet.
- The "sample code" text beneath the barcode in the preview image will be replaced with the redemption code, but that code is not displayed on the preview as the digital pass has not been generated yet.
DELIVERING COUPONS TO SUBSCRIBERS
Once the coupon is created, there are a few ways it can be delivered: either as a response to a subscriber who is interacting with a program (via an Interactive Program, like a Text Response or Multistep Program) or via a marketing message (aka a Broadcast message). In either case, the coupon reference ID must be inserted into the message body.
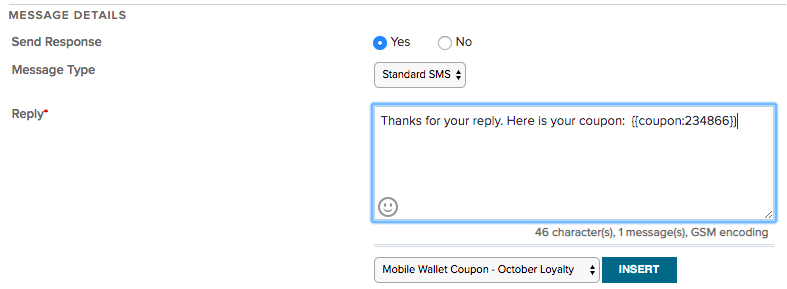
For Interactive Programs, such as a Text Response Program, you will craft your Reply and then use the Dynamic Content menu to select the coupon you wish to deliver:
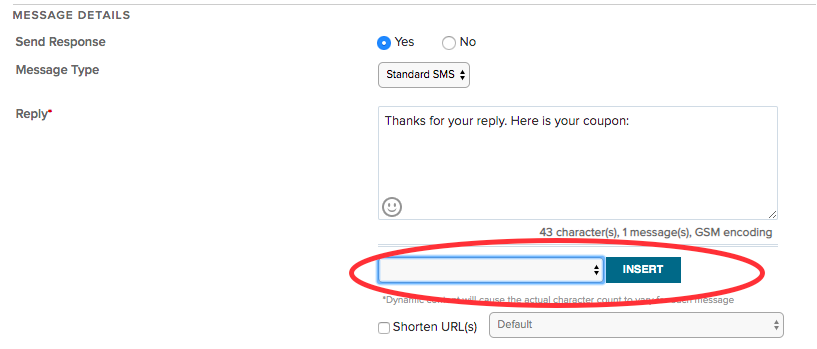
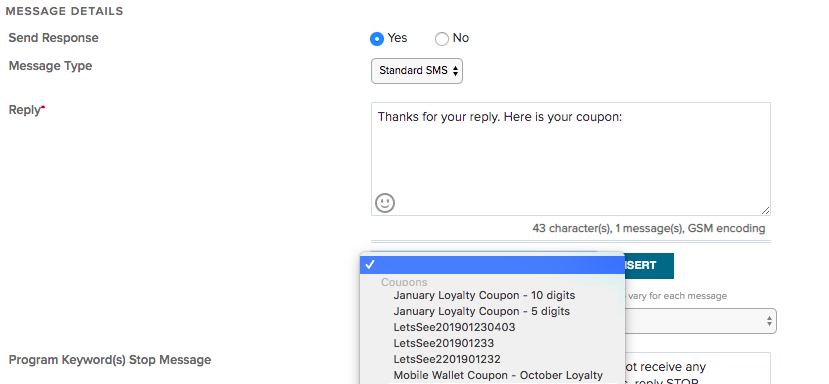
- Expand the Dynamic Coupon menu to select the coupon you wish to deliver.
- Select it and click Insert to add it into your Reply:
The coupon reference ID will be inserted into the Reply based on the position of your cursor:
- For Broadcast Messages, you will enter the Message Details and then use the Dynamic Content menu to select the coupon you wish to deliver:
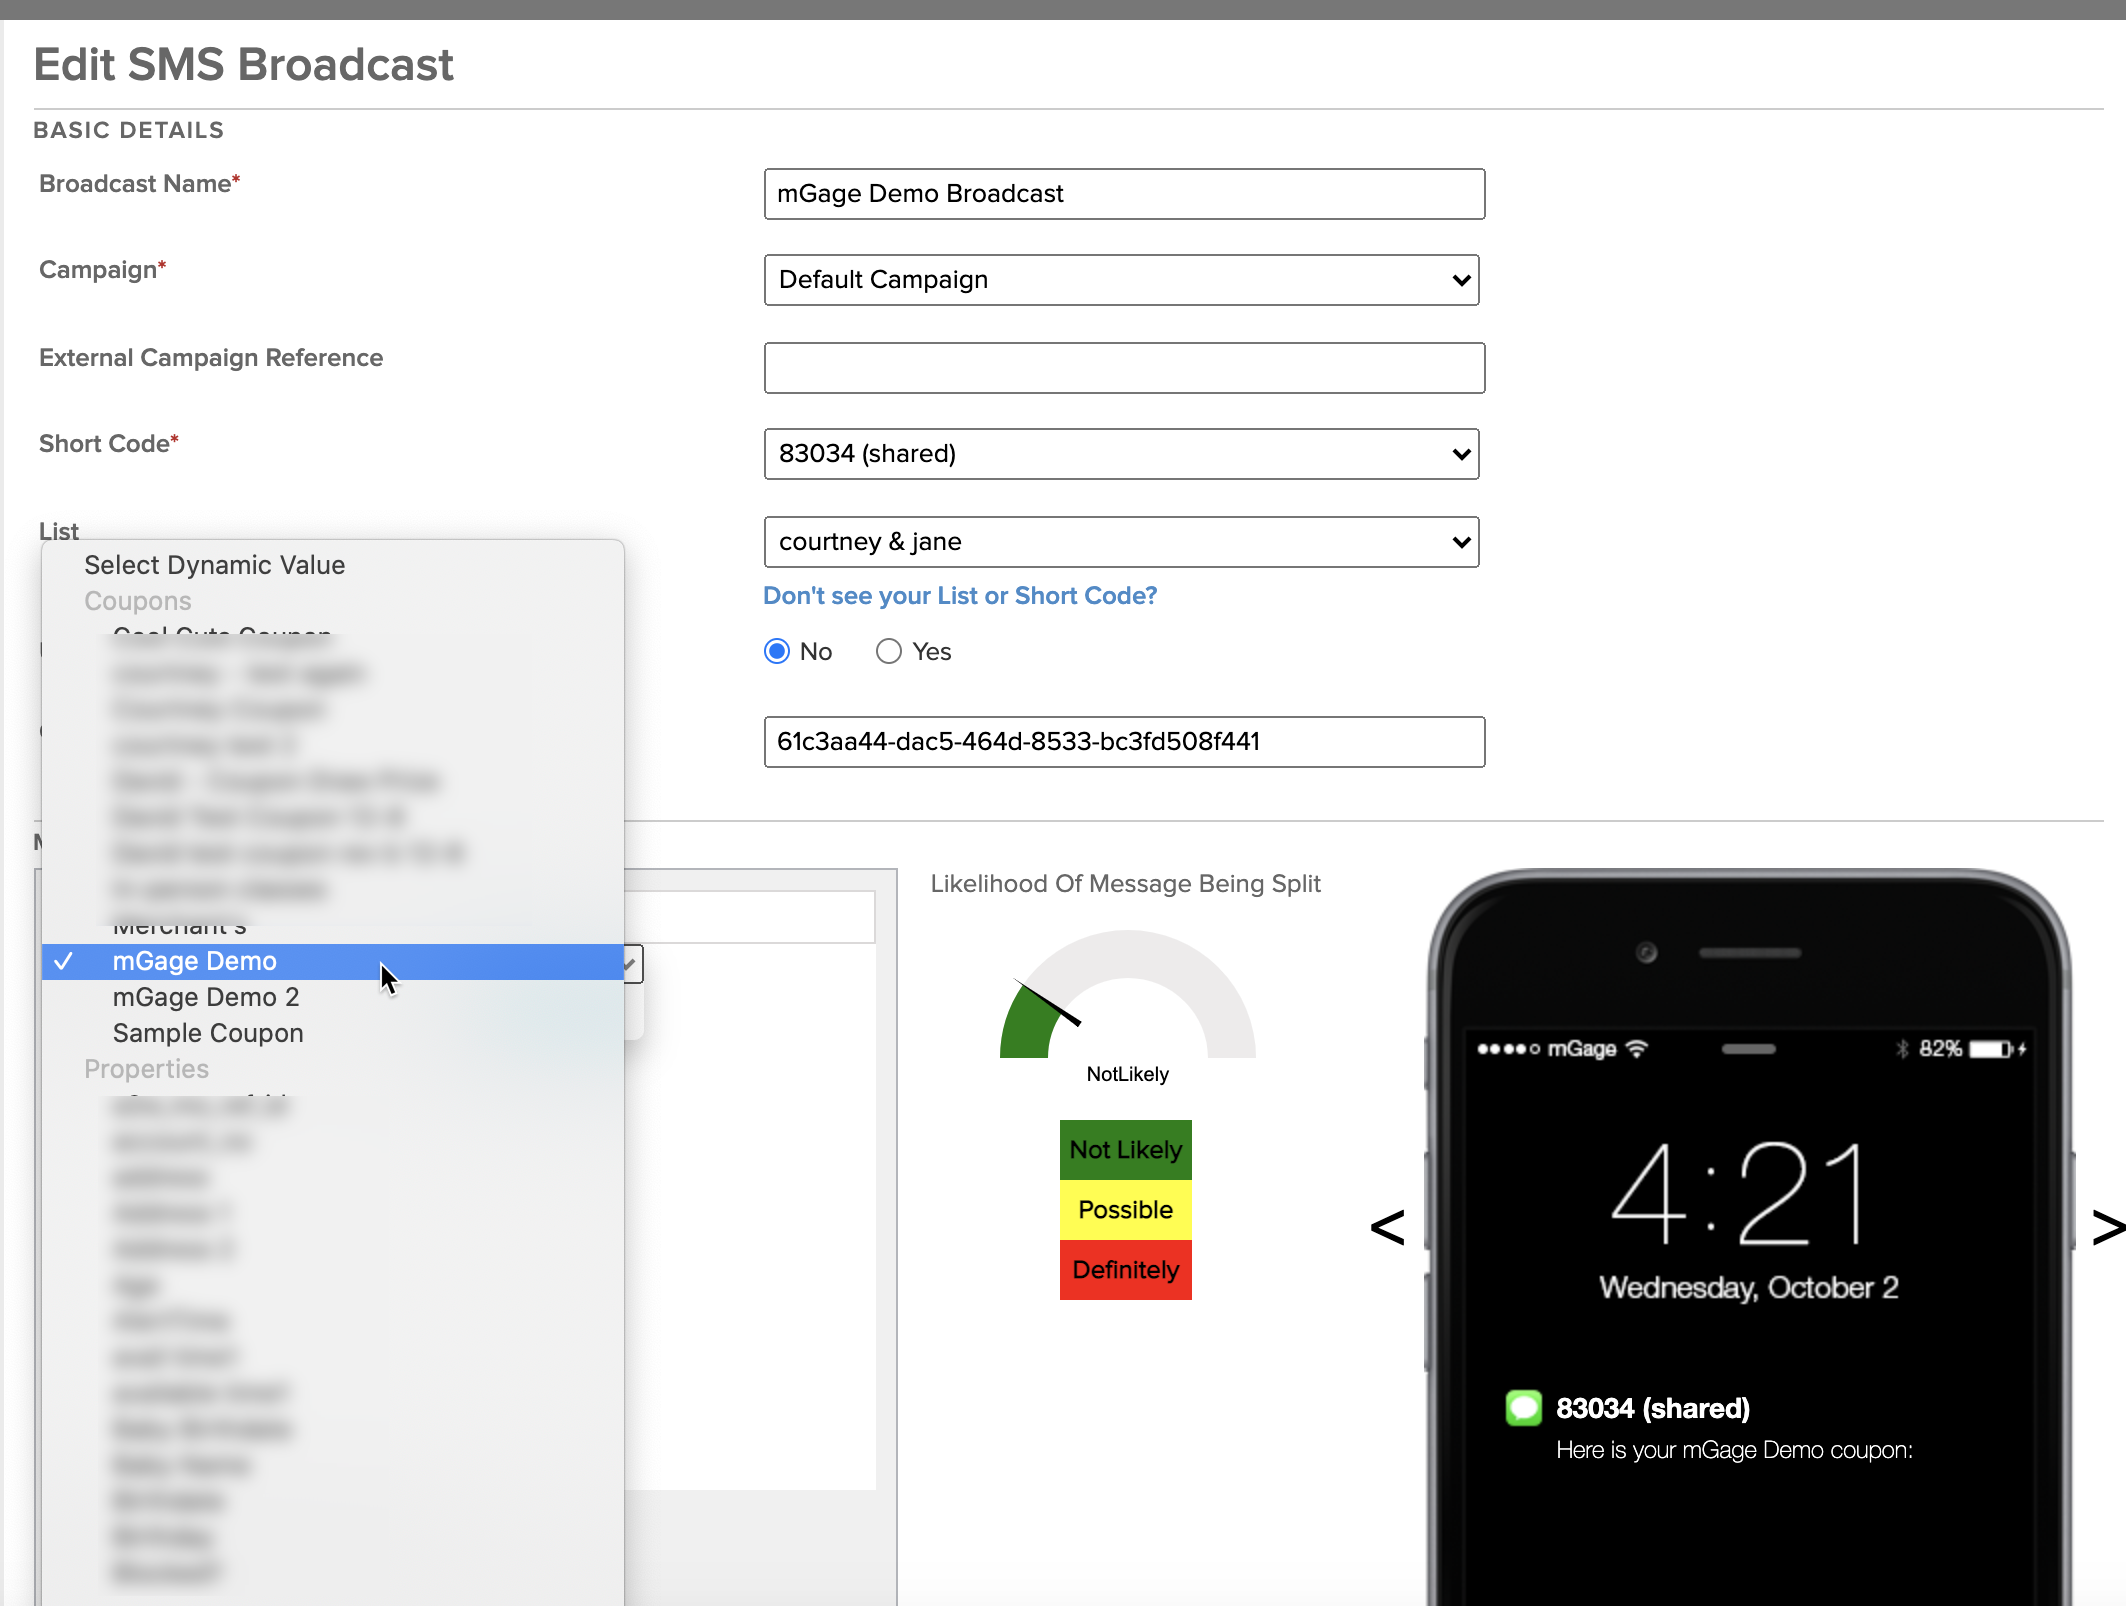
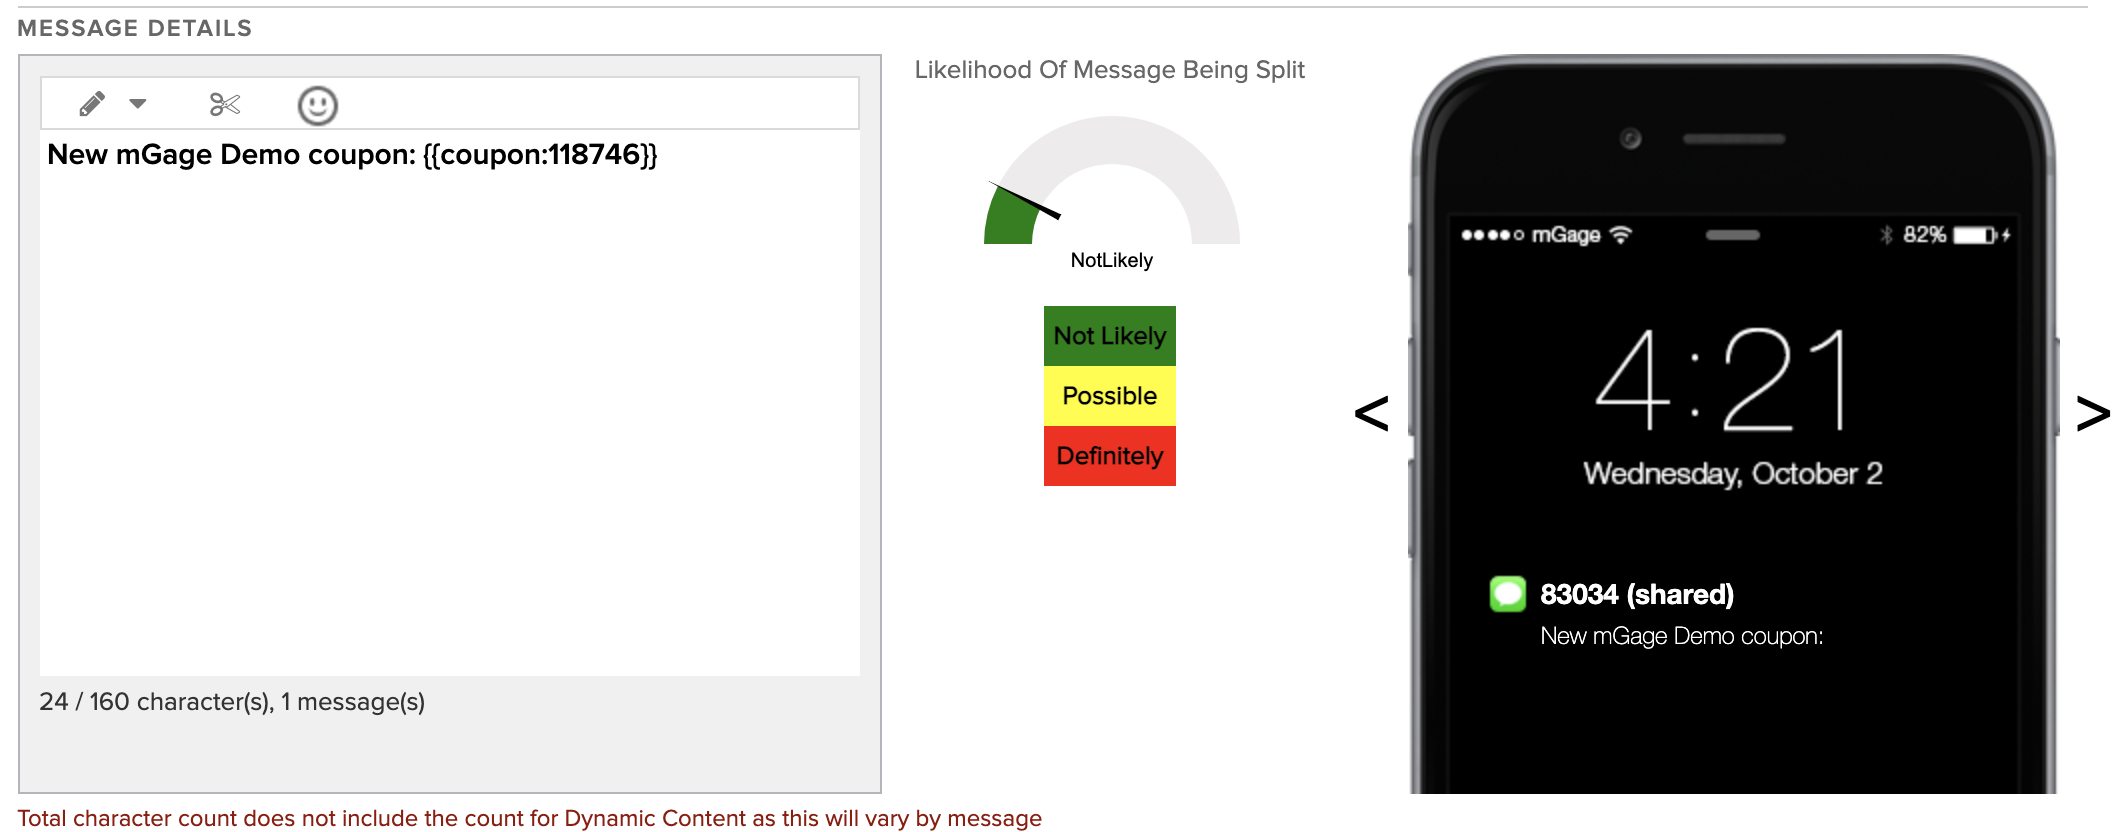
The numbers displayed when you insert the coupon represent the coupon ID; this dynamic content will be replaced for each subscriber to display either the plain text redemption code, or the link to the microsite (for the QR code or digital pass).
Users will receive their message with the appropriate dynamic content inserted:
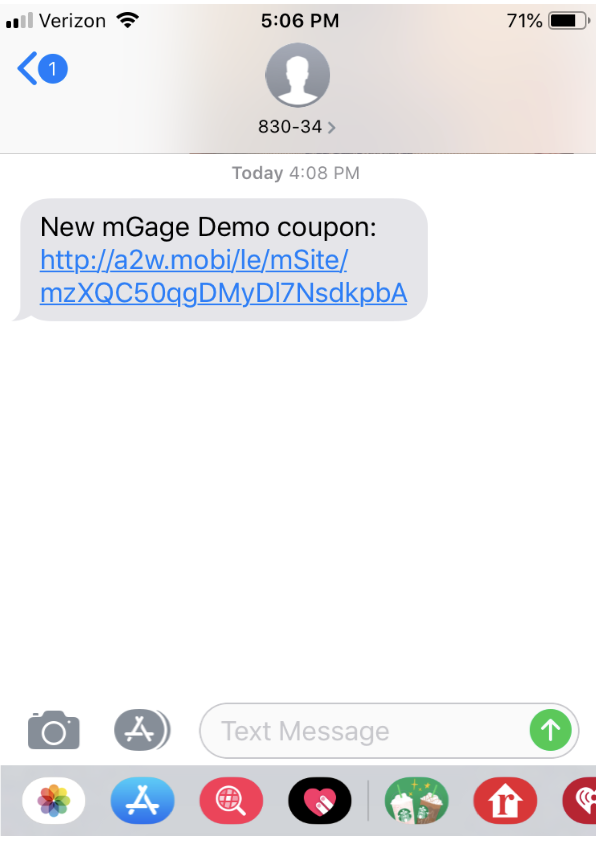
Upon clicking the URL in the message, users will be taken to the microsite:
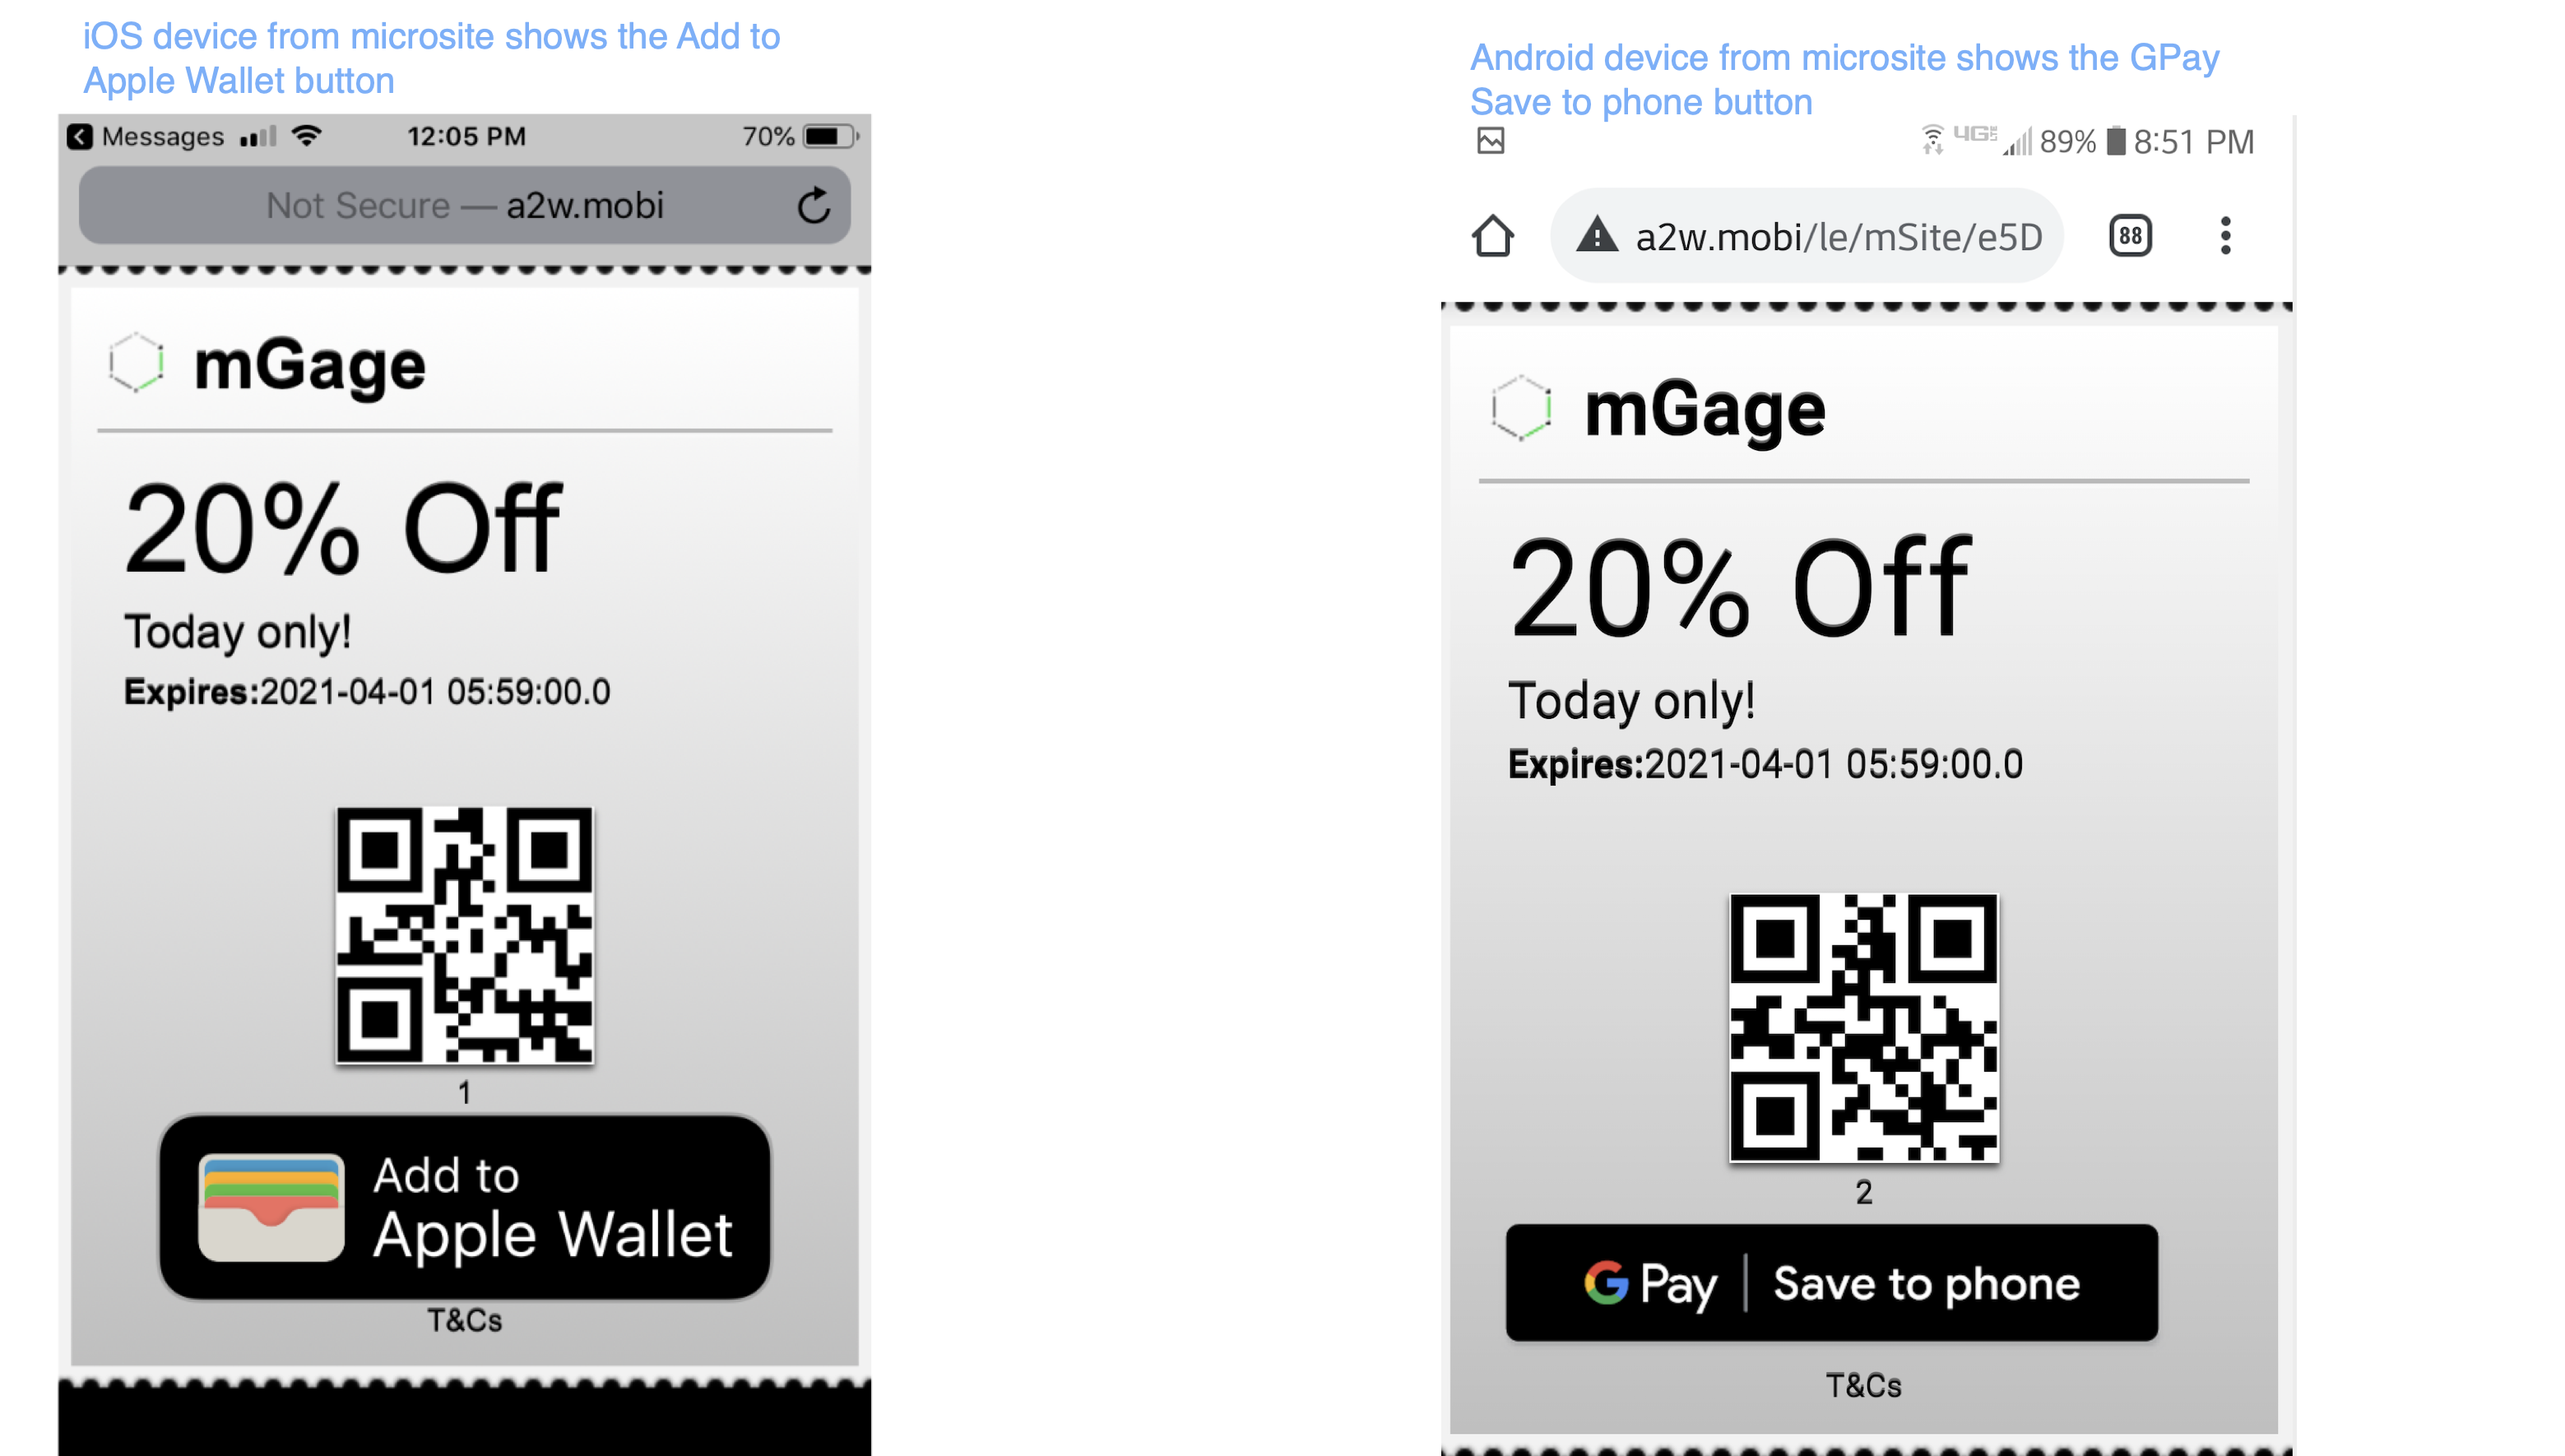
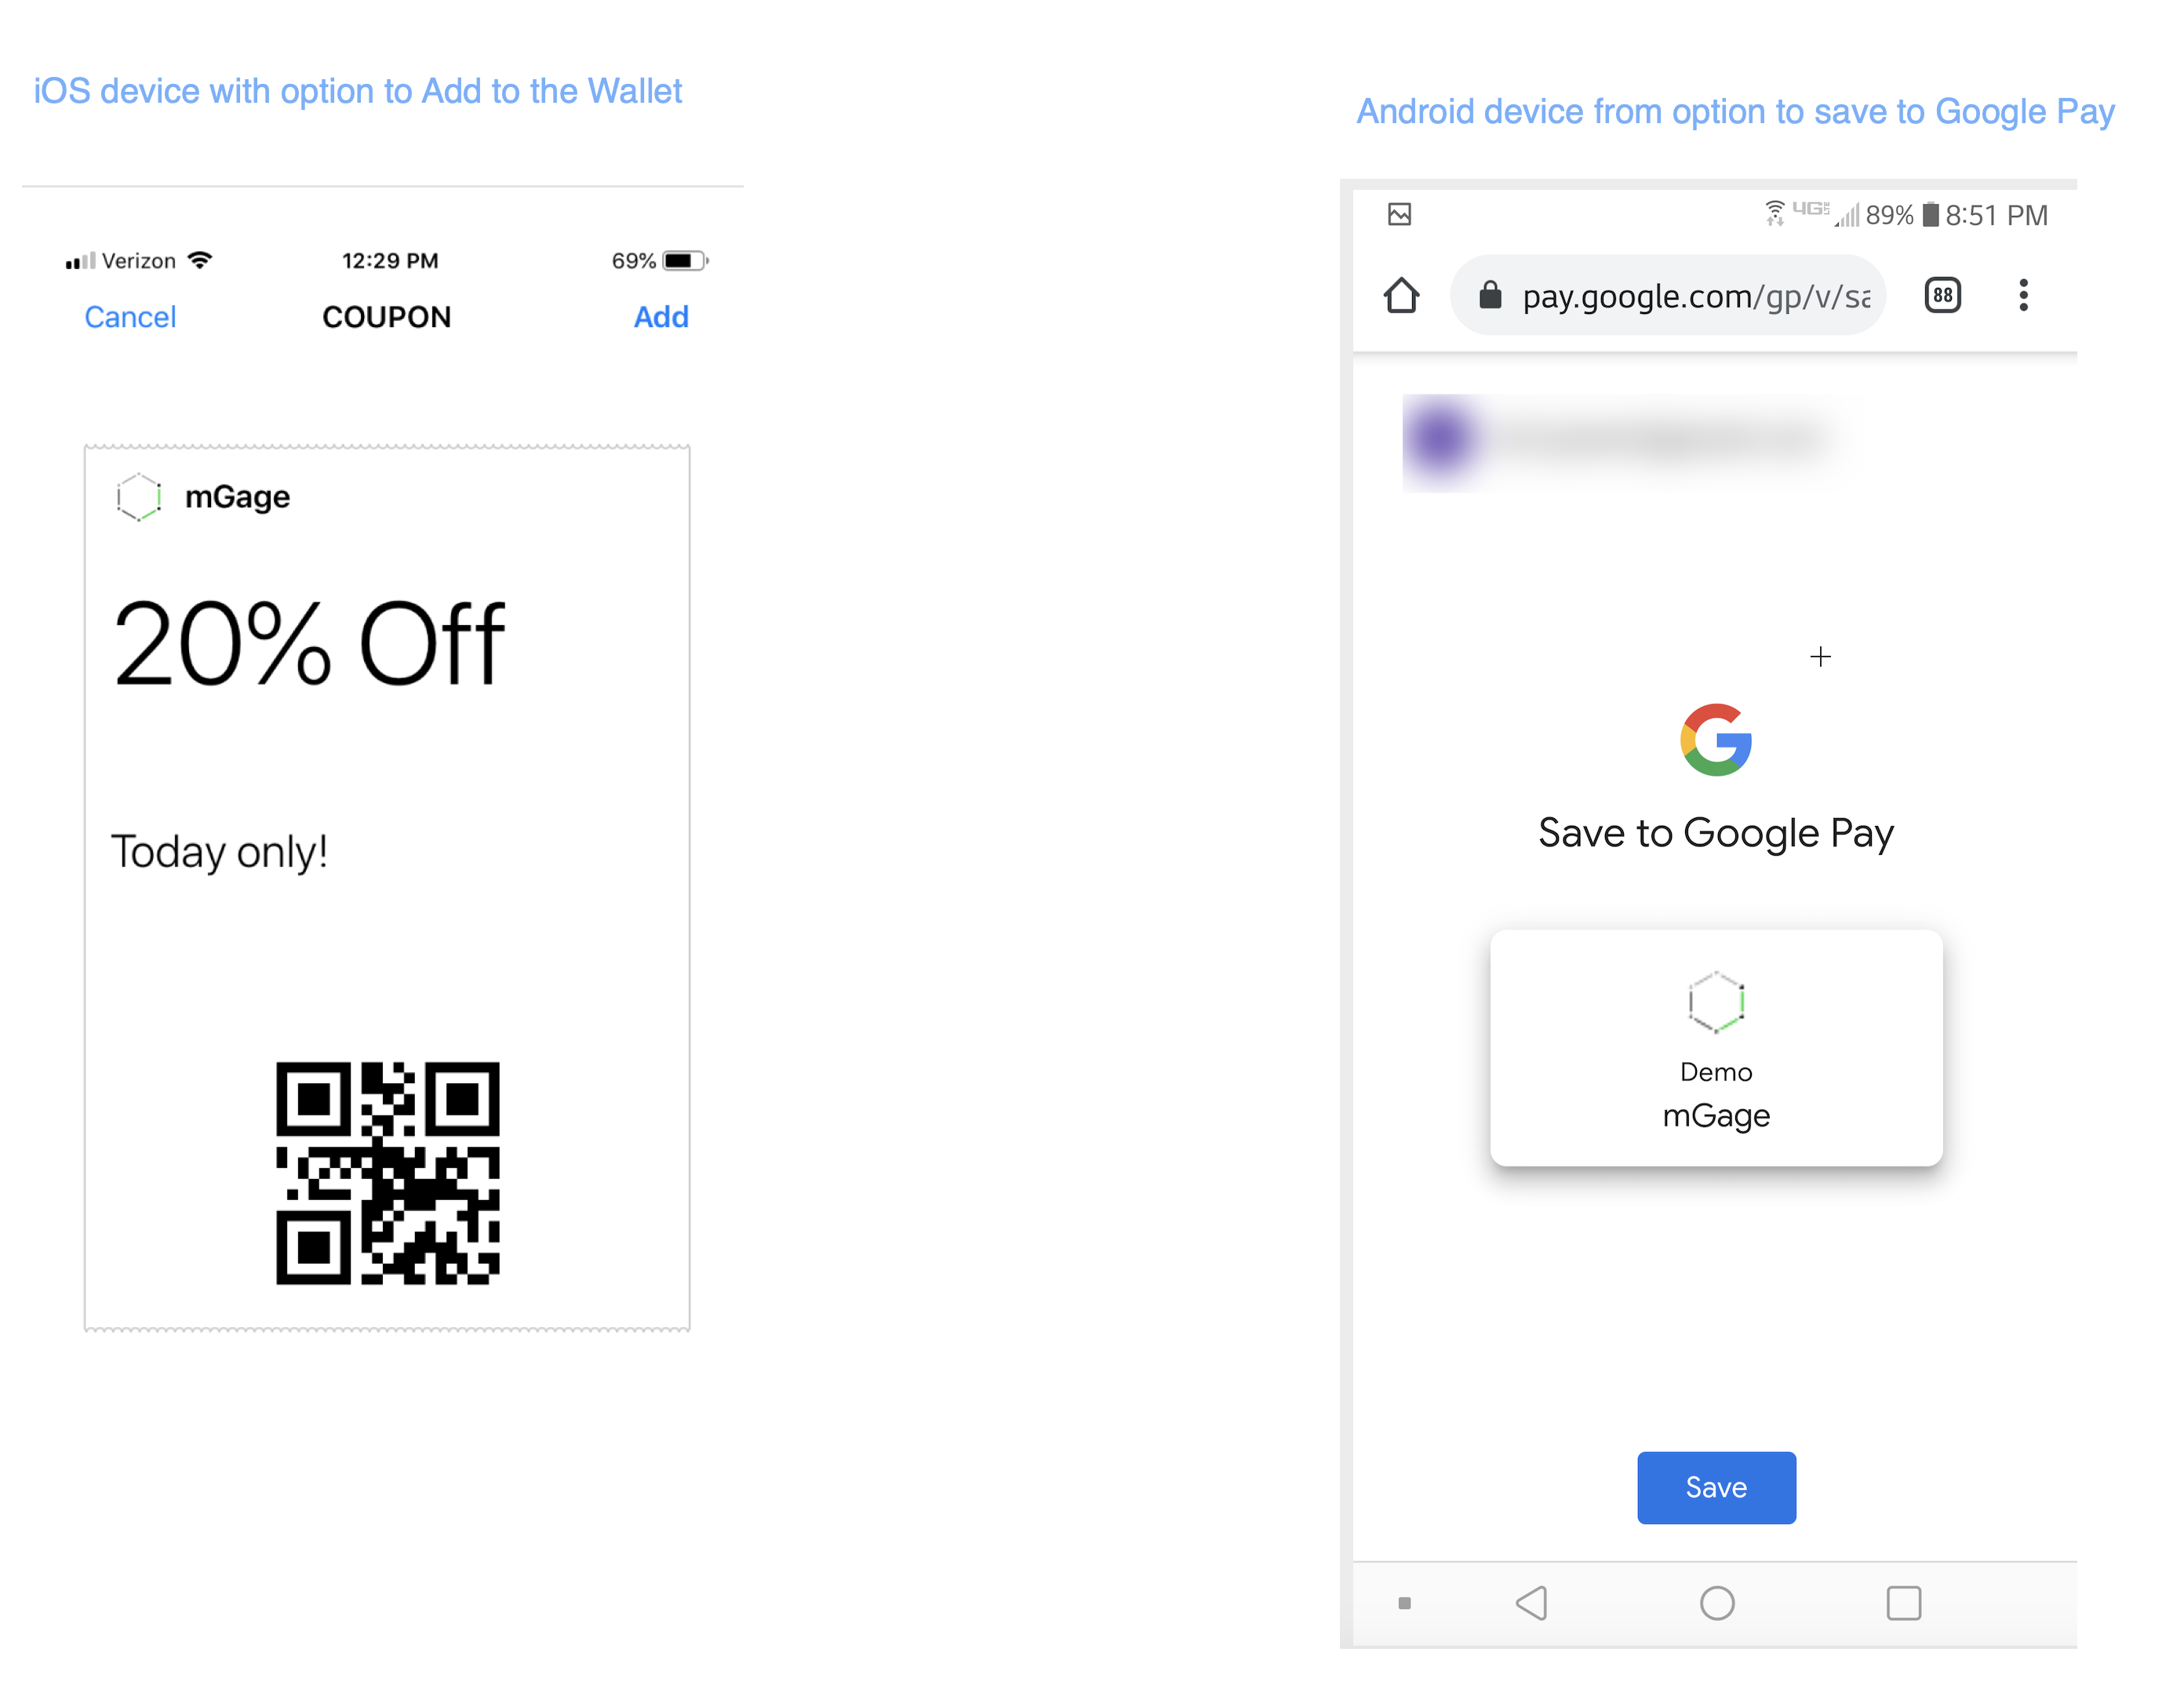
Once the Apple Wallet or Google Pay button is clicked, the user will have an option to add the digital pass to the Wallet or Google Pay:
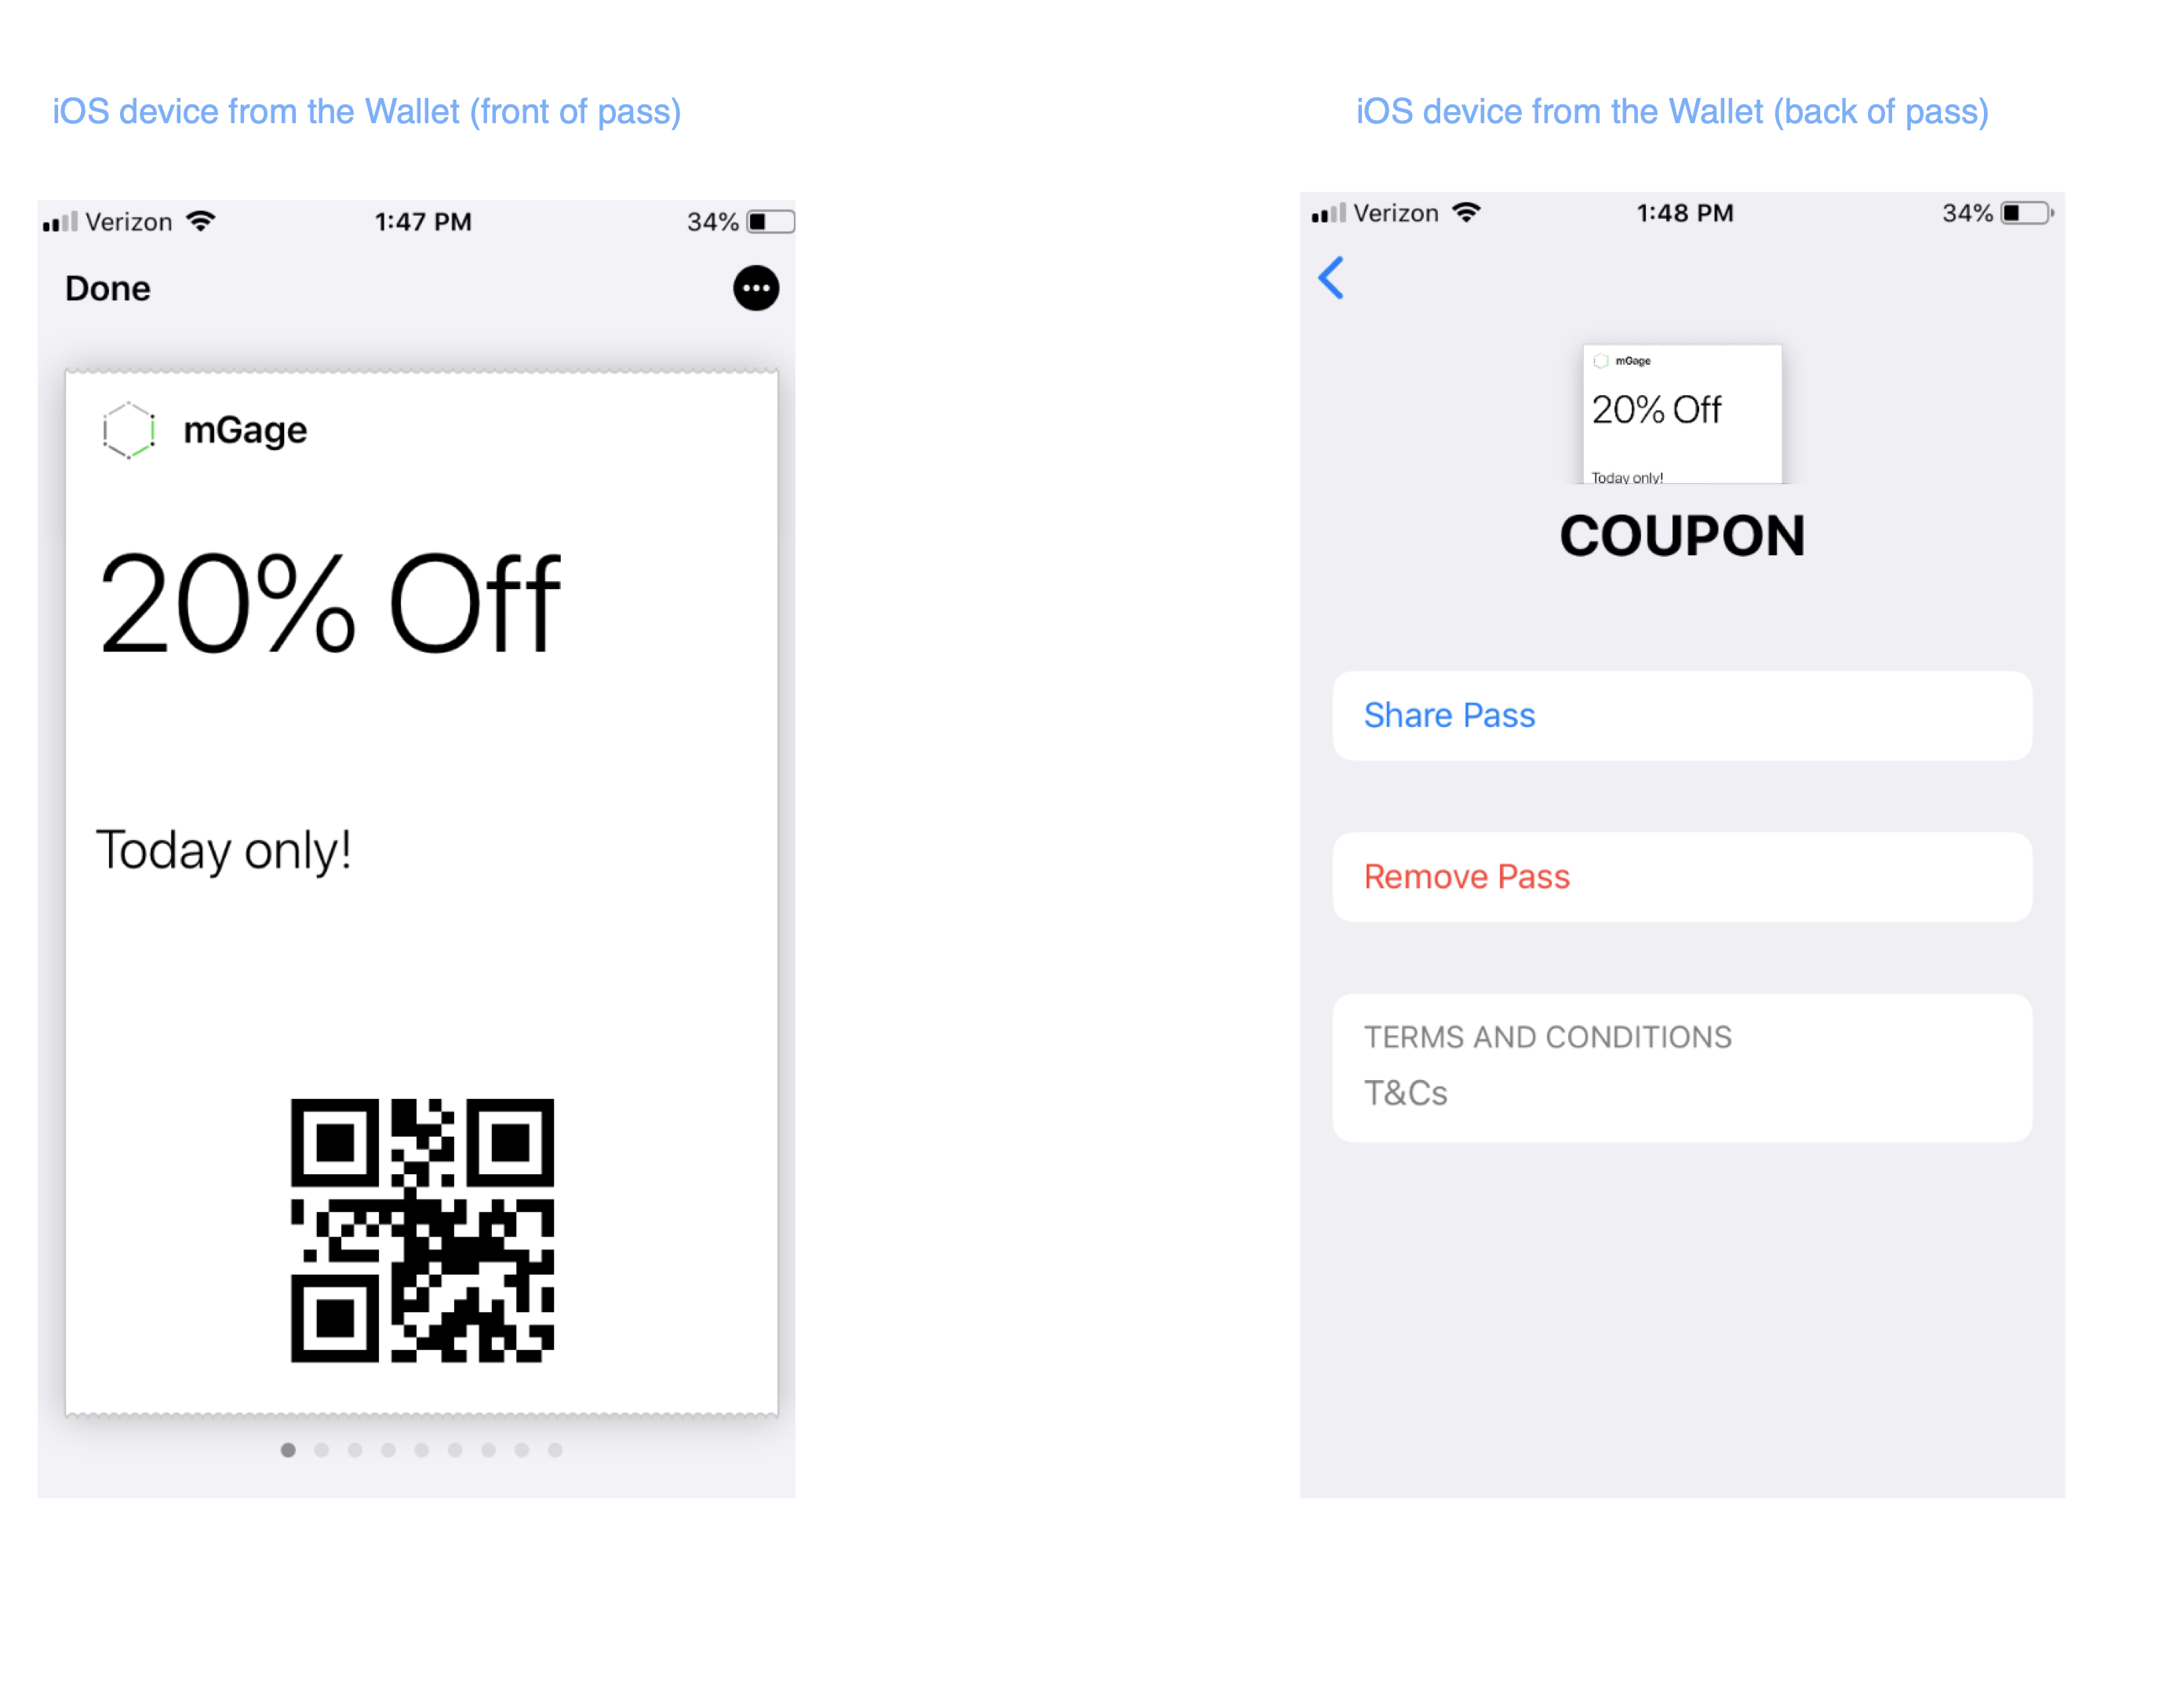
Then, the user will be able to access the digital pass from either their wallet or Google Pay:
This is what the pass looks like from within Apple Wallet:
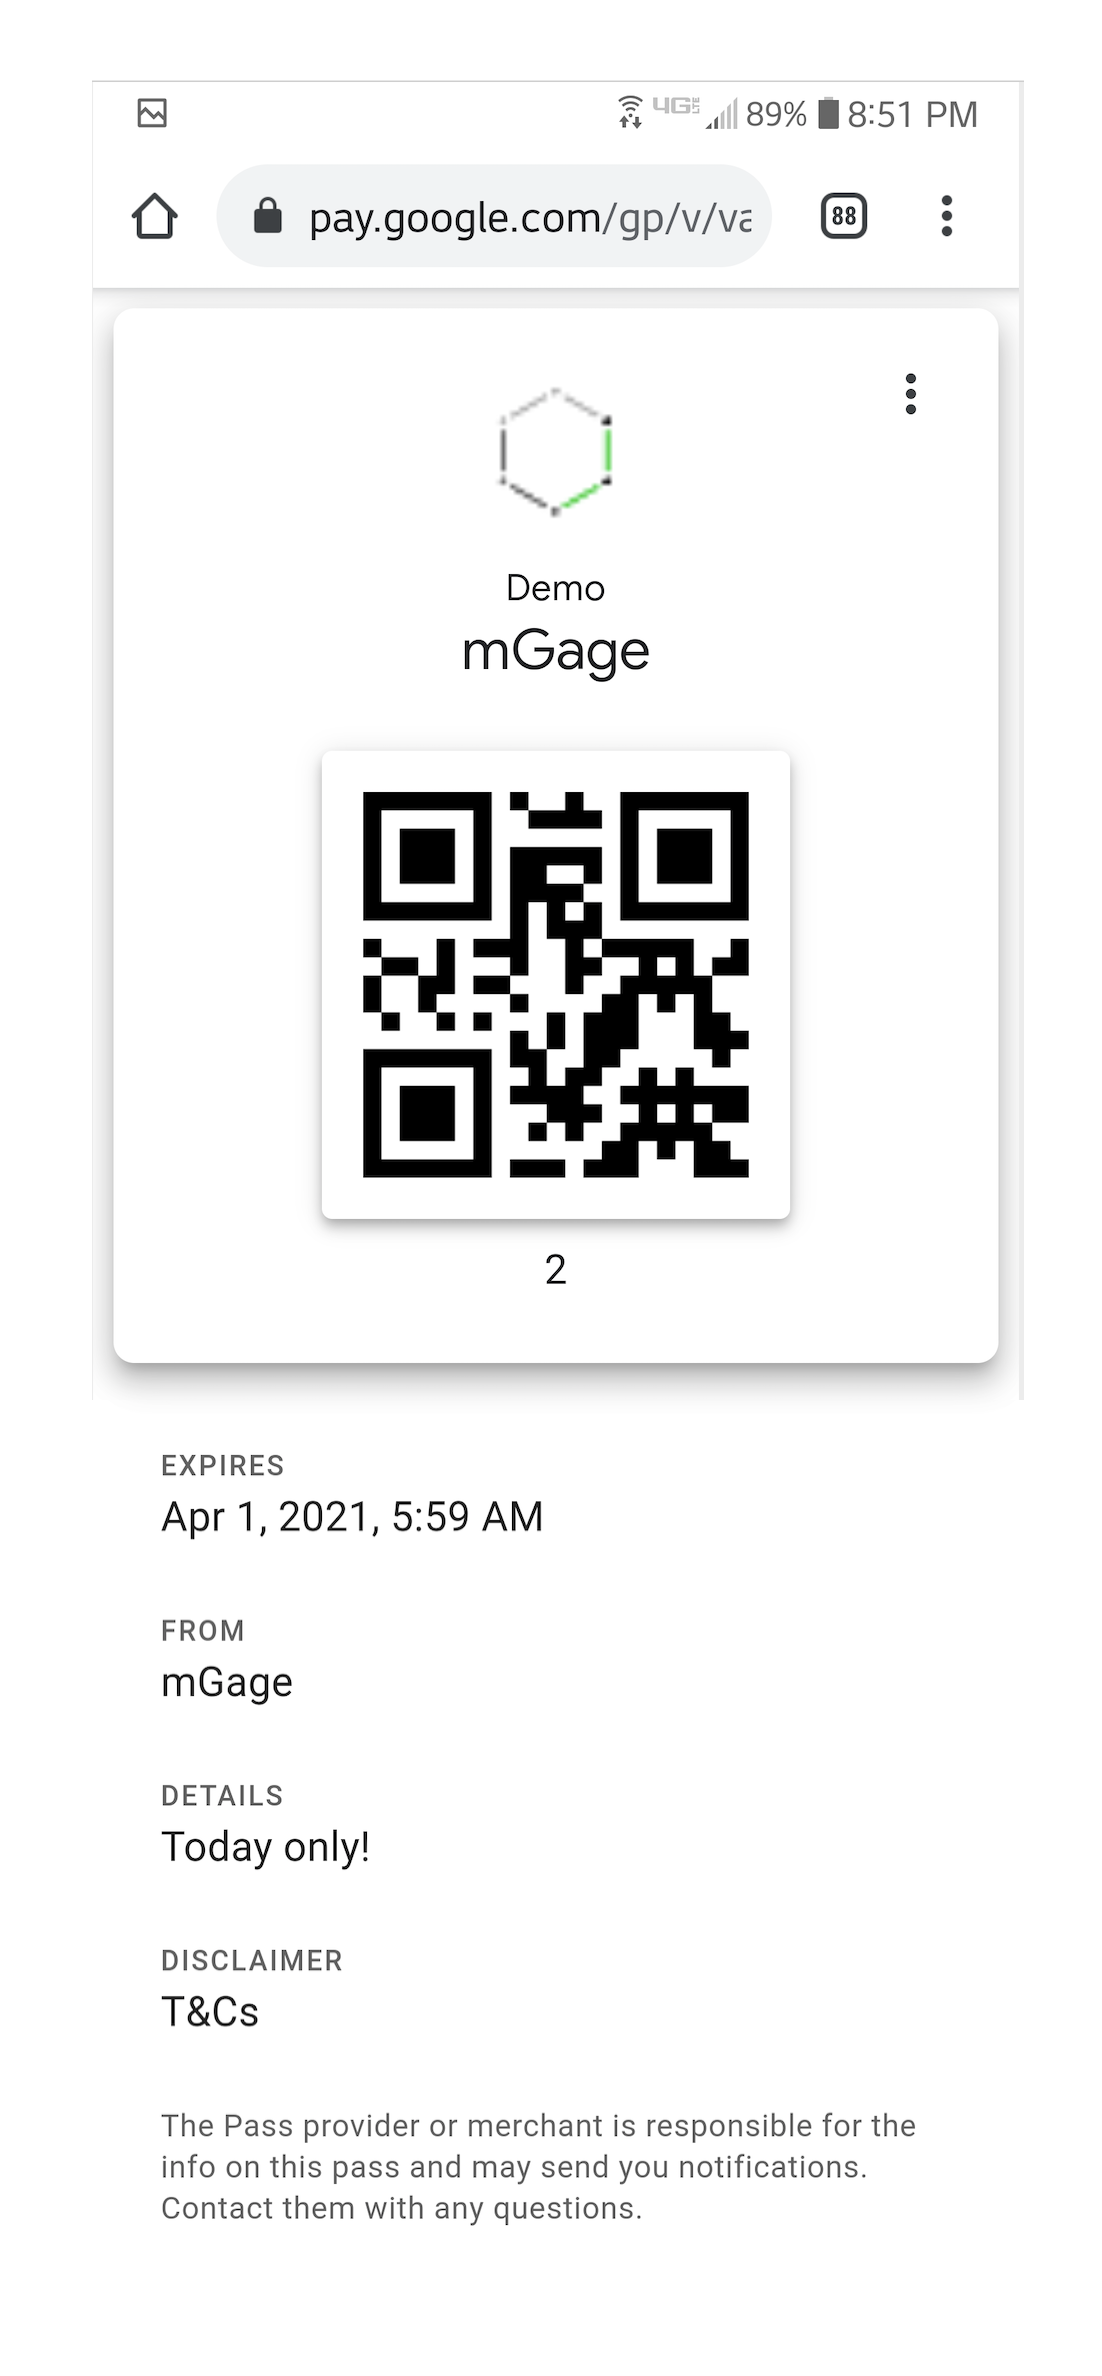
And, this is what the pass looks like from within Google Pay:
Updated about 1 year ago