Add Credits
Kaleyra.io provides a trial preloaded balance in your account to test out limited features. You can use all the available services without interruption by adding credits or balance (in currency) to your Kaleyra account.
Kaleyra also provides the auto-debit feature. With this feature, you can automatically add credits to your account when the balance goes below the set limit. You can simply link your debit/credit card to the auto-debit feature and enjoy hassle-free services.
Indian customers have the option to pay the tax using Tax Deduction at Source (TDS) while adding the credits. The TDS amount gets remitted to the Government fund. If you have updated all the required details (for example - TAN and KYC), you will get the option to select the TDS amount in percentage. The deduced TDS amount is displayed in the payment receipt.
This chapter contains below topics:
Add Funds to your Account
To add funds to your Kaleyra account, perform the following steps:
- Sign in to your Kaleyra.io account.
- On the left navigation bar, click Billing.
OR, the top-right corner of the page displays your currency information. Click the + icon to add funds to your account.
The Billing page with the Topup tab details appears.
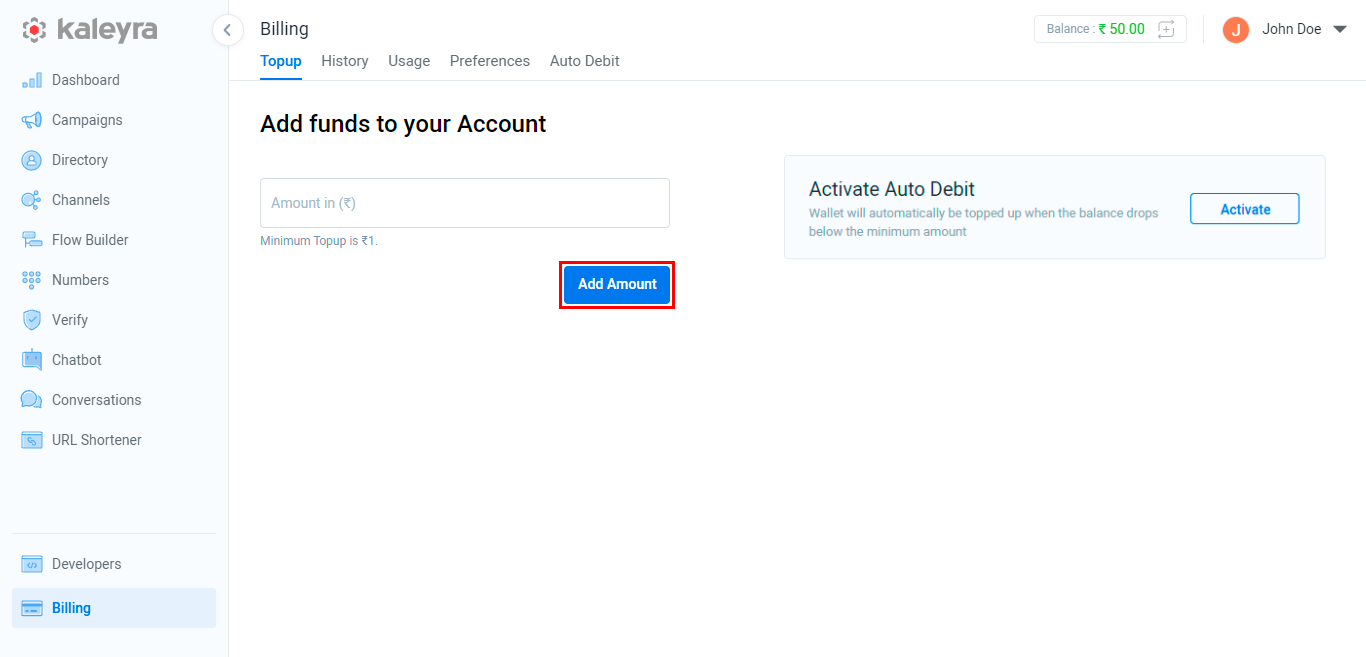
- In the Amount in Currency field, enter the amount you want to add or credit to your Kaleyra account for the payments of your subscribed numbers.
- Click Add Amount.
The Add funds to your Account appears.
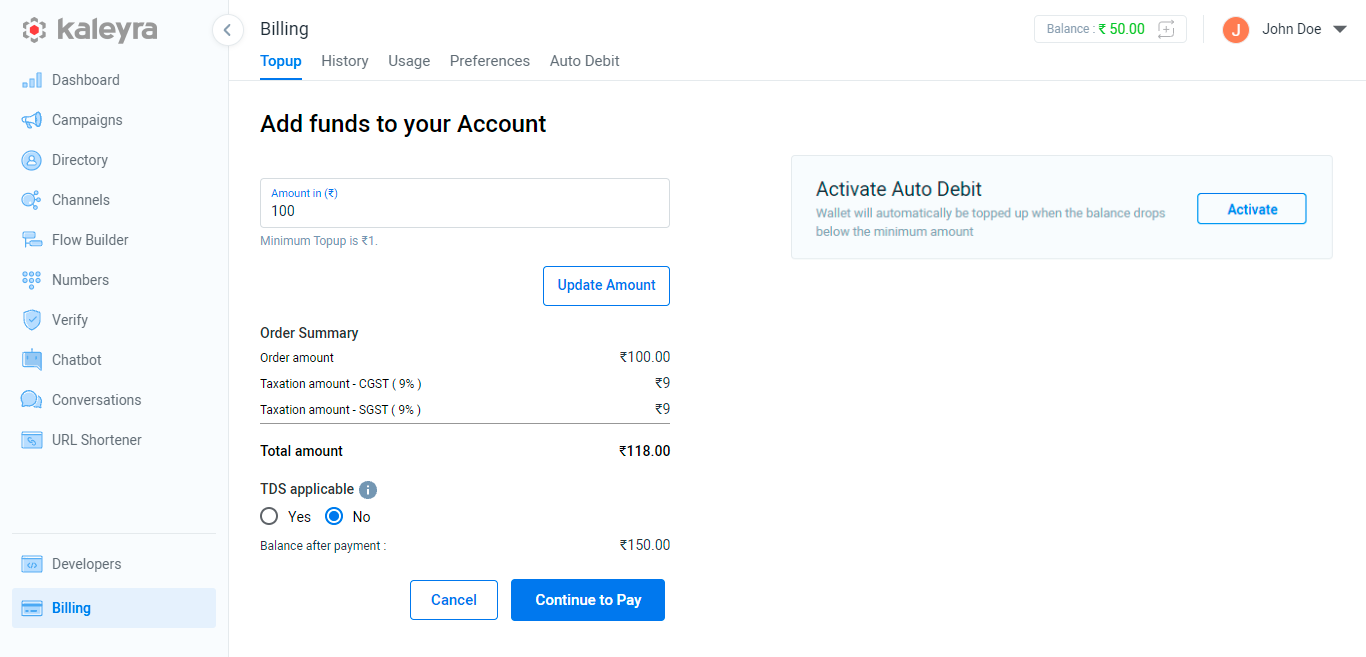
- In TDS applicable, by default it is set as No. If you wish to add the TDS amount, click Yes, and then select one of the following TDS percentages:
- 0.5%
- 2.0%
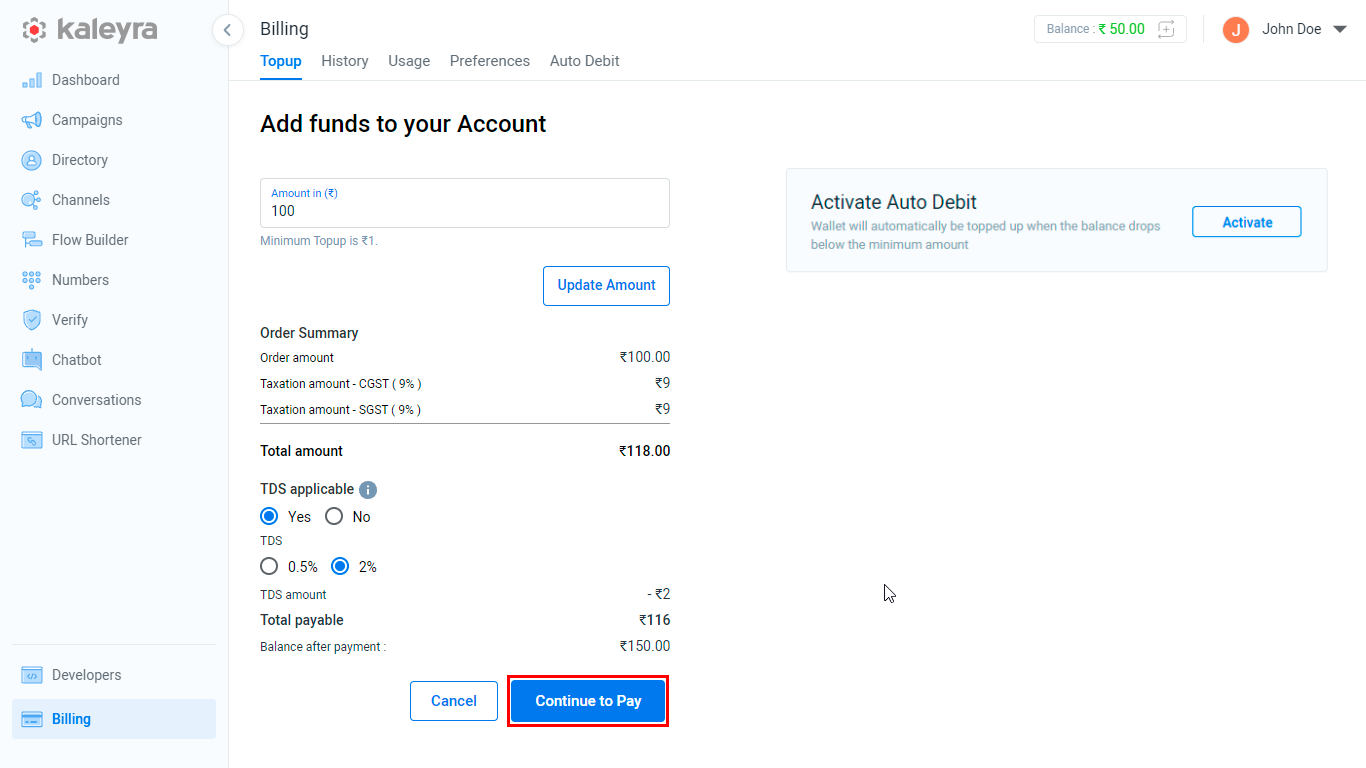
- Verify the details (including taxes if any) and click Continue to Pay.
The available payment methods appear.
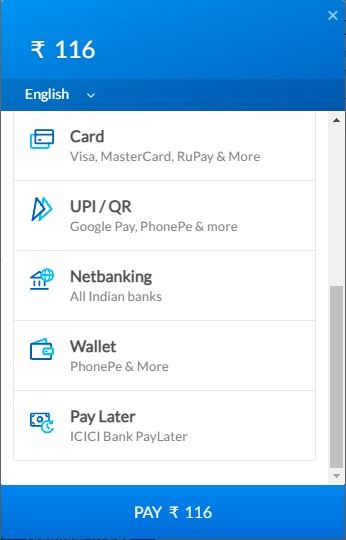
- The language is set to English by default. To change your preferred language, click the arrow next to English to view the language list, then select your preferred language.
- Select one of your preferred payment methods and continue with the payment steps. The below steps are for one of the commonly used payment methods, which is using the card payment.
The card details entry appears.
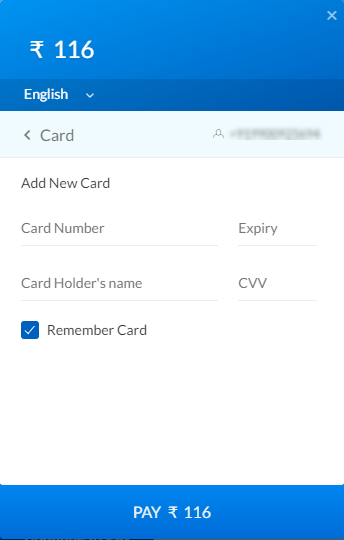
- In the Card Number field, enter the card number through which you want to make payment.
Based on your card entry, the option to select the currency type (for example - INR, GBP, and so on) through which you want to make payment appears.
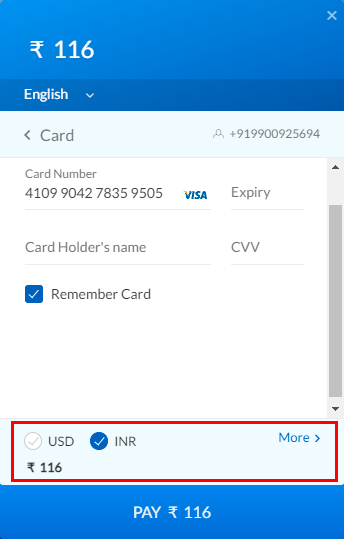
- Click the arrow next to More to view the list, select the currency type if you want to make a payment in a different currency.
- In the Expiry field, enter the card validity in MM/YY format.
- In the Card Holder's name field, enter the card holder's name printed on the card.
- In the CVV field, enter the CVV behind your card.
- By default, the Remember Card option is to be selected. If you do not wish to remember your card details, deselect the Remember Card.
- Click Pay Amount.
The OTP entry appears.
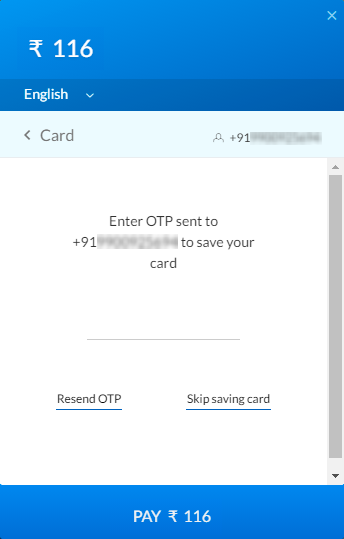
- In the OTP field, enter the OTP sent to the number linked to your account.
- If you want to re-send the OTP, click the Resend OTP link.
- Click Pay. Your account gets credited after the successful approval from your card linked to the bank. Additionally, you will receive a confirmation email from Kaleyra.io.
Auto Debit
To select the auto-debit feature, perform the following steps:
- Sign in to your Kaleyra.io account.
- Go to Billing and click the Auto Debit tab.
OR, from the Topup tab, in the Activate Auto Debit section, click Activate.
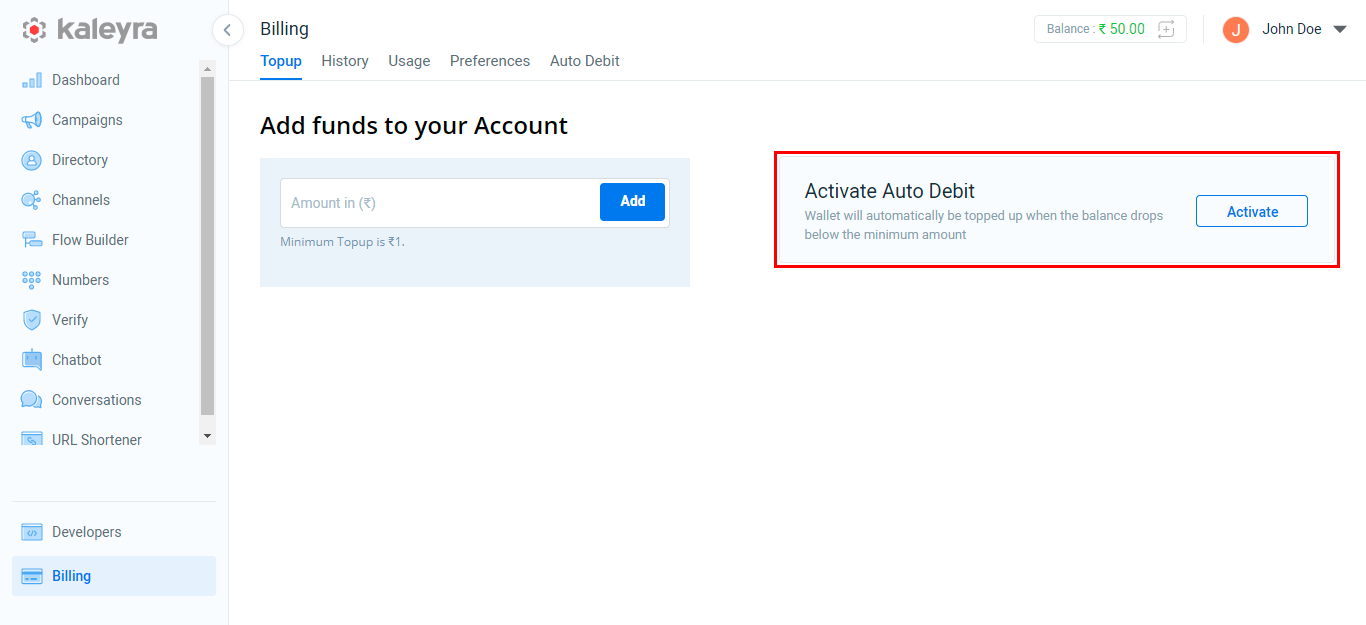
The Billing page with the Auto Debit tab details appear.
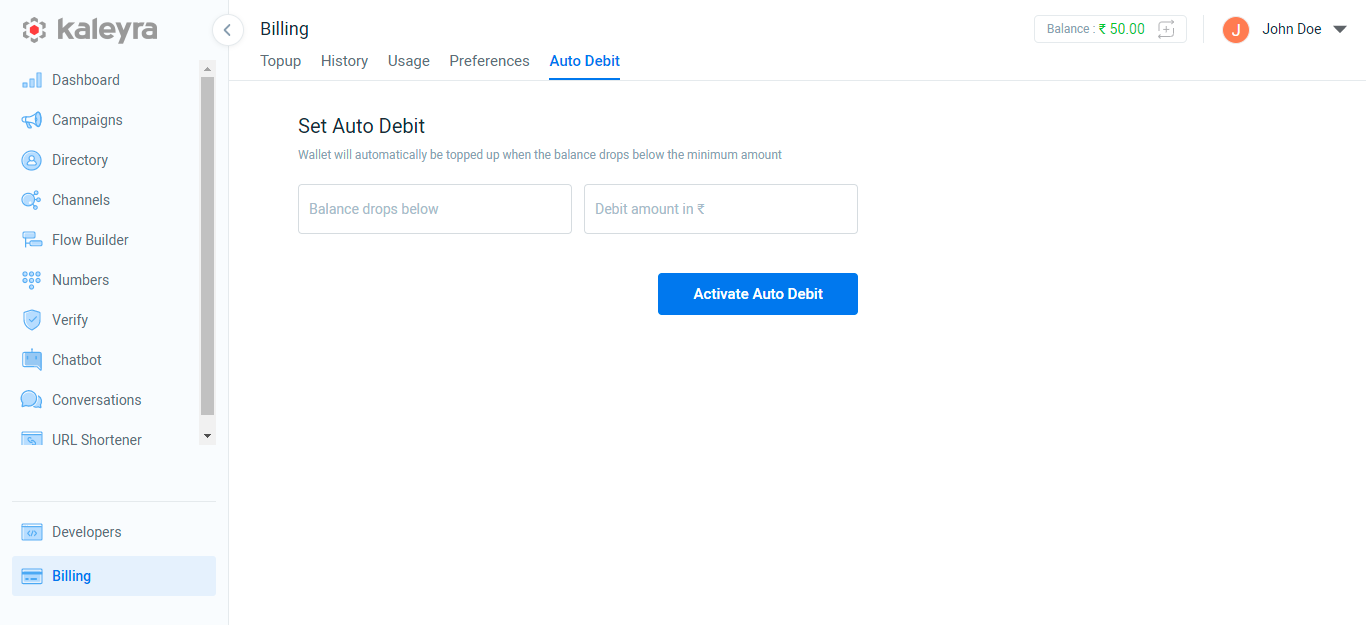
Note:The Debit amount should be equal to or greater than 500.
- In the Balance drop below field, enter the minimum amount of balance when you want to auto-debit the amount to your Kaleyra account.
- In the Debit Amount in Currency field, enter the amount you want to add to your Kaleyra account from your added debit or credit card when your account balance reaches the threshold.
- Click Activate Auto Debit.
The add your details page appears. The minimum amount is to complete the transaction through your card for the first time, to update the card details for any hassle-free transaction in the future. The amount credited to your Kaleyra account will be added as the Kaleyra Topup amount.
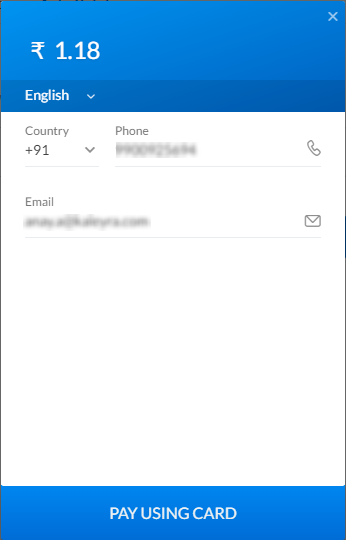
Note:Please verify your mobile number and email address. If you want to update, you can click on the mobile number or email address field and update your details.
- Click Pay Using Card.
The add card details appear.
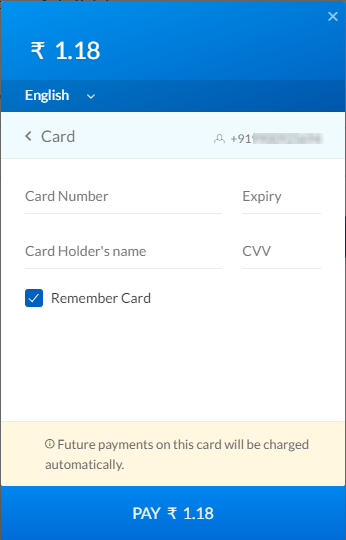
- In the Card Number field, enter the card number through which you want to make payment.
Based on your card entry, the option to select the currency type (for example - INR, USD, and so on) through which you want to make payment appears.
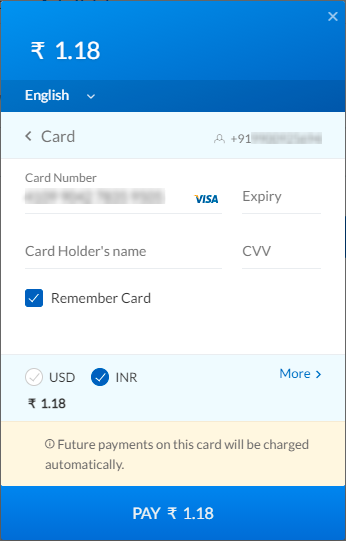
Notes:
- Make sure the card you are updating supports recurring payments.
- Payments on this card will be debited automatically in the future.
- Click the arrow next to More to view the list. Select the currency type you want to change the currency to make payment.
- In the Expiry field, enter the card validity in MM/YY format.
- In the Card Holder's Name field, enter the card holder's name printed on the card.
- In the CVV field, enter the CVV printed behind your card.
- By default, the Remember Card option is to be selected. If you do not wish to remember your card details, deselect the Remember Card.
- Click Pay Amount. After the successful payment, you get notifications on your email and mobile number. Your card is added for auto-debit and all the future payment on this card needs to be processed automatically.
Updated 7 months ago
