Create Callback Profile for Incoming WhatsApp Messages
You must configure the Callback Profile for WhatsApp Incoming Messages to receive notifications regarding all the incoming messages (including the message content) received to your registered business WhatsApp number. You must first create a Callback Profile and then add the Callback Profile ID to the WhatsApp Number.
Create a Callback Profile for WhatsApp Incoming Messages
To create a Callback Profile for Incoming WhatsApp messages:
- Follow the instructions given in Callback Profiles.
- Select the required HTTP method:
i. GET and in the Endpoint field, enter the endpoint and the query parameters as shown in the following example:https://webhook.site/7ef1e66d-4231-46f7-907a-75df0df6357c?body=<body>&mime_type=<mime_type>&media_url=<media_url>&from=<from>&name=<name>&type=<type>&created_at=<created_at>&reply_to=<reply_to>&wanumber=<wanumber>&mobile=<mobile>&custom_response=<custom_response>&message=<message>&contacts=<contacts>&location=<location>
ii. POST and
a. In the Endpoint field, enter the endpoint (as shown in the following example) where you want to receive notifications as shown:
https://webhook.site/7ef1e66d-4231-46f7-907a-75df0df6357cb. Enter the following in the Endpoint field:
{
"body": "<body>",
"mime_type": "<mime_type>",
"media_url": "<media_url>",
"from": "<from>",
"name": "<name>",
"type": "<type>",
"created_at": "<created_at>",
"reply_to": "<reply_to>",
"wanumber": "<wanumber>",
"mobile": "<mobile>",
"custom_response": "<custom_response>",
"message": "<message>",
"contacts": "<contacts>",
"location": "<location>"
}
Sample Response
The following is an example of a callback received due to an incoming text message received by a customer:
body	Hi
from	919xxxxxxxx8
name	John
type	text
created_at	1692619555
reply_to	4e7b75d9-e885-4e1f-b958-2568780ff25f
wanumber	917xxxxxxx9
mobile	919xxxxxxx8
custom_response	false
message	[{"from":"919xxxxxxxxx8","id":"4e7b75d9-e885-4e1f-b958-2568780ff25f",
          "timestamp":"1692619555","type":"text","text":{"body":"Hi"},
          "profile":{"name":"john"},"wa_number":"917xxxxxxxxx9"}]
The following table displays the parameter in the sample response:
| Parameter | Description |
|---|---|
| body | Body of the message. |
| from | The WhatsApp business number registered with Kaleyra.io from which the message is to be sent. Ensure the number is prefixed with the country code. (E164 format). |
| name | Name of the sender of the message. |
| type | Format of the message. |
| created_at | Time at which the message was created. |
| reply_to | End user’s response on business message ID. |
| wanumber | The registered WhatsApp number in E164 format. |
| mobile | Phone number of the recipient. |
| custom_response | The static field is set as false. |
| message | The end user’s entire message including name, profile details, time, WhatsApp number, and message ID. |
Add the Callback Profile ID to the WhatsApp Number
To receive a callback about the incoming WhatsApp messages, you must ensure that the WhatsApp number has an associated Callback Profile ID configured. You can do this while creating a new WhatsApp Number or you can edit the configuration for an existing number.
Note:You can use different callback profiles for other WhatsApp numbers, as in, different endpoints if needed.
- On the profile settings drop-down list, select the Callback Profiles option.
The Callback Profiles page appears with all the existing Callback Profiles.
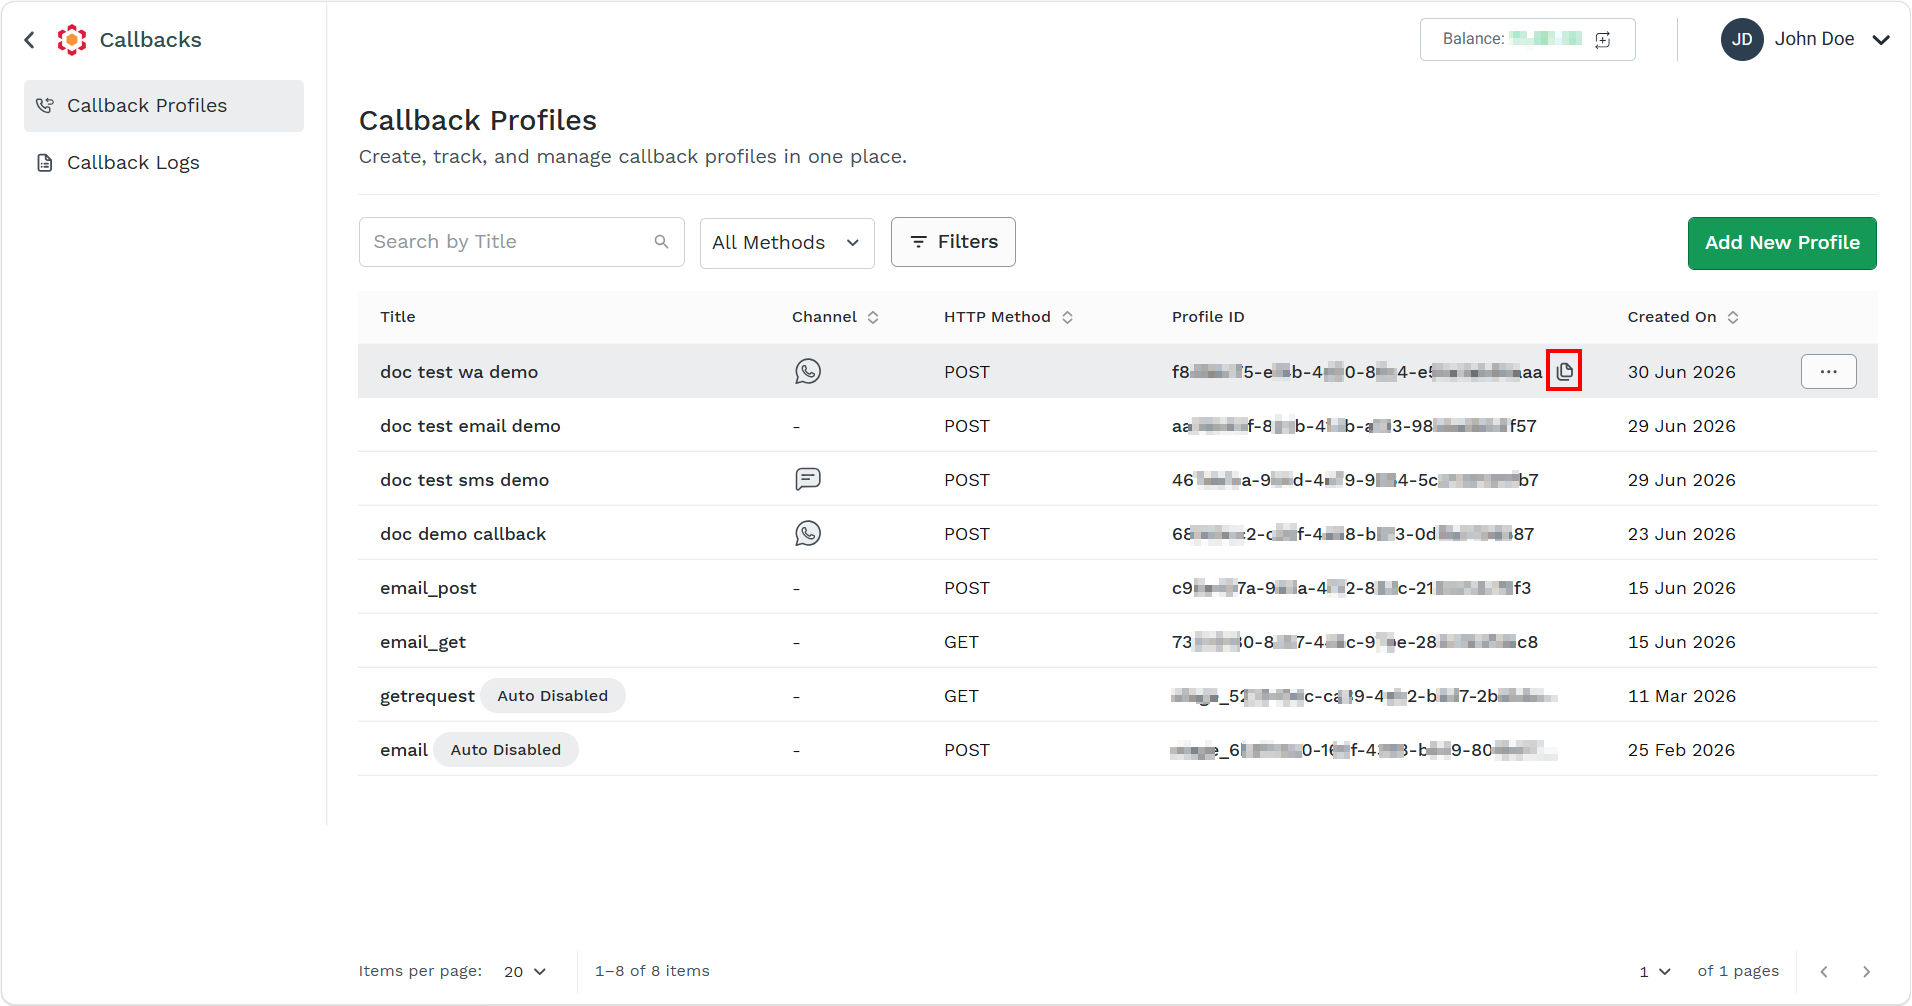
-
On the Callback Profiles page, hover over the Callback Profile ID that you want to copy and click
 .
. -
On the top left of the Callback Profiles page, click the Callbacks to return to the Dashboard page.
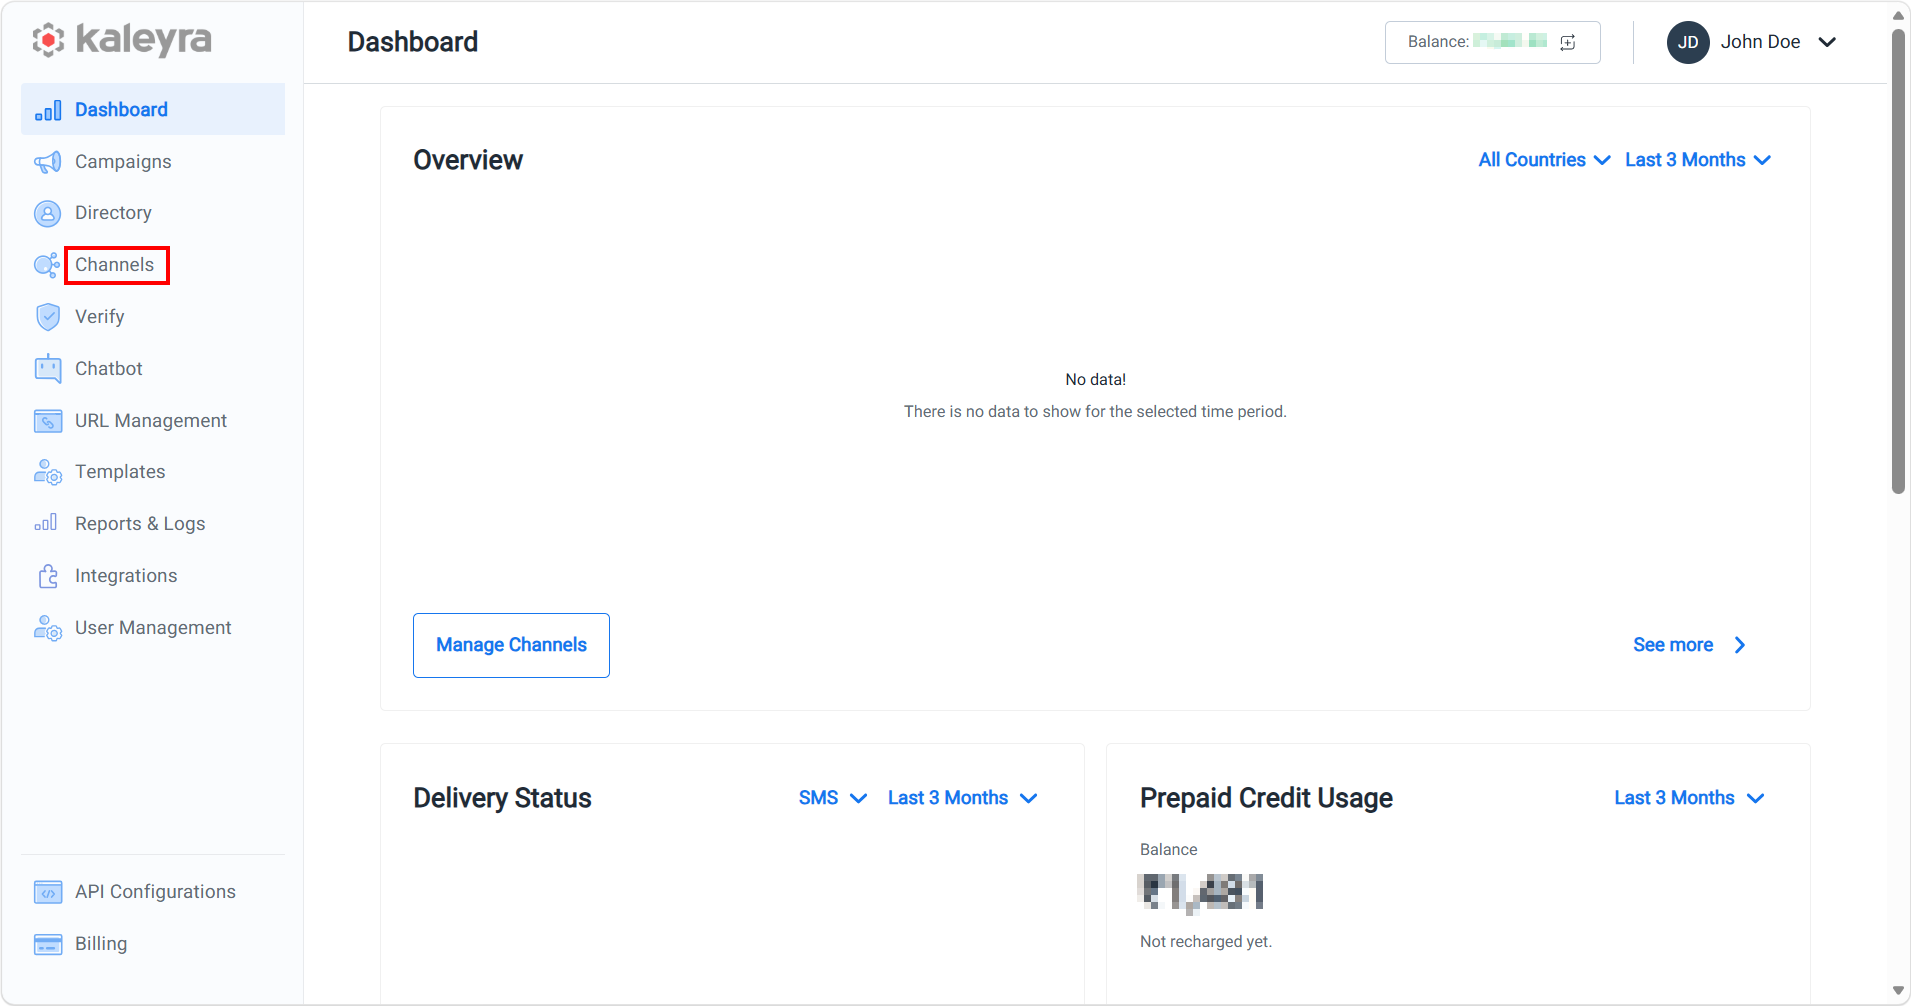
-
From the left menu bar on Kaleyra Platfrom, click the Channels menu.
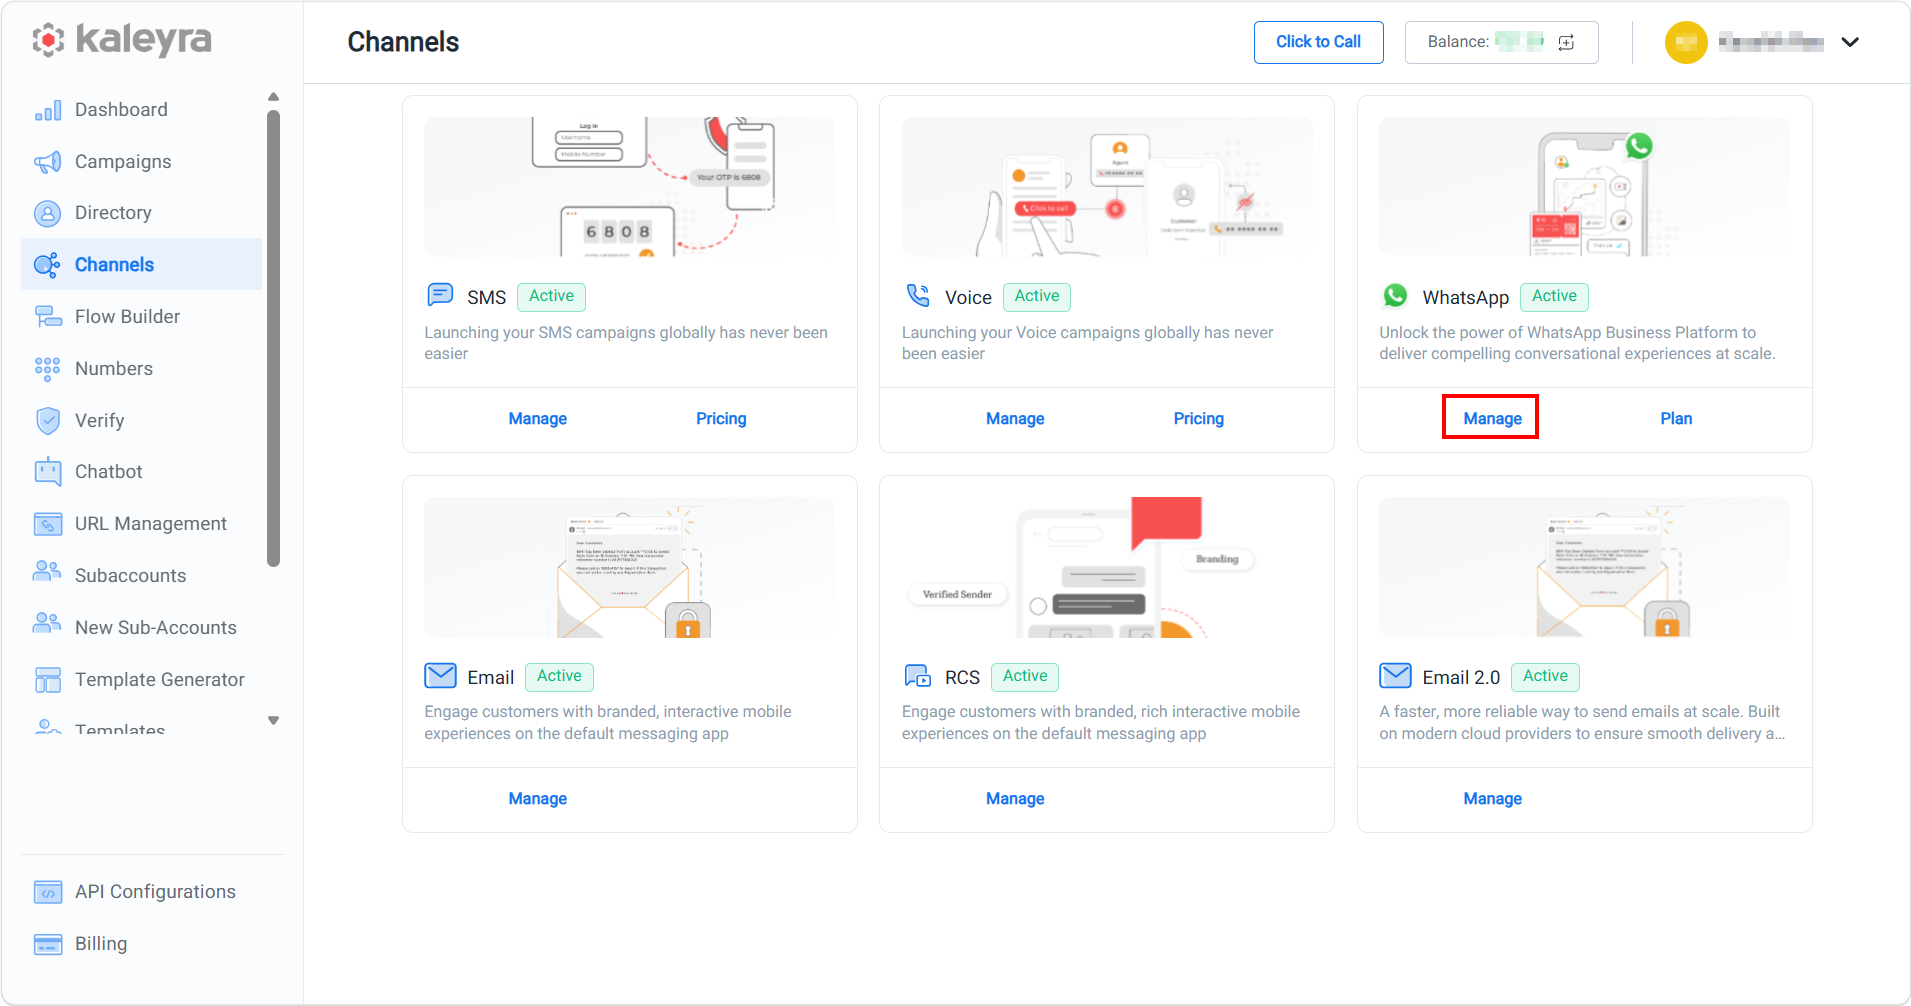
-
On the WhatsApp card, click Manage.
The Business Details page appears.
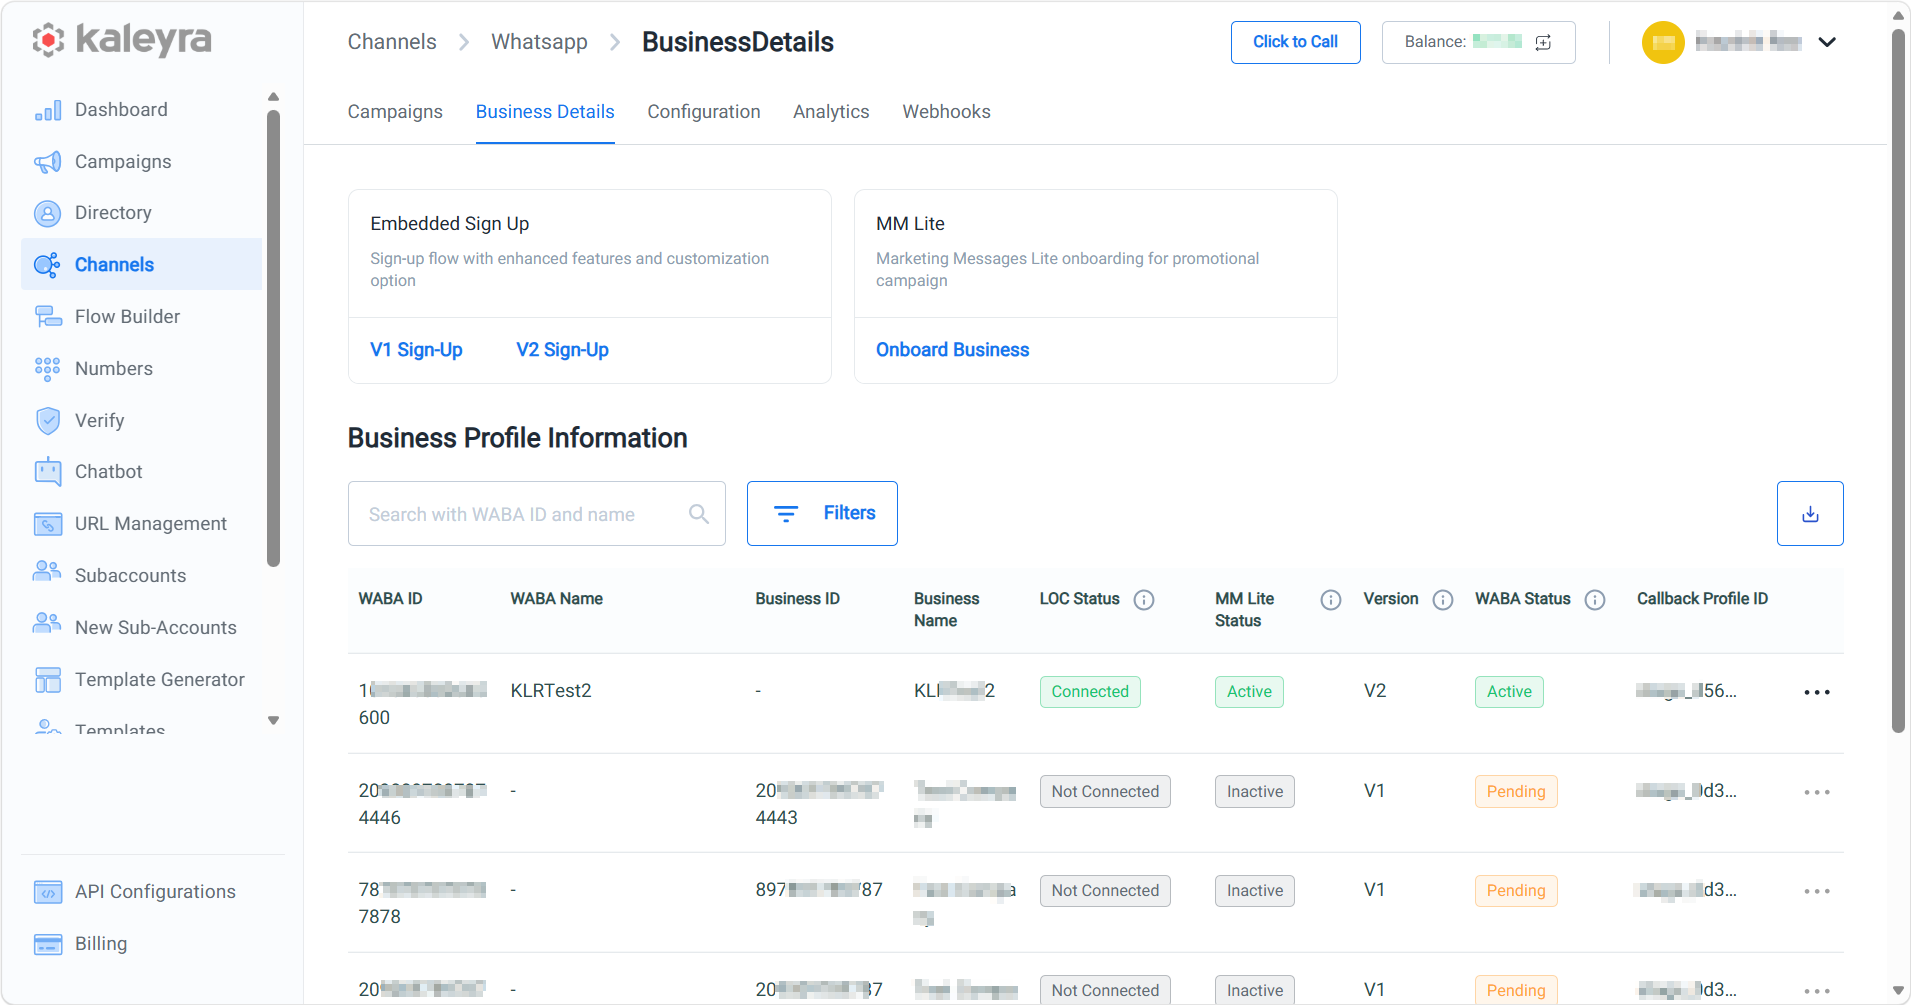
- Click the Configuration tab. The Configuration details page appears.
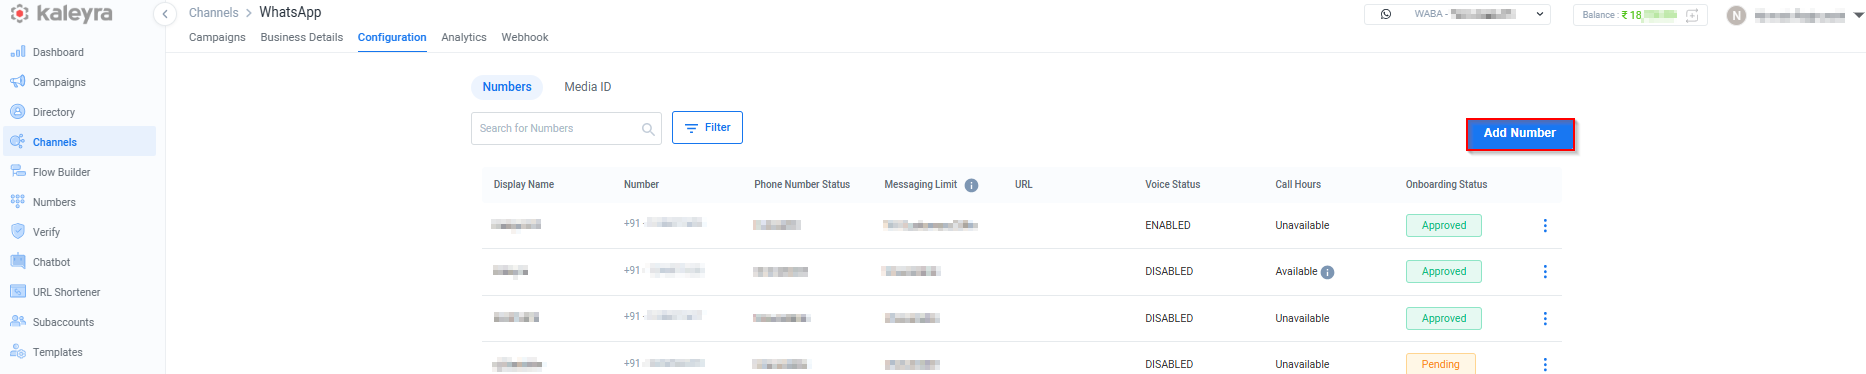
- On the Numbers page, click Add Number.

Or
On the Numbers page, click the three dots corresponding to the number that you want to edit and click Edit. Only the details of an approved number can be edited.
- In the Callback Profile ID field, enter the callback profile ID that is used in the APIs to trigger the callback to receive an update about the message status (e.g. Delivered, Read). For more information, refer to the instructions on the Add a Number page to configure a new number or Edit the configuration for an existing number.
Updated 26 days ago