RCS Text Template
You can send a simple, plain-text message to one or more recipients using the Text template. It is ideal for sending basic notifications, alerts, or transactional messages without any formatting or media.
You can send interactive suggestions like replies and actions. You have options to add chips such as:
- URL Action - Add URL to the text template.
- Reply - Add reply message to the RCS text template. This message will help the end user to set the context for their reply message. If they click on the reply message provided while creating a template, then the same message will be received by the sender.
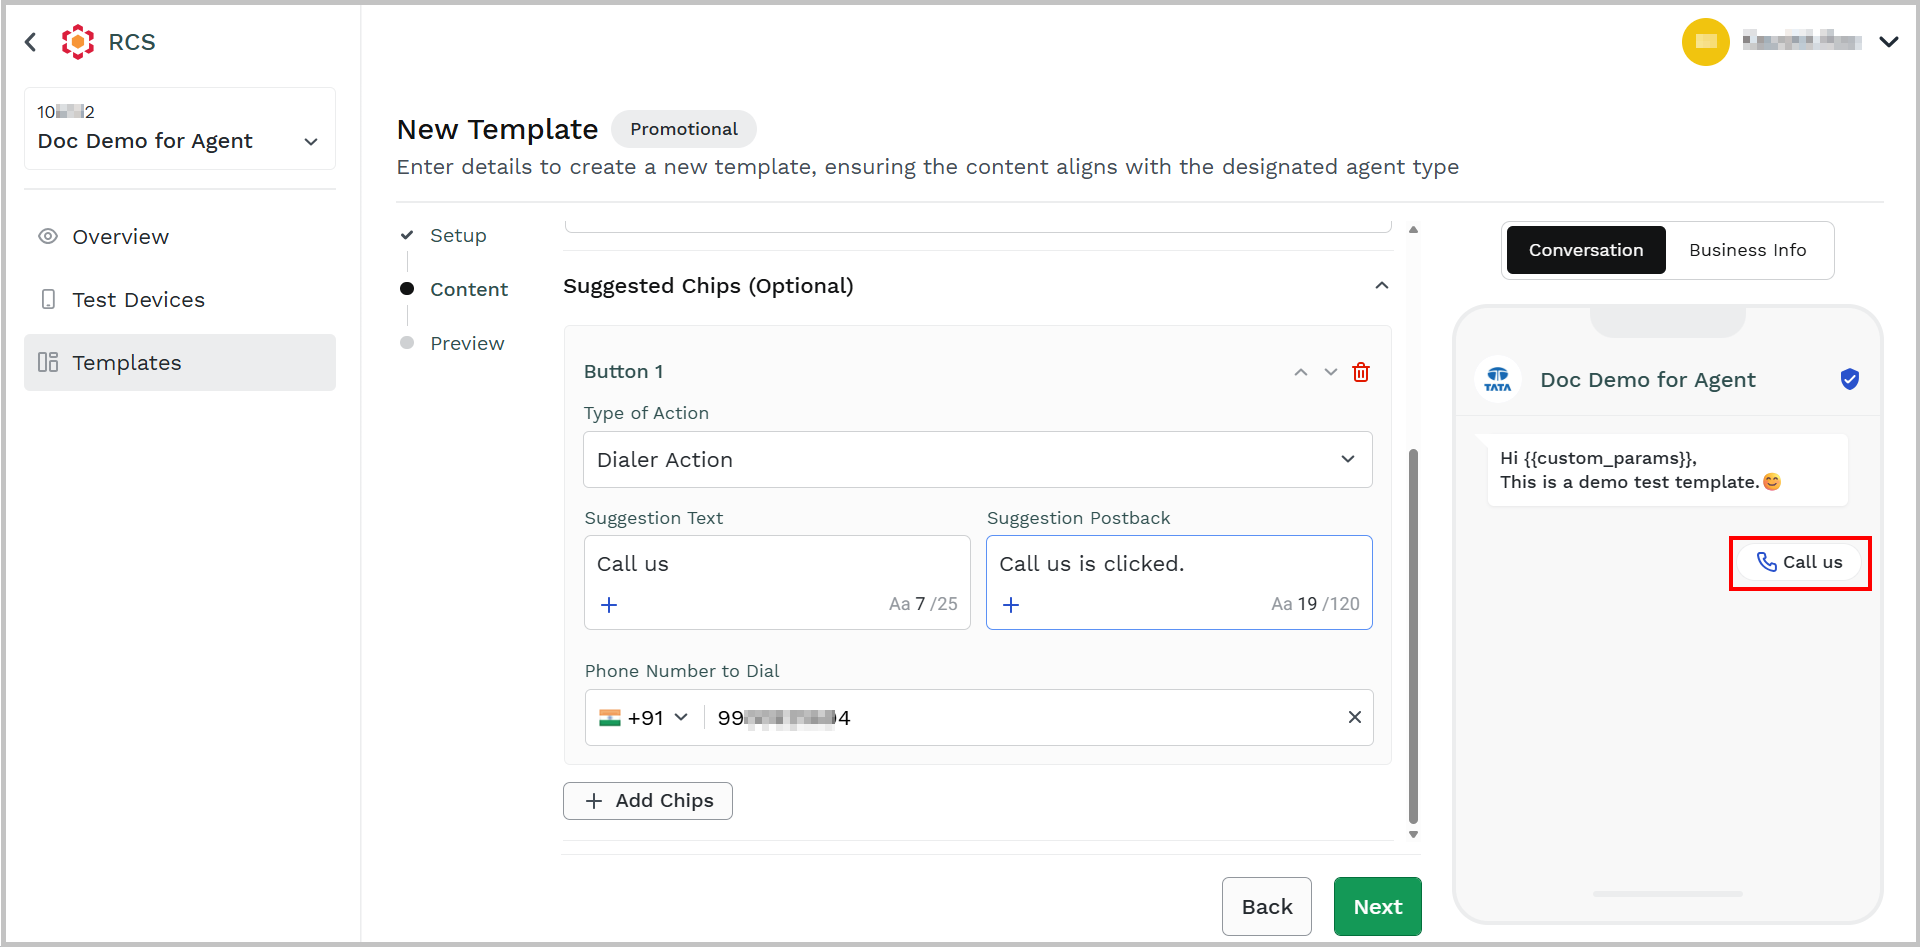
- Dialer Action - Add a phone number using which end-users can use to contact.
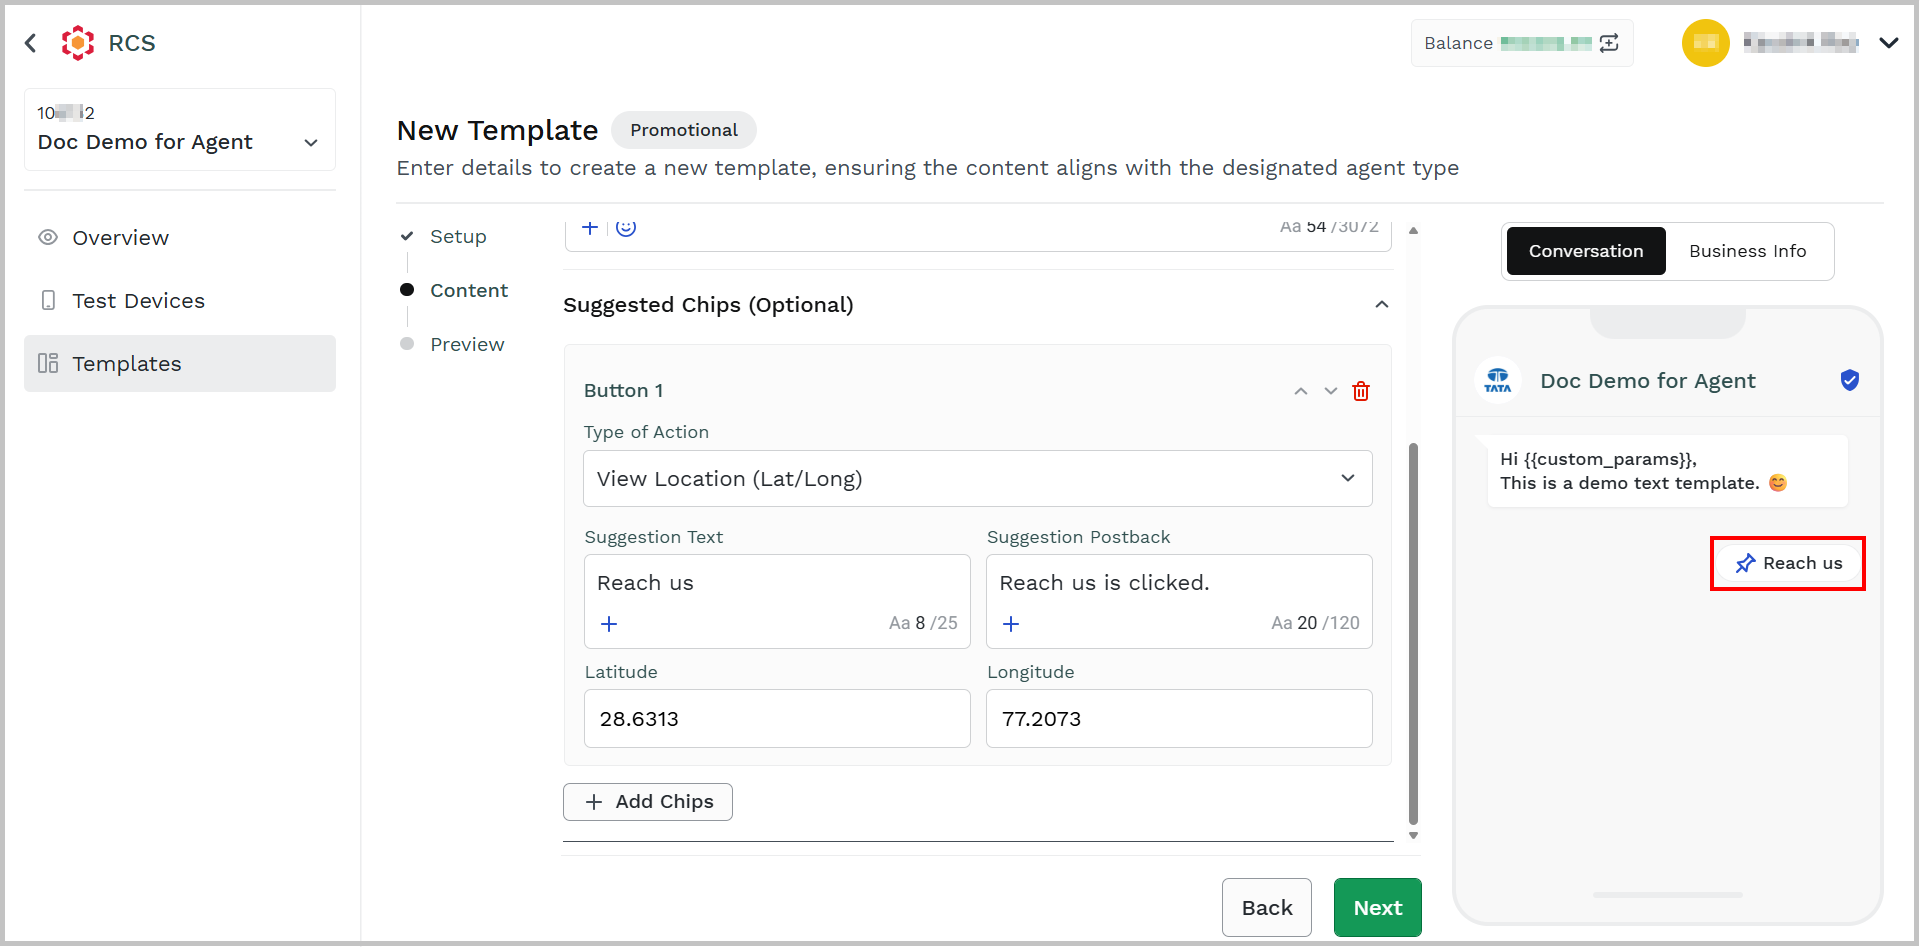
- View Location (Lat/Long) - Add location to the text template.
- Create Calendar Event - Create an event and share the date in a text template.
To create an RCS text template, perform the following steps:
- Follow step 1 to step 3 of the Add a New Agent topic.
The Agents dashboard page appears.
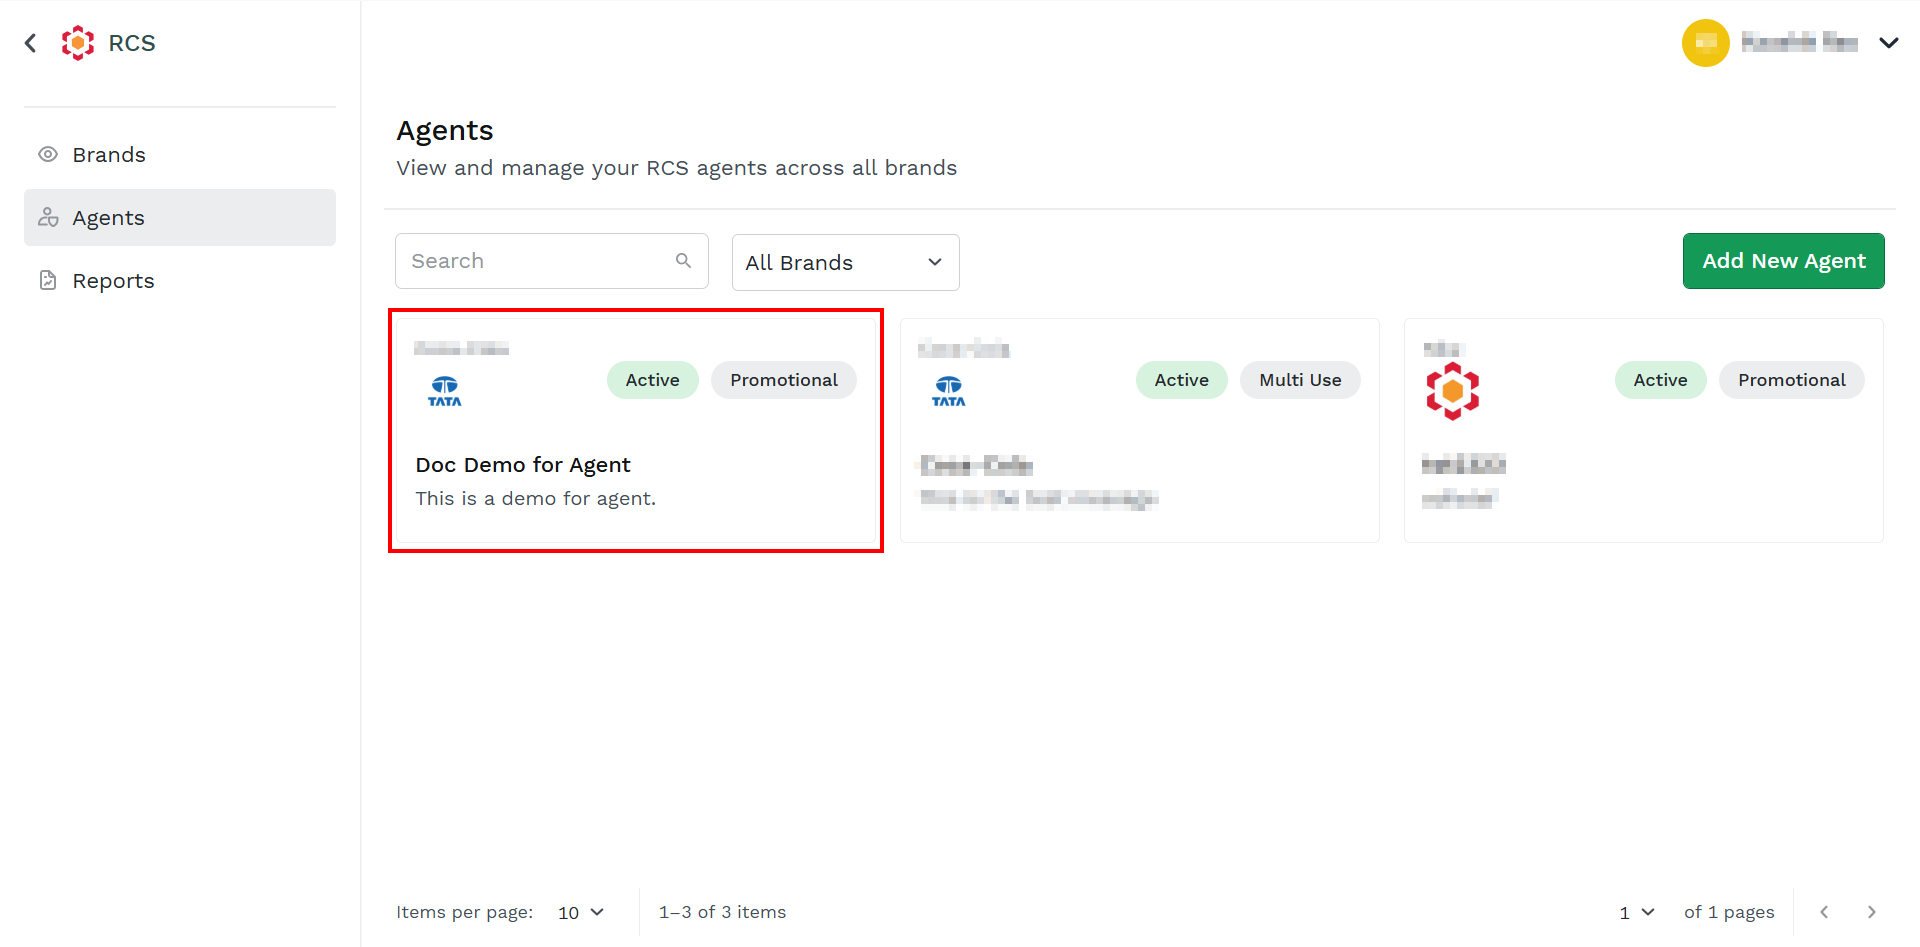
- Click the agent for which you want to add the template.
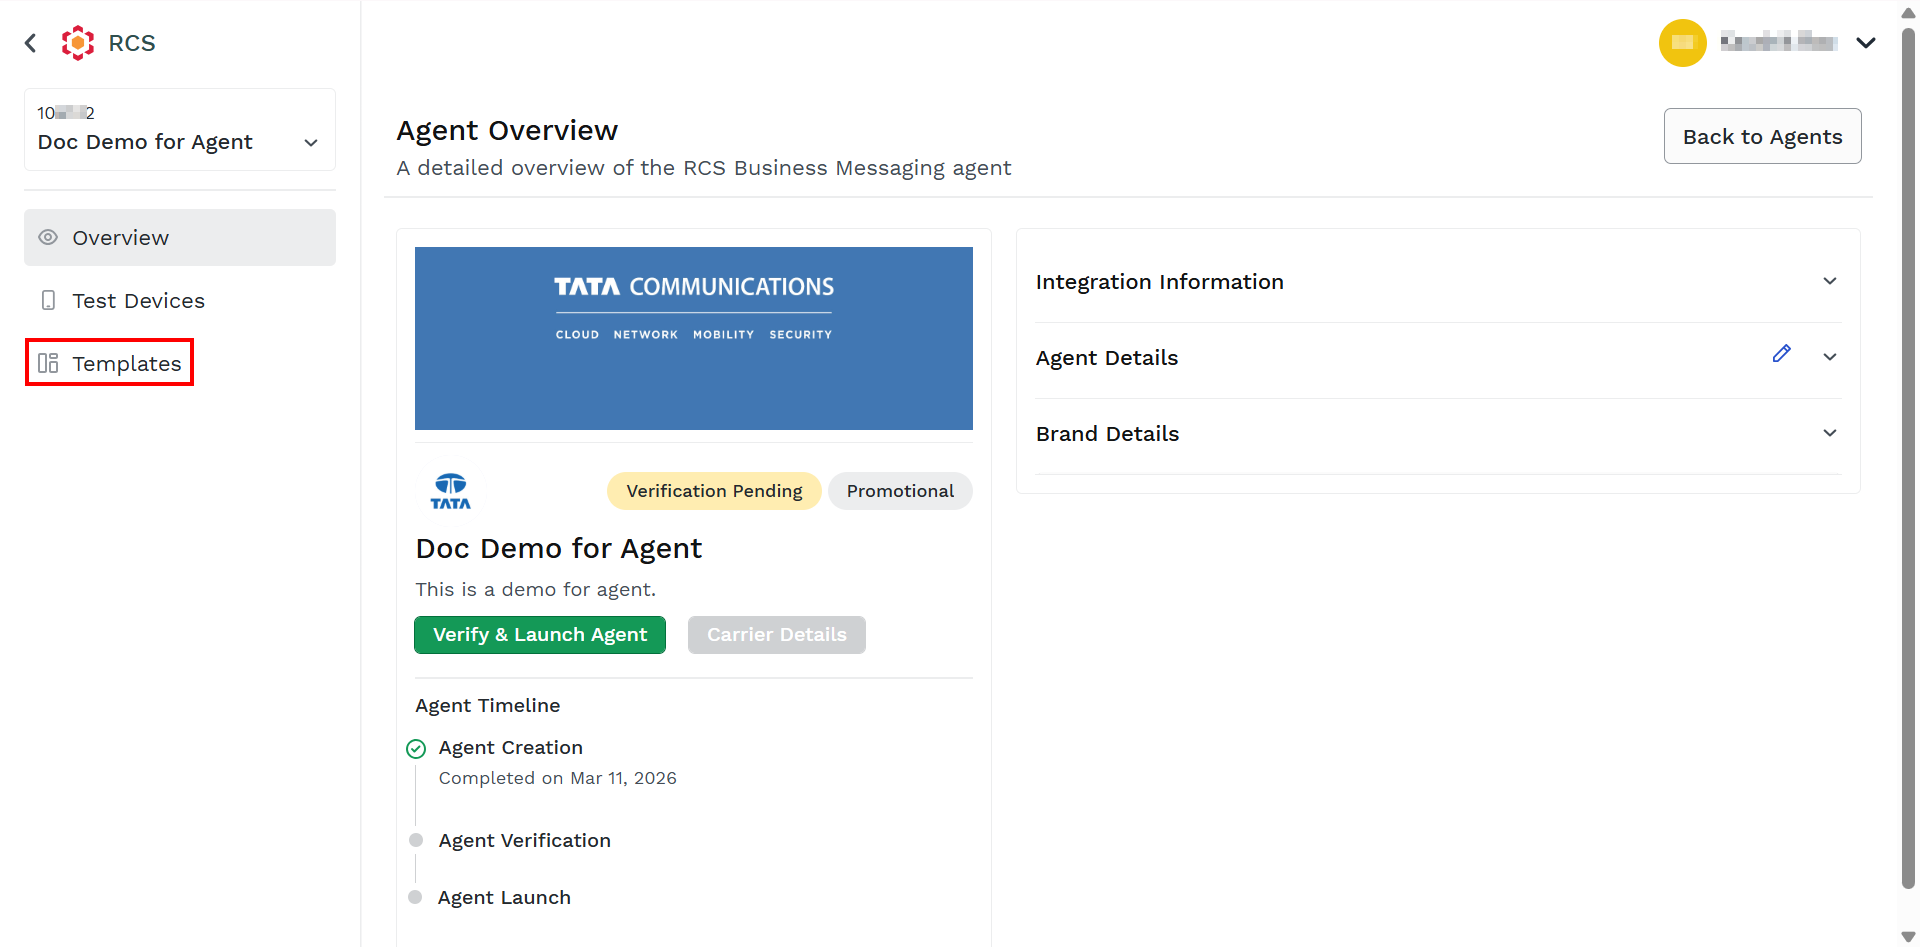
- From the left menu bar, click Templates.
The Template Details step appears.
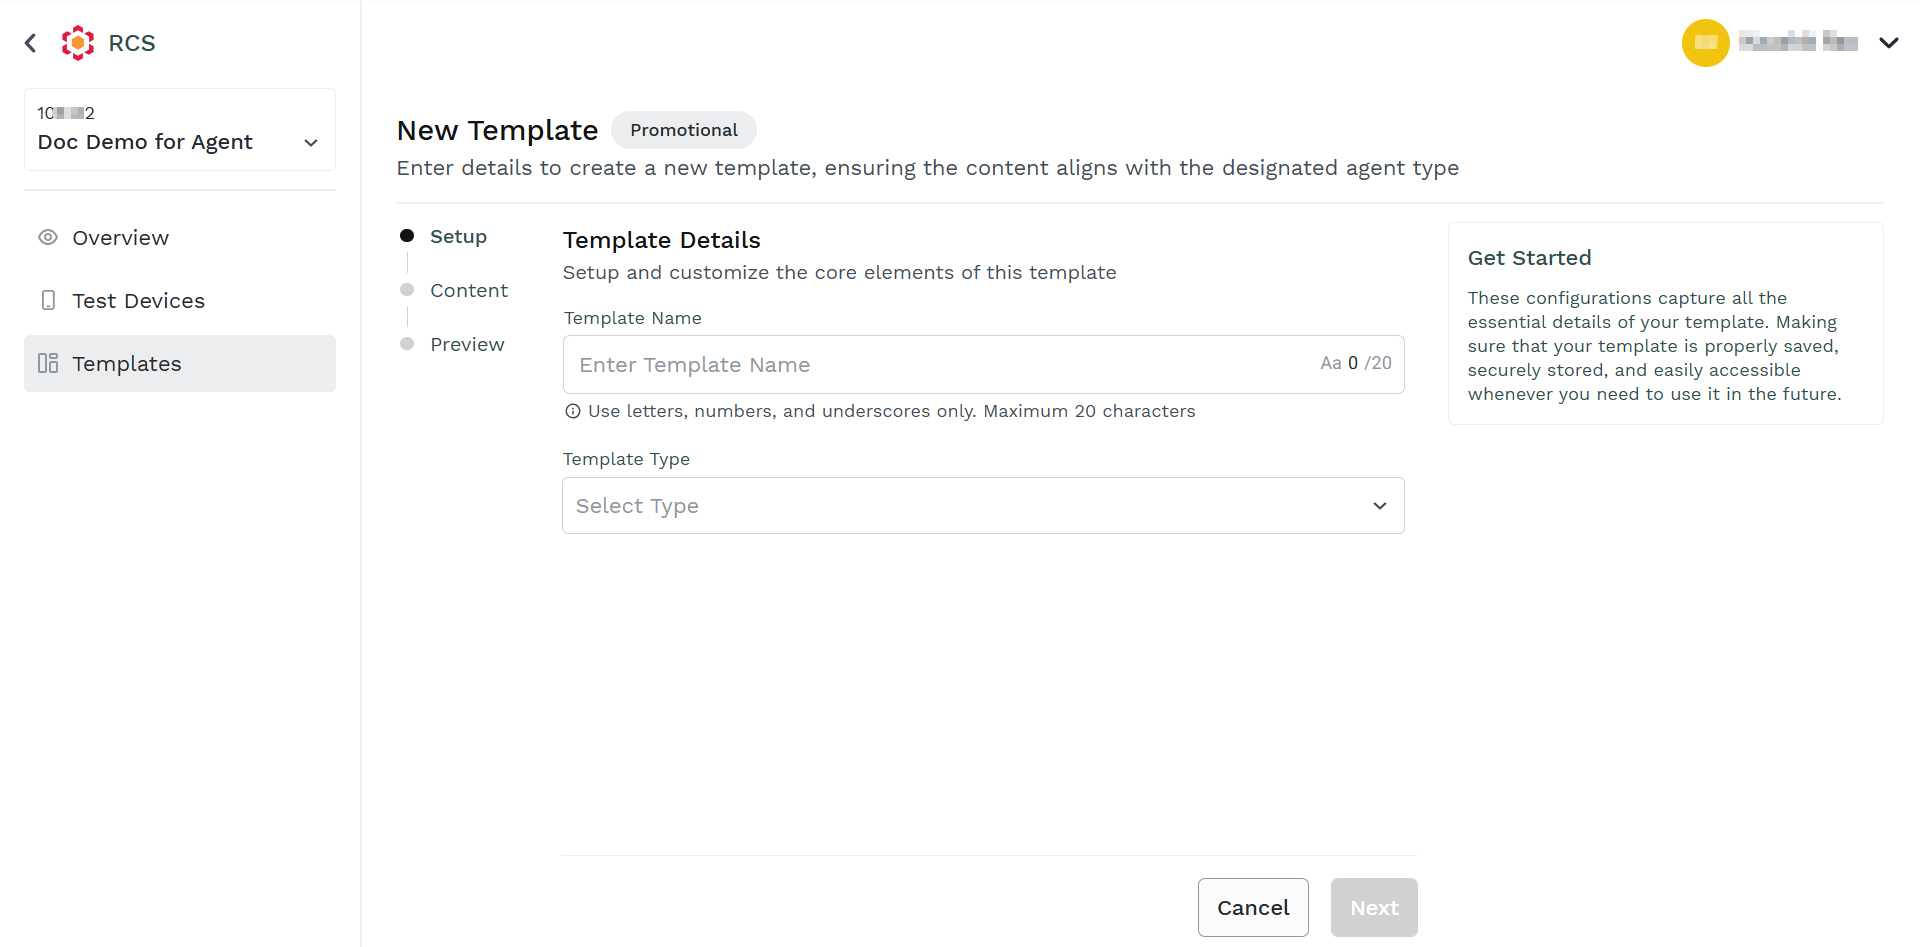
- In the Template Details section, perform the following:
- In the Enter Template Name field, enter the template name. Only alphanumeric characters of a maximum of 20 characters are supported.
- In the Select Type drop-down field, click the drop-down button and then select the Text option.
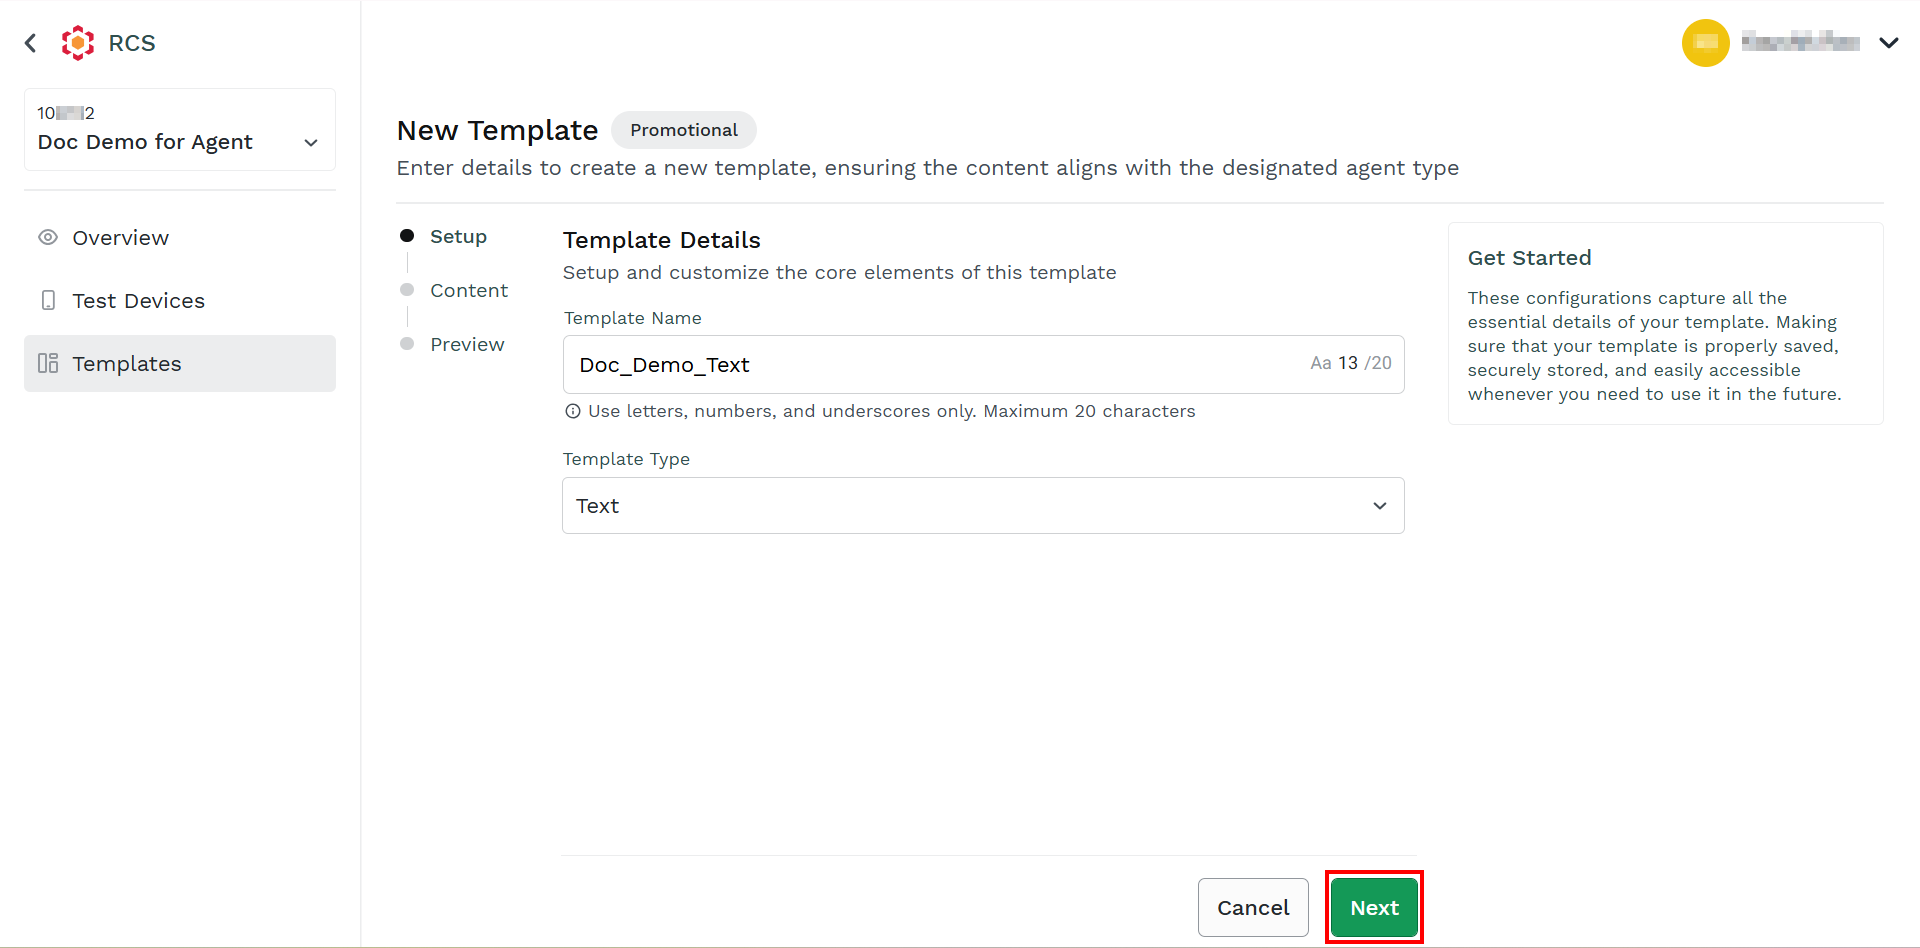
- Click Next.
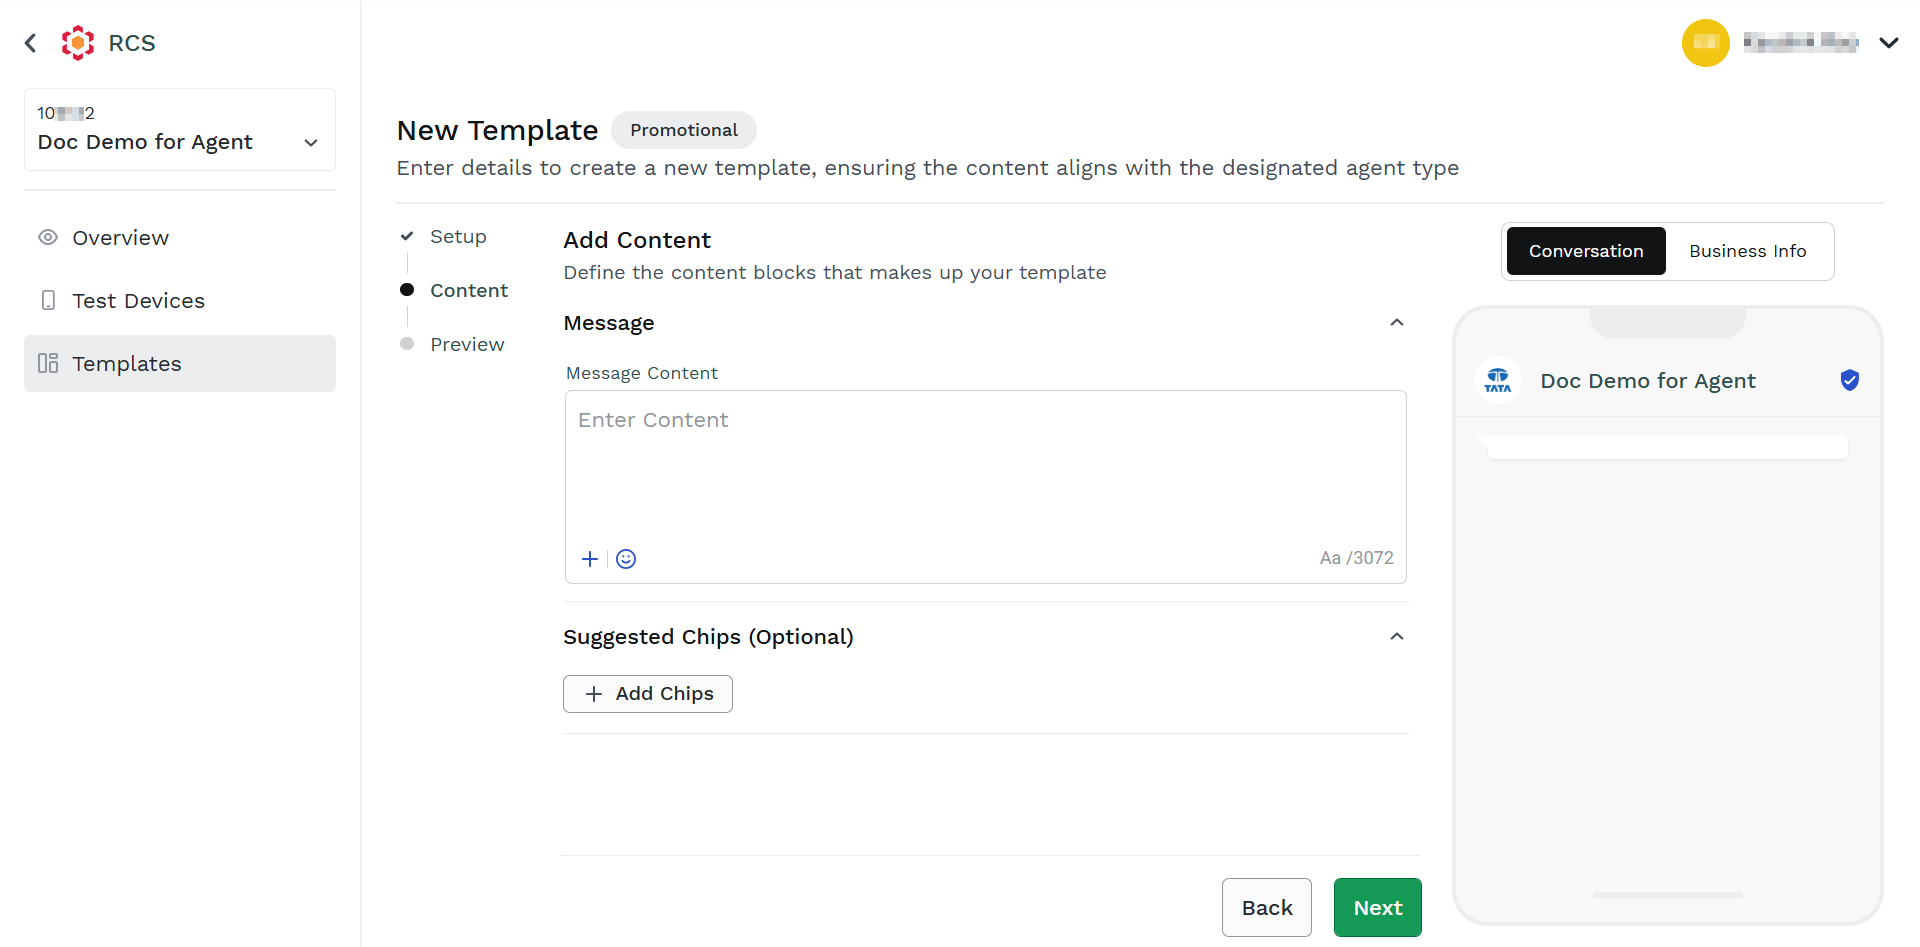
The Add Content step appears.
Notes:
- From the right side of the page, in mobile view, you can preview the RCS template message to be delivered to the end-users.
- From the right side of the page, in mobile view, click the Business Info tab to view the business information of an agent.
- The body component represents the core text of your RCS text message template and is a text-only template component; no rich content is supported. Templates are limited to one body component. In the Message Content field, enter the content for the text template. You can use dynamic variables to insert data dynamically into your template. Use the dynamic variables inside the template by clicking the + icon on the bottom-left of the Enter Content field. The new
{{custom_params}}variable appears. You can use the emojis by clicking the emoji and selecting them from the pop-up. Enter the variable details. A maximum length of 2000 characters is supported for the message content.
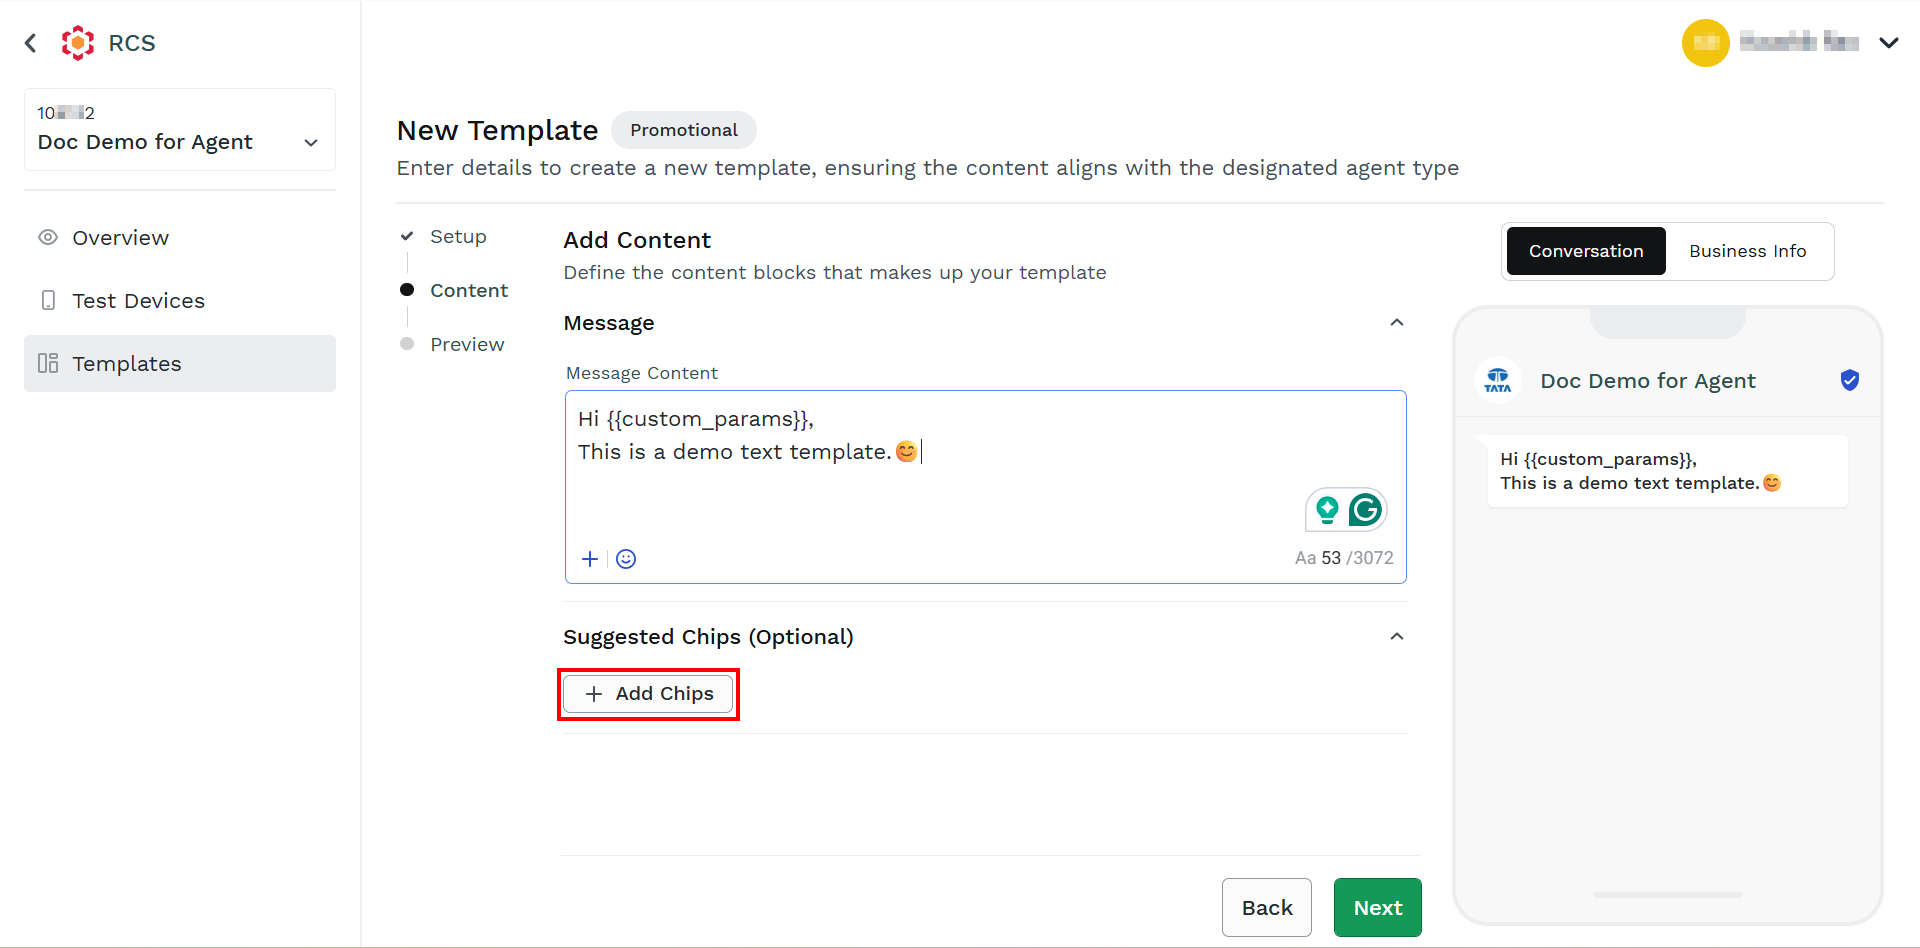
- Click + Add Chips.
The Button 1 section appears.
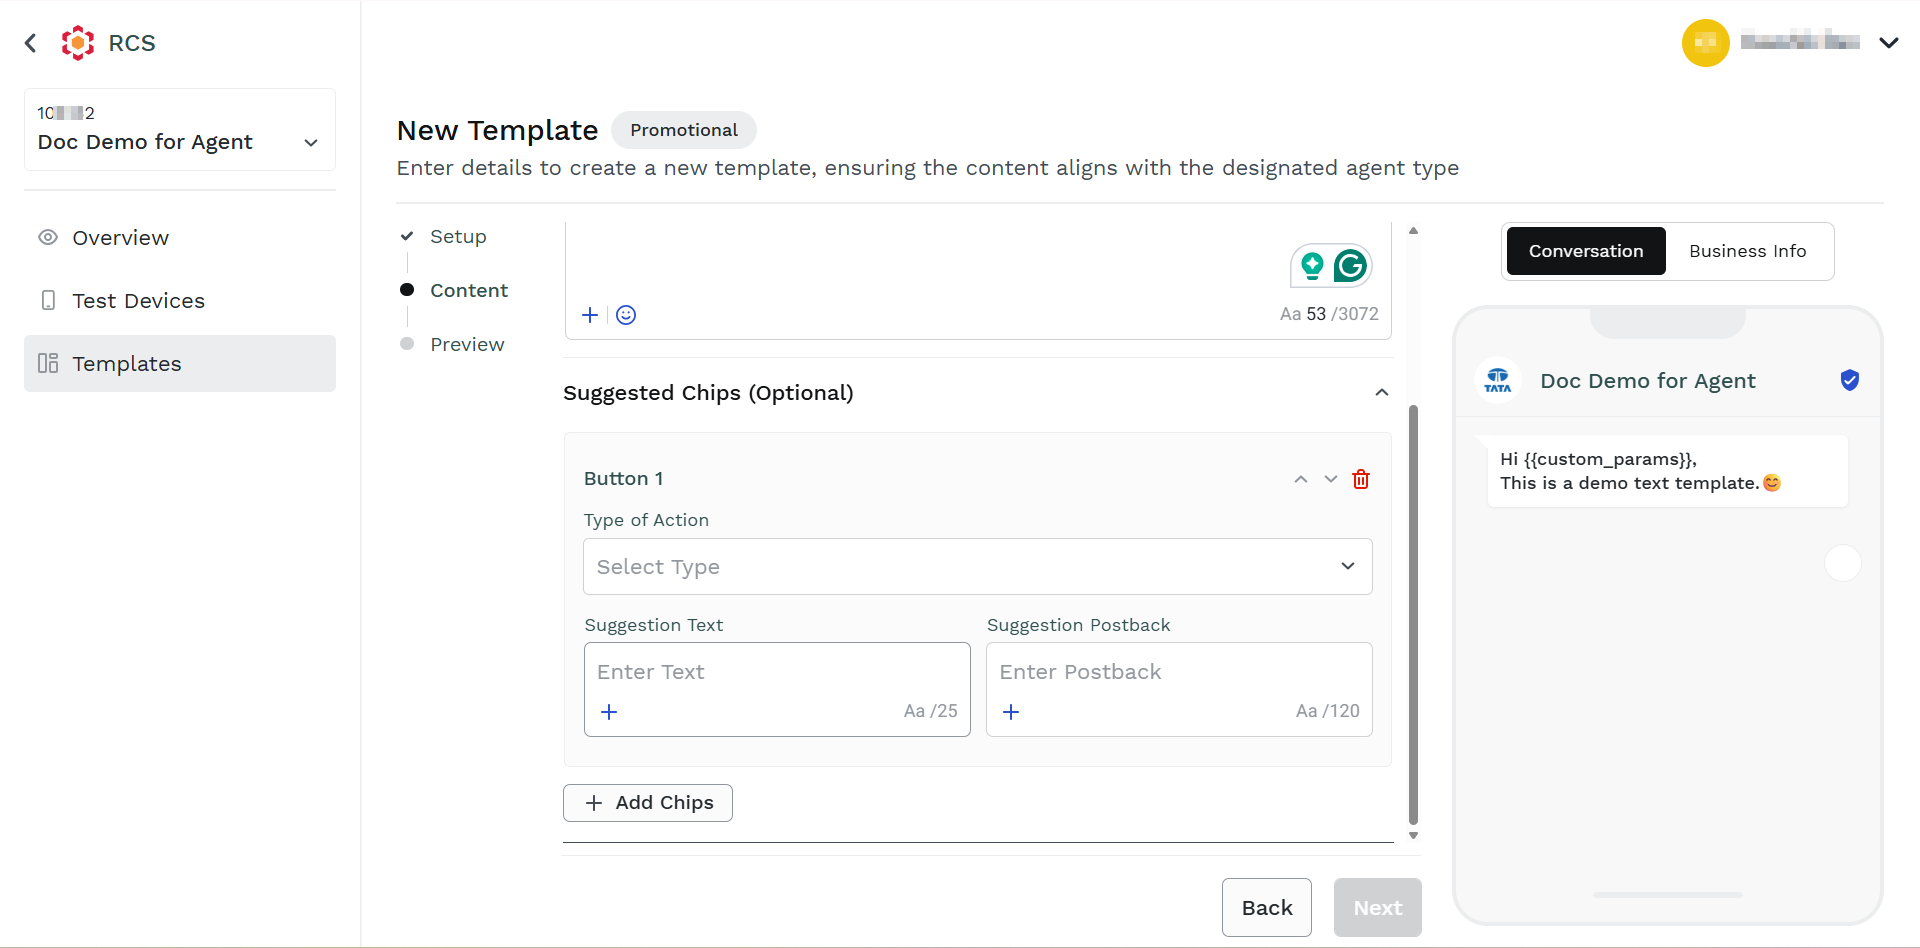
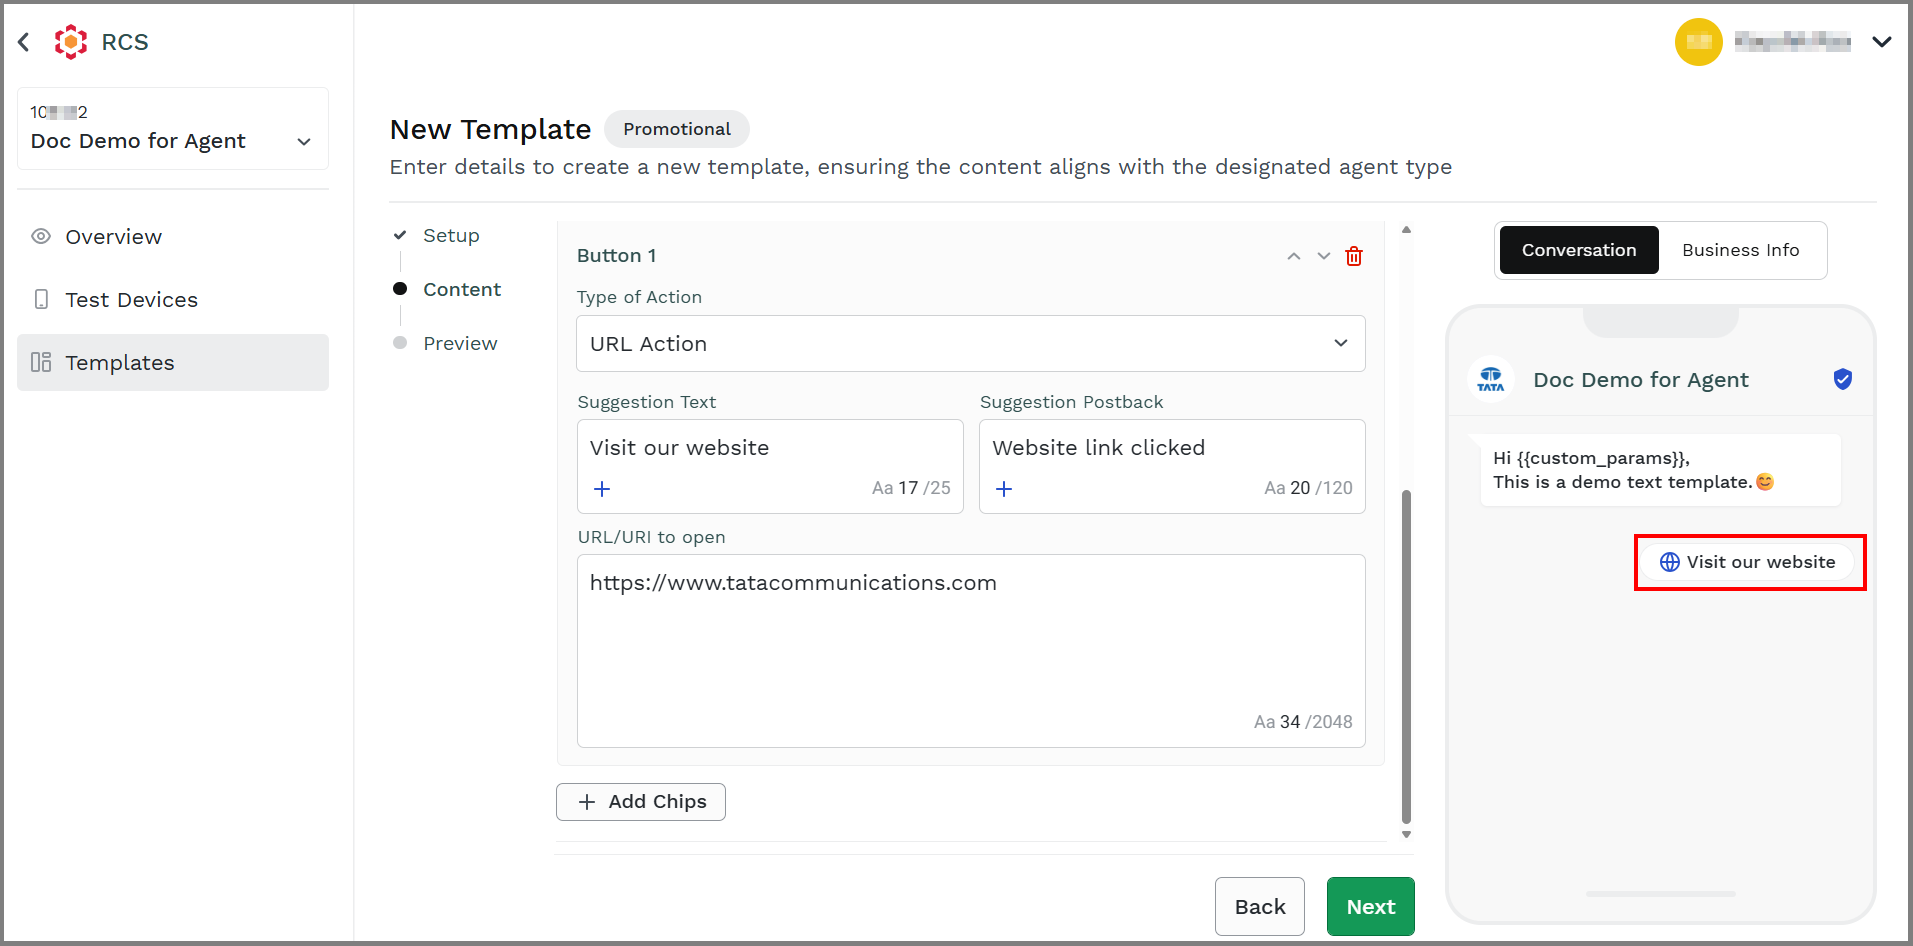
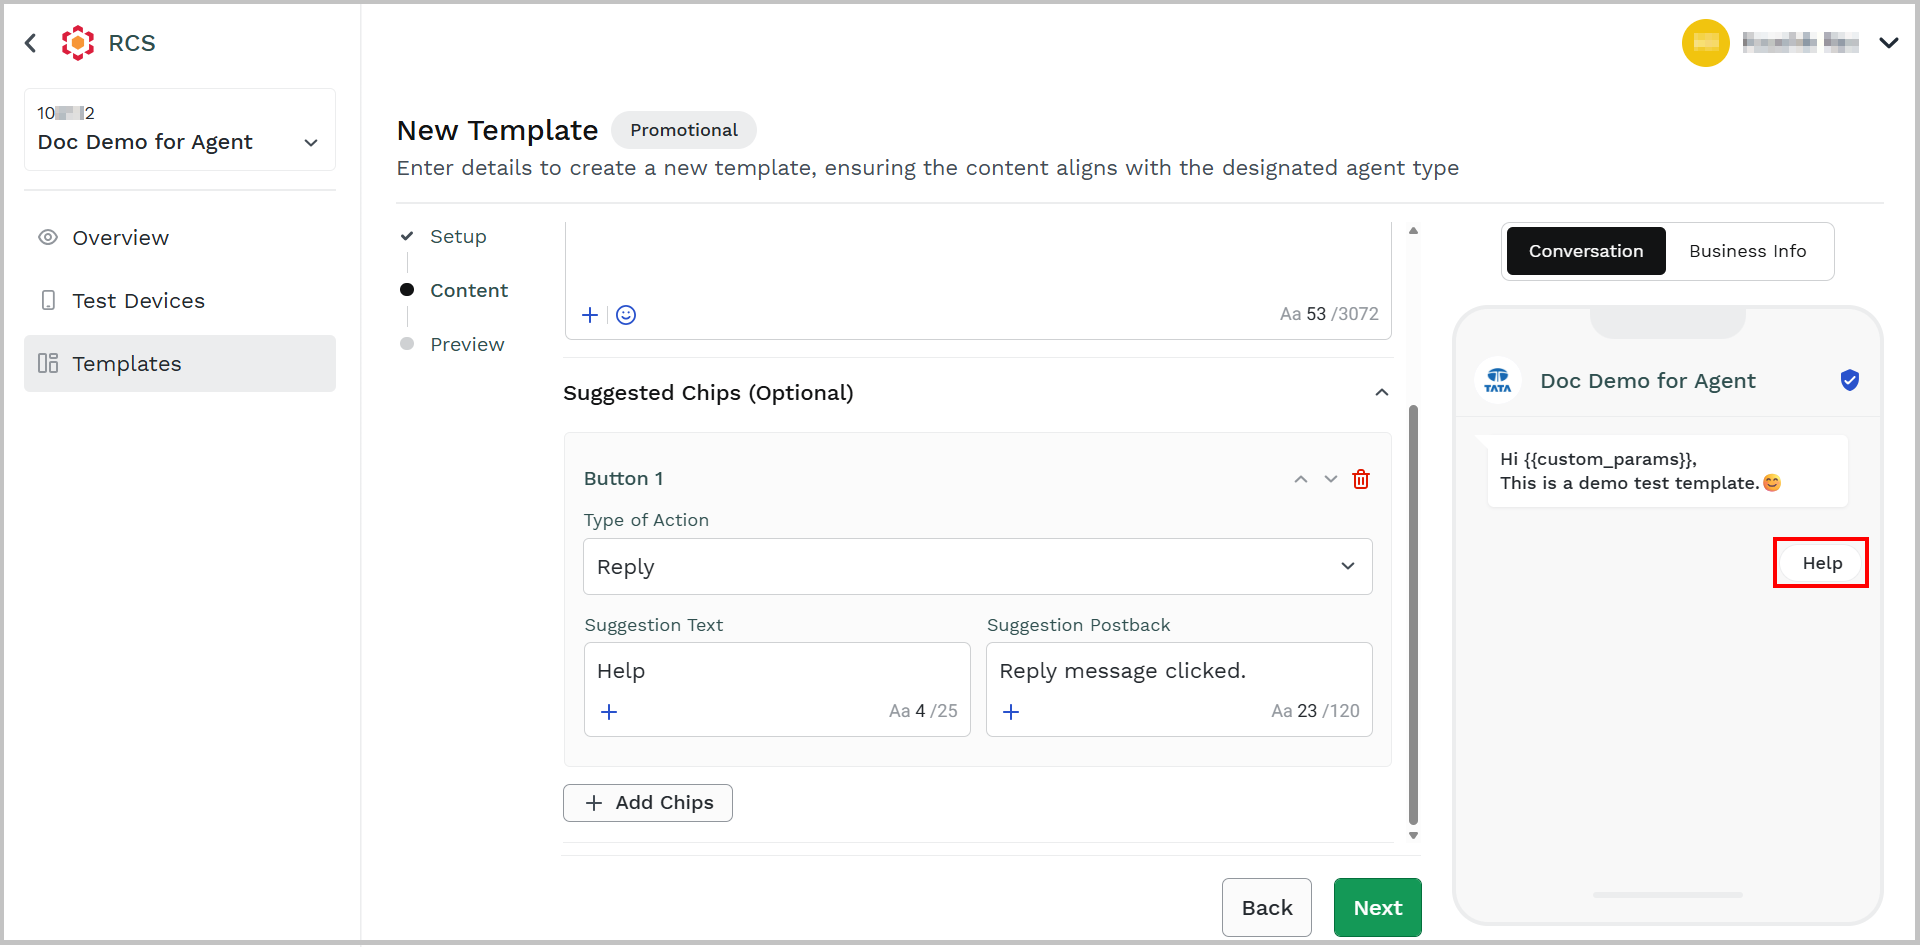
- From the Select Type field, click the drop-down icon and then select from the following options:
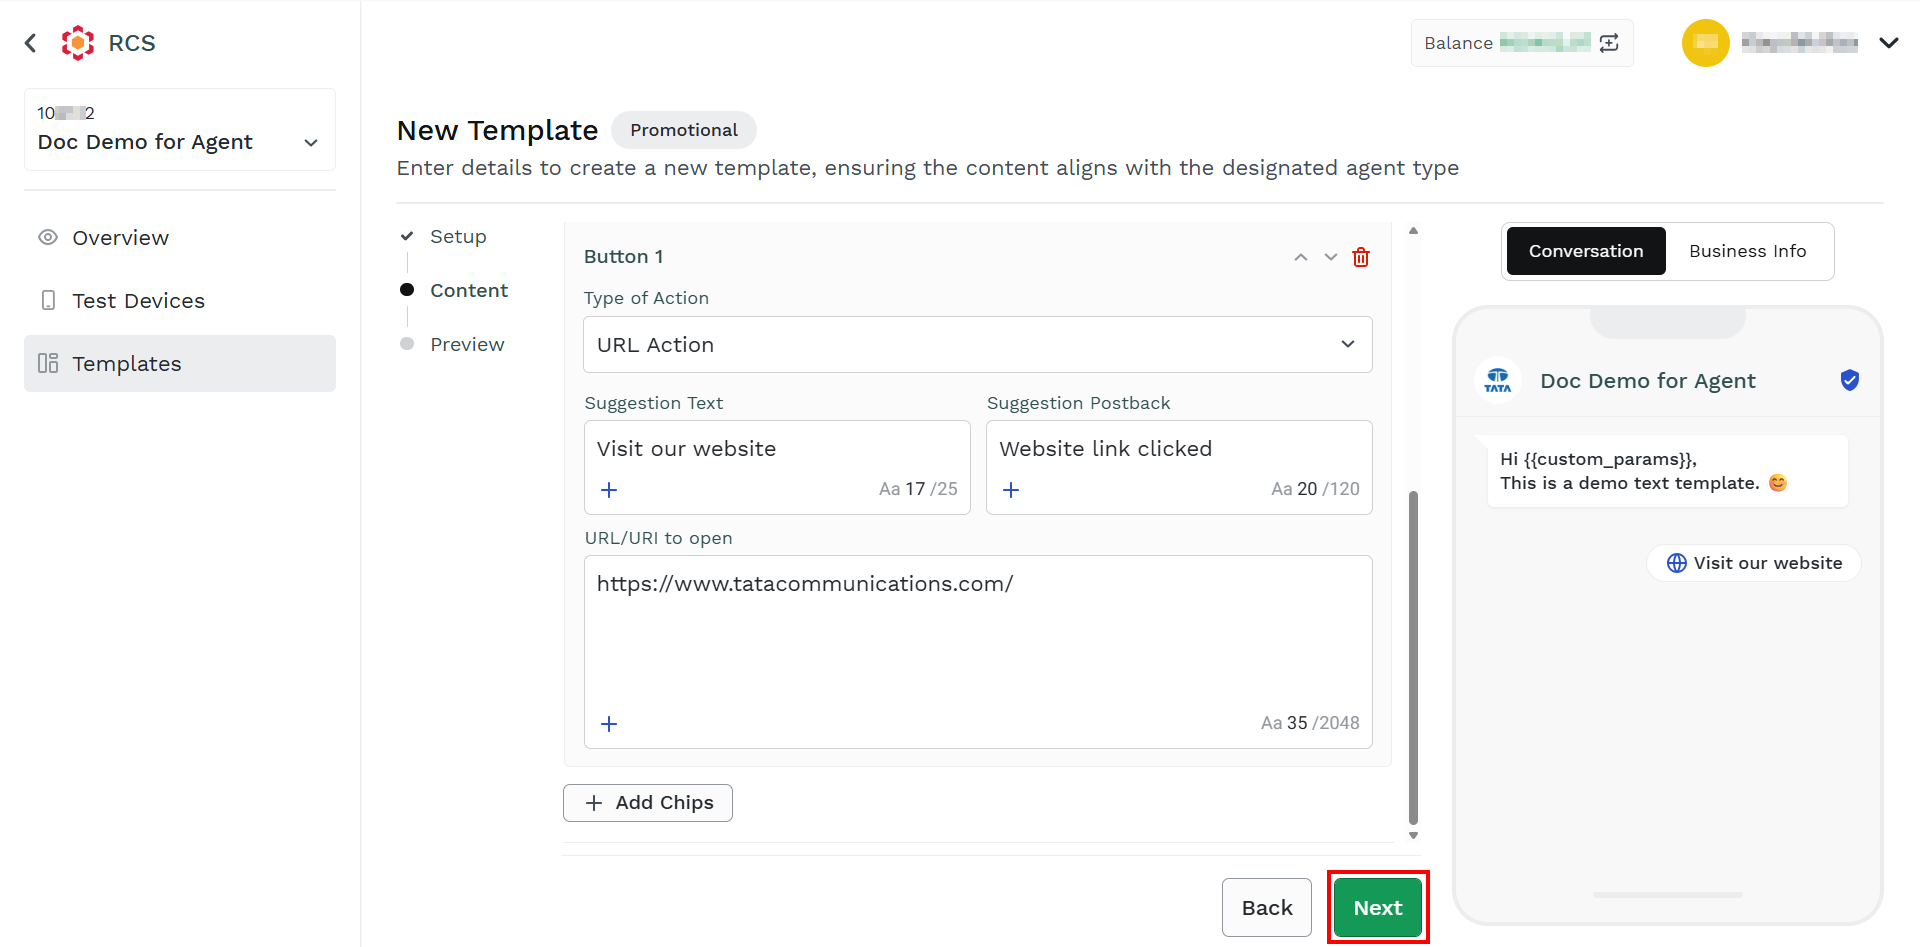
URL Action
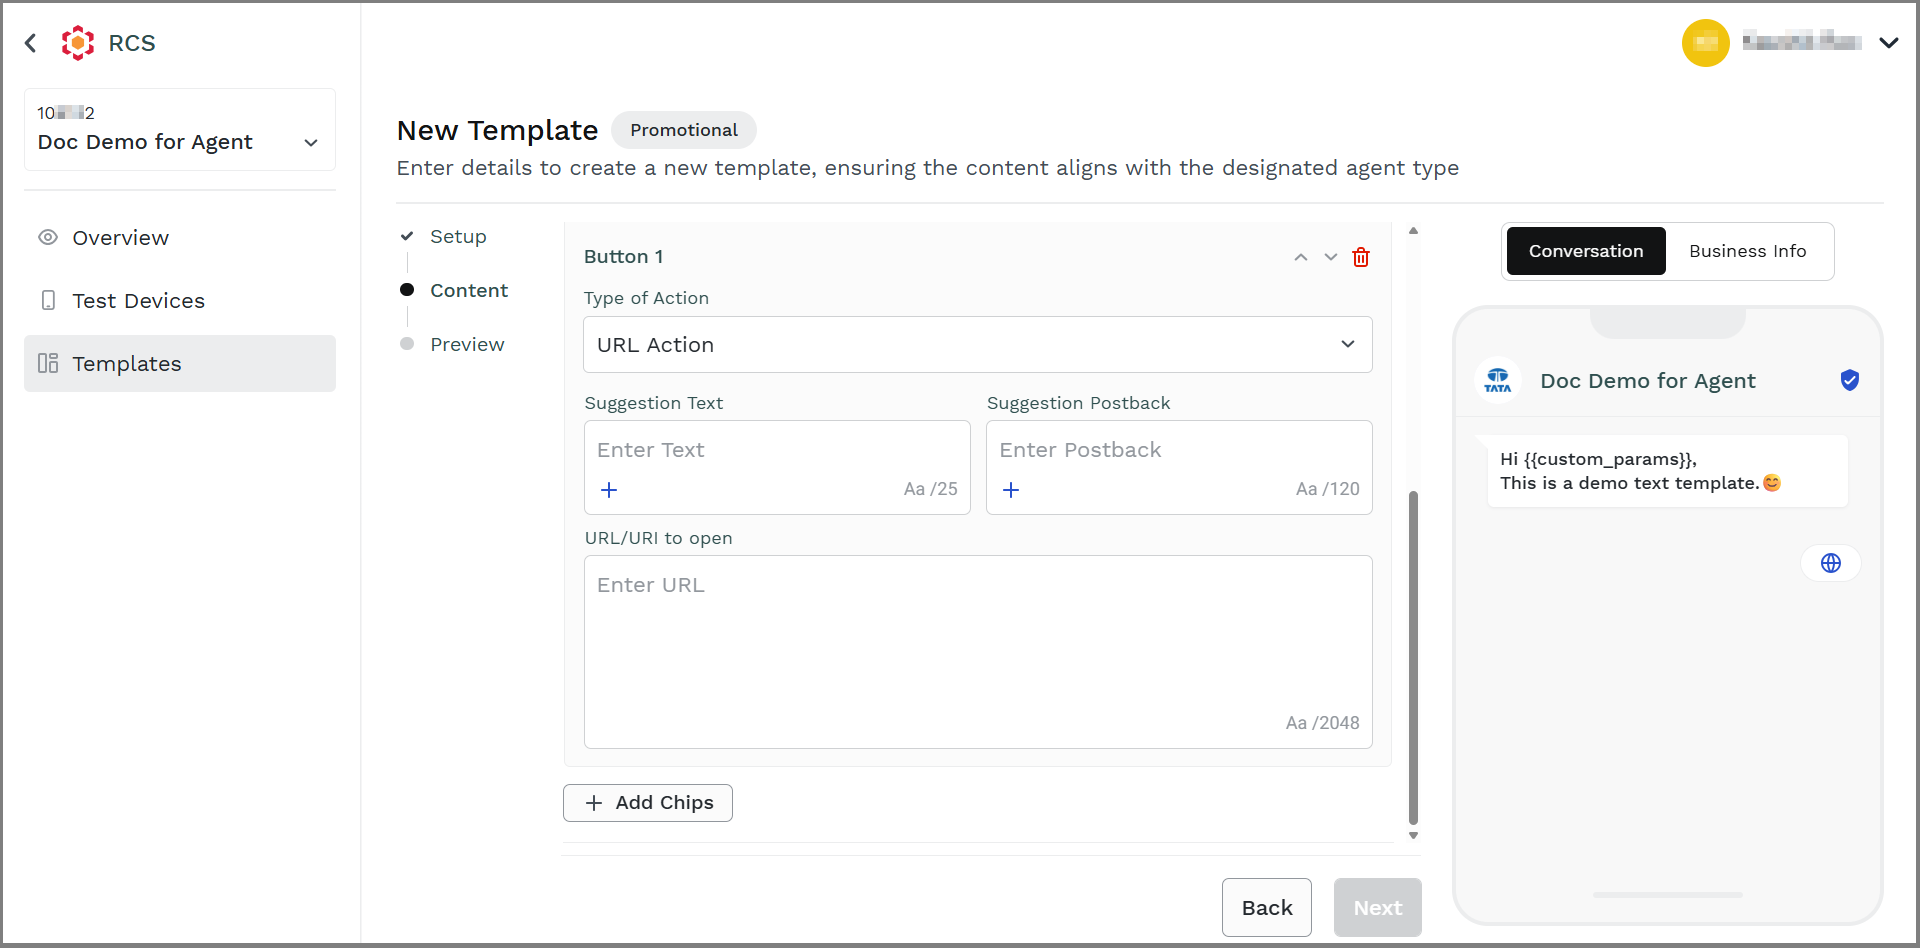
i. In the Enter Text field, enter the text for the URL that you want to display in the message. Use the dynamic variables inside the template by clicking the + icon on the bottom-left of the Enter Content field. The new {{custom_params}} variable appears. The maximum length of 25 characters is supported.
ii. In the Enter Postback field, enter the content you want to capture as a log event when the URL is clicked. Use the dynamic variables inside the template by clicking the + icon on the bottom-left of the Enter Content field. The new {{custom_params}} variable appears. The maximum length of 120 characters is supported.
iii. In the Enter URL field, enter the URL to which you want to redirect your end-users. The maximum length of 2048 characters is supported.
Notes:
Reply
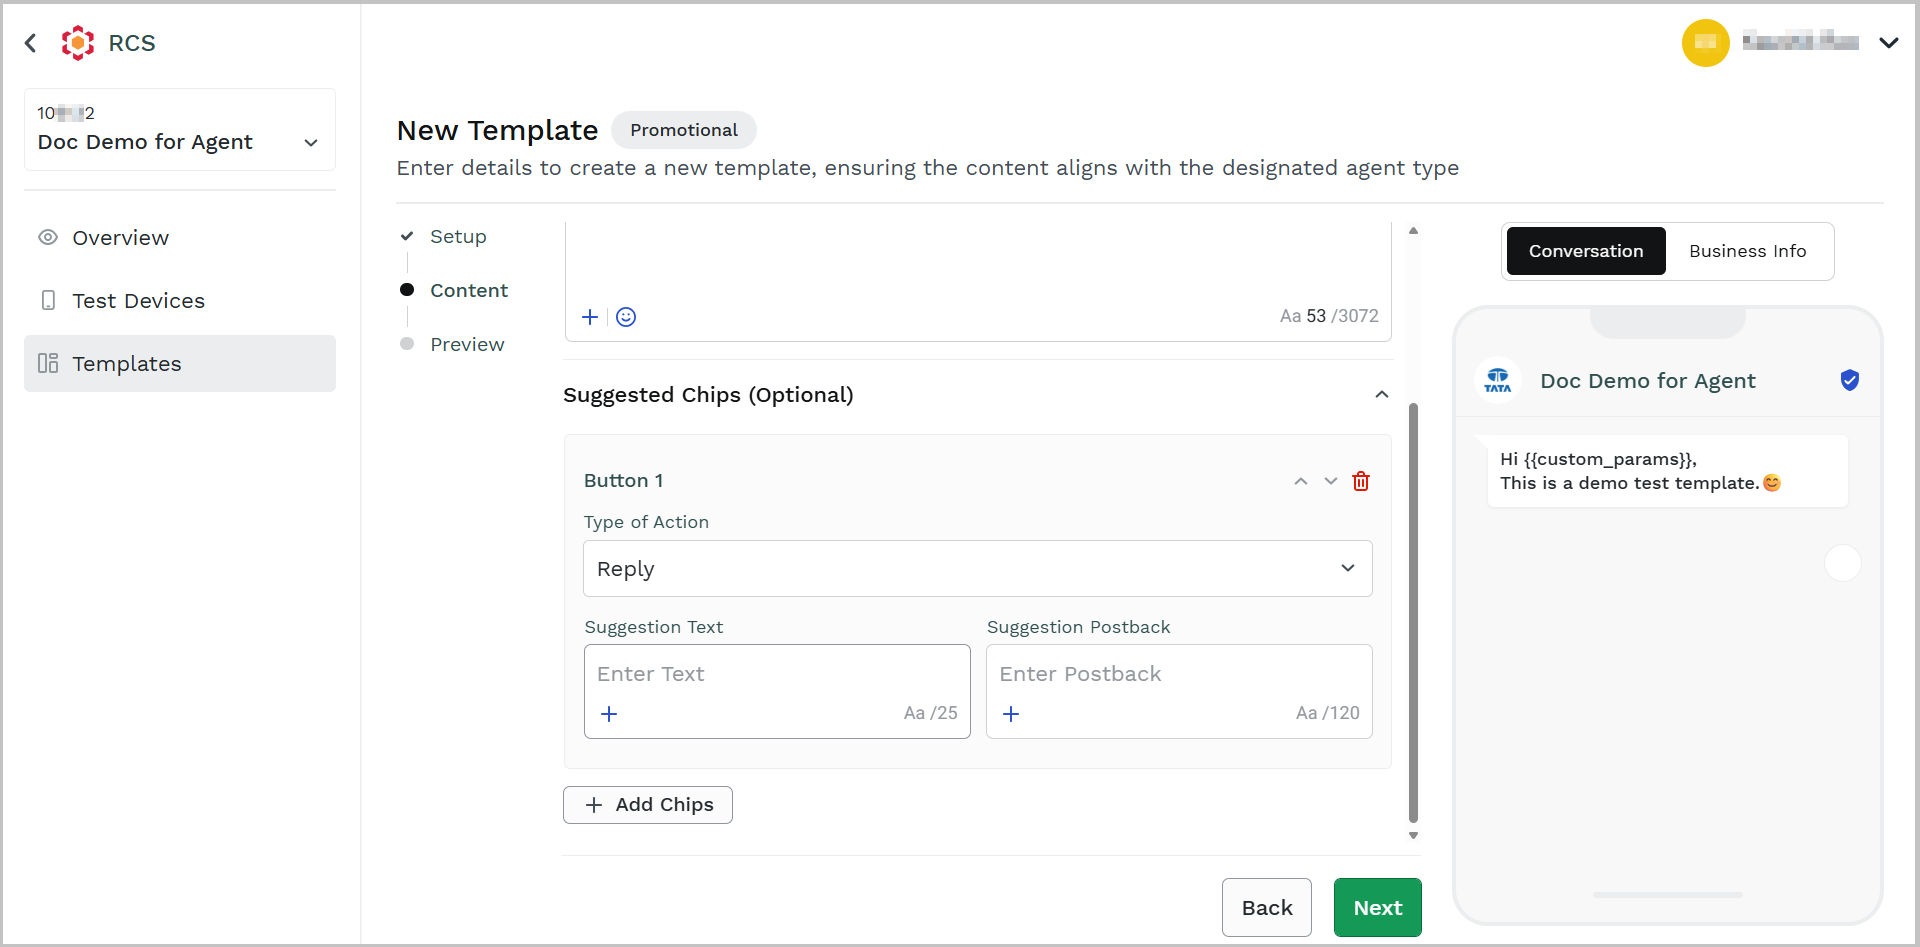
i. In the Enter Text field, enter the text for the reply that you want to display in the message. This reply message will help the end user to set the context for their reply message. If they click on the Reply message provided while creating a template, then the same message will be received, and it will start the conversation. Use the dynamic variables inside the template by clicking the + icon on the bottom-left of the Enter Content field. The new {{custom_params}} variable appears.
ii. In the Enter Postback field, enter the content you want to capture when the reply is clicked as a log event. Use the dynamic variables inside the template by clicking the + icon on the bottom-left of the Enter Content field. The new {{custom_params}} variable appears.
Notes:
Dialer Action
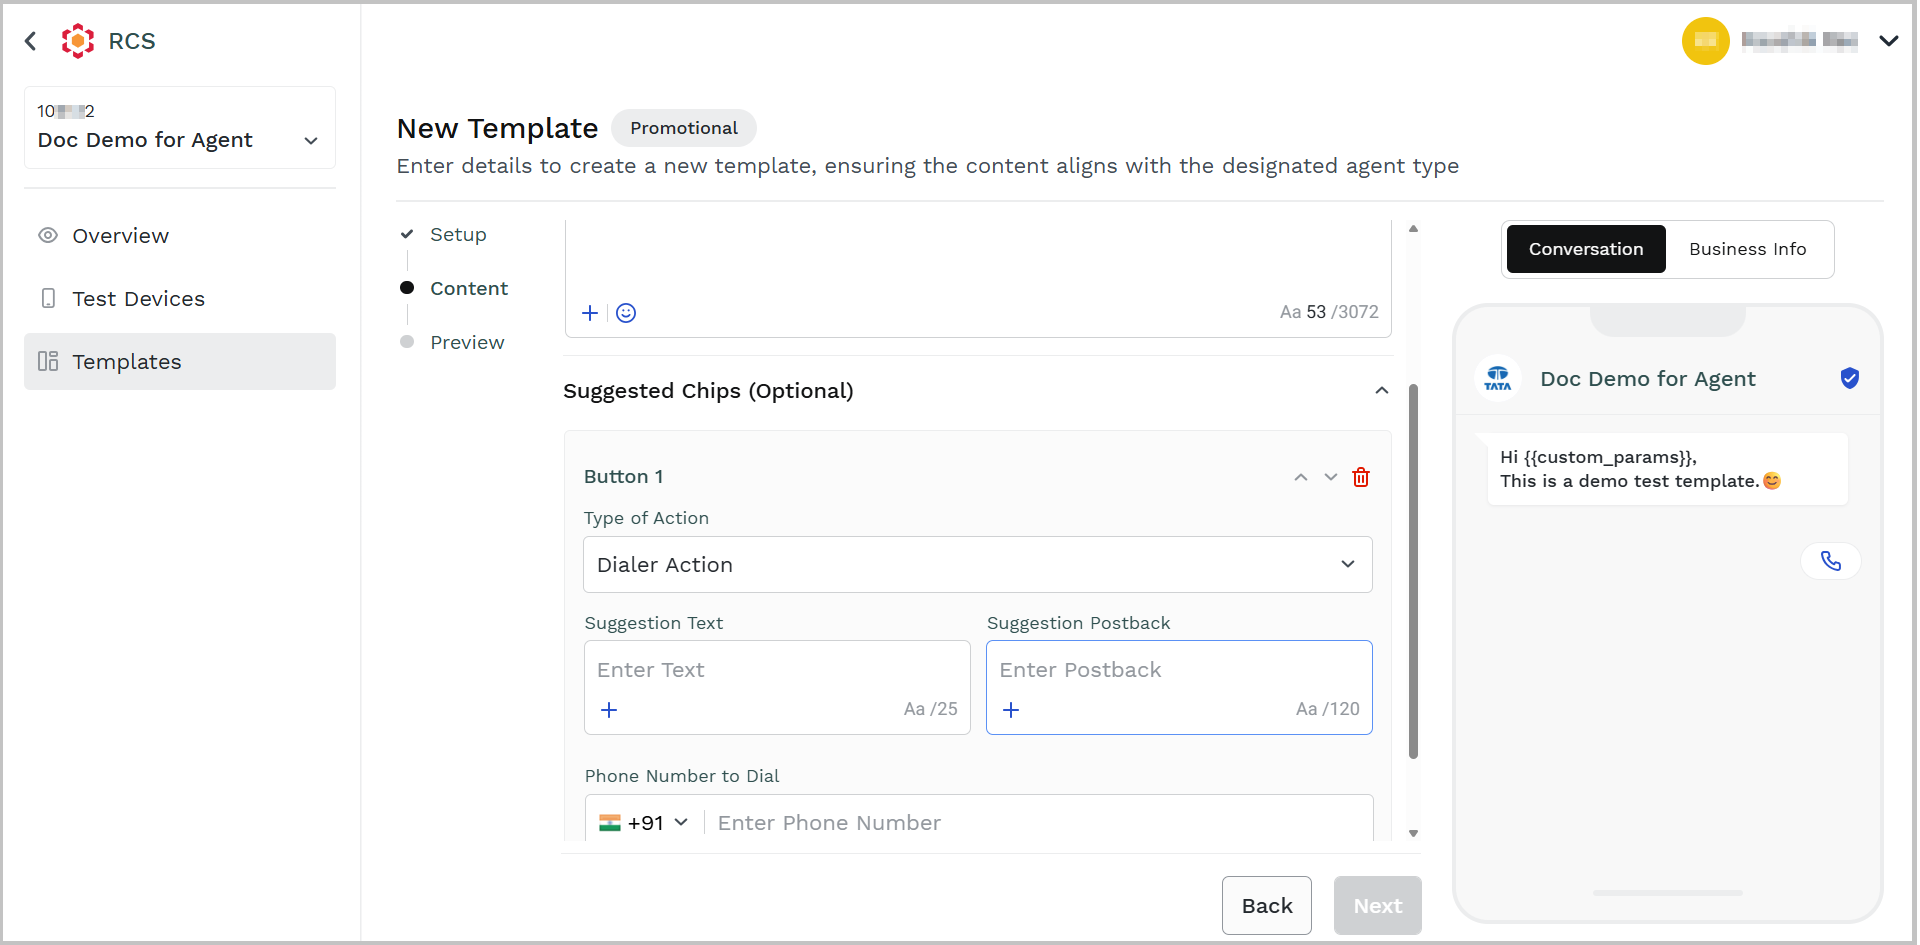
i. In the Enter Text field, enter the text for Dialer Action that you want to display in the message. Use the dynamic variables inside the template by clicking the + icon on the bottom-left of the Enter Content field. The new {{custom_params}} variable appears.
ii. In the Enter Postback field, enter the content you want to capture when the Dialer Action is clicked as a log event. Use the dynamic variables inside the template by clicking the + icon on the bottom-left of the Enter Content field. The new {{custom_params}} variable appears.
iii. In the Country Code drop-down field, click the drop-down icon and then select the country code for your phone number.
iv. In the Enter Phone Number field, enter the phone number by which the end-user can contact you.
Notes:
View Location (Lat/Long)
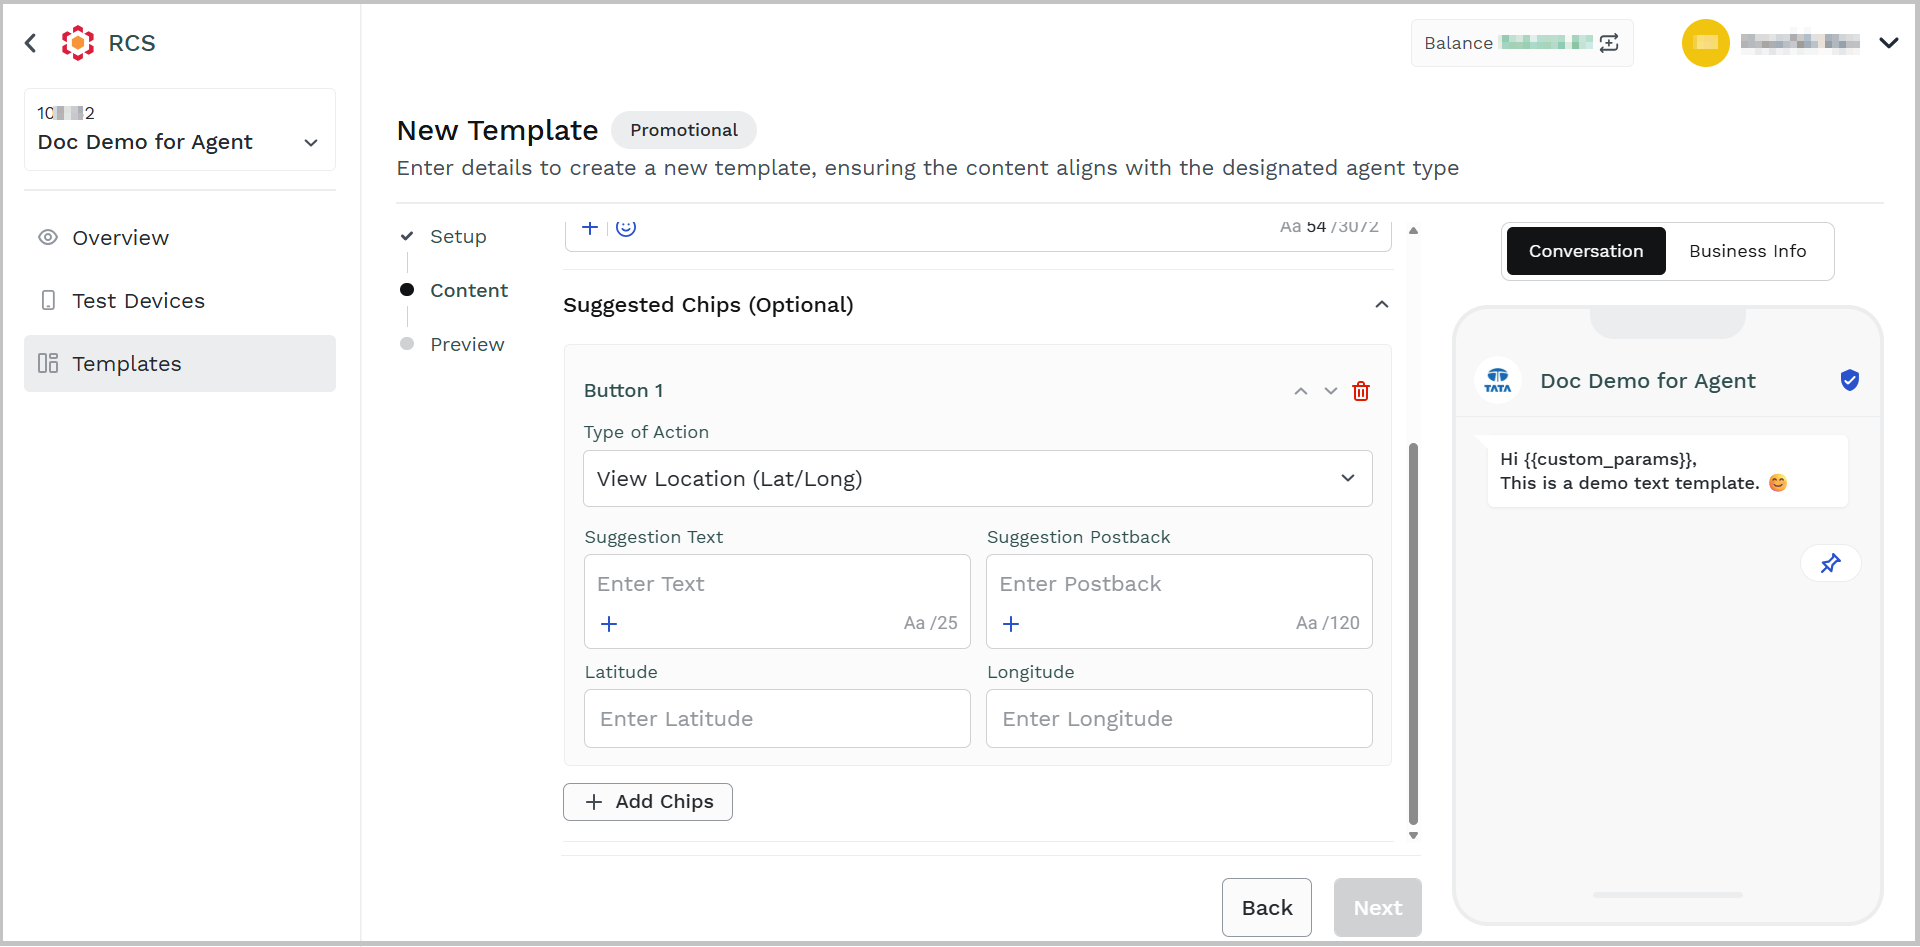
i. In the Enter Text field, enter the text for View Location (Latitude/Longitude) that you want to display in message. Use the dynamic variables inside the template by clicking the + icon on the bottom-left of the Enter Content field. The new {{custom_params}} variable appears.
ii. In the Enter Postback field, enter the content you want to capture when the View Location (Latitude/Longitude) is clicked as a log event. Use the dynamic variables inside the template by clicking the + icon on the bottom-left of the Enter Content field. The new {{custom_params}} variable appears.
iii. In the Enter Latitude field, enter the latitude for your location.
iv. In the Enter Longitude field, enter the longitude for your location.
Notes:
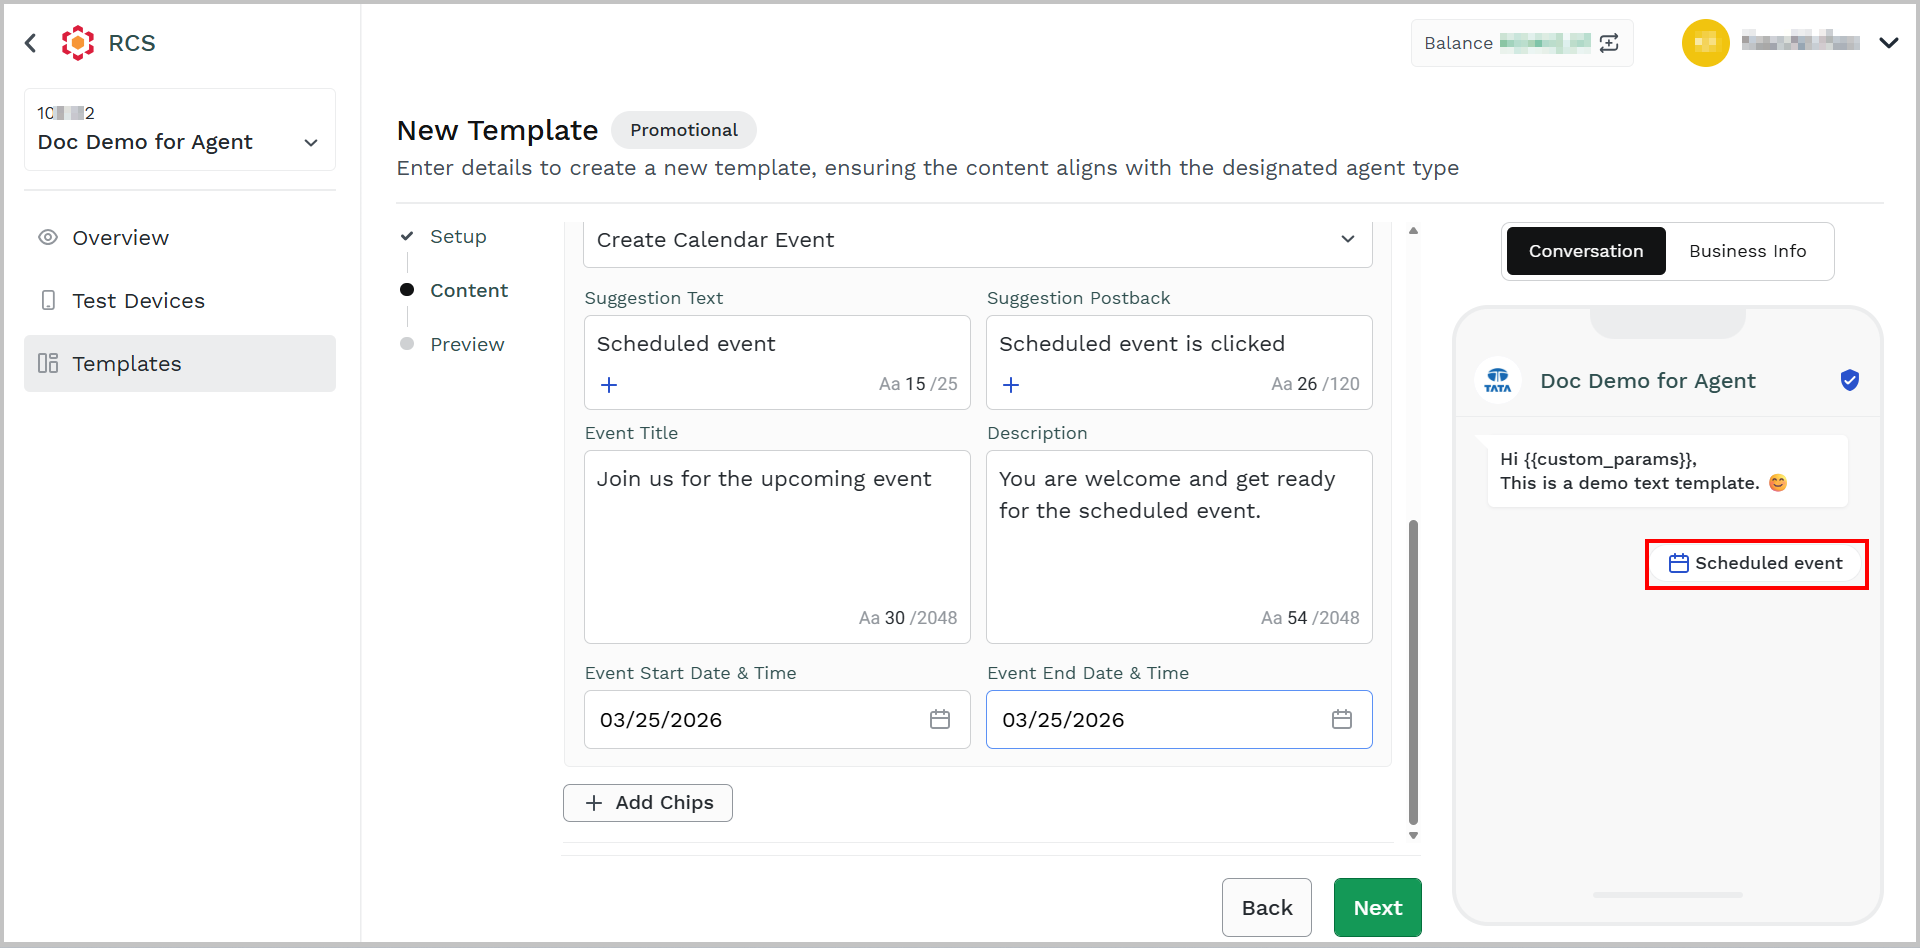
Create Calendar Event
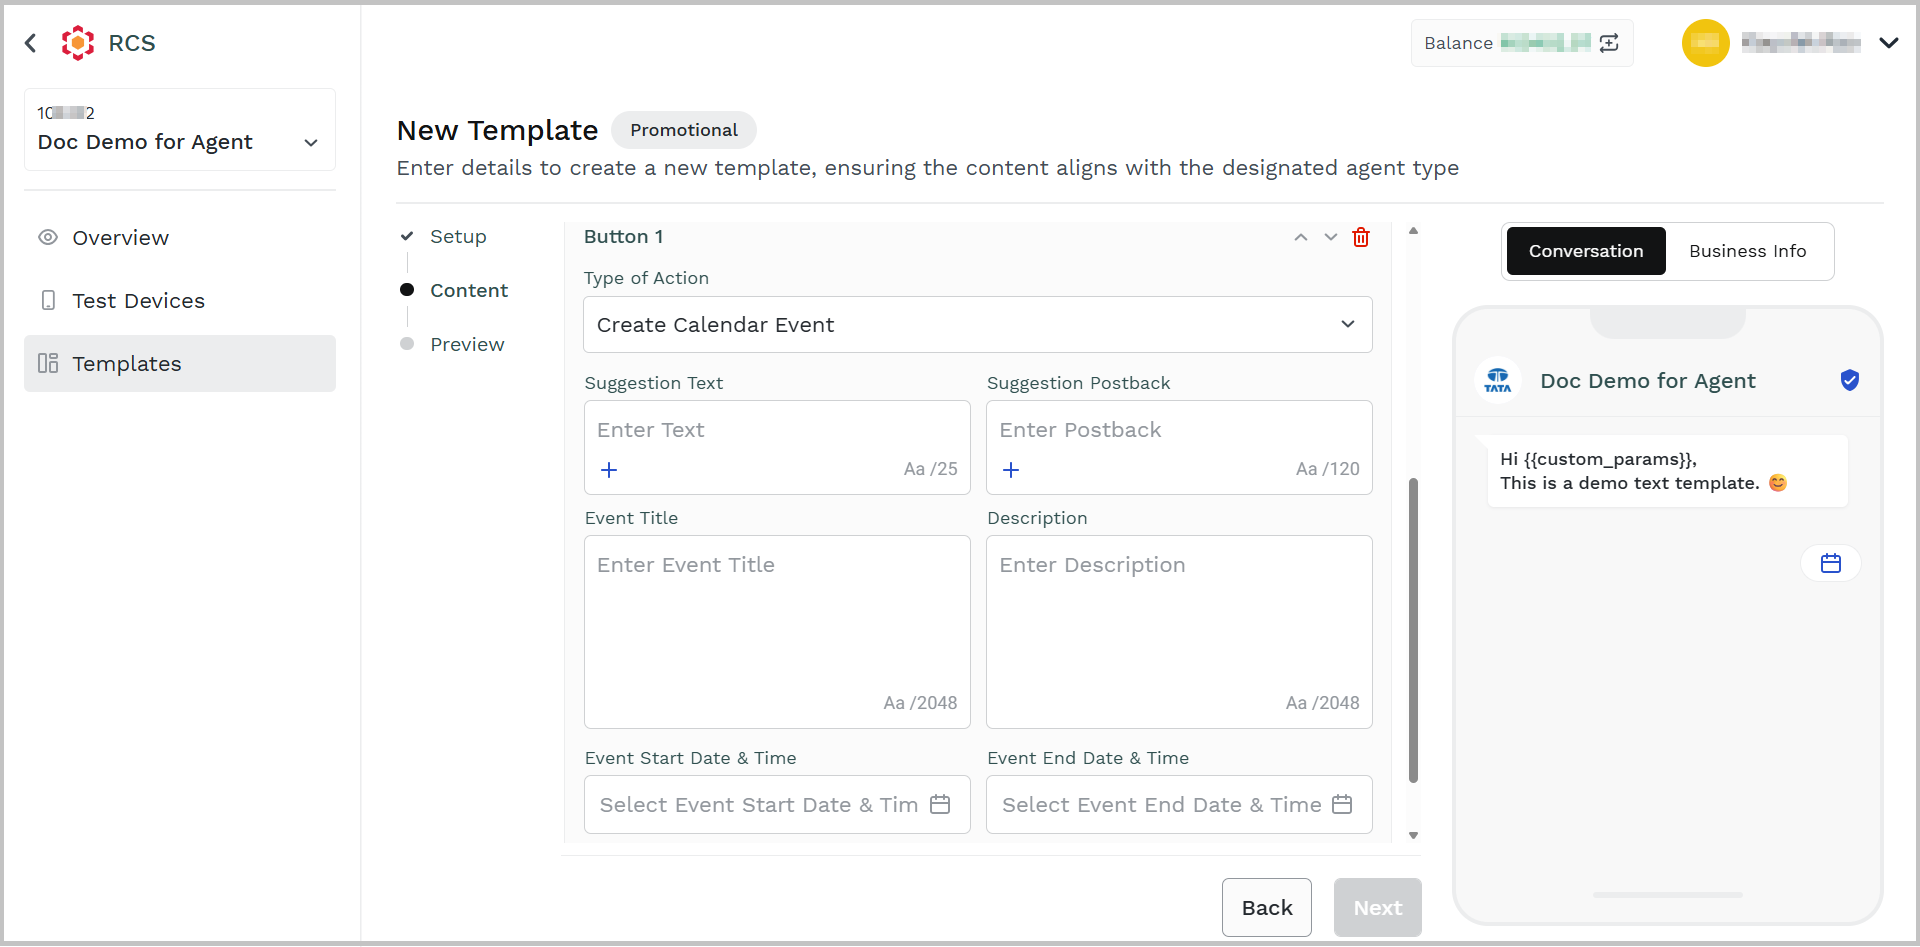
i. In the Enter Text field, enter the text for the Create Calendar Event that you want to display in message. Use the dynamic variables inside the template by clicking the + icon on the bottom-left of the Enter Content field. The new {{custom_params}} variable appears.
ii. In the Enter Postback field, enter the content you want to capture as a log event when the Create Calendar Event is clicked. Use the dynamic variables inside the template by clicking the + icon on the bottom-left of the Enter Content field. The new {{custom_params}} variable appears.
iii. In the Enter Event Title field, enter the title for your event.
iv. In the Enter Description field, enter the description for your event.
v. In the Enter Event Start Date & Time field, enter the event's start date and time.
vi. In the Enter Event End Date & Time field, enter the event's end date and time.
Notes:
- Click Next.
The Preview step appears with template details.
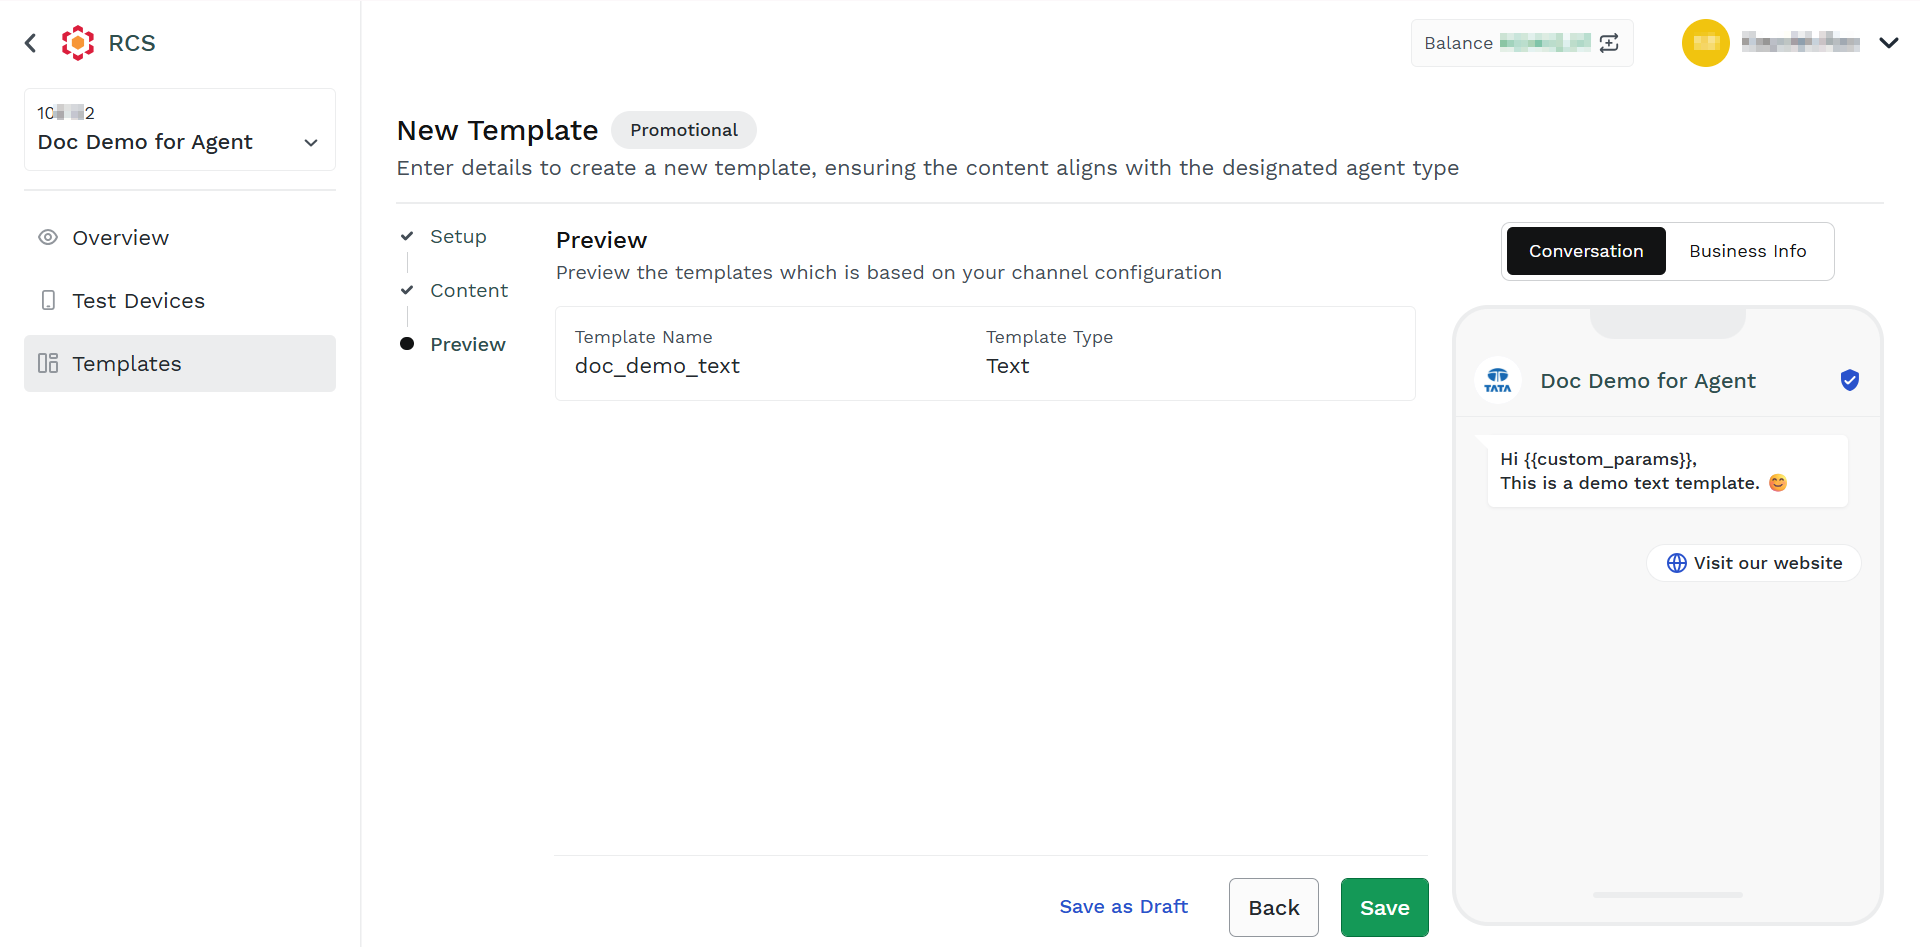
- Click Save.
The Activate template pop-up appears.

- Select one of the following options:
-
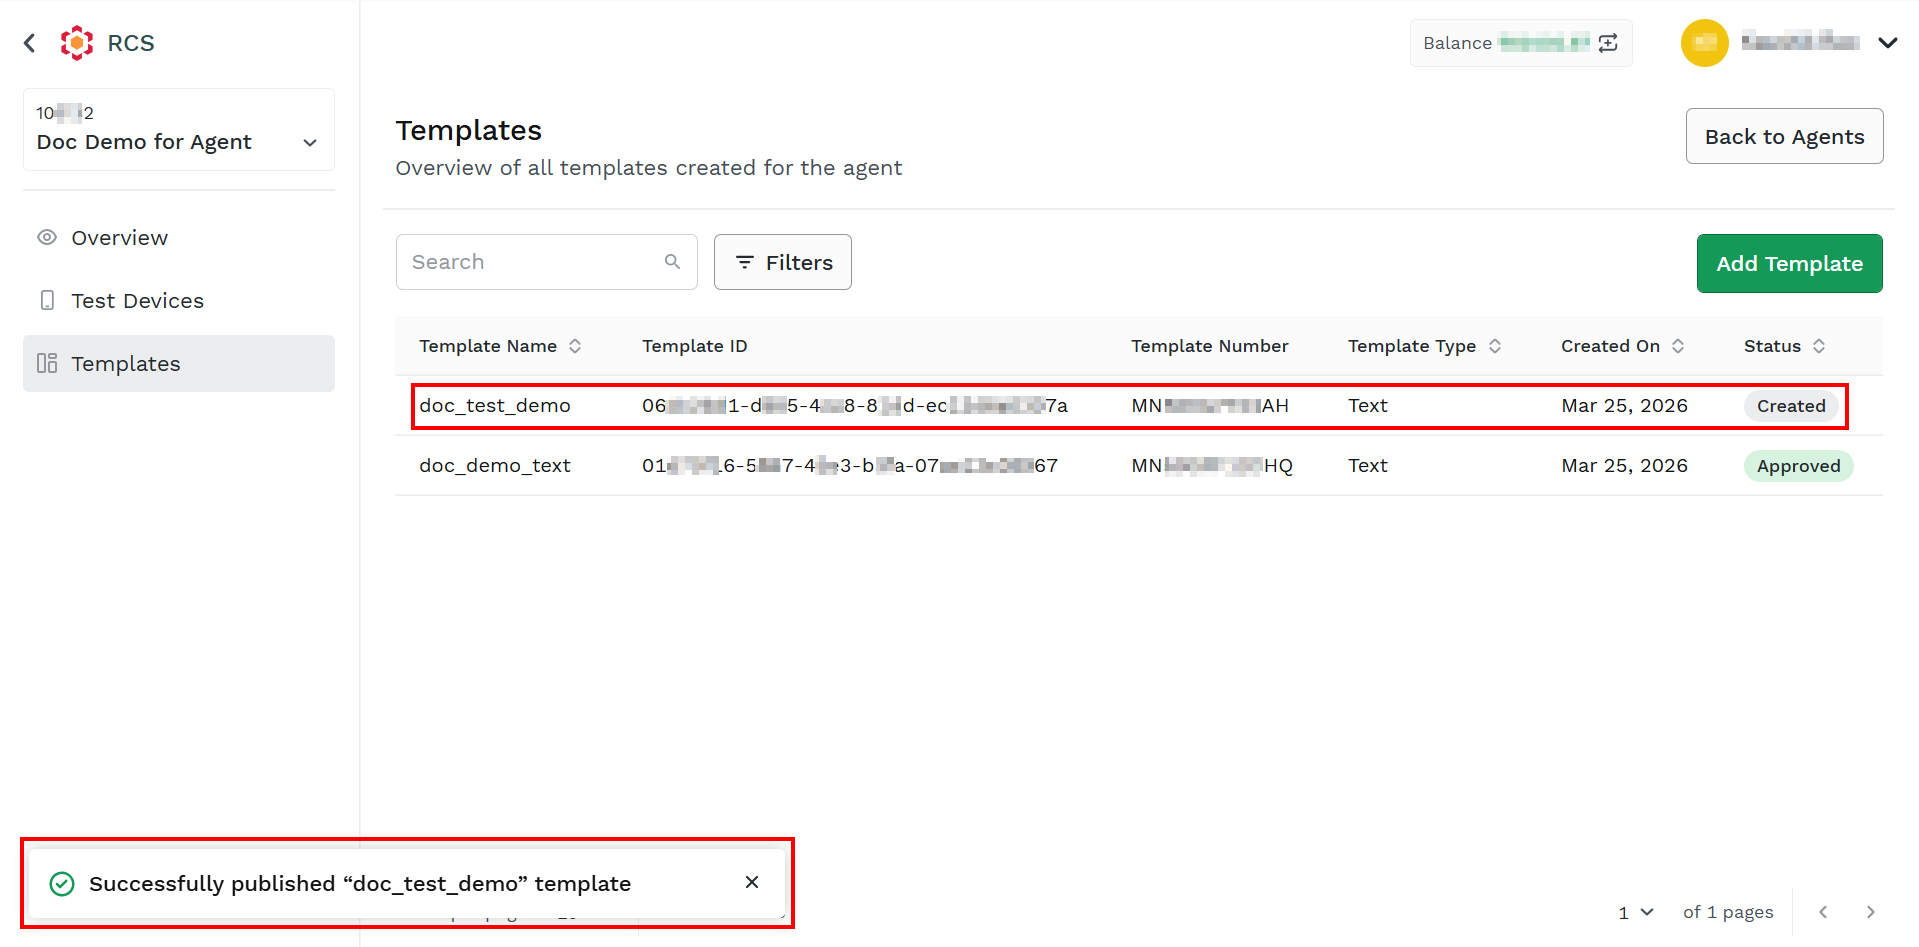
Activate Now - Activate the template immediately. After successful approval of template, the Status of the template will be Approved.

-
Activate Later - Create the template. After selecting the Activate Later option, the status of the template will be Created. You can send the template for approval later. For more information, see Send Template for Approval.
-
Updated about 2 months ago