

Voice Call Logs
Logs screen lets you access all the call log details for the calls made using your account. You can view details like type of call, call to and call from numbers, time of the call, status of the call, chargeable duration of the call, credits utilized for the call, link to the call recording and so on.
Access Voice Call Logs page
To view, filter and Export Voice Call Logs, access the Voice Call Logs page from the left navigation bar of the Reports & Logs section, the Voice Call Logs page appears.
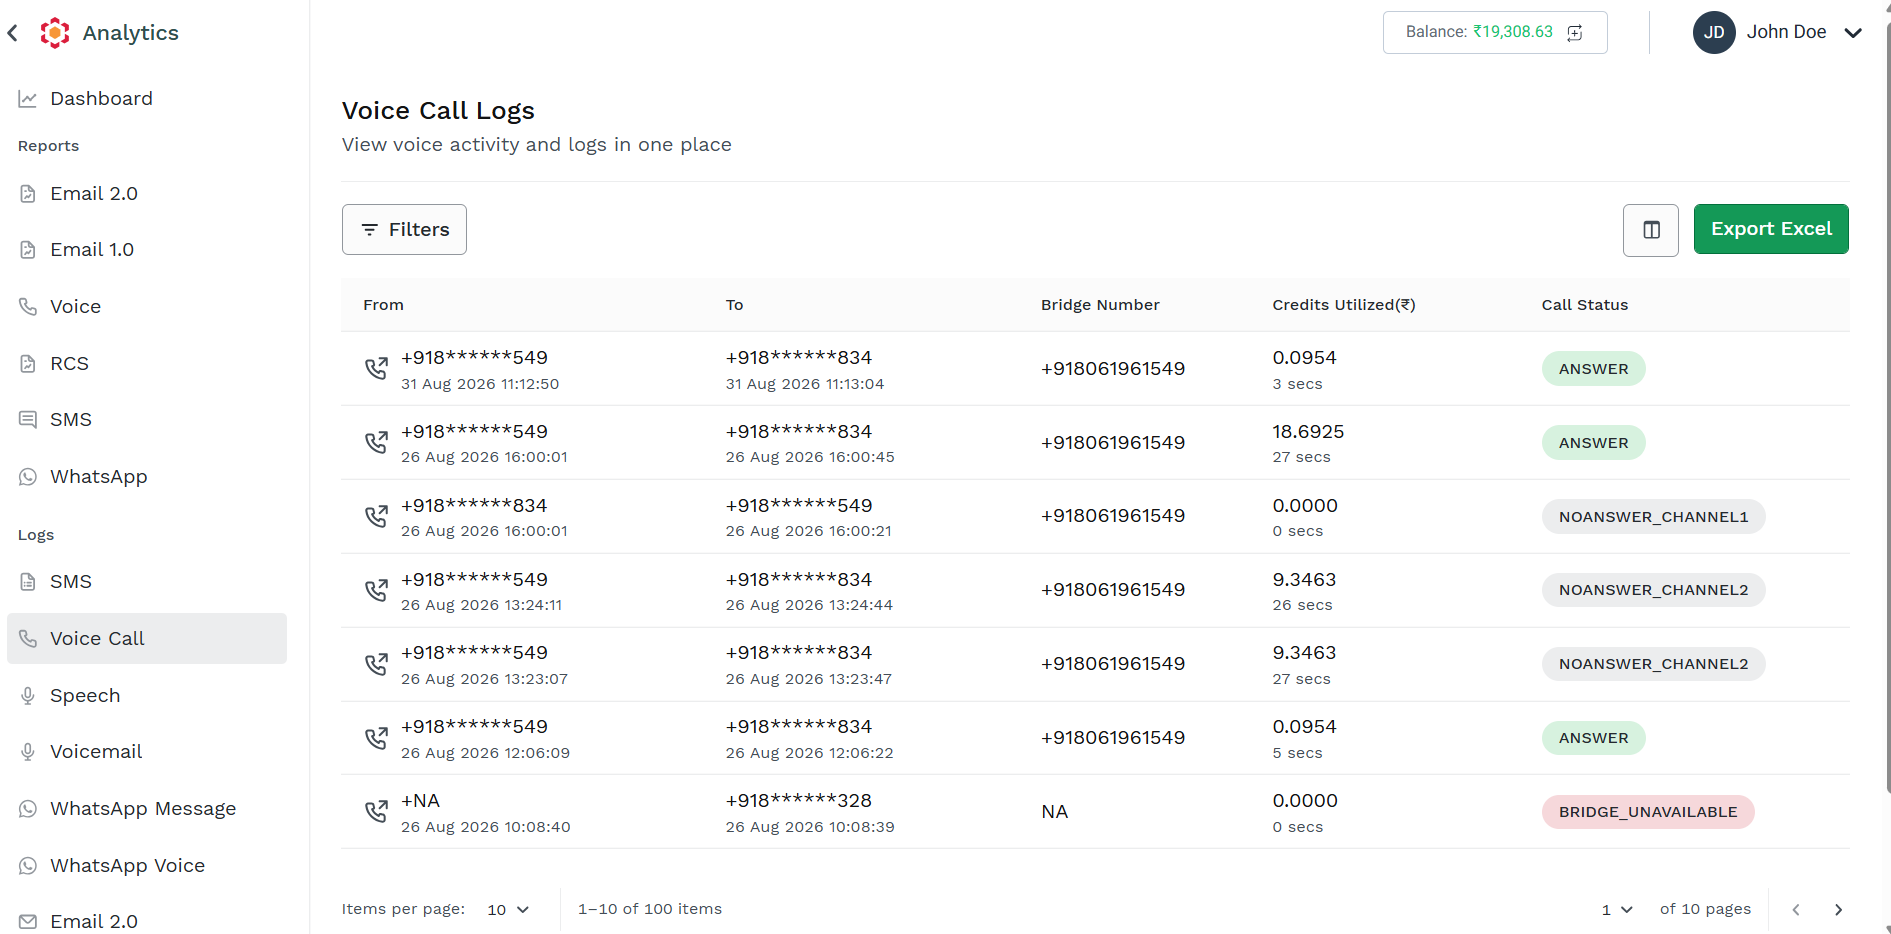
Columns on the Log screen
The following table provides descriptions for the columns on the log screen:
| Column Name | Description |
|---|---|
| Type | The type of call is represent by the small phone icon with an arrow on the left of the From Column.
|
| From | The number from which the call is received. |
| To | The number to which the call is made. |
| Bridge Number | The DID number that is used to initiate the call. |
| Call Status | The status of the call. For example ANSWER, NOANSWR, BUSY, and so on. For more details on the call statuses, refer to https://developers.kaleyra.io/docs/call-statuses. |
| Credits Utilized(cur) | The credits utilized for the call. |
You can personalize which column you want to see in the Logs page by clicking on the "two-column" icon near the Export button, the Column Display Properties panel appears.
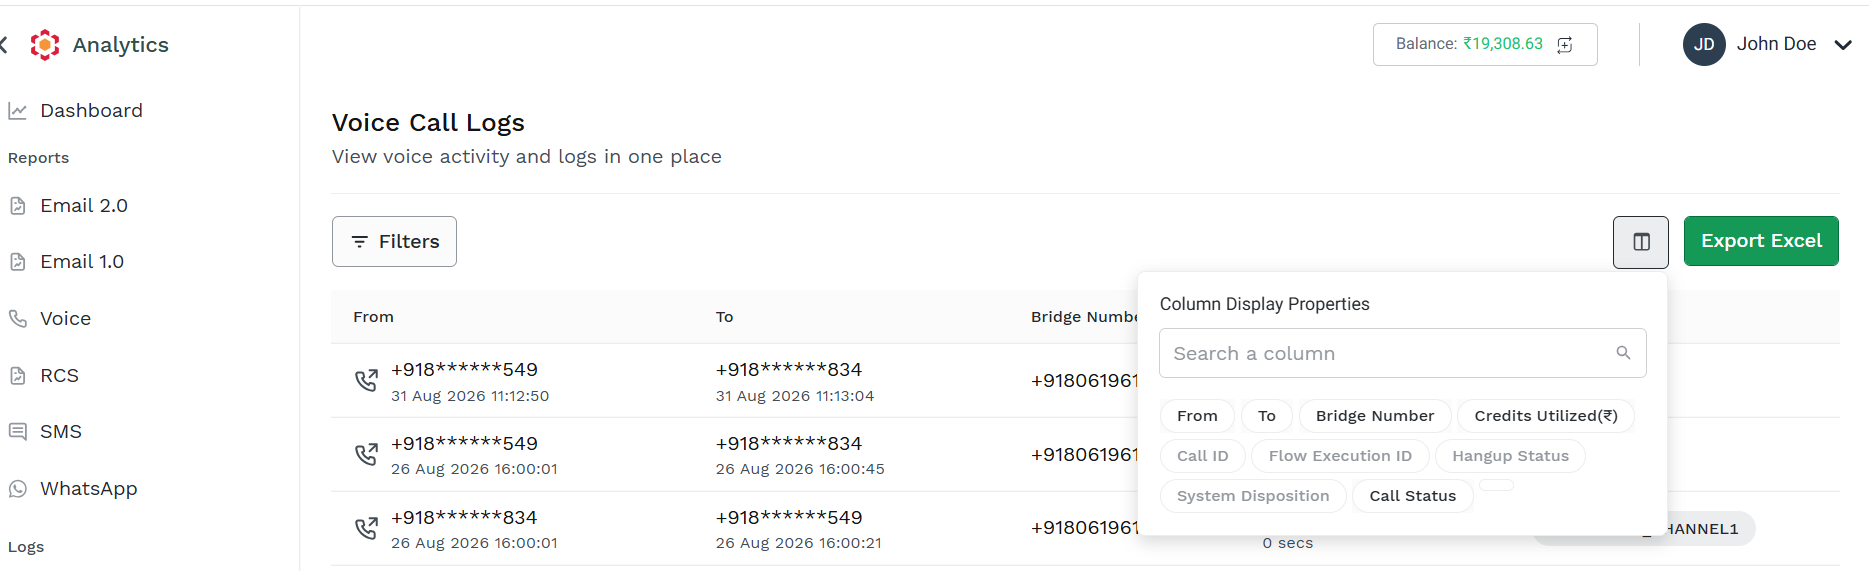
The column in bold are the one already displayed in the log page; the one not in bold are not currently displayed in the Logs page but are available to be added.
You can remove any of the visible column just clicking on it in the Column Display Properties. The column is then removed from the Logs page and it is not more shown in bold in the panel
You can add any of the non-visible column just clicking on it in the Column Display Properties. The column is then added to the Logs page and it is shown in bold in the panel.
Additional Available columns are:
| Column Name | Description |
|---|---|
| Call Id | Id of the call generated by Kaleyra Platform |
| Flow Execution Id | Id of the automated flow within which the the call has been generated / received |
| Hungup Status | Provides information on which side has closed the call |
| System Disposition | Provides information on system status during the call |
Filter the Voice Call Logs
You can filter the displayed Voice Call Logs by clicking on the Filters button and applying one or more filtering conditions:
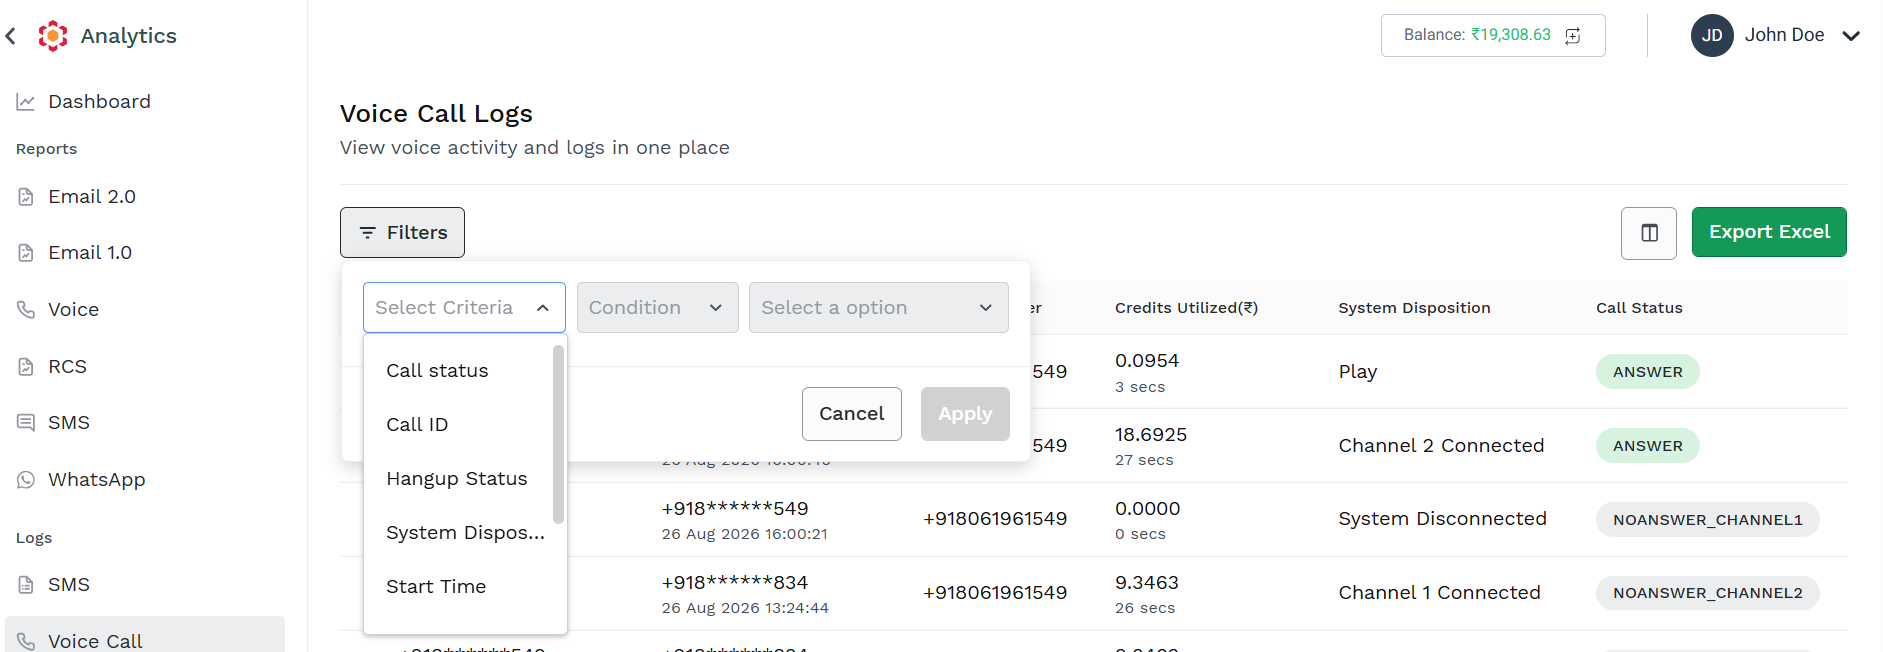
To add a filter conditions, select one of the available Criteria from the Select Criteria dropdown, the available option are:
- Call Status - filter Logs based on Call Status information
- Call Id - filter Logs based on specific Call Id
- Hangup Status - filter Logs based on who closed the call
- System Disposition - filter Logs based on System Disposition information
- Start Time - filter Logs based on Start Time being in the selected time range
- Call to - filter Logs based on the recipient number
- Call From - filter Logs based on the caller number
- Bridge Number - filter Logs based on the bridge used during the call
After selecting a Criteria, you can complete the filter conditions selecting one of the available operator from the Conditions dropdown and then entering or selecting a value to be matched
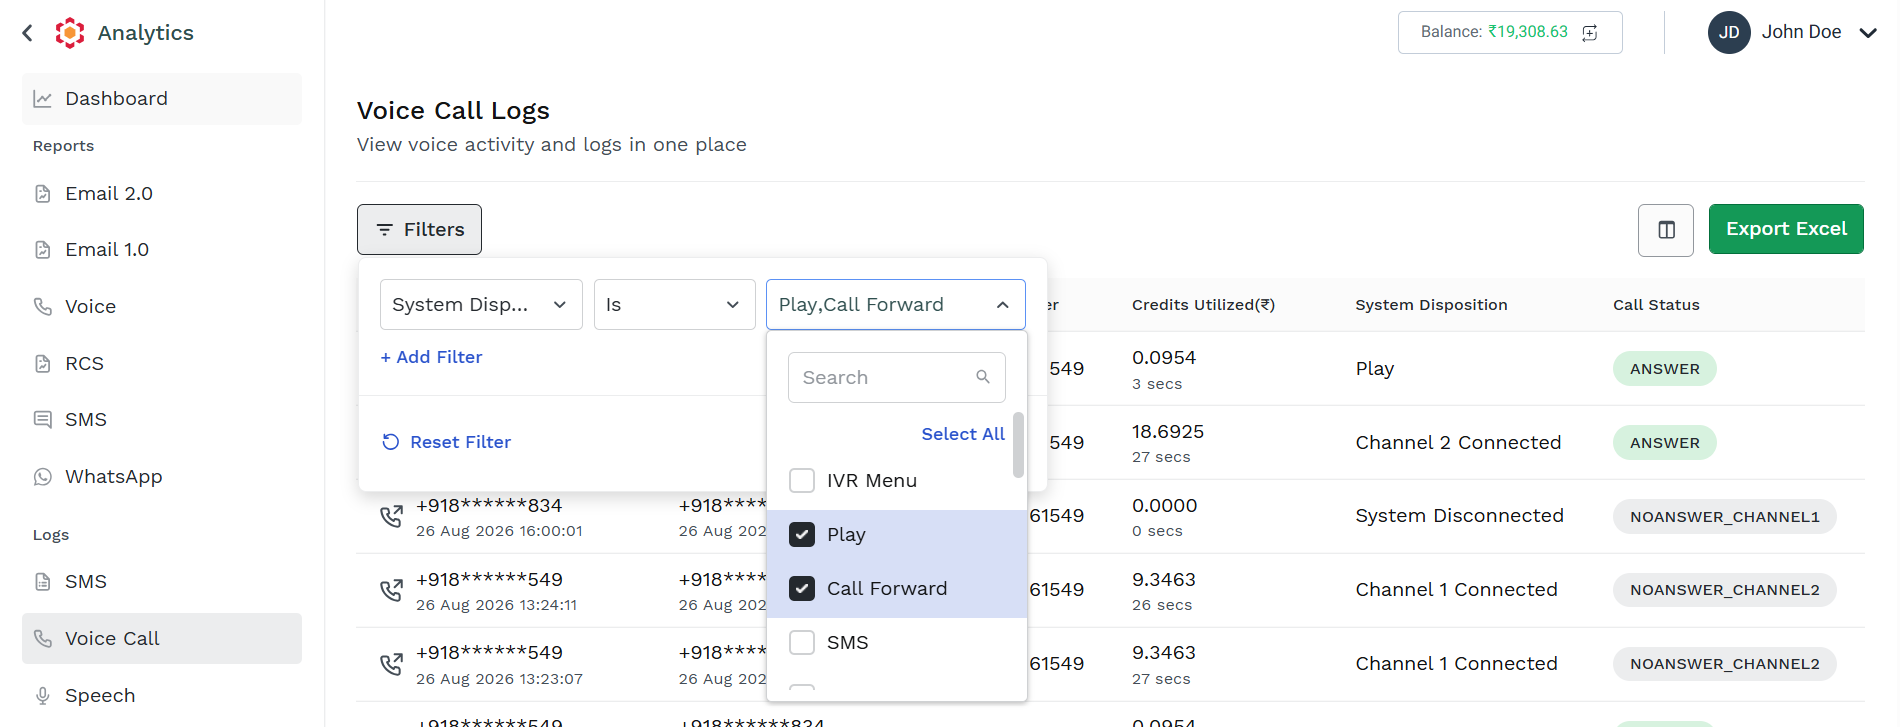
Click Apply.
Based on the selected filter, the filtered result appears. A small number near the Filters button provide how many filter condition are applied.
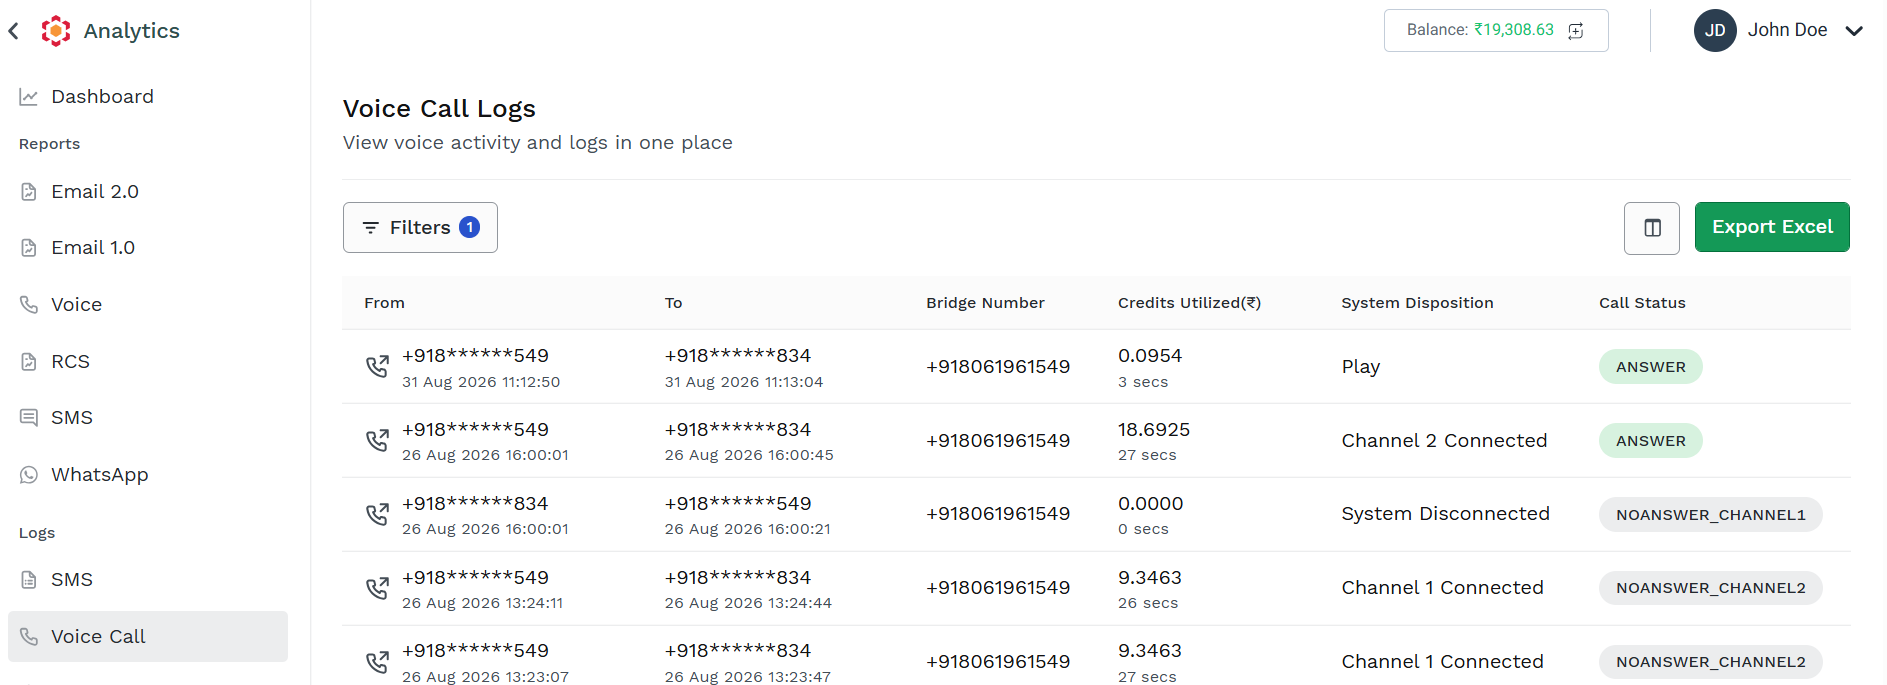
You can apply more than one condition clicking on Add Filter option in the Filters panel. When more then one filter condition is applied, only Logs matching all the conditions are returned.
To remove any filter, click on Reset Filter in the Filters panel.
Exporting the Voice Call Logs
You can view and extract logs of up to the last seven days from the current day.
Click Export Excel button to export logs, the export logs configuration page appears
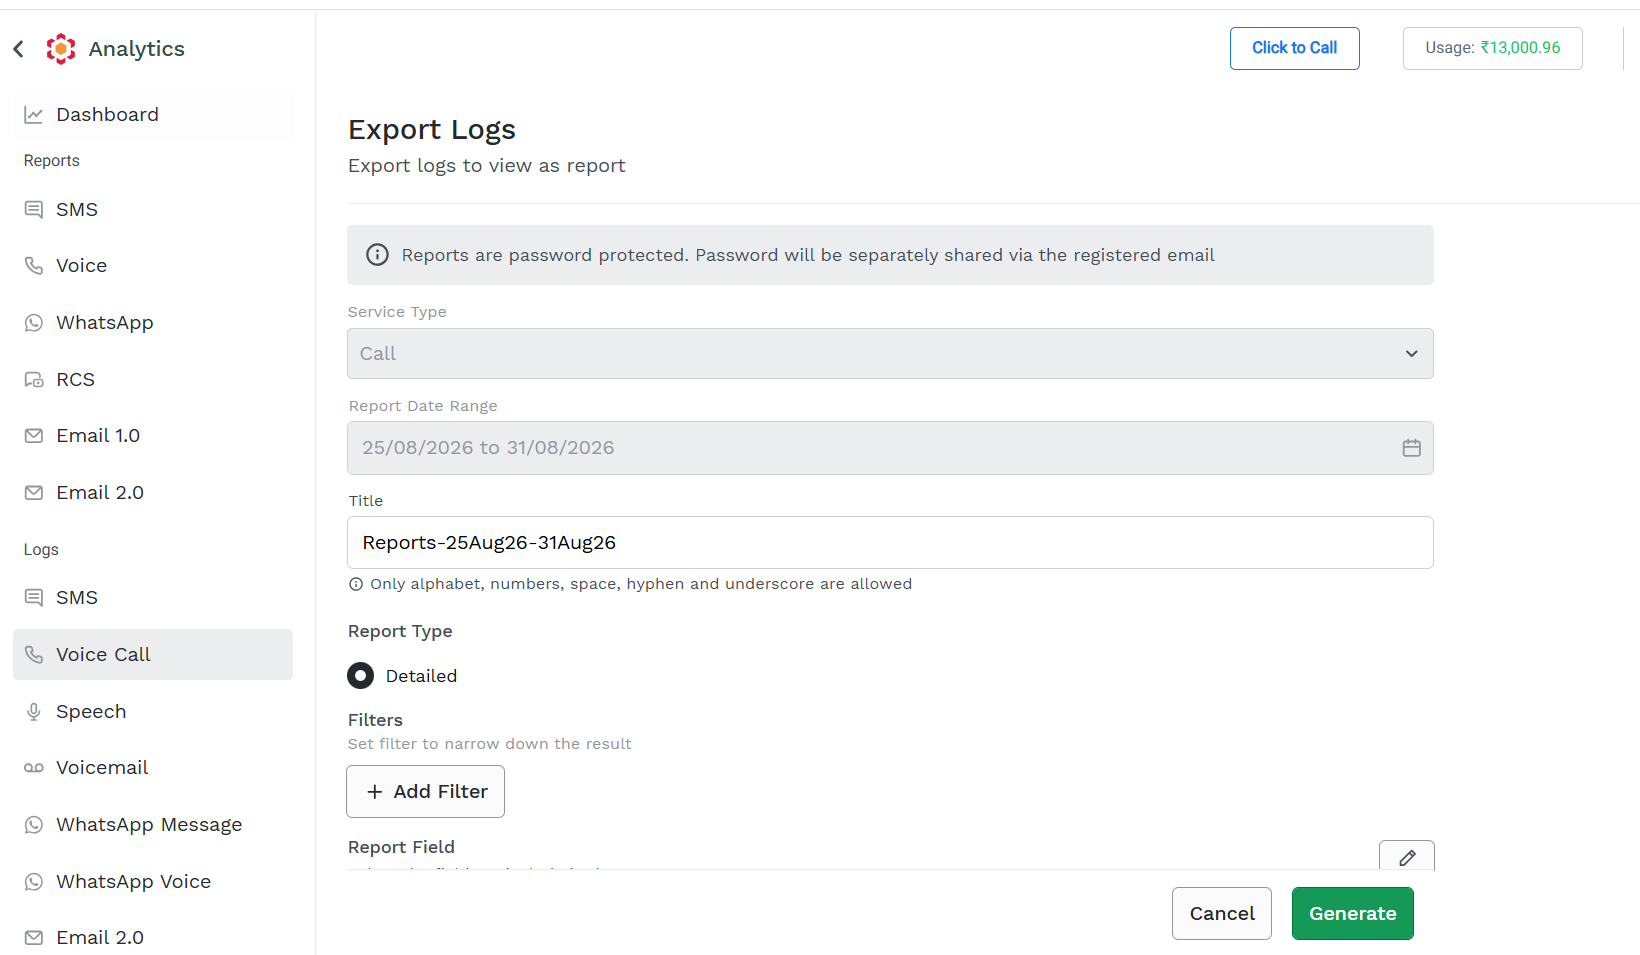
- Enter the title for the report to be generated. By default, the system auto-populates this field with the applicable date range.
- Select the Report Type. By Default Detailed option is selected
- Use filters to narrow down the results.
- Click the pencil icon to select fields to be exported to the report. By default, the fields displayed on the Logs screen are selected.
- Click Generate.
Updated about 1 month ago