

Auto Debit to Kaleyra Prepaid Account
Kaleyra also provides the auto-debit feature. With this feature, you can automatically recharge your prepaid account when the available wallet falls below the set limit. You can simply link your debit or credit card to the auto-debit feature and enjoy hassle-free services.
The topic contains the following sections:
Enable Auto Debit
Kaleyra Auto Debit Feature is a billing automation feature available for prepaid Kaleyra accounts. It automatically adds funds to your account when the available balance falls below a predefined threshold, ensuring uninterrupted messaging and communication services
To enable auto debit to your prepaid account, perform the following steps:
- Follow step 1 and step 2 of Prepaid Billing Overview.
The Billing Overview page appears.
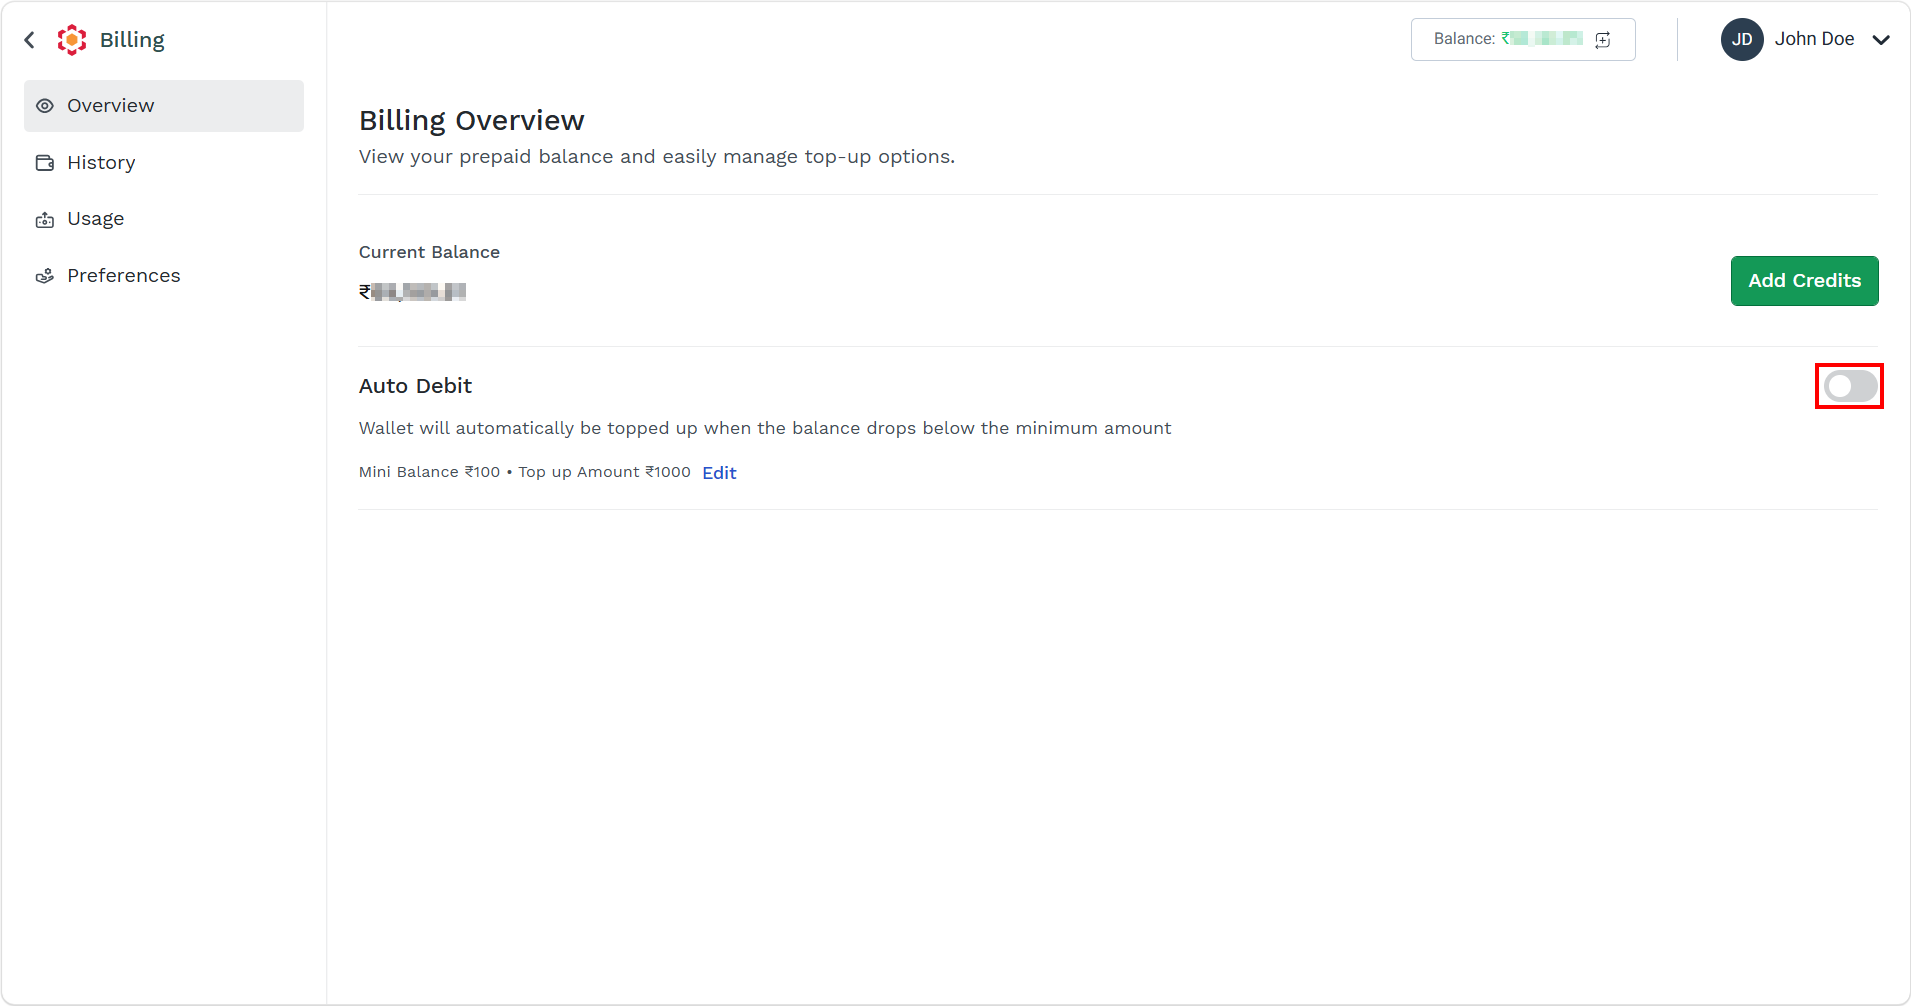
- On the right side of Auto Debit, toggle to enable the auto debit amount.
The Set Auto Debit pane appears on the right side of the page.
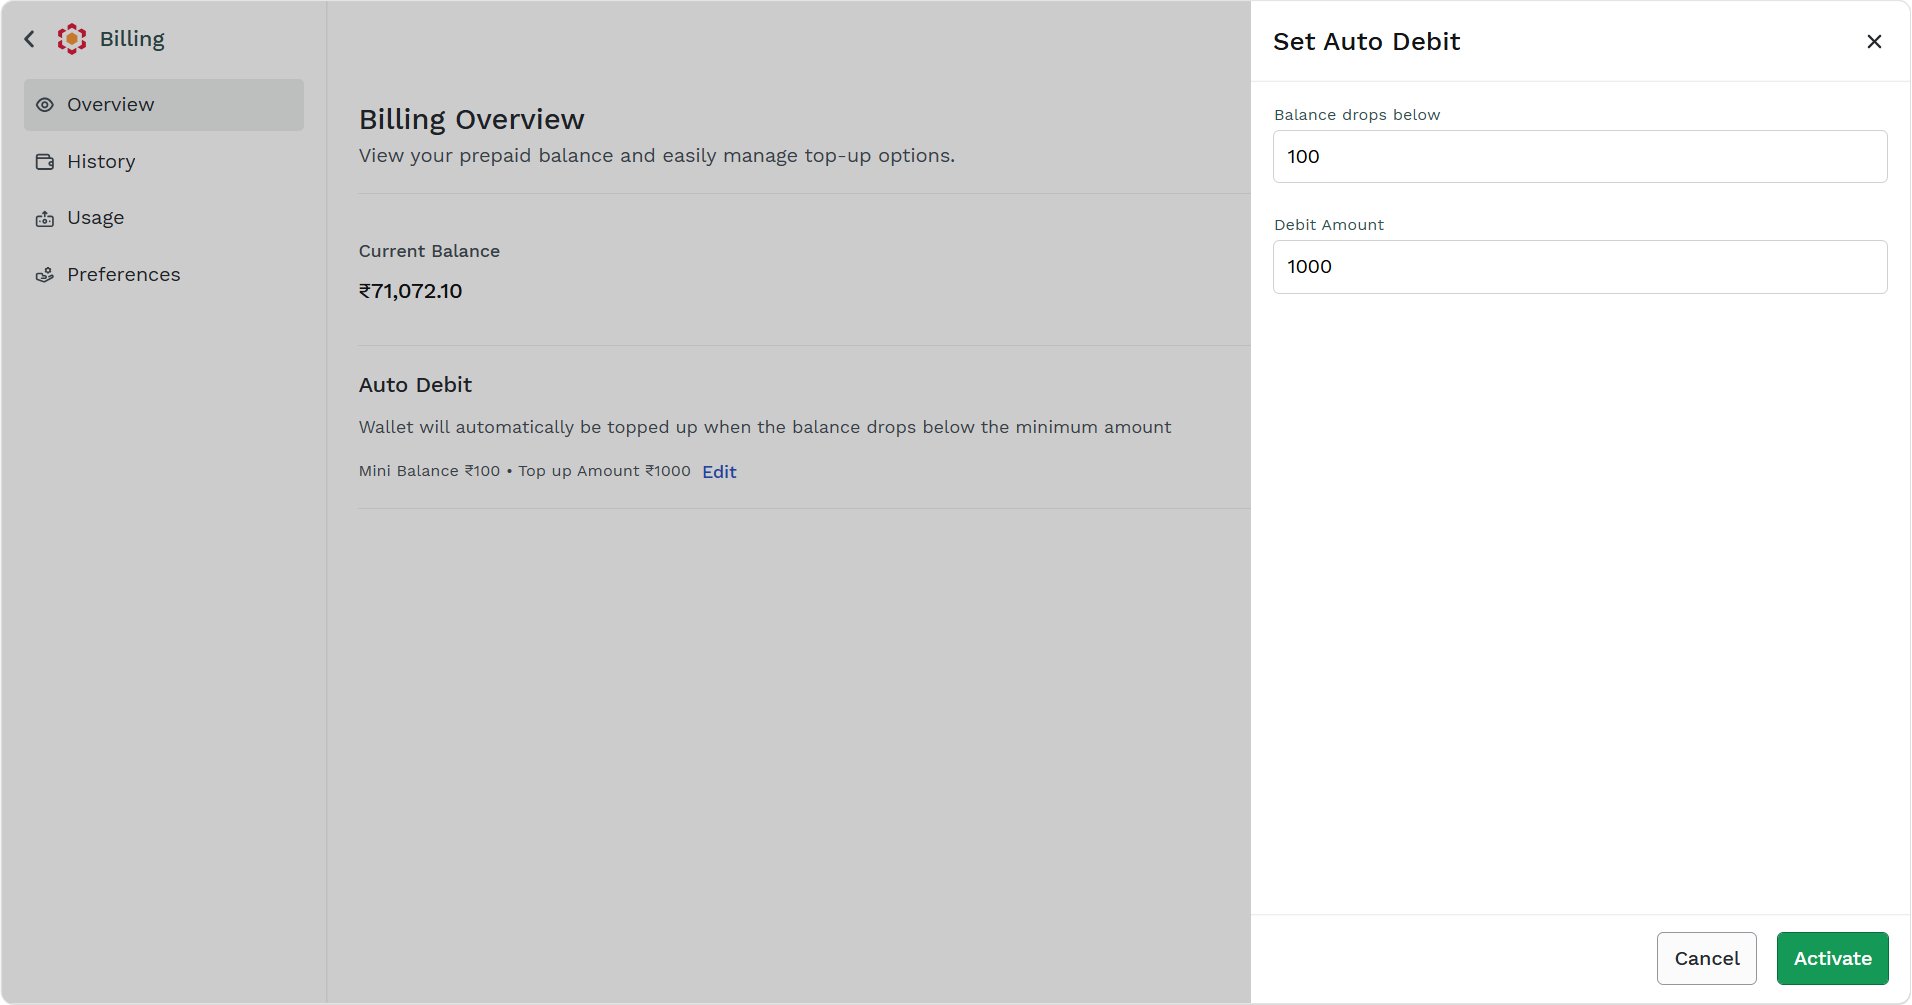
- Perform the following:
- In the Balance drops below field, enter the minimum amount when you want the auto debit amount to be credited.
- In the Debit Amount field, enter the amount you want to get credited as an auto debit amount.
Note:To begin your subscription, a one-time payment will be charged. Future payments will then be charged automatically as per your plan until cancellation.
- Click Activate.
The Payment Options pop-up appears.
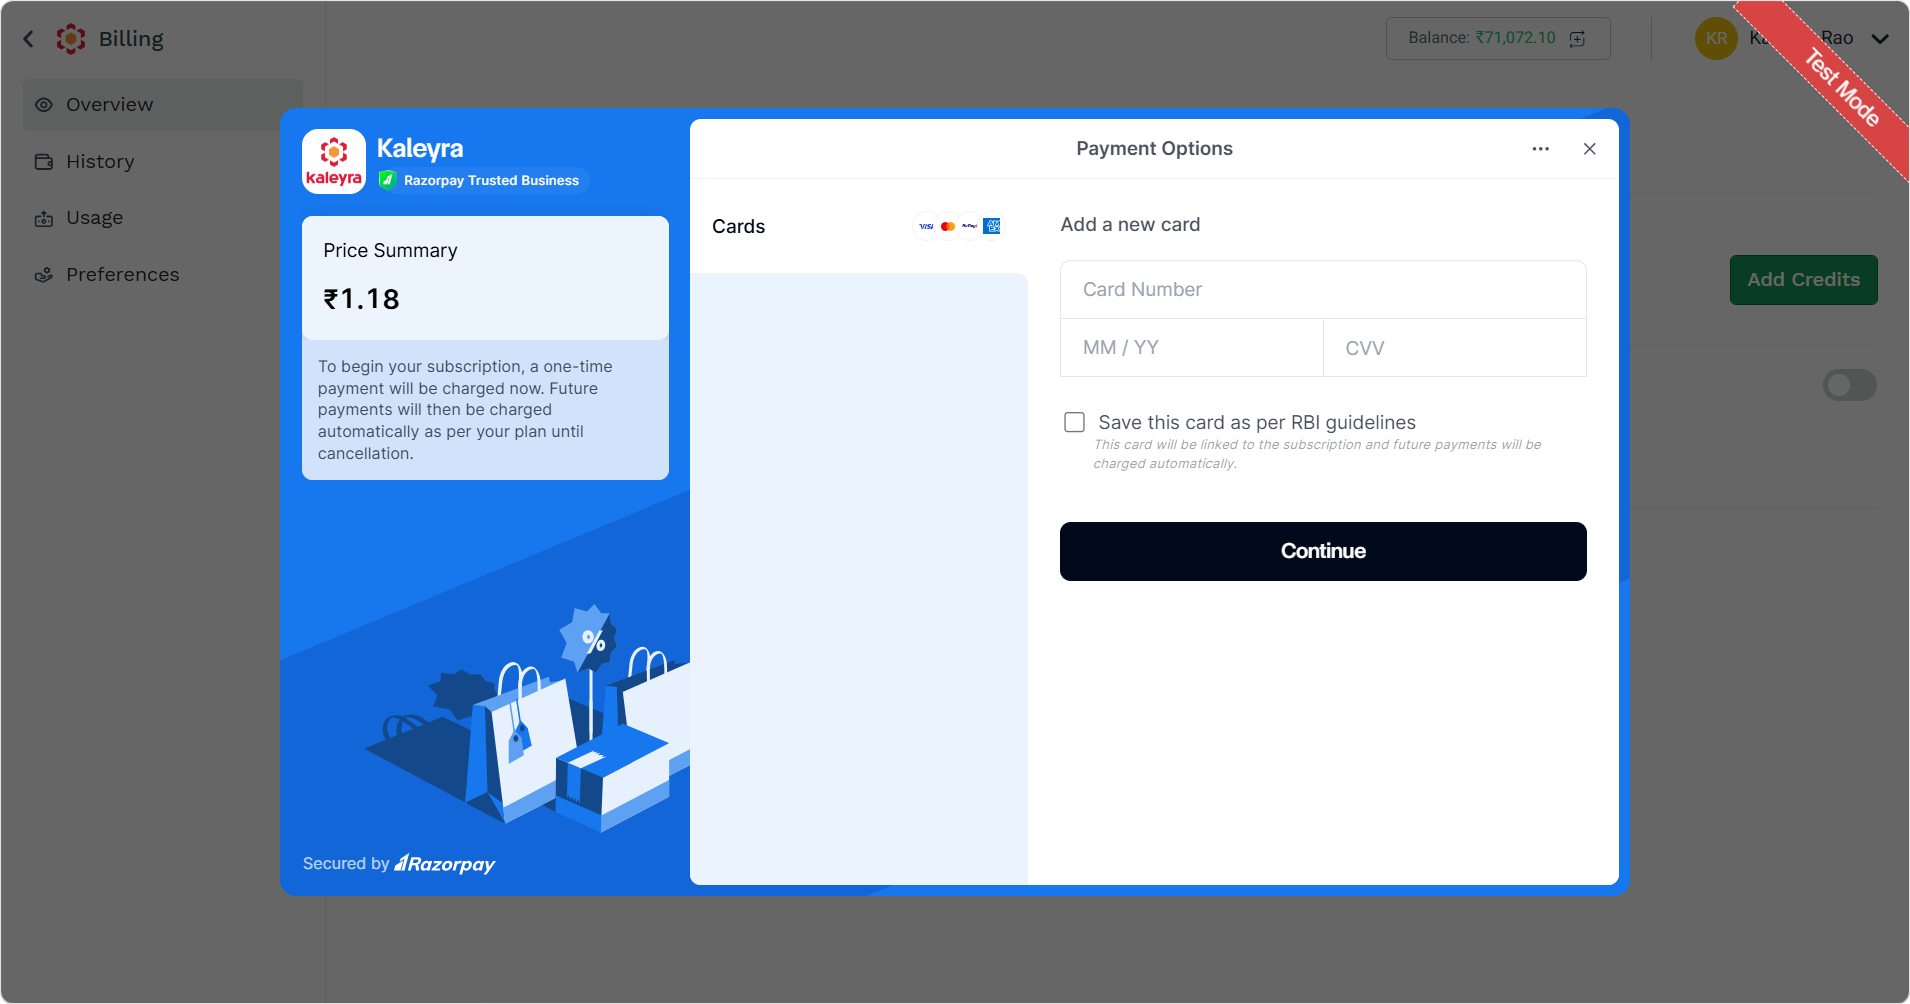
- Perform the following steps:
-
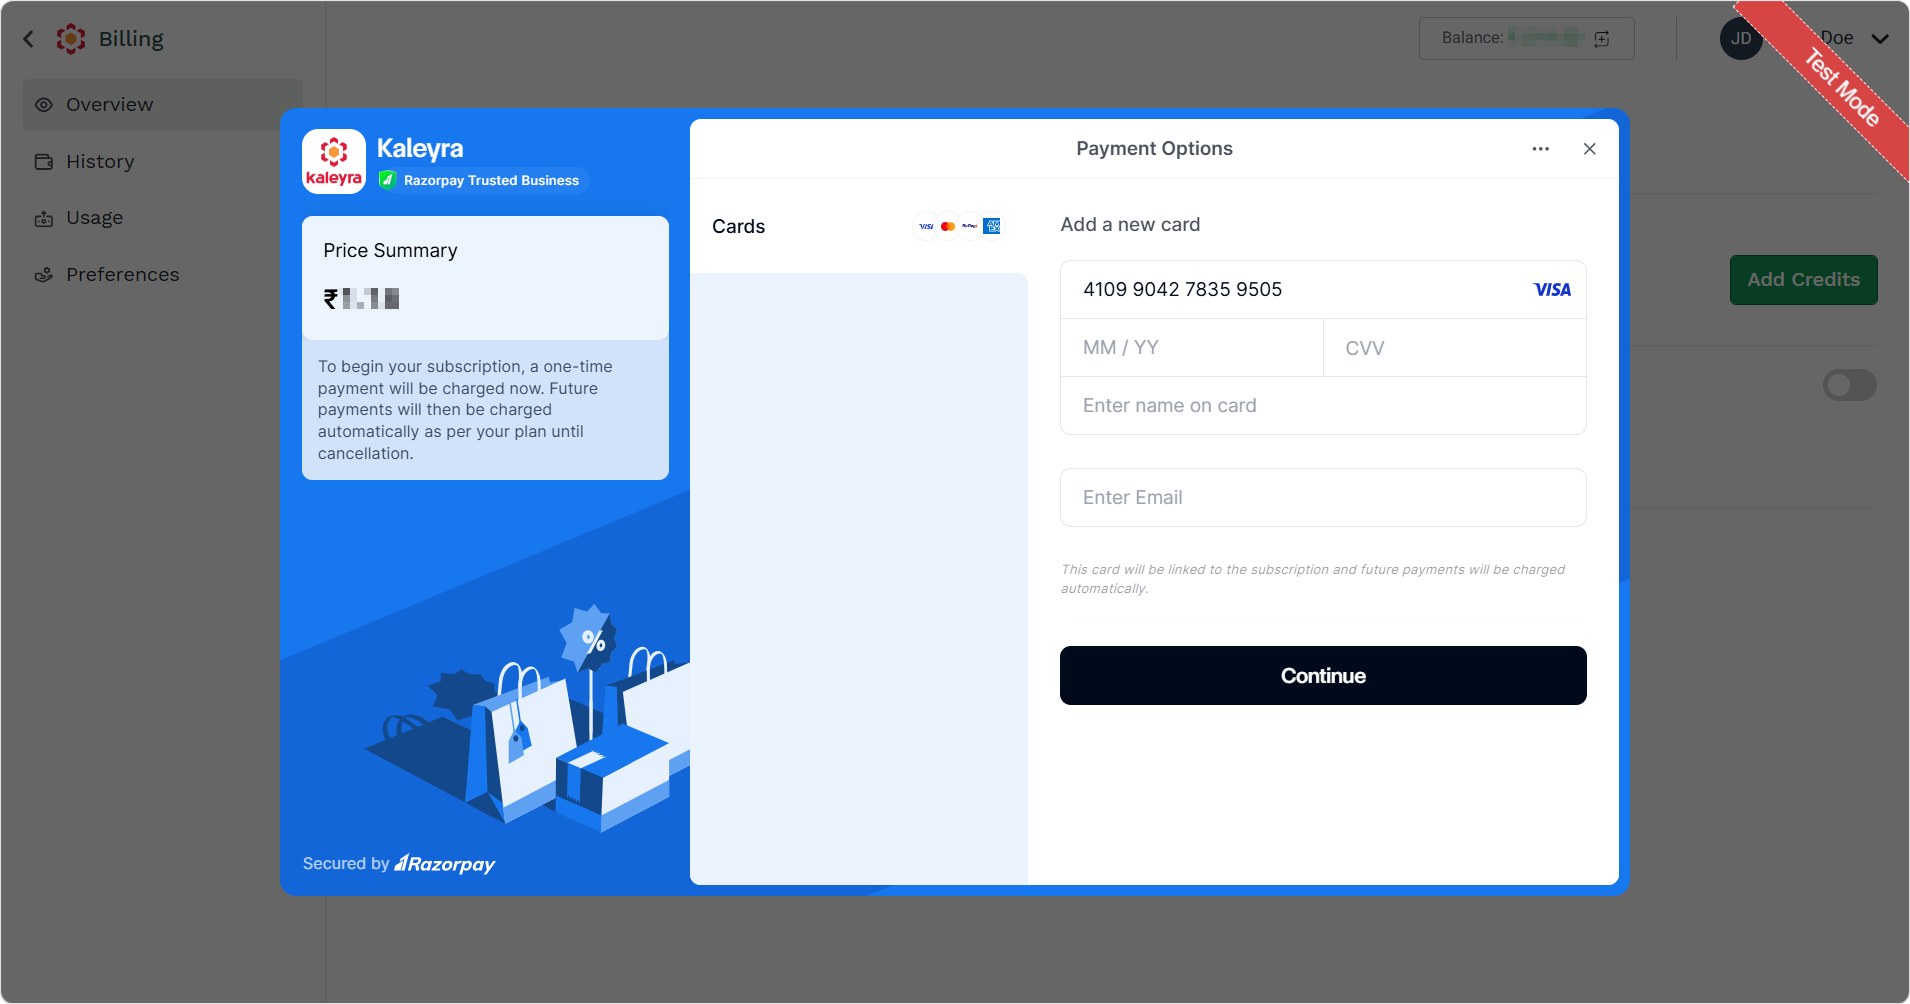
In the Card Number field, enter the card number through which you want to make payment. The field gets updated to enter the name on card and email address.
-
In the MM/YY field, enter the month and year of your card expiry.
-
In the CVV field, enter the CVV of the card through which you are making payment.
-
In the Enter name on card field, enter the name on the card.
-
In the Enter Email field, enter the email address associated with the card.
-
- Click Continue.
The Select currency to pay pop-up appears.
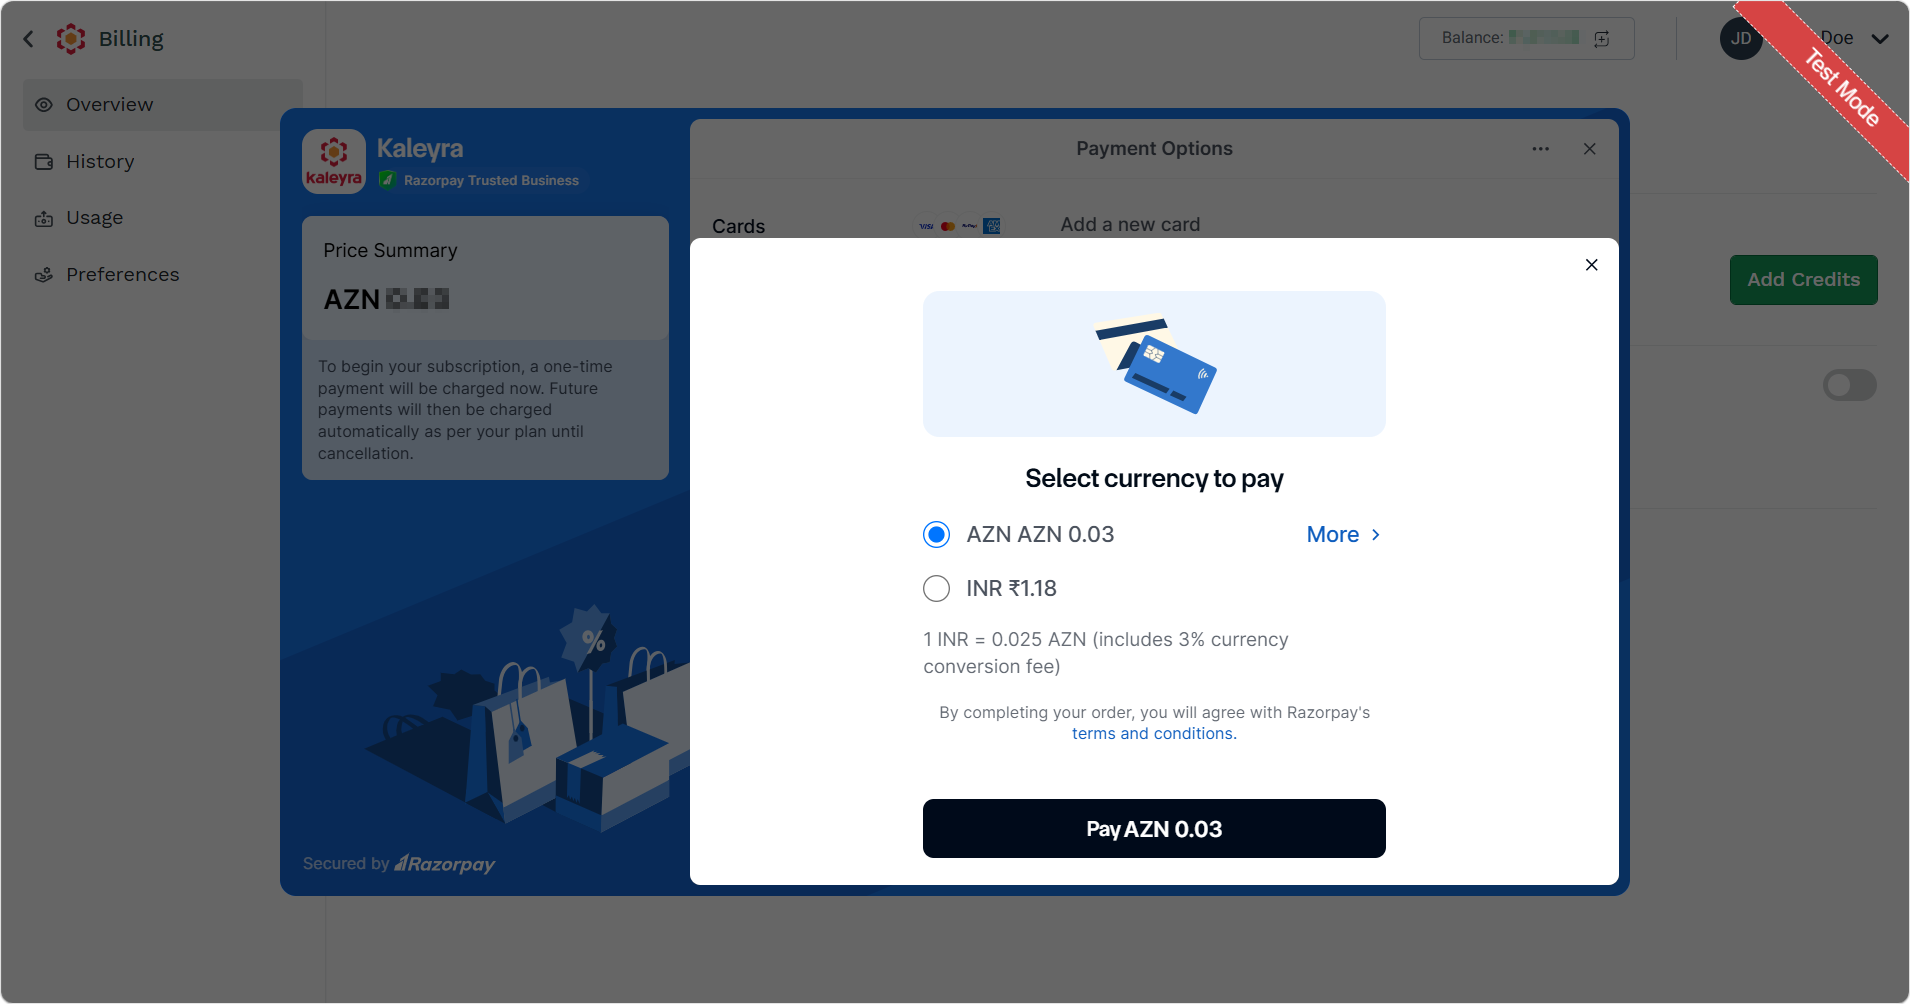
Note:To see all the supported currencies, click More >. The supported currencies appear on the right side of the page.
- Select the currency through which you want to pay the top-up amount.
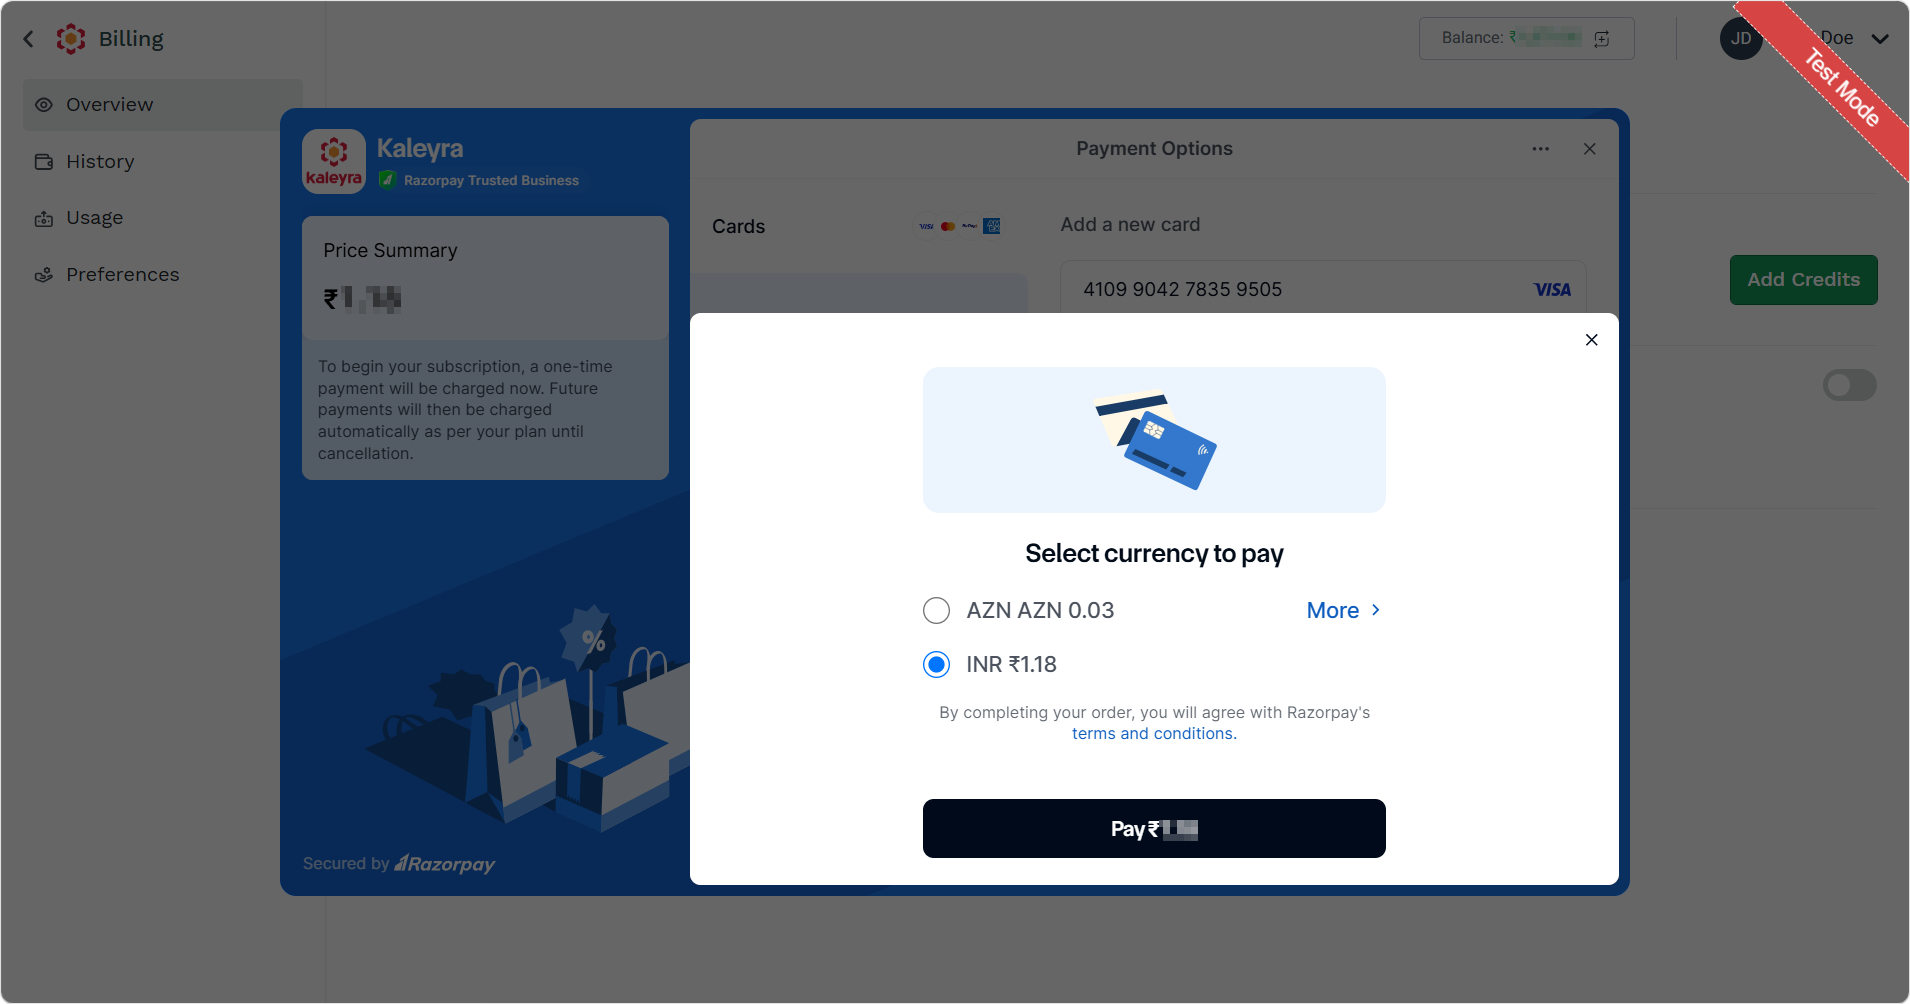
- Click the Pay button.
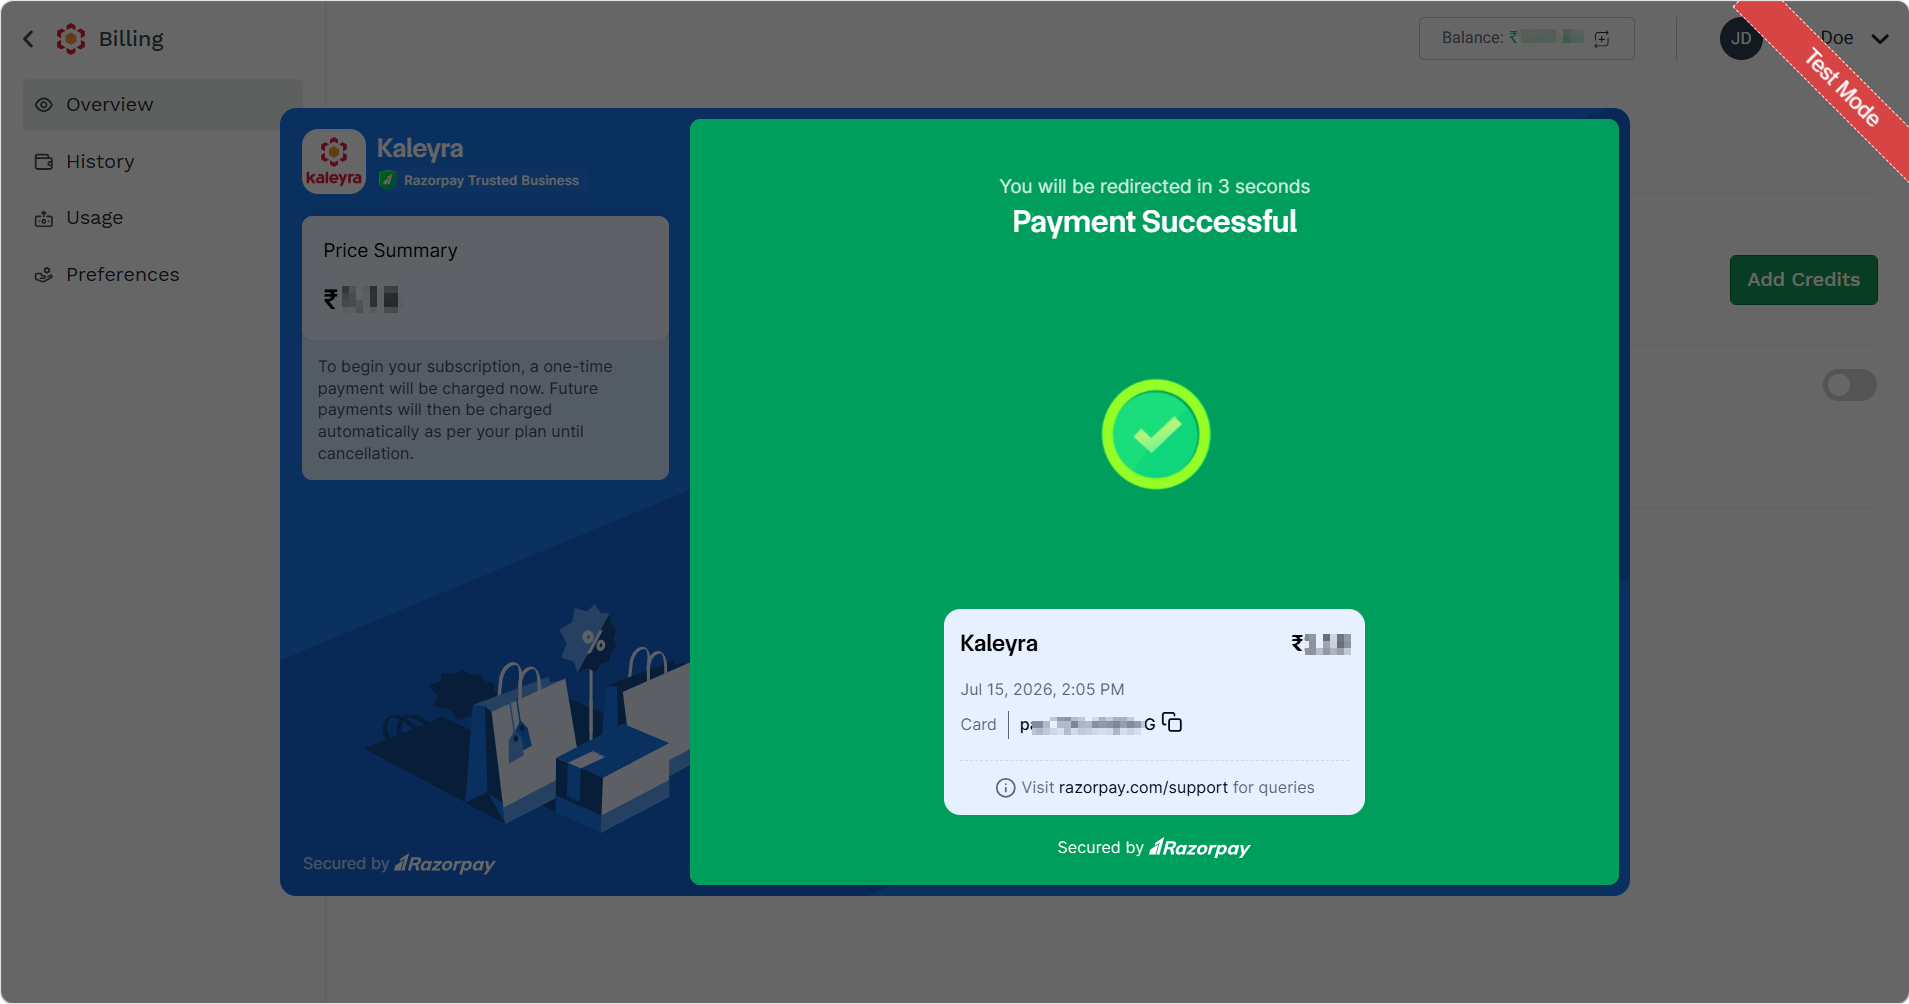
The confirmation Payment Successful message appears.
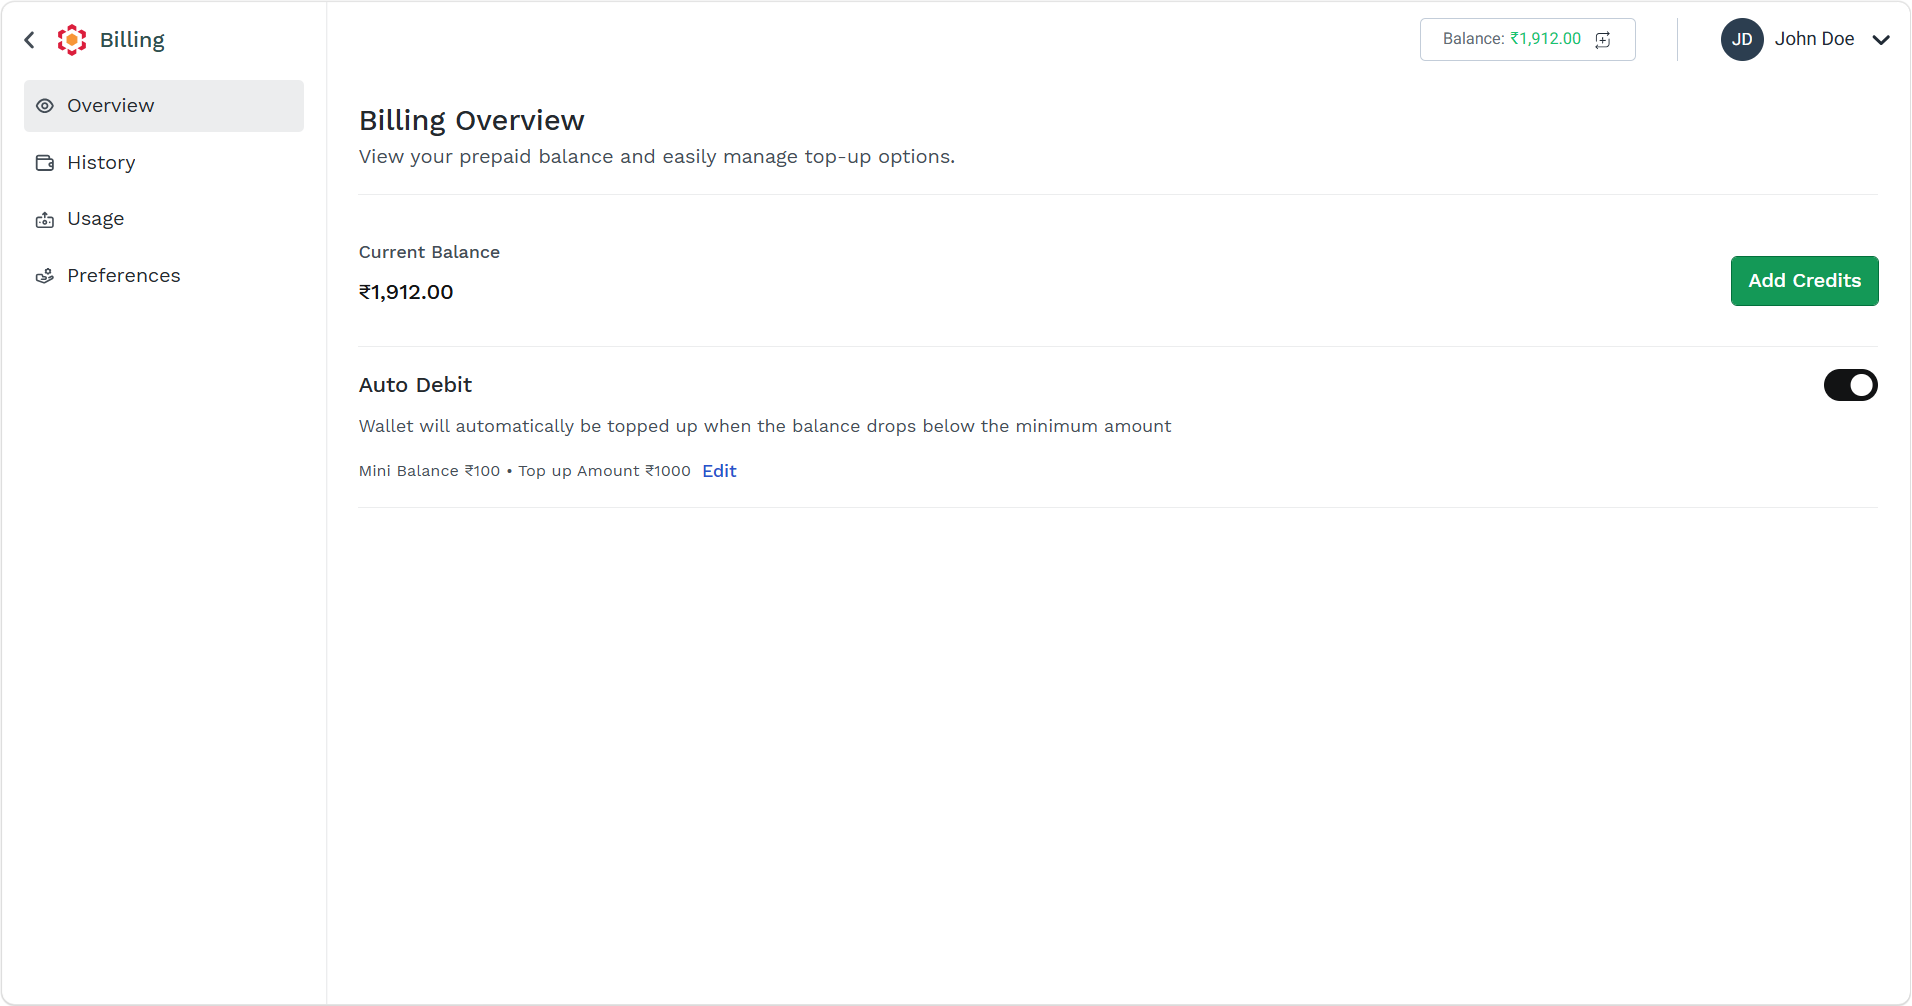
The Auto Debit gets enabled.
Edit Auto Debit Amount
You can edit the auto debit amount for your account. You can set the threshold amount and amount to be automatically recharged to your account.
To edit the auto debit amount for your prepaid account, perform the following steps:
- Follow step 1 and step 2 of Prepaid Billing Overview.
The Billing Overview page appears.
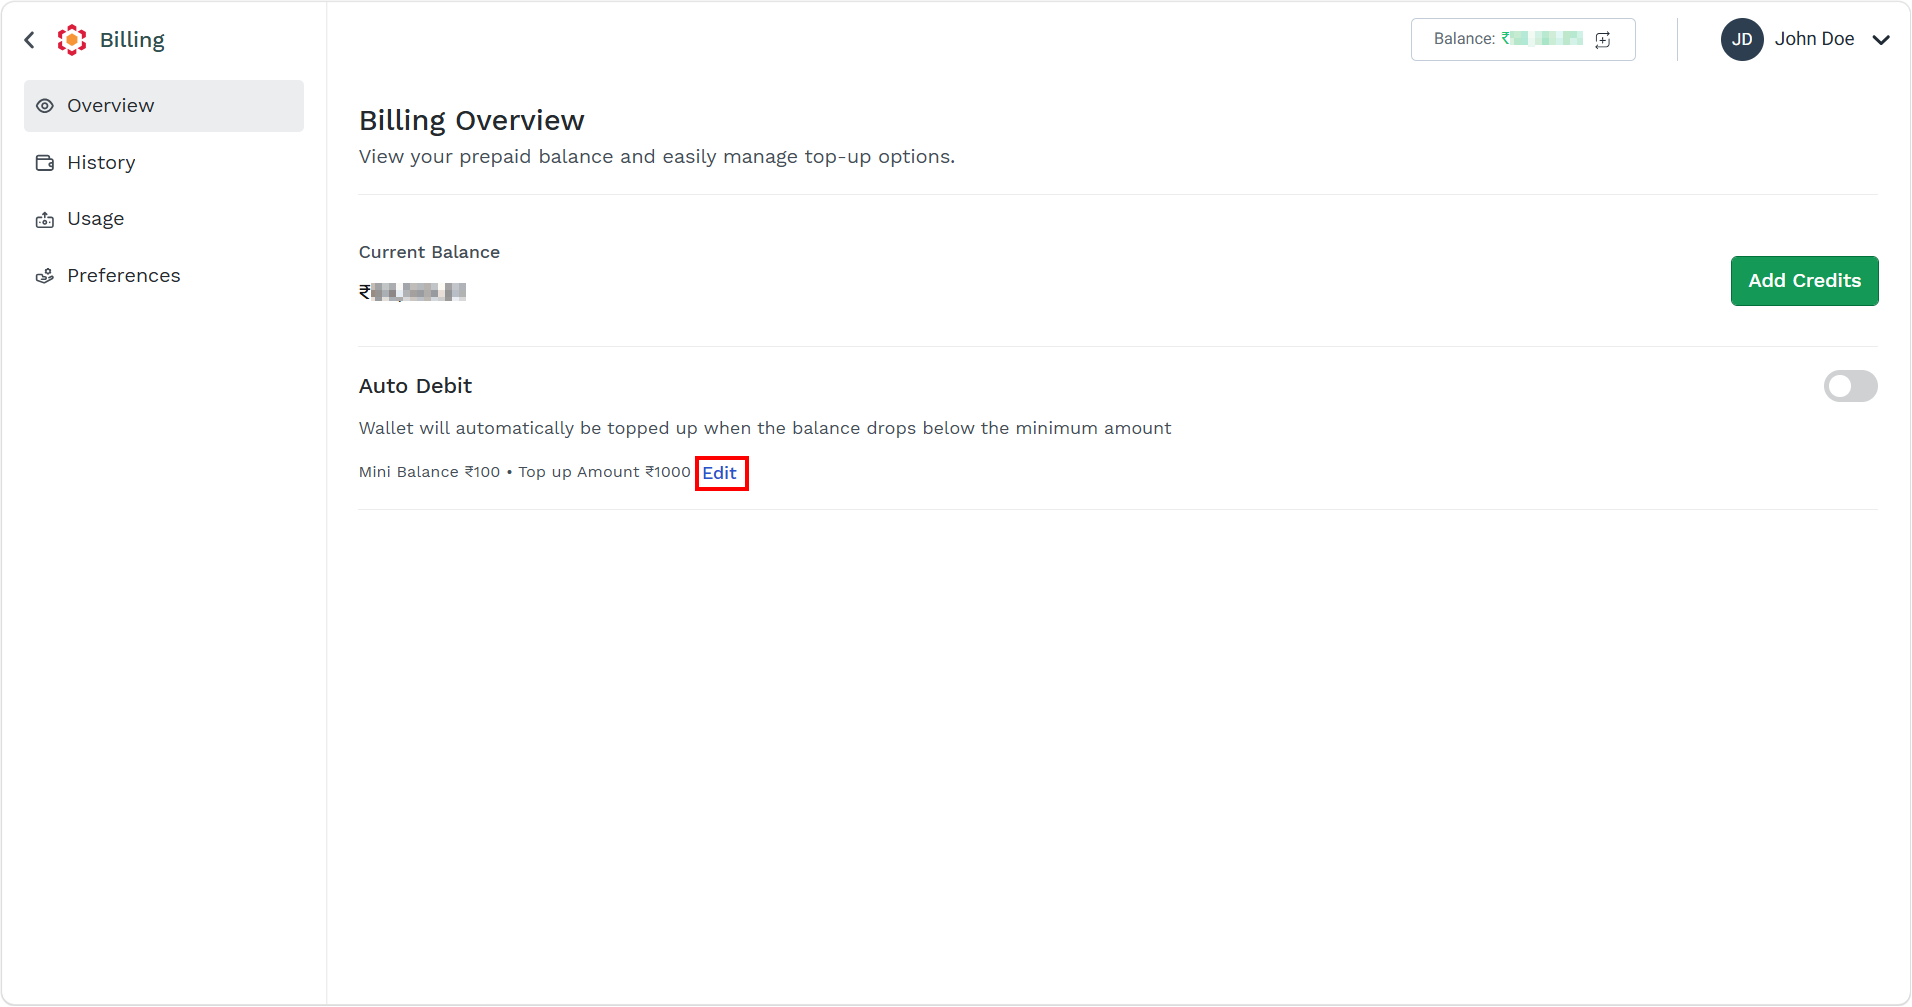
- To edit the minimum balance and the top-up amount, click the Edit link.
The Edit Auto Debit pane appears on the right side of the page.
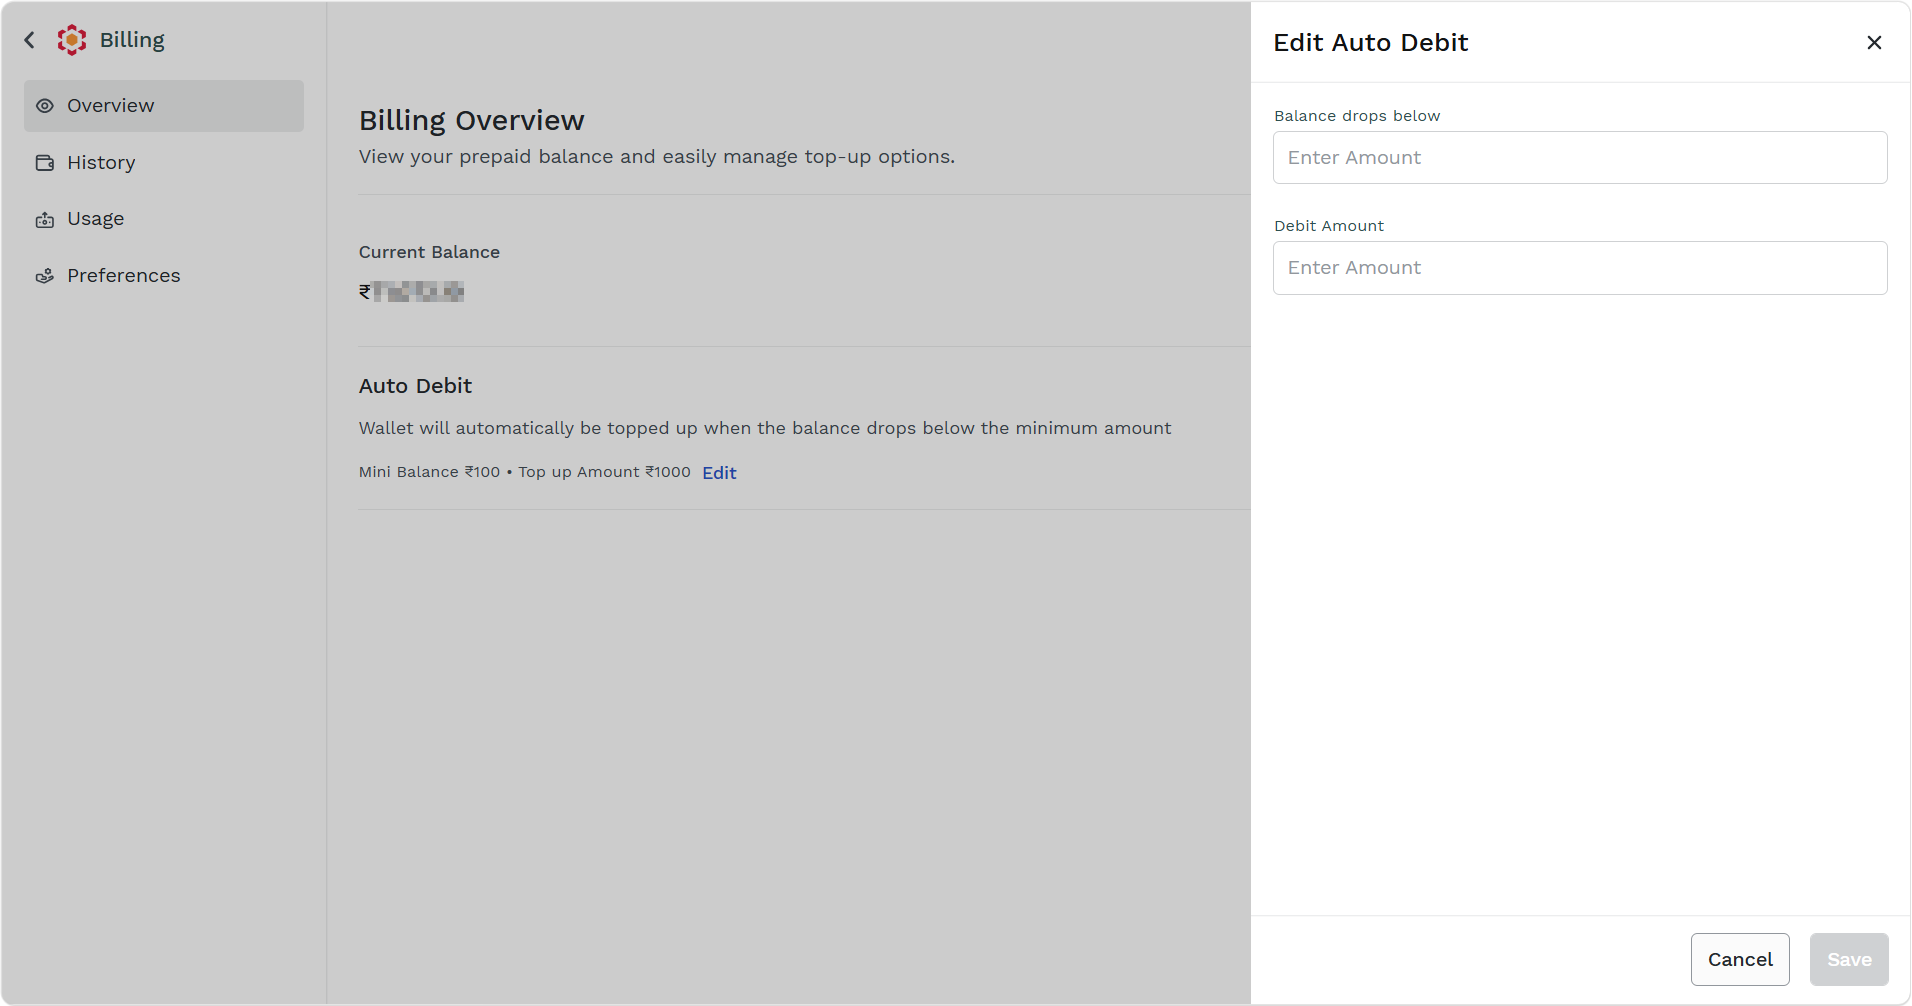
- Perform the following:
- In the Balance drops below field, enter the minimum amount when you want the auto debit amount to be credited. For example, 10 IN.
- In the Debit Amount field, enter the amount you want to add to your account wallet as an auto debit amount. For example, 50 IN.
- Click Save.
The confirmation Auto debit saved. message appears.
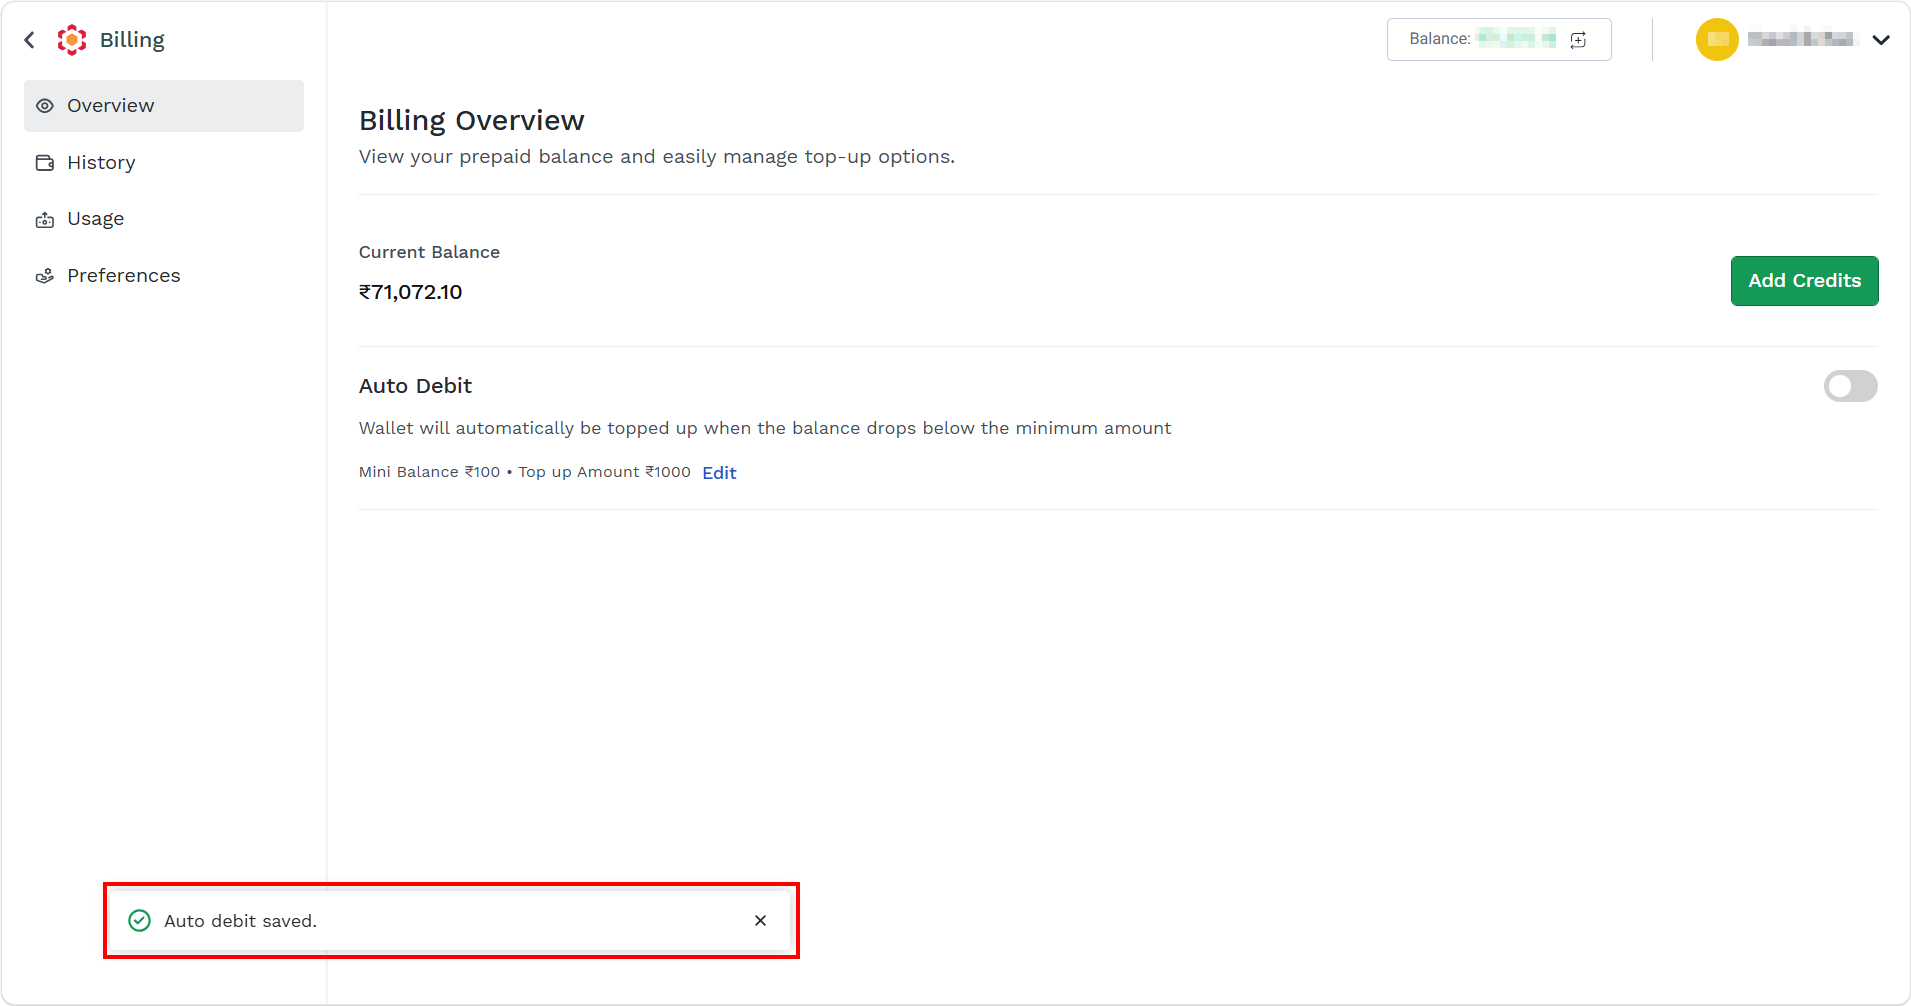
Now, whenever your account wallet drops to or below 10 IN, automatically system will trigger a transaction on the pre-configured credit card to add 50 IN.
Disable Auto Debit
You can disable the auto-debit option at any time if it is enabled.
The following are the impacts of disabling the Auto Debit option:
- Automatic balance top-ups will stop.
- You will need to manually recharge your account when your account balance is low.
- Services may be interrupted if the account balance becomes insufficient.
To disable the auto debit option, perform the following steps:
- Follow step 1 and step 2 of Prepaid Billing Overview.
The Billing Overview page appears.
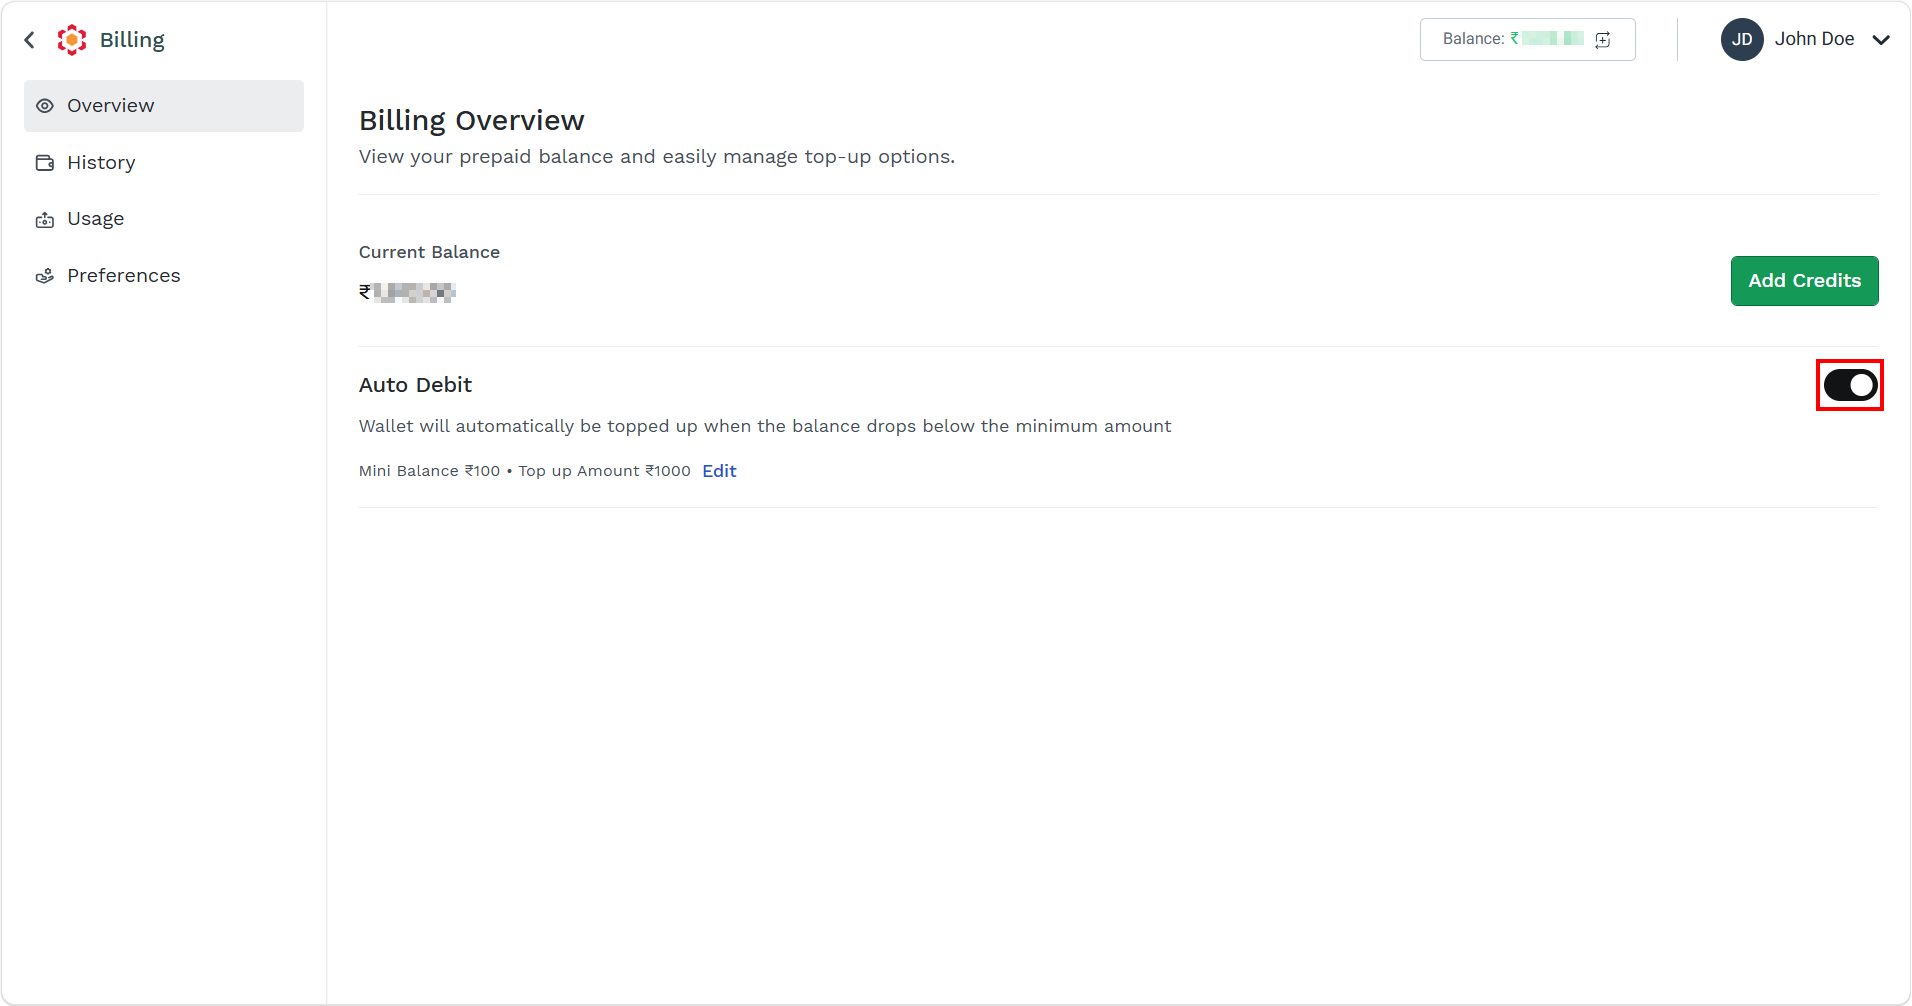
- On the right side of Auto Debit, toggle to disable the auto debit amount.
The Confirmation pop-up appears.
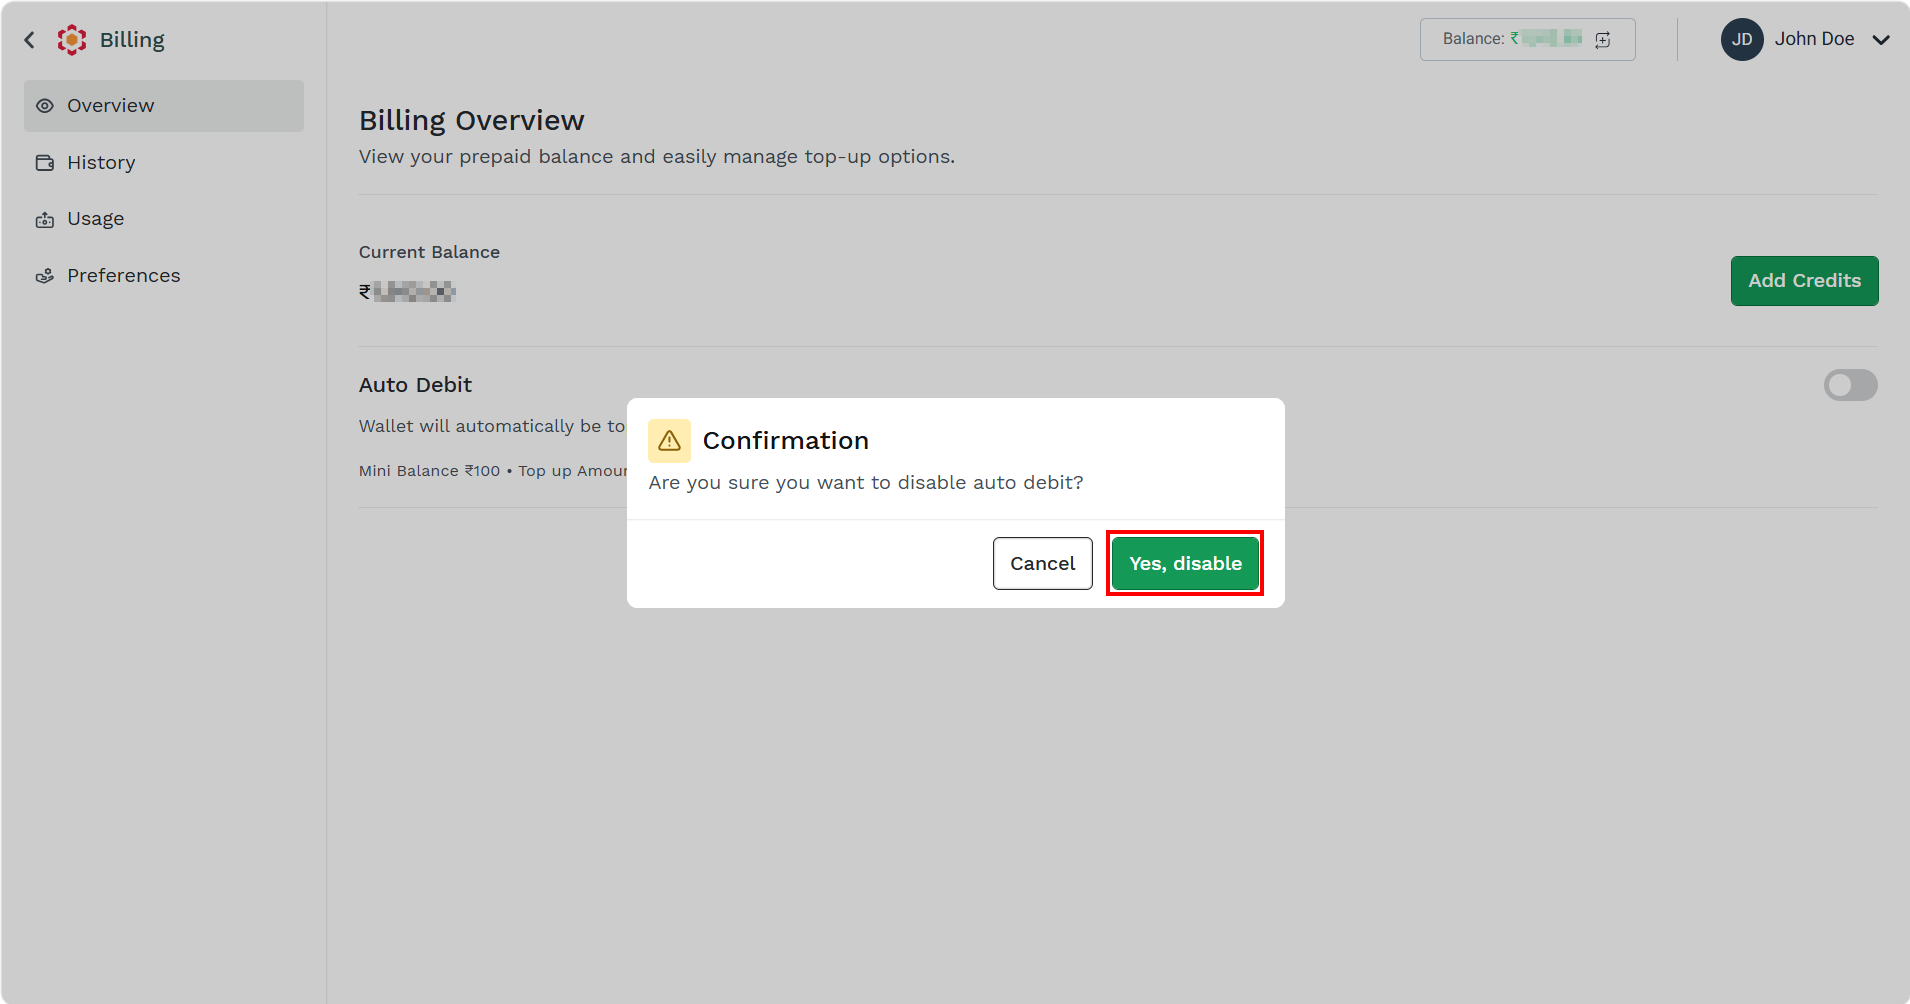
- Click the Yes, disable button.
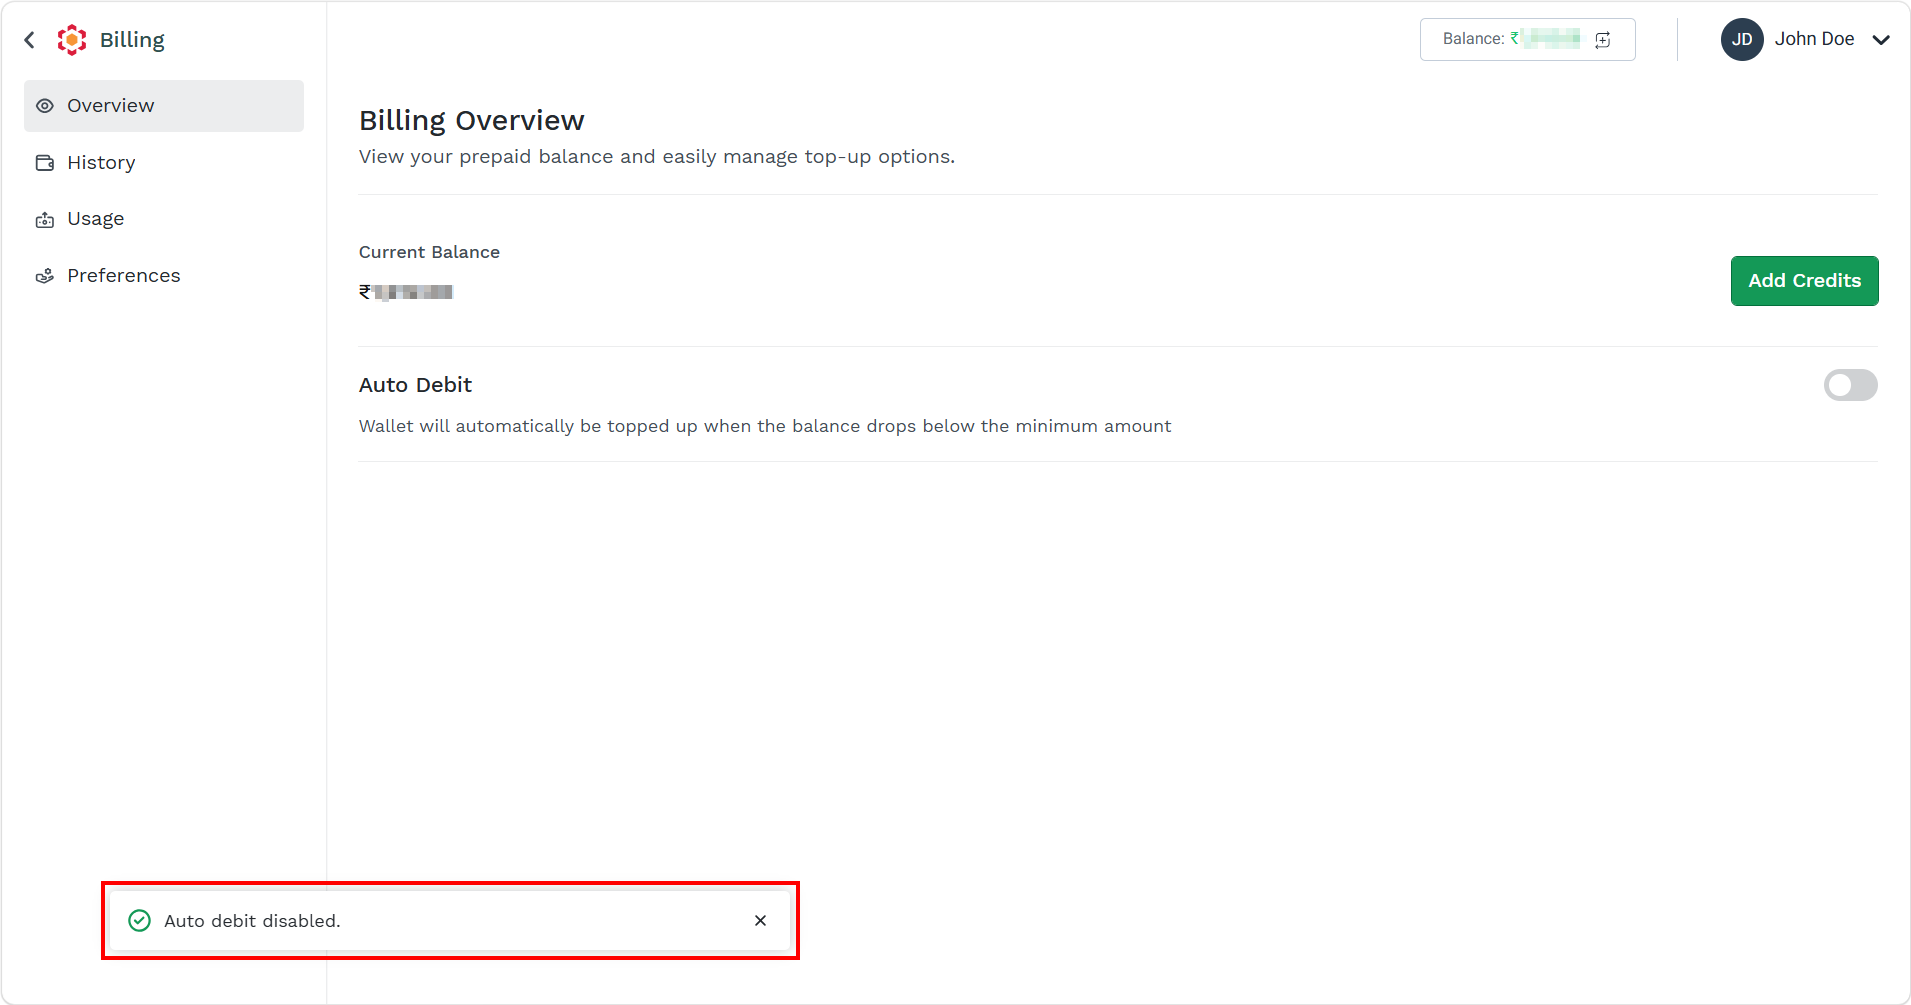
The confirmation Auto debit disabled message appears.
Updated about 2 months ago