

Add a New WABA ID
You can add a new WhatsApp Business Account (WABA) to your Kaleyra account to enable WhatsApp messaging services for your business. The Kaleyra’s platform lets you add and manage multiple WhatsApp Business Accounts (WABAs) all in one place, so you can handle messaging separately for different brands using a single dashboard.
Note:
If you have more than one WABA ID in your Kaleyra platform account, you can select which WABA ID to use from the Kaleyra platform User Interface among the available ones.
This process includes connecting your Facebook Business Manager, verifying your business details, and onboarding the WABA through Kaleyra’s Embedded Signup flow for account creation.
The following conditions apply when using multiple WABA IDs:
- While adding a new WABA ID to your account, you cannot add a WABA ID that already exists in your account.
- A given WABA ID cannot be added to different Kaleyra accounts within a given region.
- The same WABA ID cannot be added to Kaleyra accounts in different regions. For example, between the Europe or North America or India or the Rest of the World region.
- You can have a different WABA ID with the same name.
Prerequisites:Before you can create a WABA ID, you need to:
- Create a kaleyra.io Account.
- Complete the Know Your Customer (KYC) Procedure.
- Create an account name and a Business Manager ID using the Facebook Business Manager.
- Have an active mobile Number that does not have an associated WhatsApp account.
To add a new WABA ID from the kaleyra.io account, perform the following steps:
-
Sign in to your Kaleyra Platform.
The Channels page appears.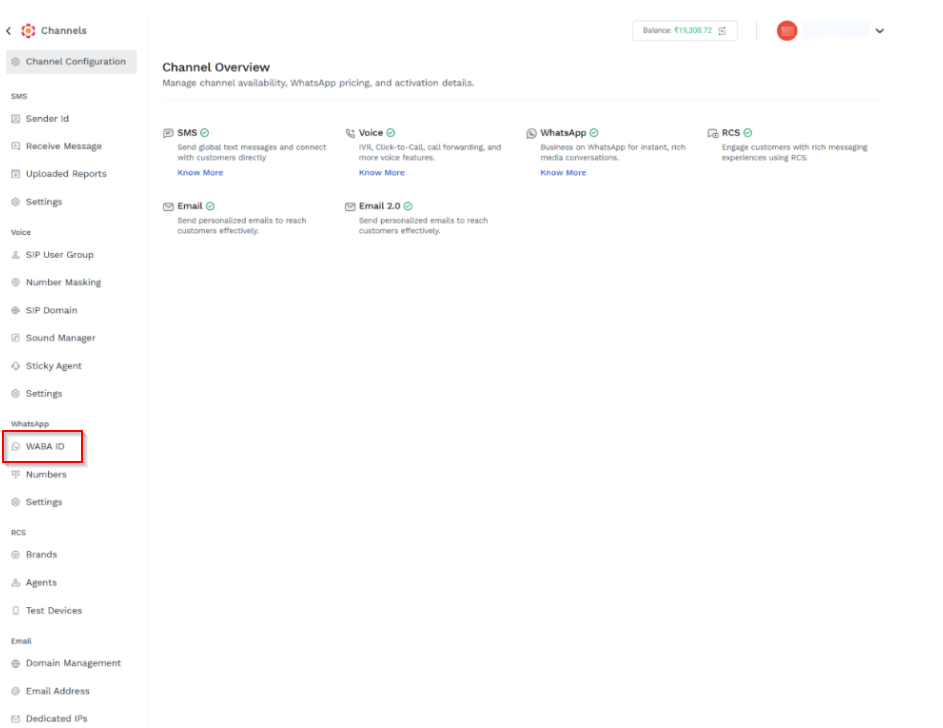
- On the left navigation bar from the WhatsApp section, click WABA ID.
The WABA ID page appears.
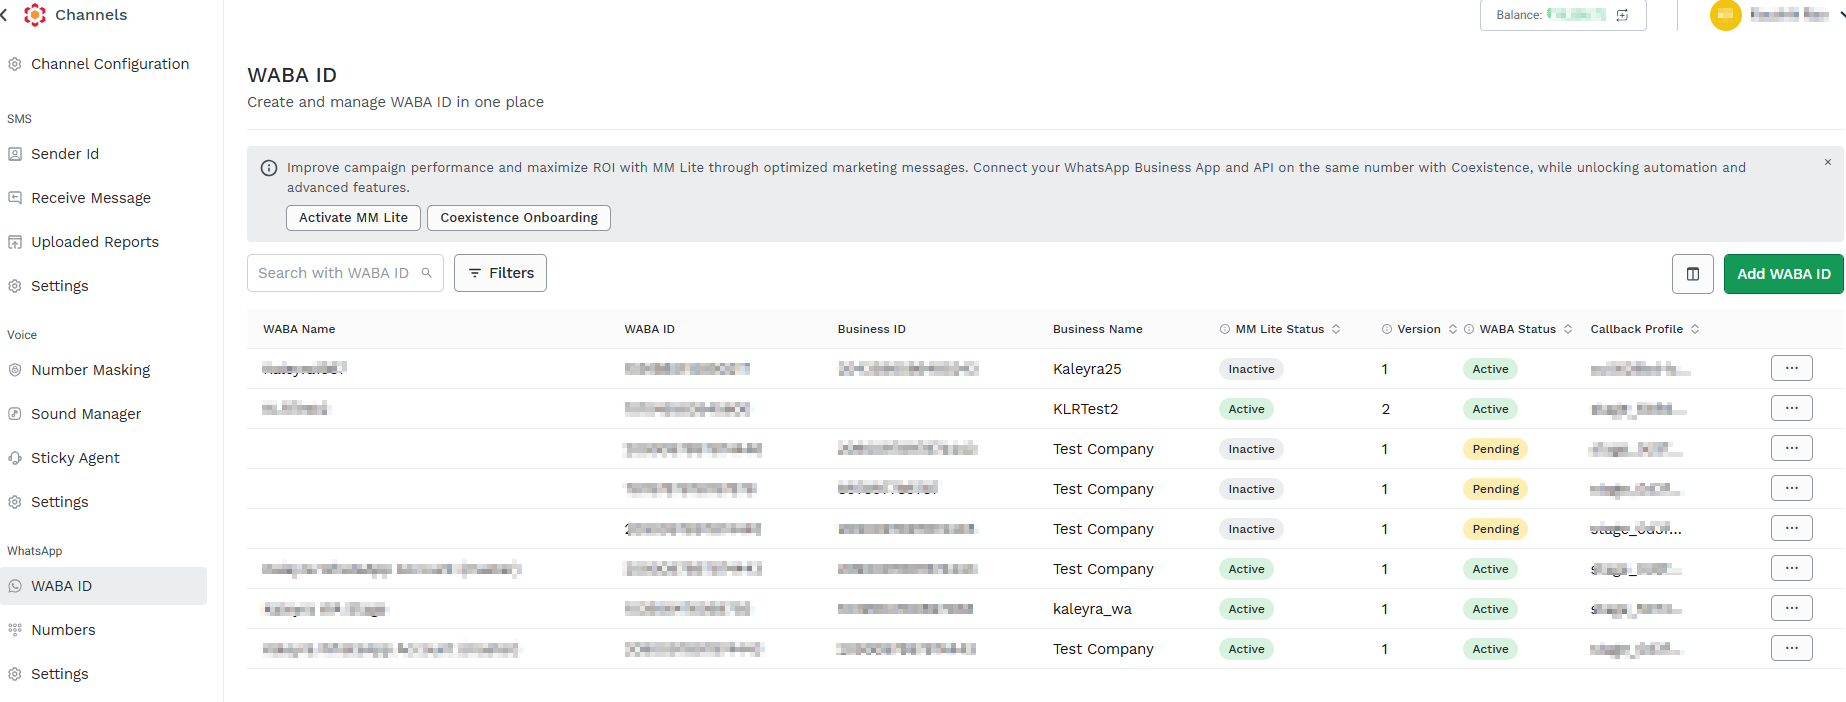
- The WABA ID page displays the following fields:
- WABA Name - The registered name of your WhatsApp Business Account.
- WABA ID - Unique identifier for your WhatsApp Business Account. This ID is essential for linking your account with Kaleyra’s messaging services.
- Business ID - A unique identifier assigned to your business entity in Kaleyra’s platform.
- Business Name - The official name of your business as registered with Kaleyra.
- MM Lite Status - Indicates the status of Marketing Messages Lite (MM Lite) for the WABA.
- Version - Indicates the Kaleyra API version your WABA is currently linked to, ensuring compatibility and access to the latest features.
- WABA Status - Shows the current operational state of your WhatsApp Business Account. Supported statuses include Active or Pending, indicating whether your account is ready to send messages or awaiting approval.
- Callback Profile - Unique identifier assigned to each callback profile you create. For more information, see Callback Profile page.
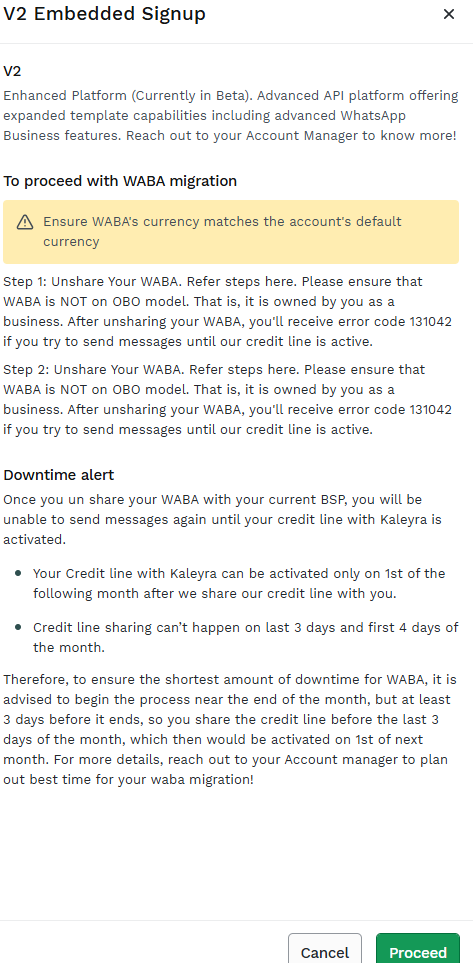
- Click Add WABA ID. The V2 Embedded Signup pop-up appears.
-
Click Proceed. The Facebook login widget page appears where you will be redirected to the Embedded Sign-Up page, where you can complete the onboarding process for the end users' WABA IDs.
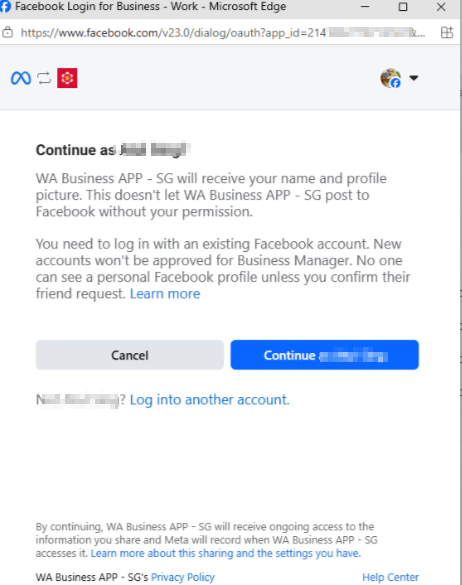
- Click Continue as XXX.
- The Connect your account to Kaleyra page appears.
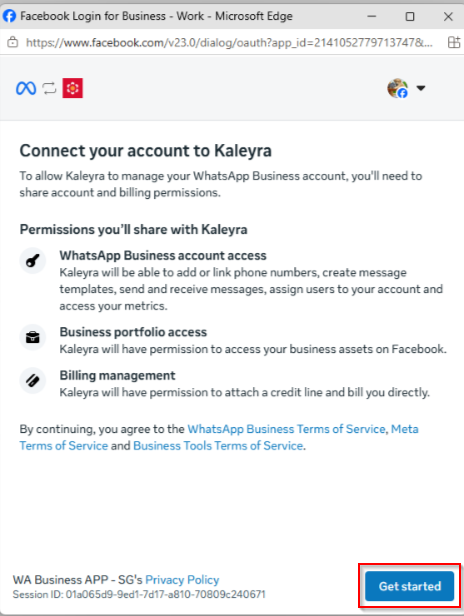
- Read the terms of service and click Get Started.
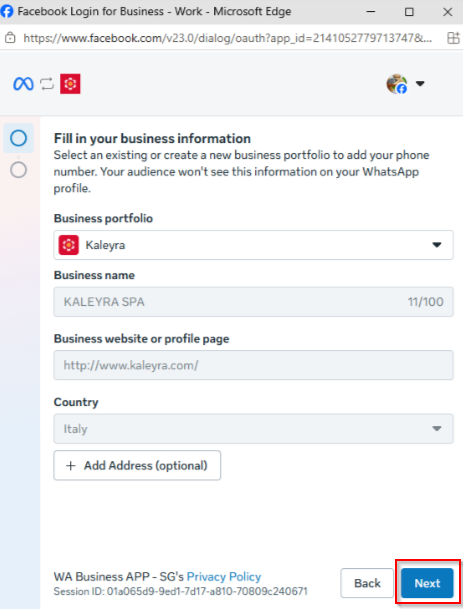
The Fill in your business information page appears.
Complete WhatsApp Business Account Creation
After selecting your onboarding method and connecting your Facebook Business Manager, complete the WhatsApp Business Account (WABA) creation process.
- On the Fill in your business Information page, enter the following details:
- In the Business Portfolio drop-down, the Kaleyra option is selected.
- In the Business name field, enter the business name you want to provide for the new WABA. You cannot use an already existing name for your new WABA, whatever the name is already in use in the same Kaleyra account, in other Kaleyra accounts, or even in accounts in different region environments.
- In the Business website or profile page field, enter your business website or profile link.
- In the Country field, select a country from the drop-down list.
- (Optional) Click Add address; the fields to enter the address appear. Then, enter your business address details.
- Click Next.
The Create or select your WhatsApp Business account page appears.
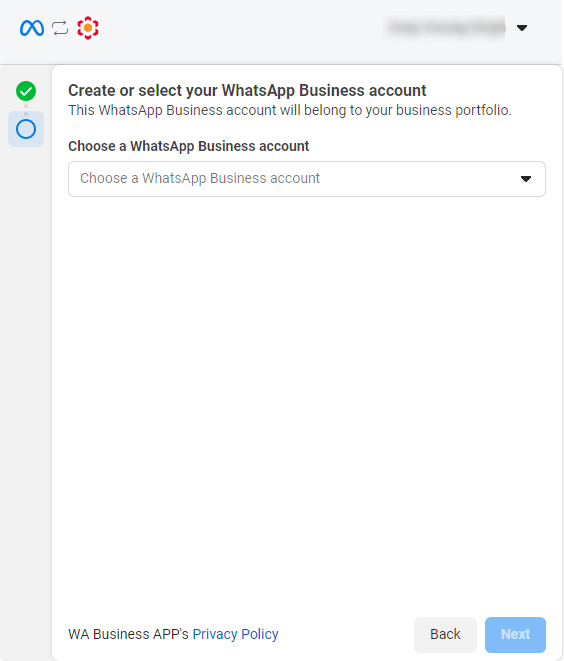
- Click the Choose a WhatsApp Business account drop-down.
The Choose a WhatsApp Business account option appears.
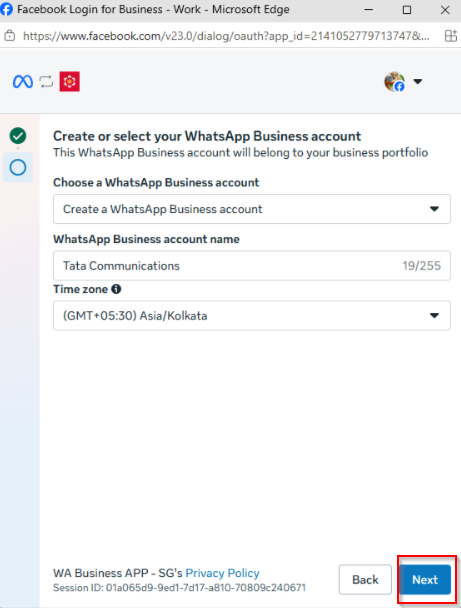
- Click Next.
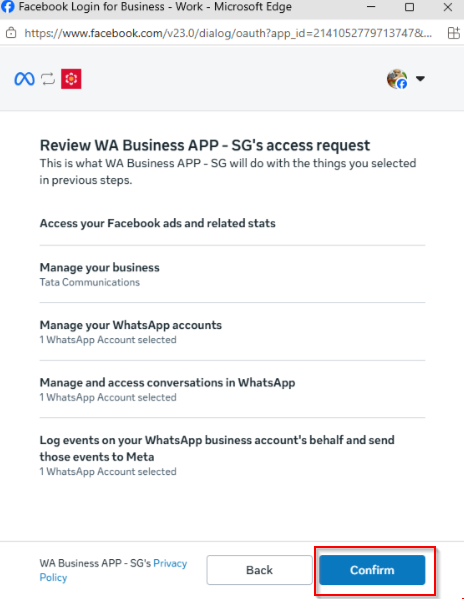
The Review what WA Business APP is requesting permission to do page appears.
-
Click Confirm. A confirmation code (OTP) is sent to your email ID.
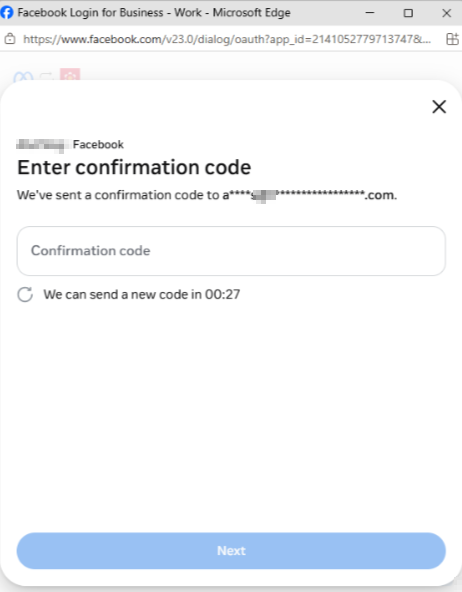
Enter the Confirmation code and click Next.
The You're now ready to chat with people on WhatsApp page appears.

- Click Finish.
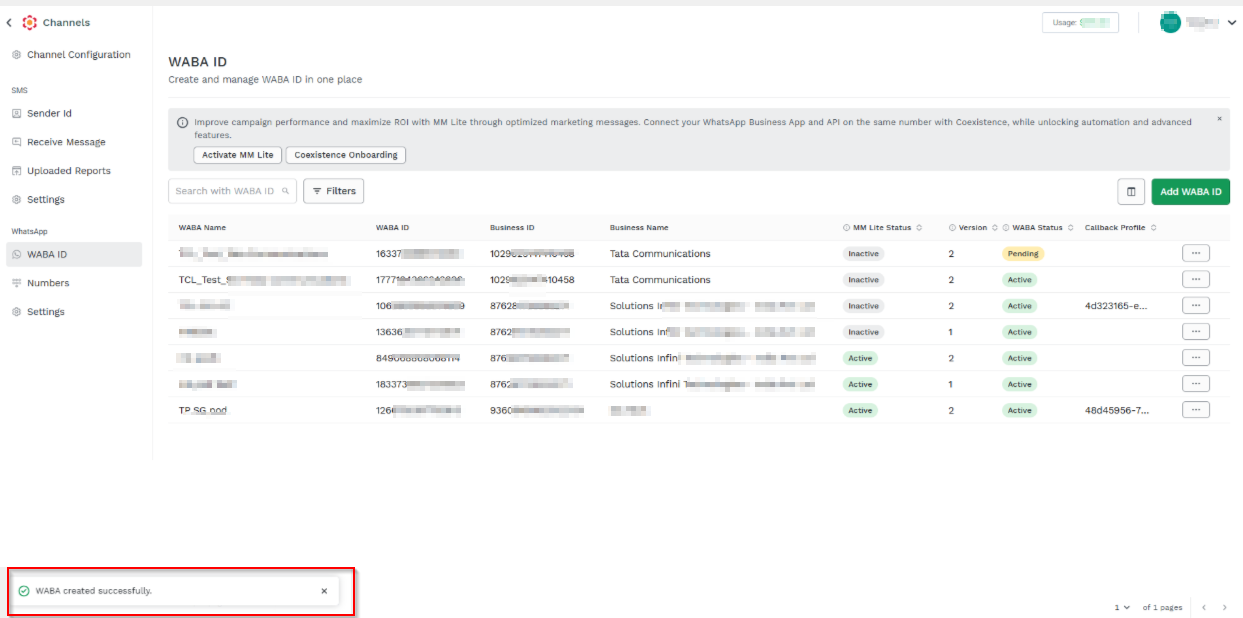
A confirmation message Embedded Signup Successfully appears.
Search, Filters, and View Steps
You can search, filters, and View Steps of the Business Profile Information.
The topic contains the following sections:
Search
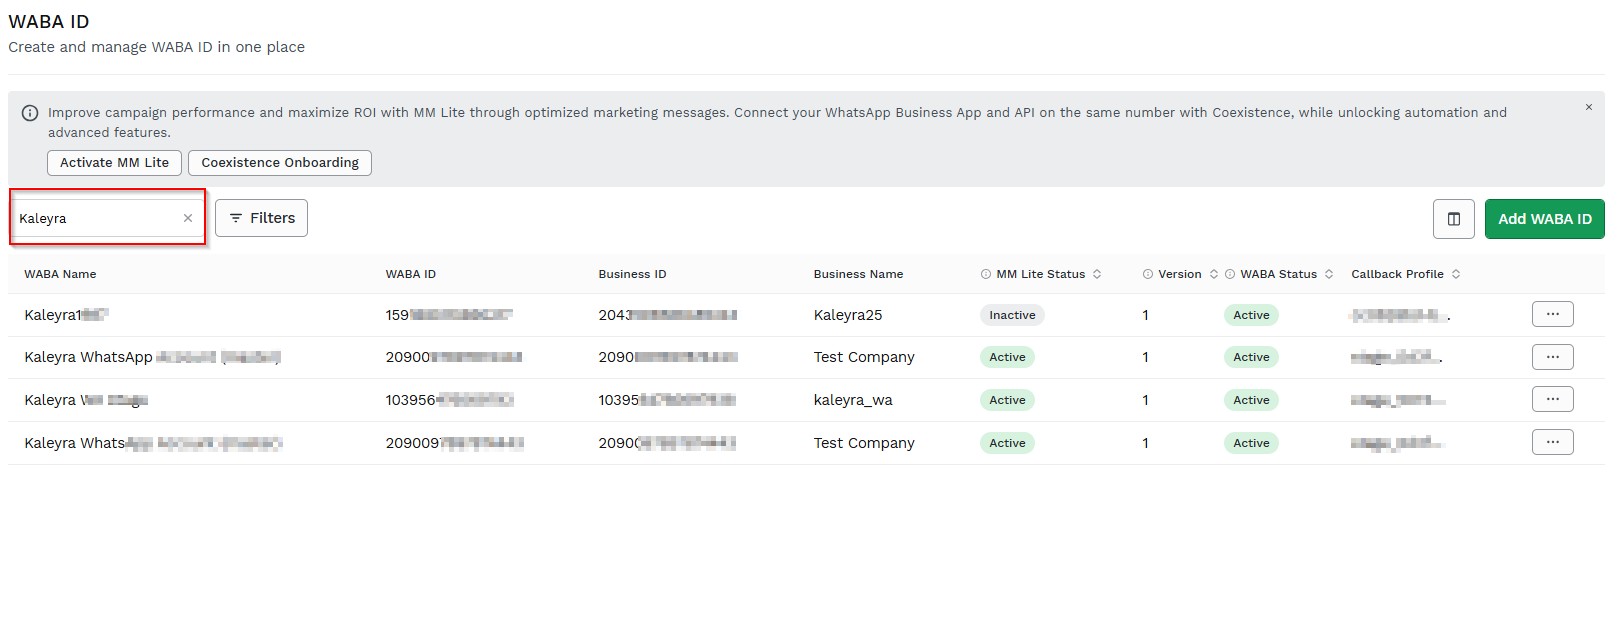
You can search the business profile information using the WABA ID and WABA Name.
To search the business profile information using WABA ID and Name, perform the following steps:
- Perform the steps from 1 through 2 of the Add a New WABA ID page.
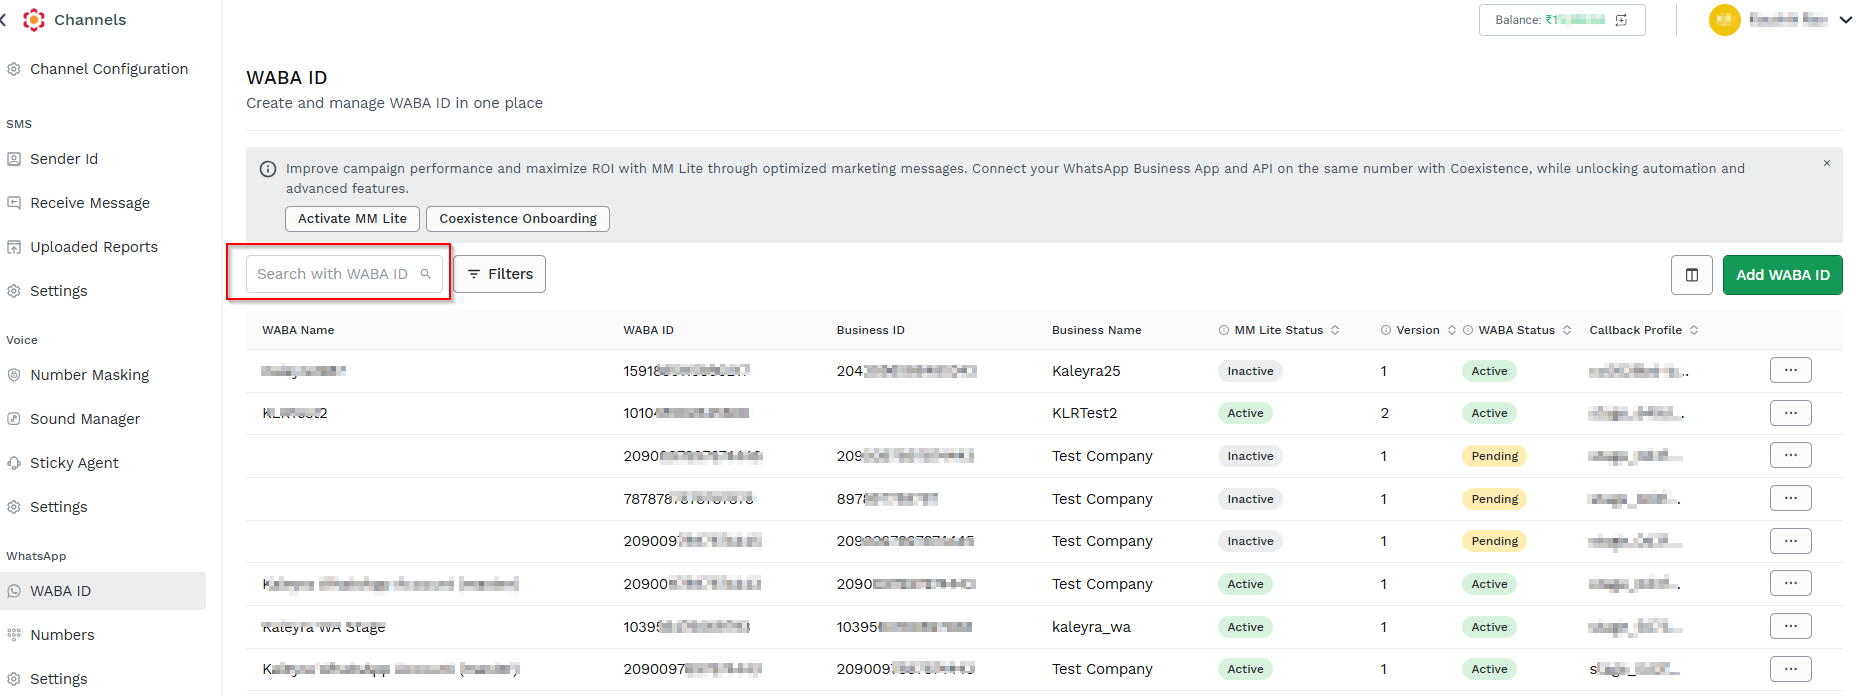
- In the Search field, enter the keyword or specific WABA ID or WABA Name you want to search. For example, enter a WABA ID to find a specific WhatsApp Business Account.
The search result appears.
Filters
The Filters option allows you to filter the business details based on the LOC Status, MM Lite Status, Version, and WABA Status.
To filter the business profile information, perform the following steps:
- Perform the steps from 1 through 2 of the Add a New WABA ID page.
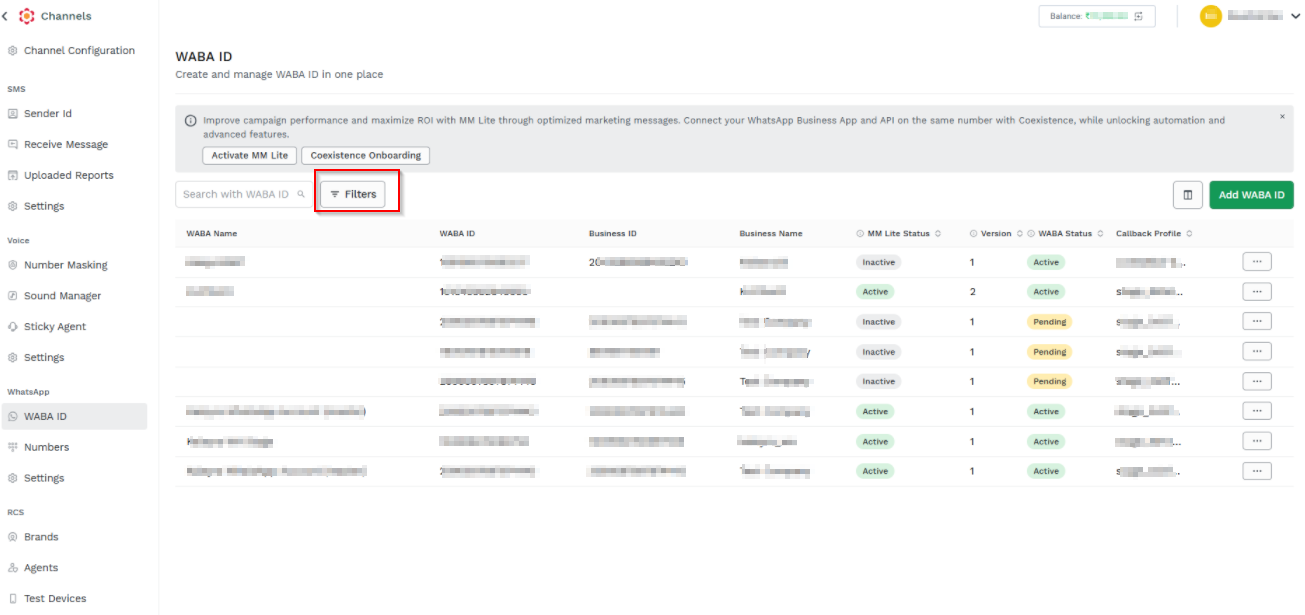
- Click Filters. The Filters pop-up appears.
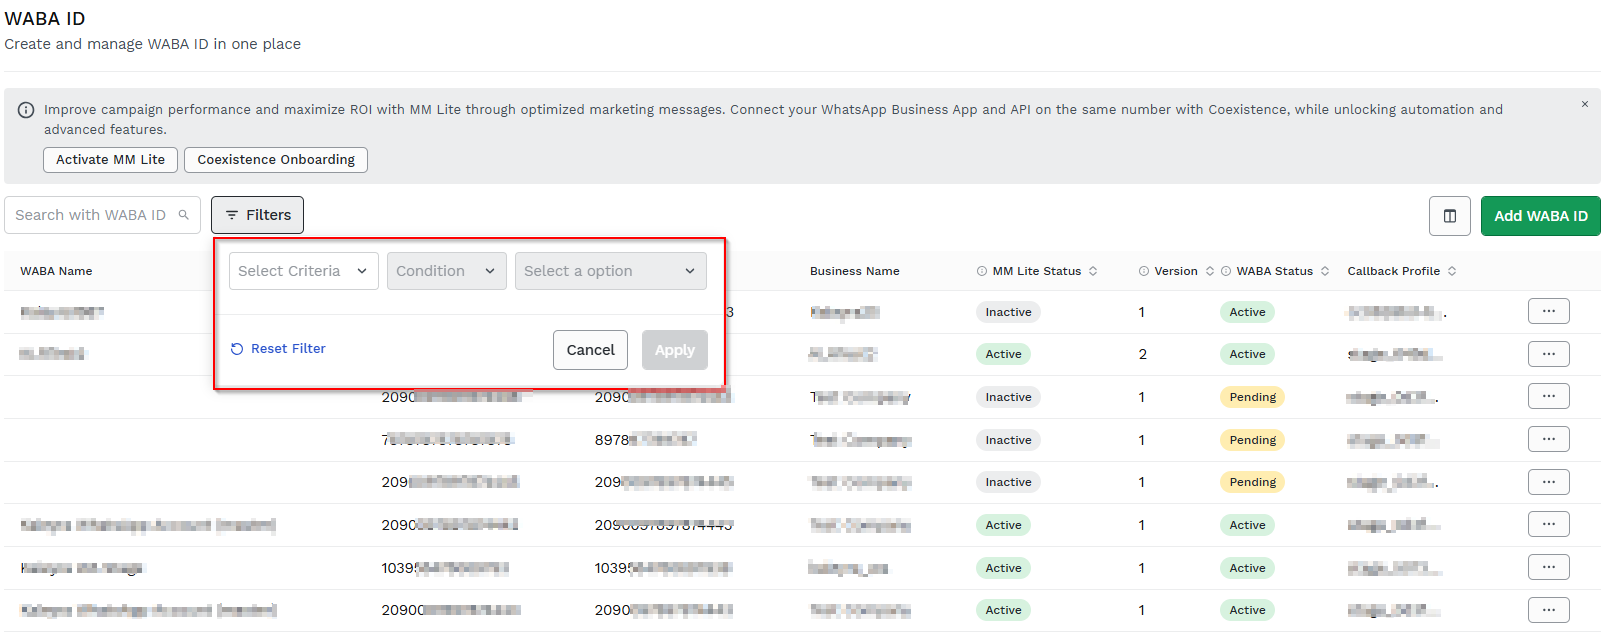
The Filters section has the following fields:
- Select Criteria - Select the criteria of filter from the drop-down list. The available options are MM Lite Status, Version, and WABA Status.
-
MM Lite Status - Select the MM Lite Status from the drop-down list. The supported options are Active and Inactive.
Active - Specifies the Marketing Messages Lite (MM Lite) is enabled for the specific WABA.
Inactive - Specifies the Marketing Messages Lite (MM Lite) is disabled for the specific WABA
-
Version - Select the Version from the drop-down list. The supported options are one and two.
One - Specifies that the WABA belongs to version one.
Two - Specifies that the WABA belongs to version two.
-
WABA Status - Select the WABA Status from the drop-down list. The supported options are Active and Pending.
Active - WABA is ready to use.
Pending - WABA onboarding is in progress.
-
- Conditions - Select the conditions for the selected criteria from the drop-down list. For example, Is.
- Select a option - Select a option from the drop-down list. The available options are Active, and Pending.
-
Click +Add Filter to add the more filters.
-
Click Reset Filter to reset the filters.
-
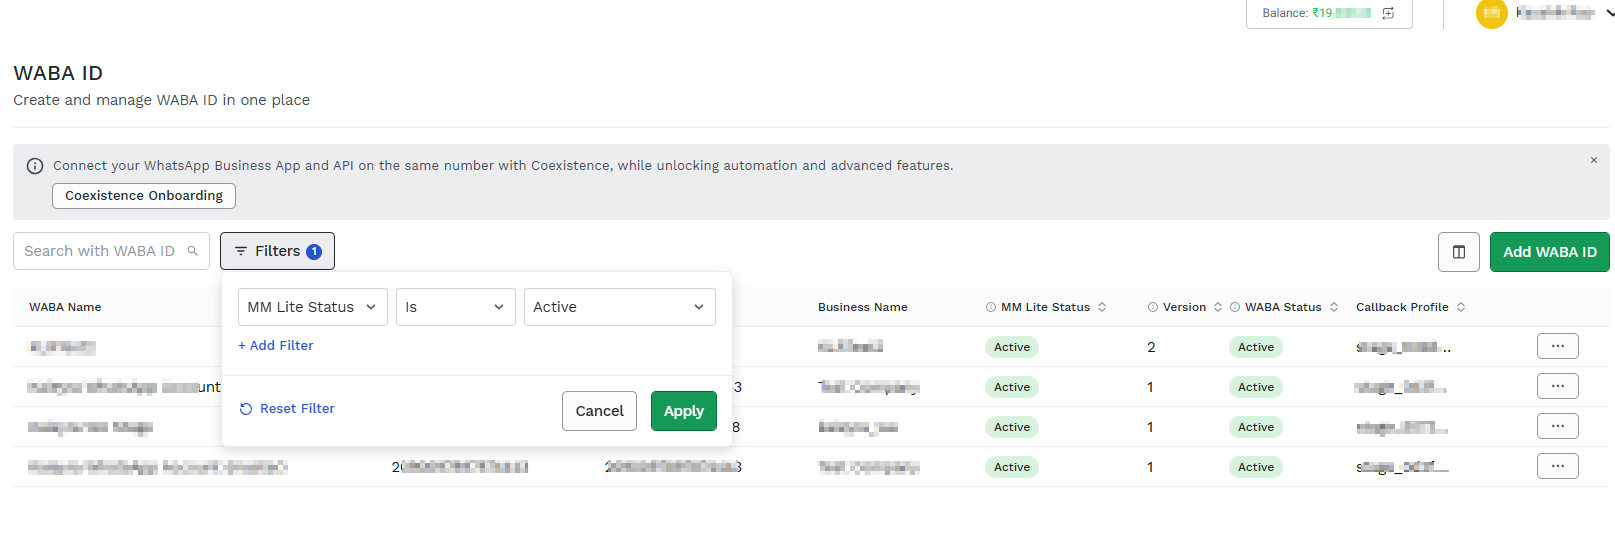
After adding all the relevant fields, click Apply.
The selected filters list appears.
View Steps
The View Steps feature allows you to see the detailed progress and required actions related to updating their Business Profile information during the Embedded Signup process. Displays the sequential steps involved in completing the Business Profile setup. Provides end users with guidance and instructions for each step to ensure the profile information is accurately submitted. Helps end users to track their progress without leaving the signup page.
To view the steps for business profile information, perform the following steps:
- Perform the steps from 1 through 2 of the Add a New WABA ID page.
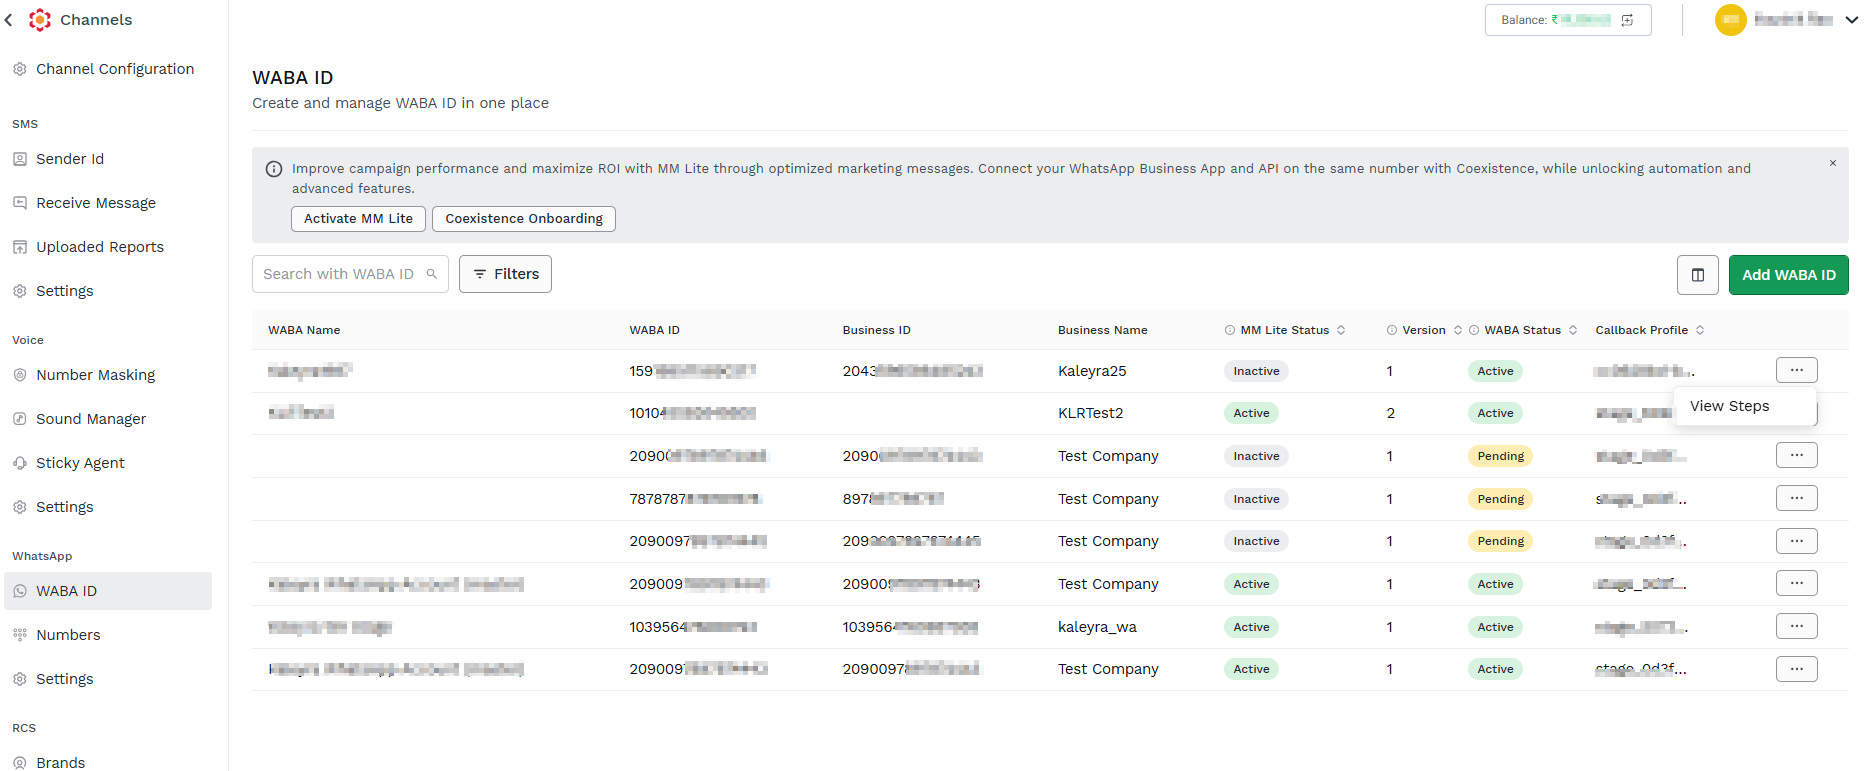
- Select the Business Details row for which you want to view the steps, click the ellipses (three dots) and then click View Steps.
The View Profile Information pop-up page appears.
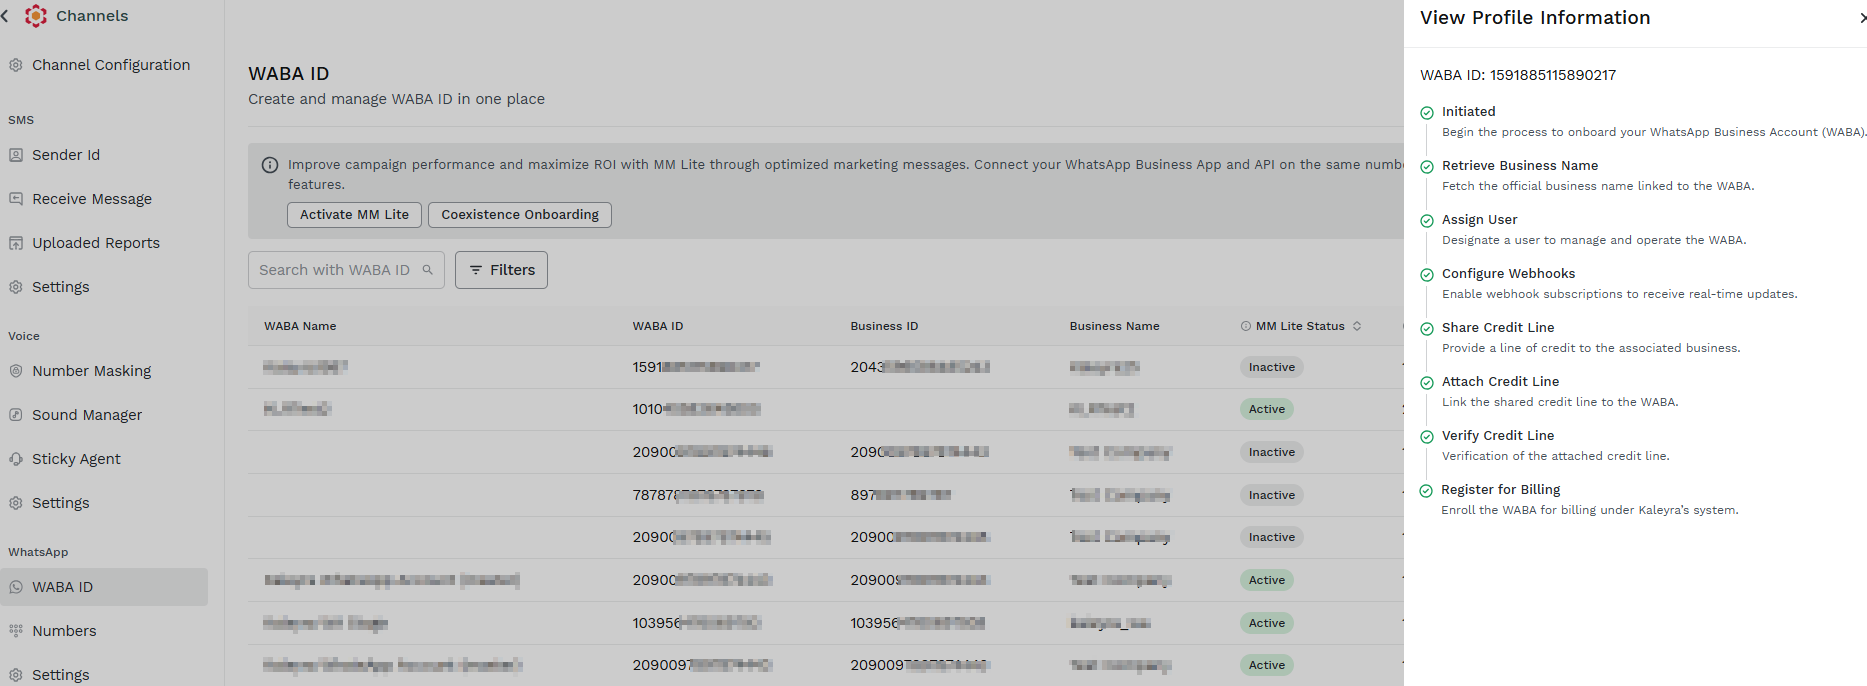
The View Profile Information section, has eight steps to onboard the WABA ID. These includes:
- Initiated - Begin the process to onboard your WhatsApp Business Account (WABA).
- Retrieve Business Name - Fetch the official business name linked to the WABA.
- Assign User - Designate a user to manage and operate the WABA.
- Configure Weebhooks - Enable webhook subscriptions to receive real-time updates.
- Share Credit Line - Provide a line of credit to the associated business.
- Attach Credit Line - Link the shared credit line to the WABA.
- Verify Credit Line - Verification of the attached credit line.
- Register for billing - Enroll the WABA for billing under Kaleyra’s system.
Note:
If any step in the View Profile Information process is blocked or incomplete, the system indicates exactly where the onboarding has been stopped.
Updated about 1 month ago