

Email 2.0 Logs
Email logs contain detailed records of all email-related activities on the Kaleyra platform using the APIs. Email logs get generated when you send or receive an email using email APIs. Email logs contain details for email activities such as, sender, recipients, recipients' type, message ID, email type, and statuses.
You can search the logs based on the From and Recipients associated with each email. Additionally, you can use the filters to view the logs more precisely according to Status, Email Type, Recipient Type, and Date Range.
You can customize the email logs using the Column Display Properties. By default, all the columns will appear. You can hide or show the columns dynamically. After each refresh or login, the column will appear as the default.
The topic contains the following sections:
View Email Logs
You can view the email logs generated when email was sent or received using email APIs.
To view, search, and filter the SMS logs, access the Email 2.0 Logs page from the left navigation bar of the Reports & Logs section, the Email Logs page appears.
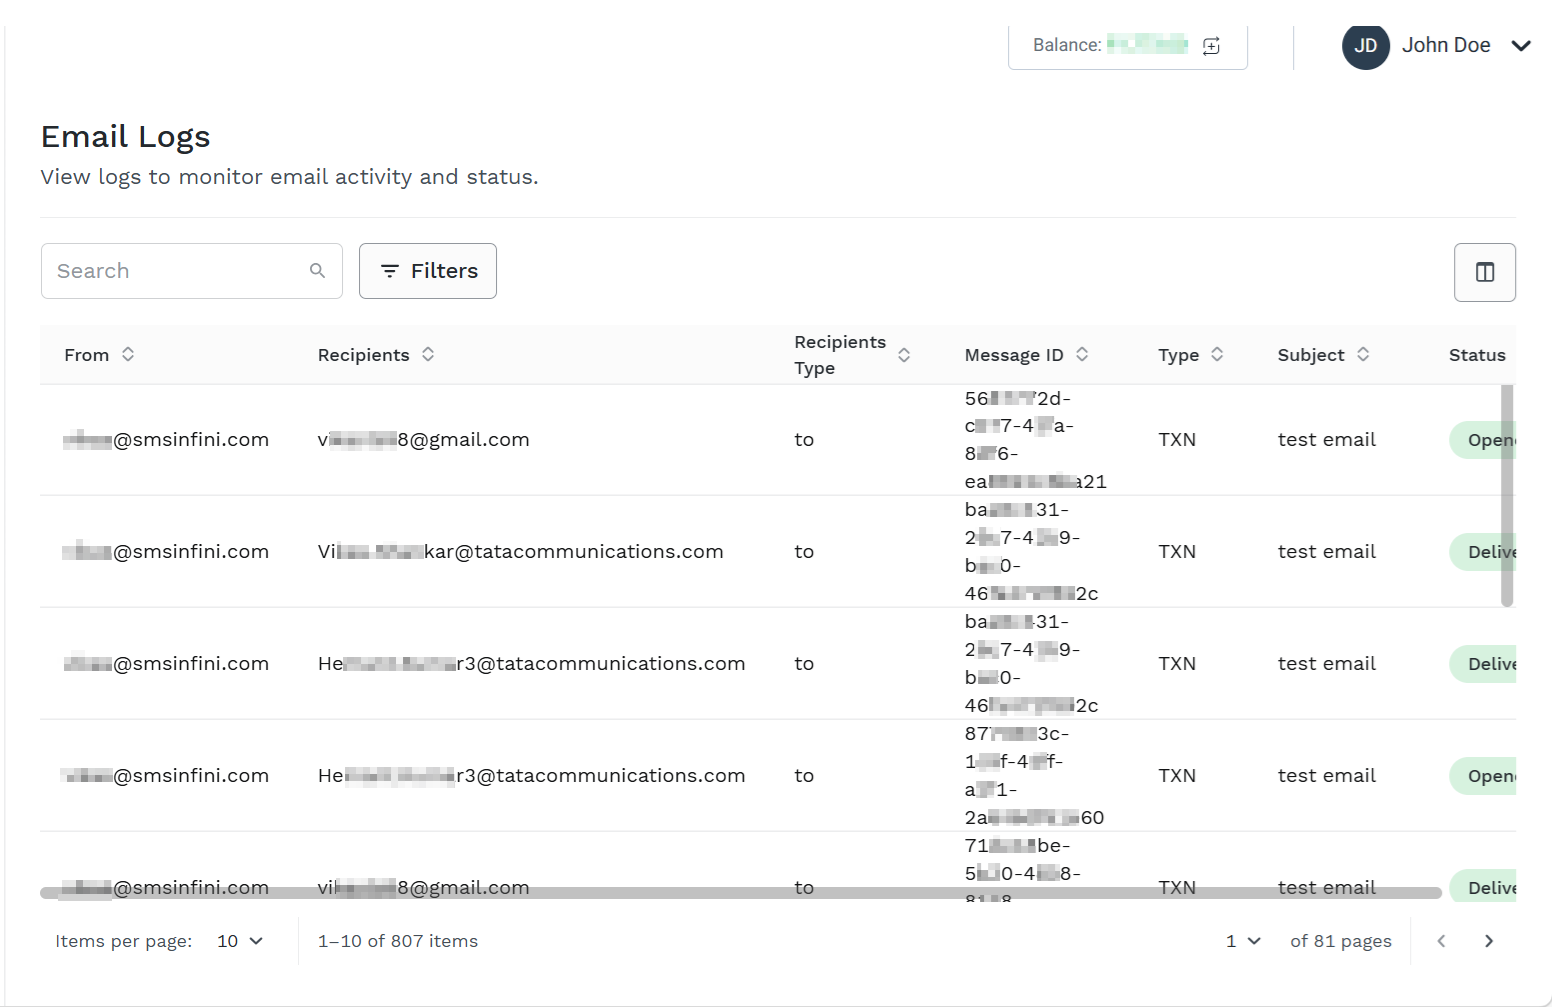
- You can view the following details:
- From - The email address of the sender or source email address.
- Recipients - The email address of the recipient or destination email address.
- Recipients Type - The recipient type, that is, whether the recipient is in
To,CC, orBCC. - Message ID - Unique identity number of email log in Kaleyra platform. It can be used by Kaleyra Support team to get the details of email communications.
- Type - The purpose of email communication. It can be transactional or marketing.
- Subject - The subject line of the email is updated by the sender for the first time while sending the email.
- Status - The status of the email. The status can be one of the following:
- DELIVERED - When the email is delivered successfully to recipient. The recipient’s mail infrastructure accepted the message, usually confirmed by a provider delivery notification. This is a post-send event, after SENT.
- FAILED - When the message fails to get delivered because of an invalid attachment, template not found, billing deduction failure, or sender not allowed. The email fails at the origin site.
- VALIDATED - The email passed pre-send checks (such as request format, template, sender or domain rules, attachments, routing, etc.). This is the status when emails are picked up from the queue.
- SENT - When the email is sent to the recipients' email addresses. The message is successfully submitted to the provider. The SENT status does not mean the recipient’s mailbox has confirmed delivery yet.
- BOUNCED - When the email fails because either the mailbox is full or the message is too large or the email address does not exist. The message was rejected or could not be delivered to the recipient (hard or soft bounce), reported by the provider.
- DELAYED - When the message is delayed because of a temporary SMTP issue. The message is not treated as permanently failed or bounced yet. Often maps to deferral notifications from the provider.
- OPENED - The recipient opened the email.
- QUEUED - When the email is in the queue to get triggered in case if campaigns comprising many emails. The email request has been accepted and placed on an internal queue (for example, send or validation queue). It is waiting to be processed; no validation or send has been completed yet.
Search Email Addresses
You can search the email based on sender and recipient email addresses.
For more information on searching, see Search Domain.
Filter Email Addresses
You can filter the email address according to the following options:
| Select Criteria | Condition | Select an option |
|---|---|---|
| Status | Is |
|
| Email Type | Is |
|
| Recipient Type | Is |
|
| Date Range | Between |
|
You can filter the displayed Email 2.0 Logs by clicking on the Filters button and applying one or more filtering conditions:
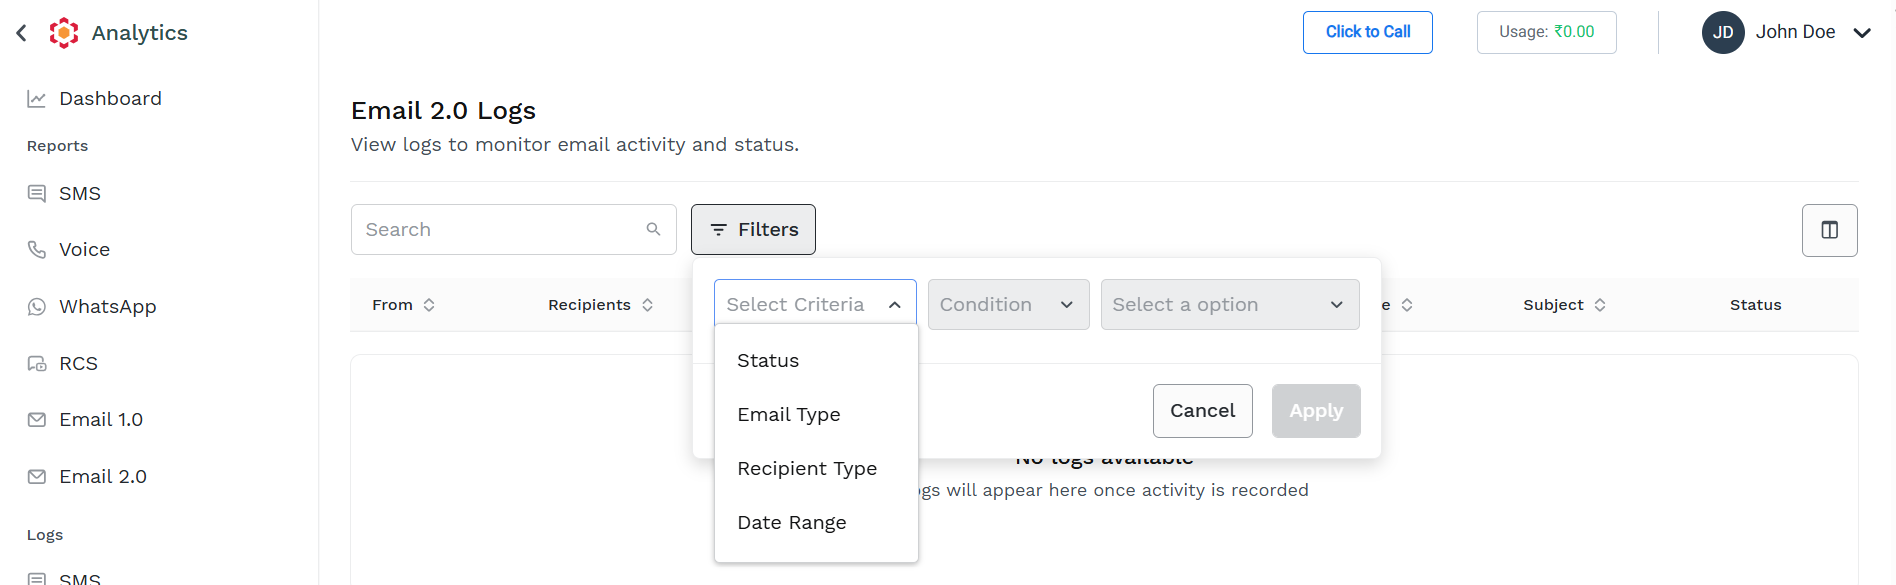
To add a filter conditions, select one of the available Criteria from the Select Criteria dropdown, the available option are:
- Status - filter Logs based on specific email status
- Email Type - filter Logs based on the email type
- Recipient Type - filter Logs based on the recipient type
- Date Range - filter Logs based on specific time range
After selecting a Criteria, you can complete the filter conditions selecting one of the available operator from the Conditions dropdown and then entering or selecting a value to be matched
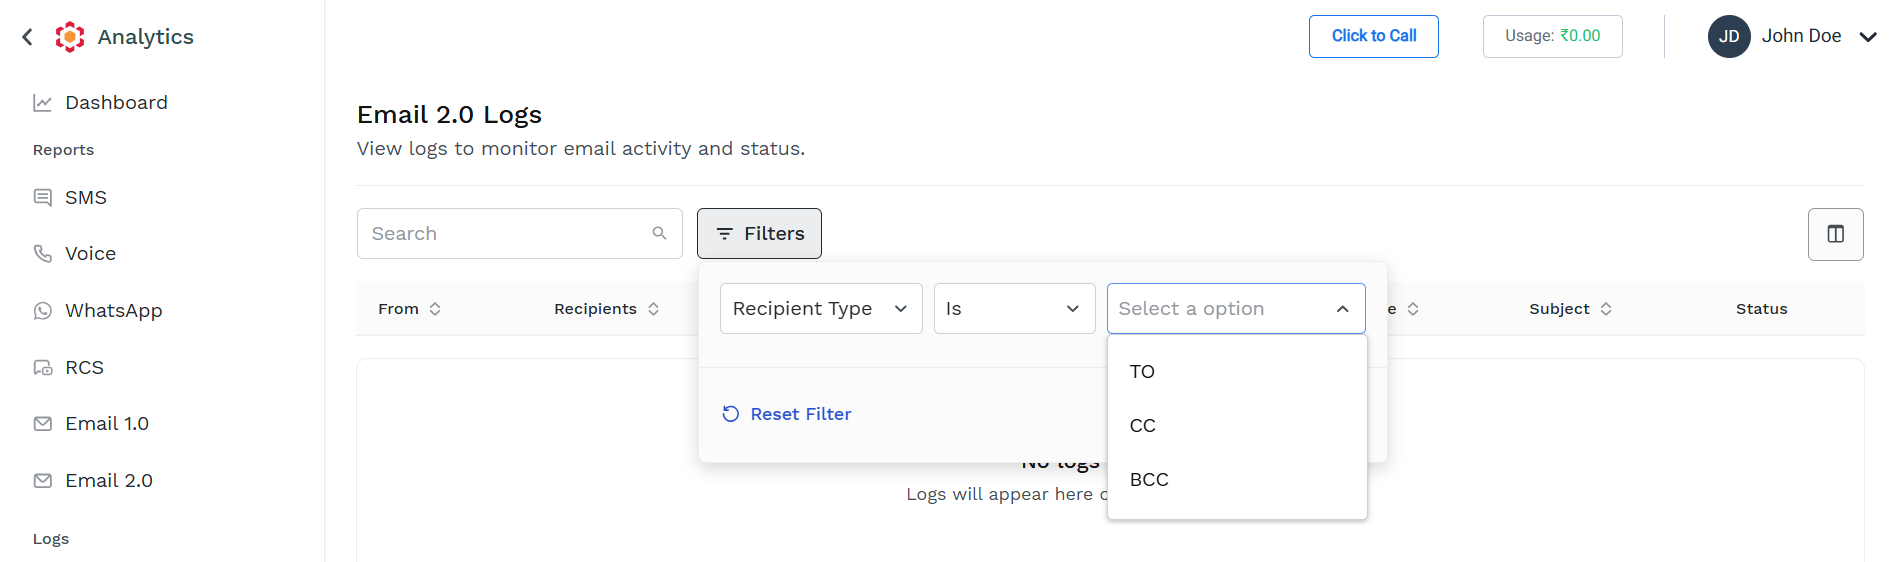
Click Apply.
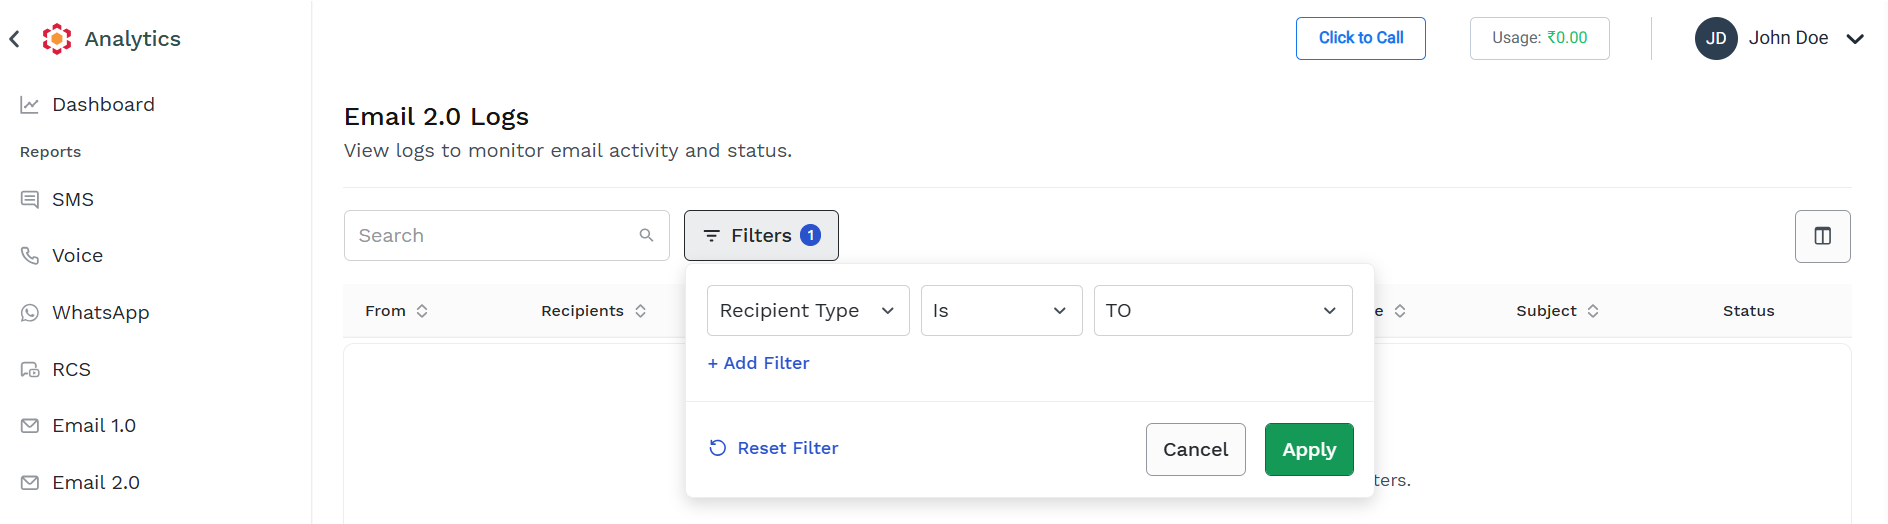
Based on the selected filter, the filtered result appears. A small number near the Filters button provide how many filter condition are applied.

You can apply more than one condition clicking on Add Filter option in the Filters panel. When more then one filter condition is applied, only Logs matching all the conditions are returned.
To remove any filter, click on Reset Filter in the Filters panel.
Sort Email Logs in Ascending or Descending Order
You can sort email logs either in ascending order or descending order for the following columns:
- From - Alphabetically.
- Recipients - Alphabetically.
- Recipients Type - Alphabetically.
- Message ID - Alphanumerically.
- Type - Alphabetically.
- Subject - Alphanumerically with special characters.
For more information on sorting, see Sort Domain's Details in Ascending or Descending Order.
Customize Columns
You can customize the columns in the Email Logs page. You can hide (and add back as needed) any column based on your choice to analyse the email logs. By default, all the columns will appear and on each refresh of the page, the default column will be set over the customized columns.
To customize columns, perform the following steps:
-
Follow steps of View Email Logs.
The Email Logs page appears.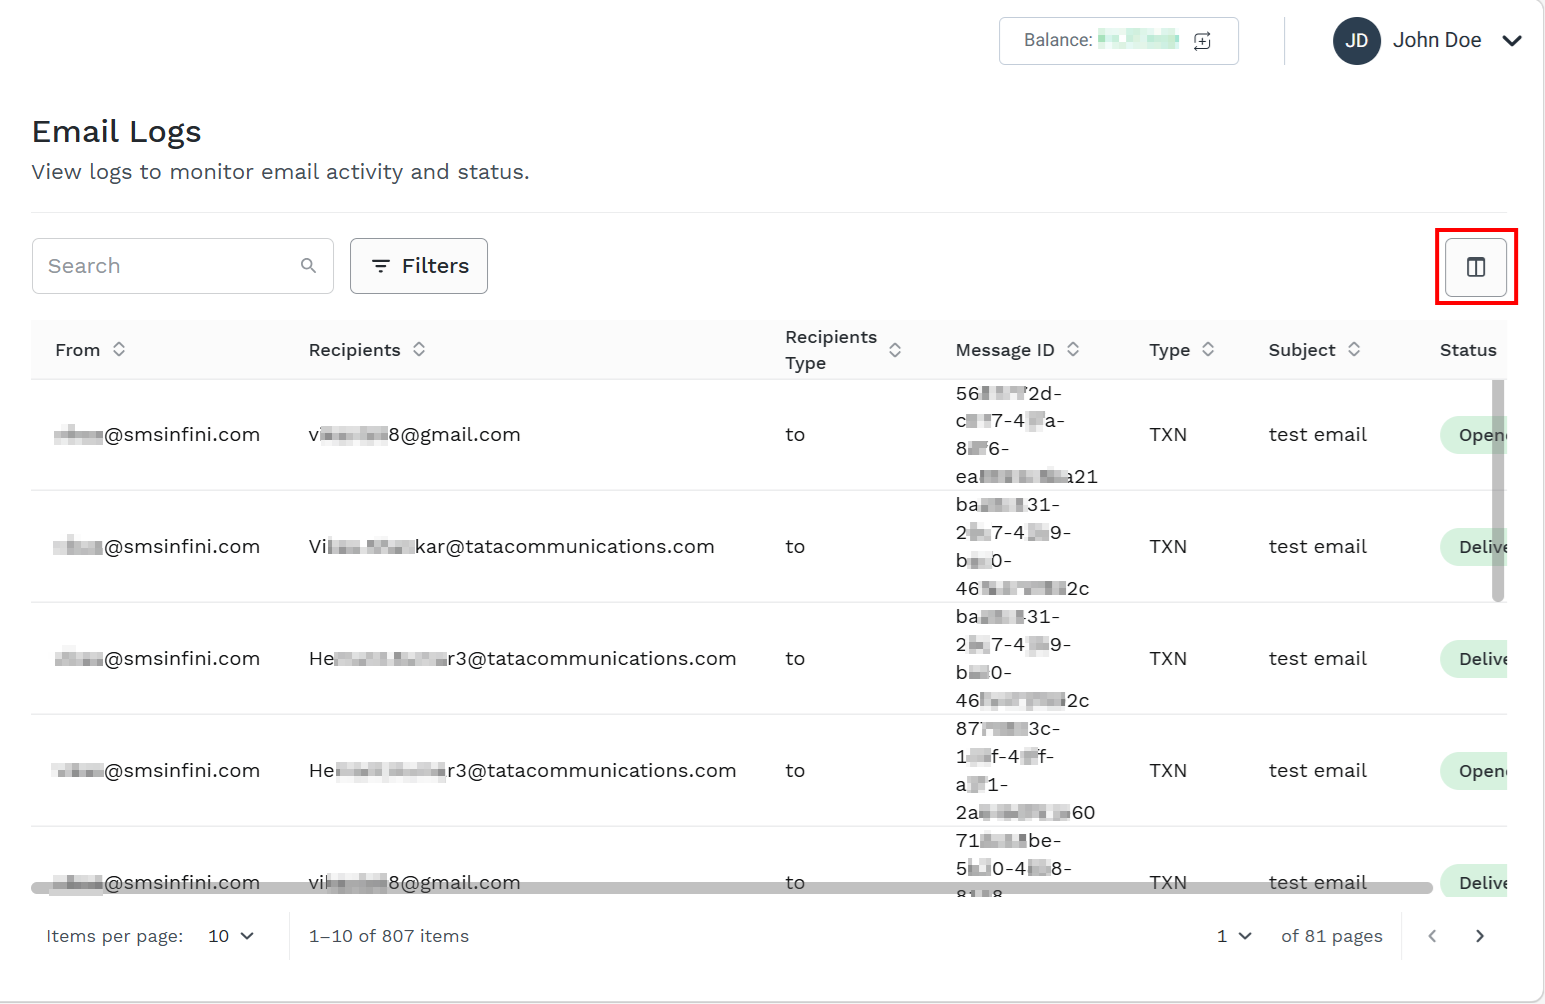
-
On the right side of the page, click the Column Display Properties icon.
The Column Display Properties pop-up appears.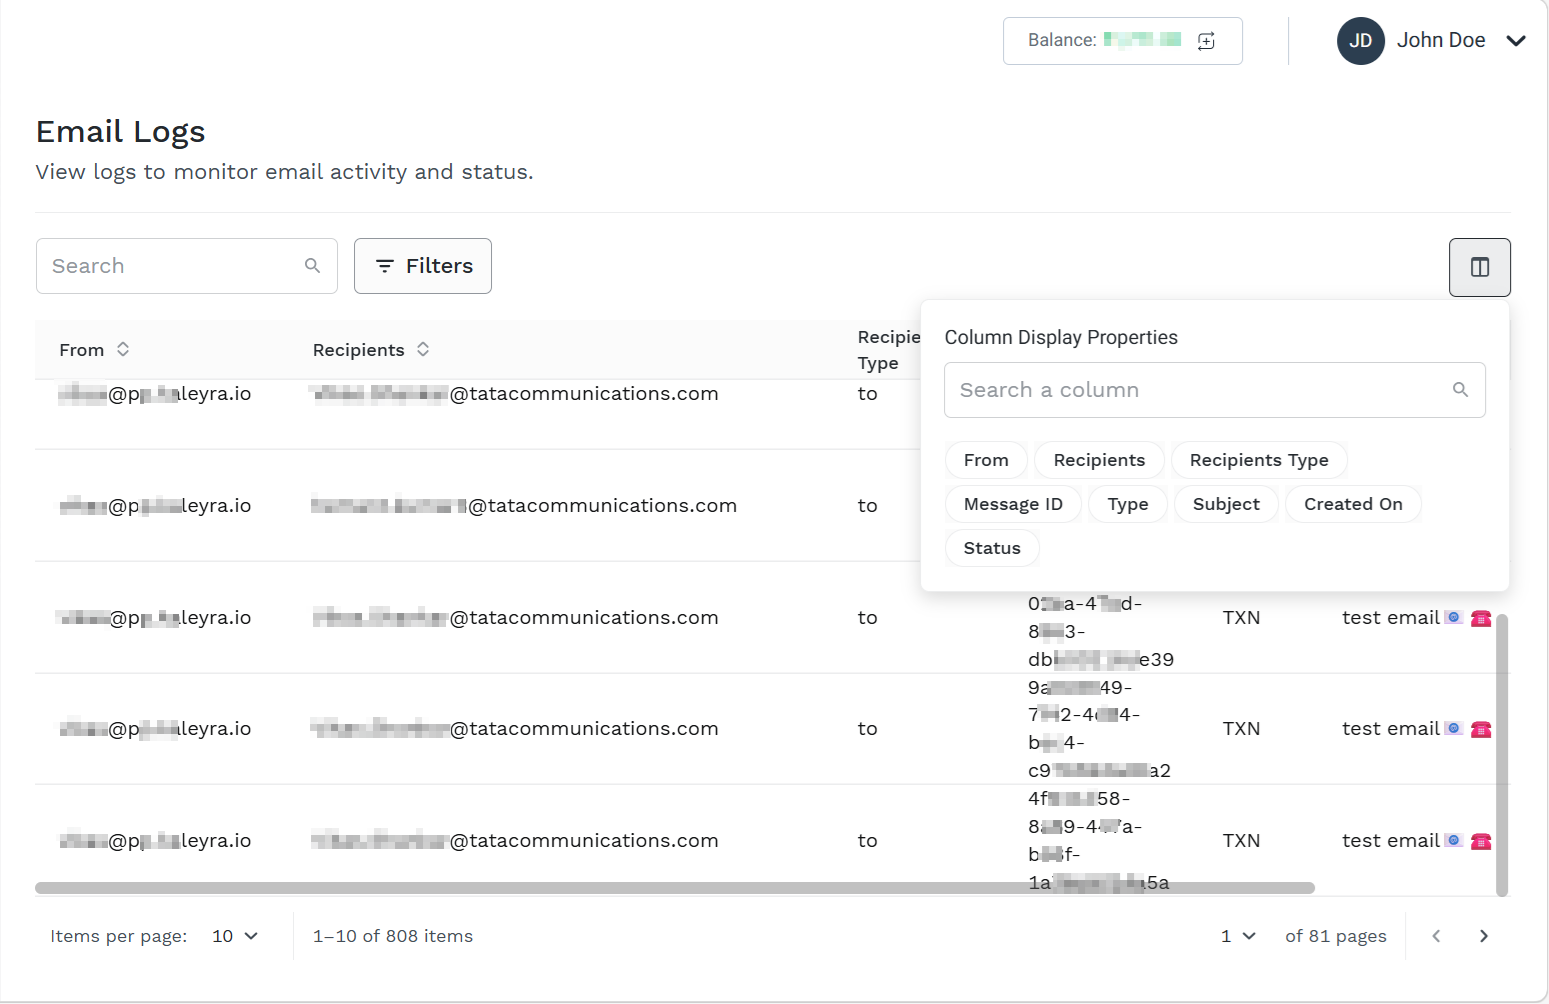
-
The column in bold are the one already displayed in the log page; the one not in bold are not currently displayed in the Logs page but are available to be added.
You can remove any of the visible column just clicking on it in the Column Display Properties. The column is then removed from the Logs page and it is not more shown in bold in the panel
You can add any of the non-visible column just clicking on it in the Column Display Properties. The column is then added to the Logs page and it is shown in bold in the panel.
You can easily analyse the columns based on your requirement by hiding the inessential columns.
Updated about 1 month ago