Deprecated - Configuration
The Failover > Configuration screen lets you configure the Failover feature to ensure that all the content is delivered to the user. When one channel fails to deliver messages, the other configured channels take over and deliver the same.
Failover configuration includes the channels, content, and time-out for each channel. Failover configuration lets you define the content delivered for each channel based on priority, time-out, or failure of content delivery through the previous channel with higher priority.
Configure the first channel
The first step in the Failover configuration is to configure the first preferred channel as follows:
- Navigate to Failover > Configuration screen.
- Click New Configuration. The Set up your configuration screen appears.
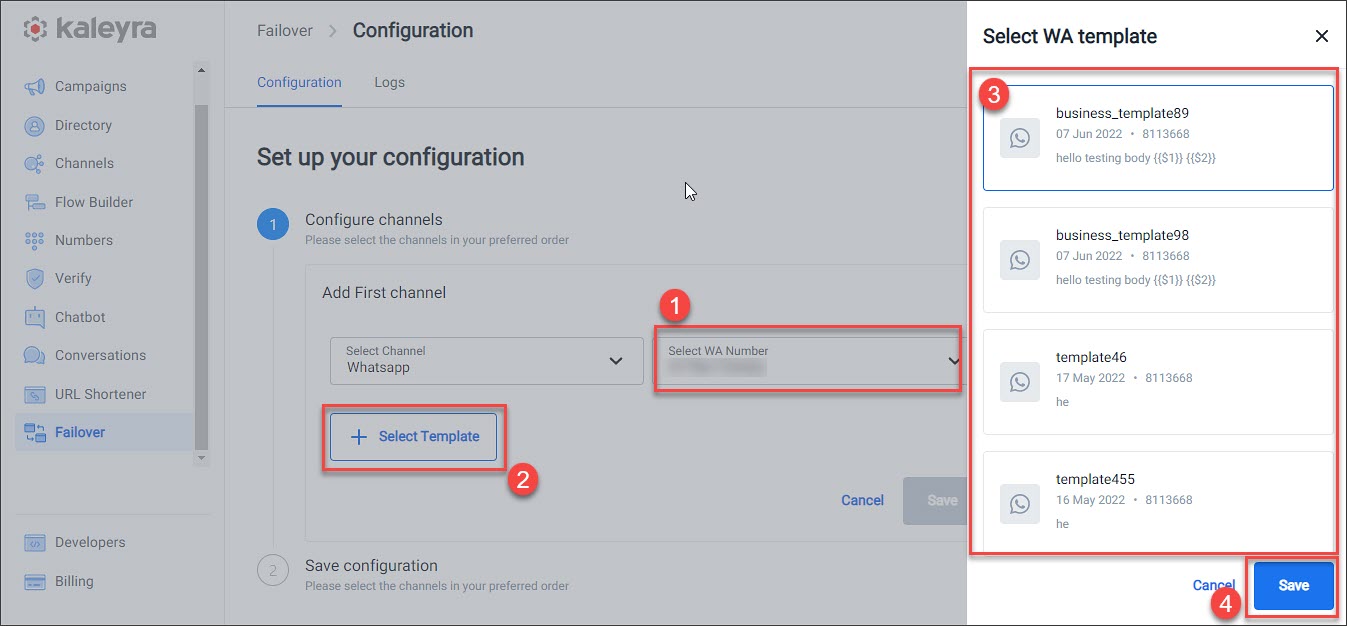
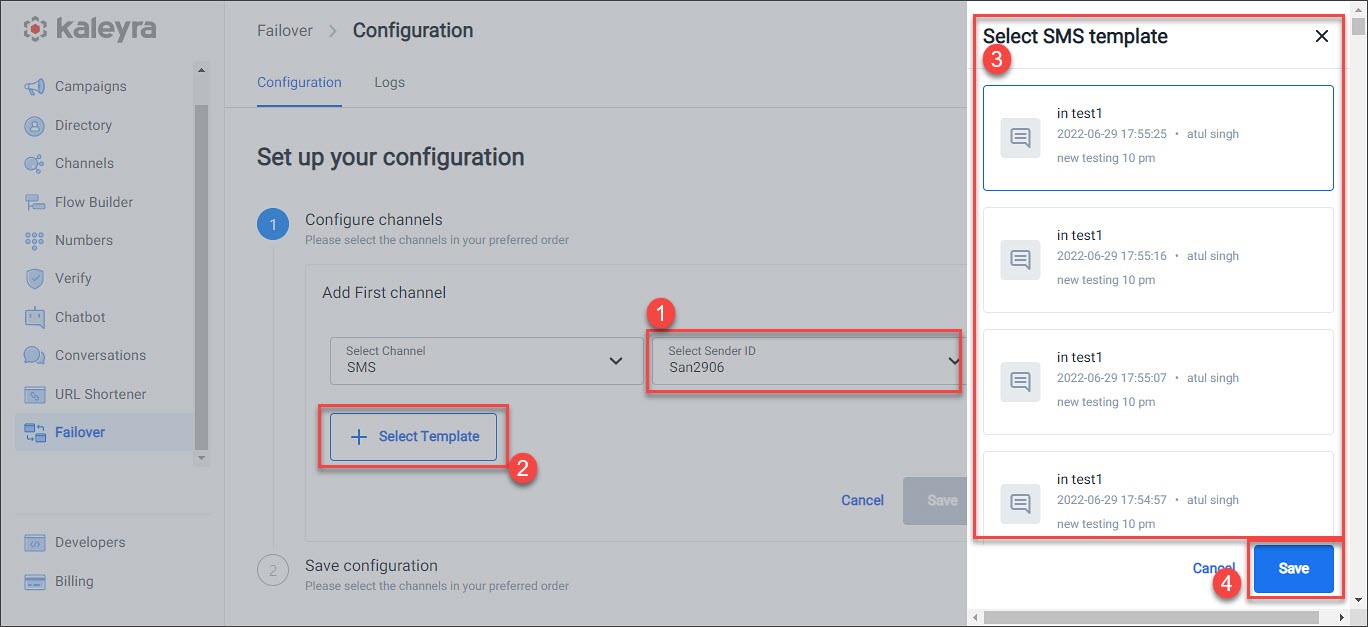
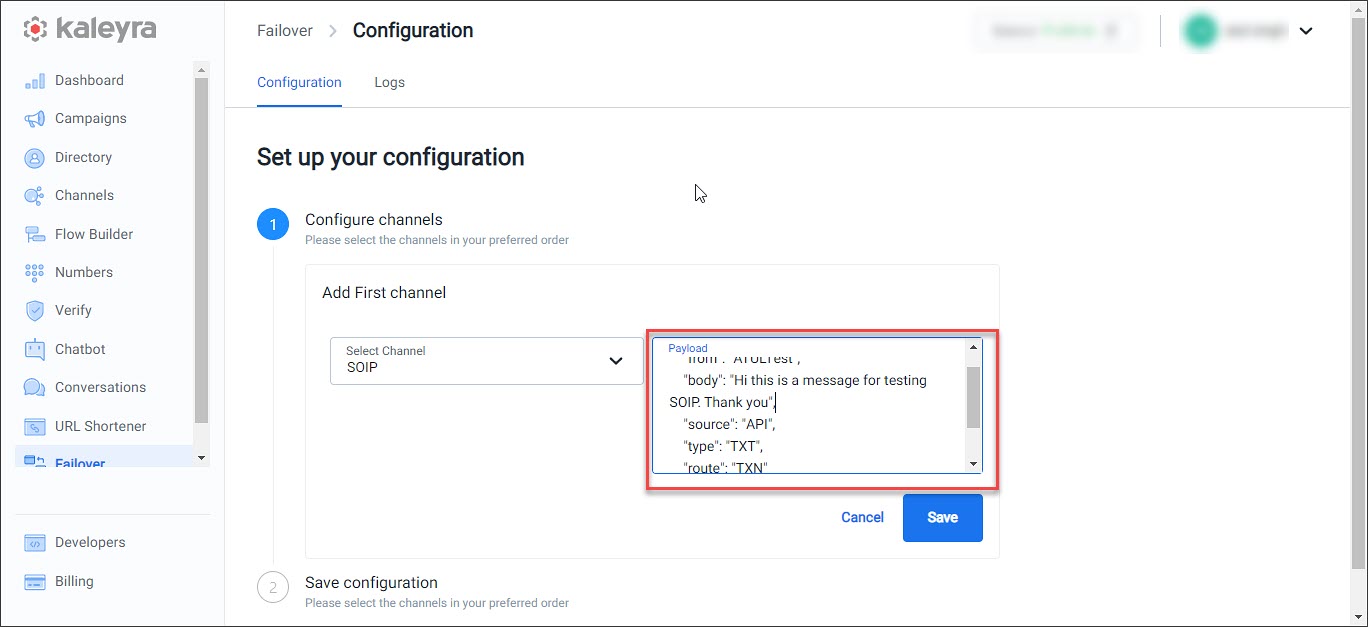
- In the Add First channel section, select your preferred first channel.
- Based on your channel selection, add values to the fields as follows:
-
WhatsApp
i. From the Select WA Number list, select a number.
ii. Click Select Template. The Select WA Template section appears with the list of templates.
iii. Select a template.
iv. Click Save to add the template to the channel configuration.
-
SMS
i. From the Select Sender ID list, select a number.
ii. Click Select Template. The Select SMS Template section appears with the list of templates.
iii. Select a template.
iv. Click Save to add the template to the channel configuration.
- SOIP
i. In the Payload field, enter the payload.
-
Click Save to add the first channel.
-
Click Next to move to the next section.
Note:If you want to add more channels to the Failover configuration, refer to the information in Configure the subsequent channels
Configure the subsequent channels
Configure your preferred subsequent failover channels:
- Click Add new channel to configure the second preferred channel.
- Complete the configuration by following the details in Step 4 of Configure the first channel section.
- In the Time interval field, enter time in seconds to set the time interval between the two channels.
Note:The minimum timeout for failover is five seconds.
- Click Save.
- Click Next. The Save Configuration section appears.
Note:To configure more channels, follow steps 1 to 4 of the Configure the subsequent channels
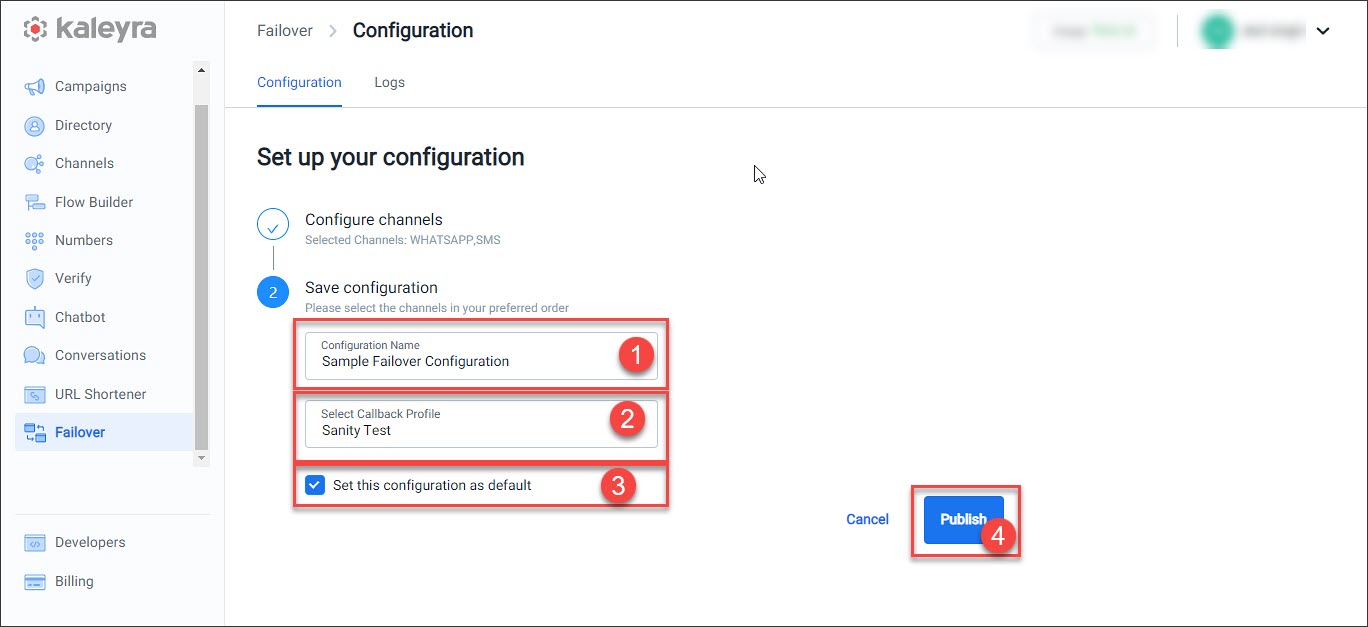
Save the configuration
Complete the Failover configuration by saving the configuration as follows:
- In the Configuration Name field, enter a name to identify the configuration.
- From the Select Callback Profile list, select a callback profile.
- Set the Failback Configuration as the default by checking Set this configuration as default.
- Click Publish.
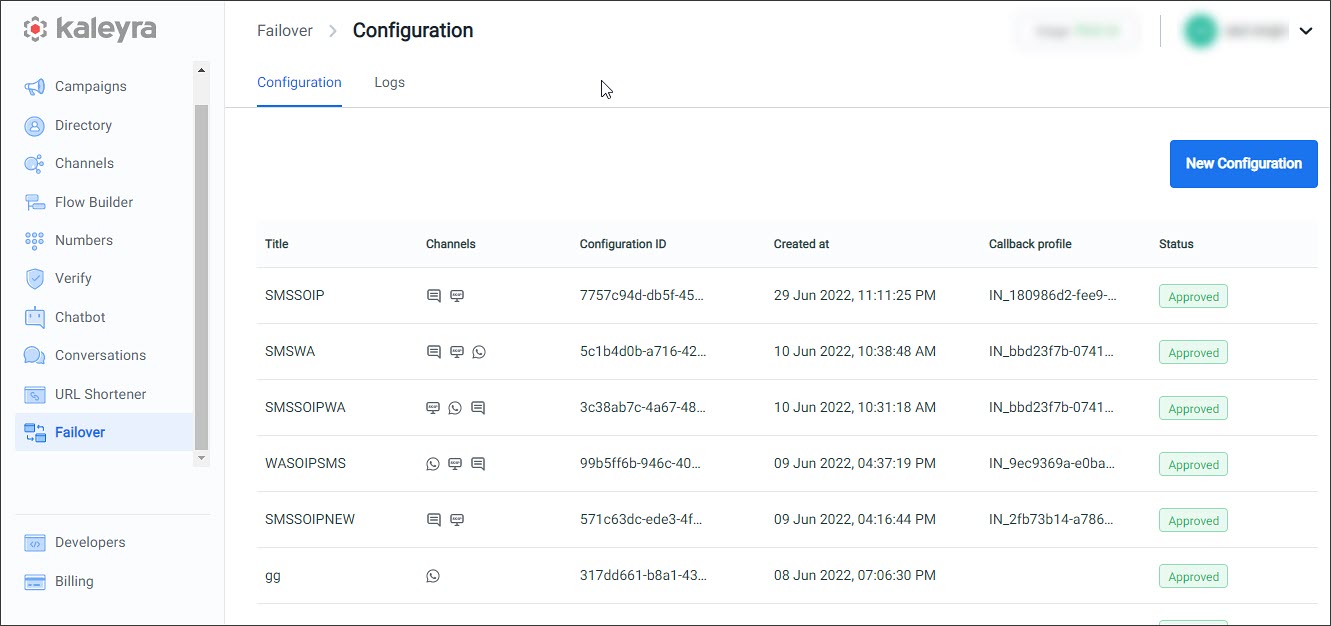
Failover Configuration screen
All the published Failover configurations are available on the Failover > Configuration screen.
| Column | Description |
|---|---|
| Title | Failover configuration title. |
| Channels | Icons of the channels configured for Failover. |
| Configuration ID | Autogenerated unique ID for each configuration. |
| Created at | Timestamp for when the Failover configuration was created. |
| Callback profile | Callback profile ID used in the Failover configuration. |
| Status | Status of the Failover configuration. Currently auto-set to Approved. |