Android SDK Integration Architecture
The Android SDK is a fast and effective way to include a live video chat in a mobile application. The SDK makes it easy to embed one to one, many to many high-quality voice and video calls into your mobile app, with a seamless integration with the Android/iOS operating system. It features a fully fledged set of collaborative tools comprehensive of: messaging, screen sharing, remote snapshot, collaborative interactive board and call recording capabilities.
The following diagram represents the most common integration layout of the Mobile SDK and the section following the diagram elaborates on the flow:
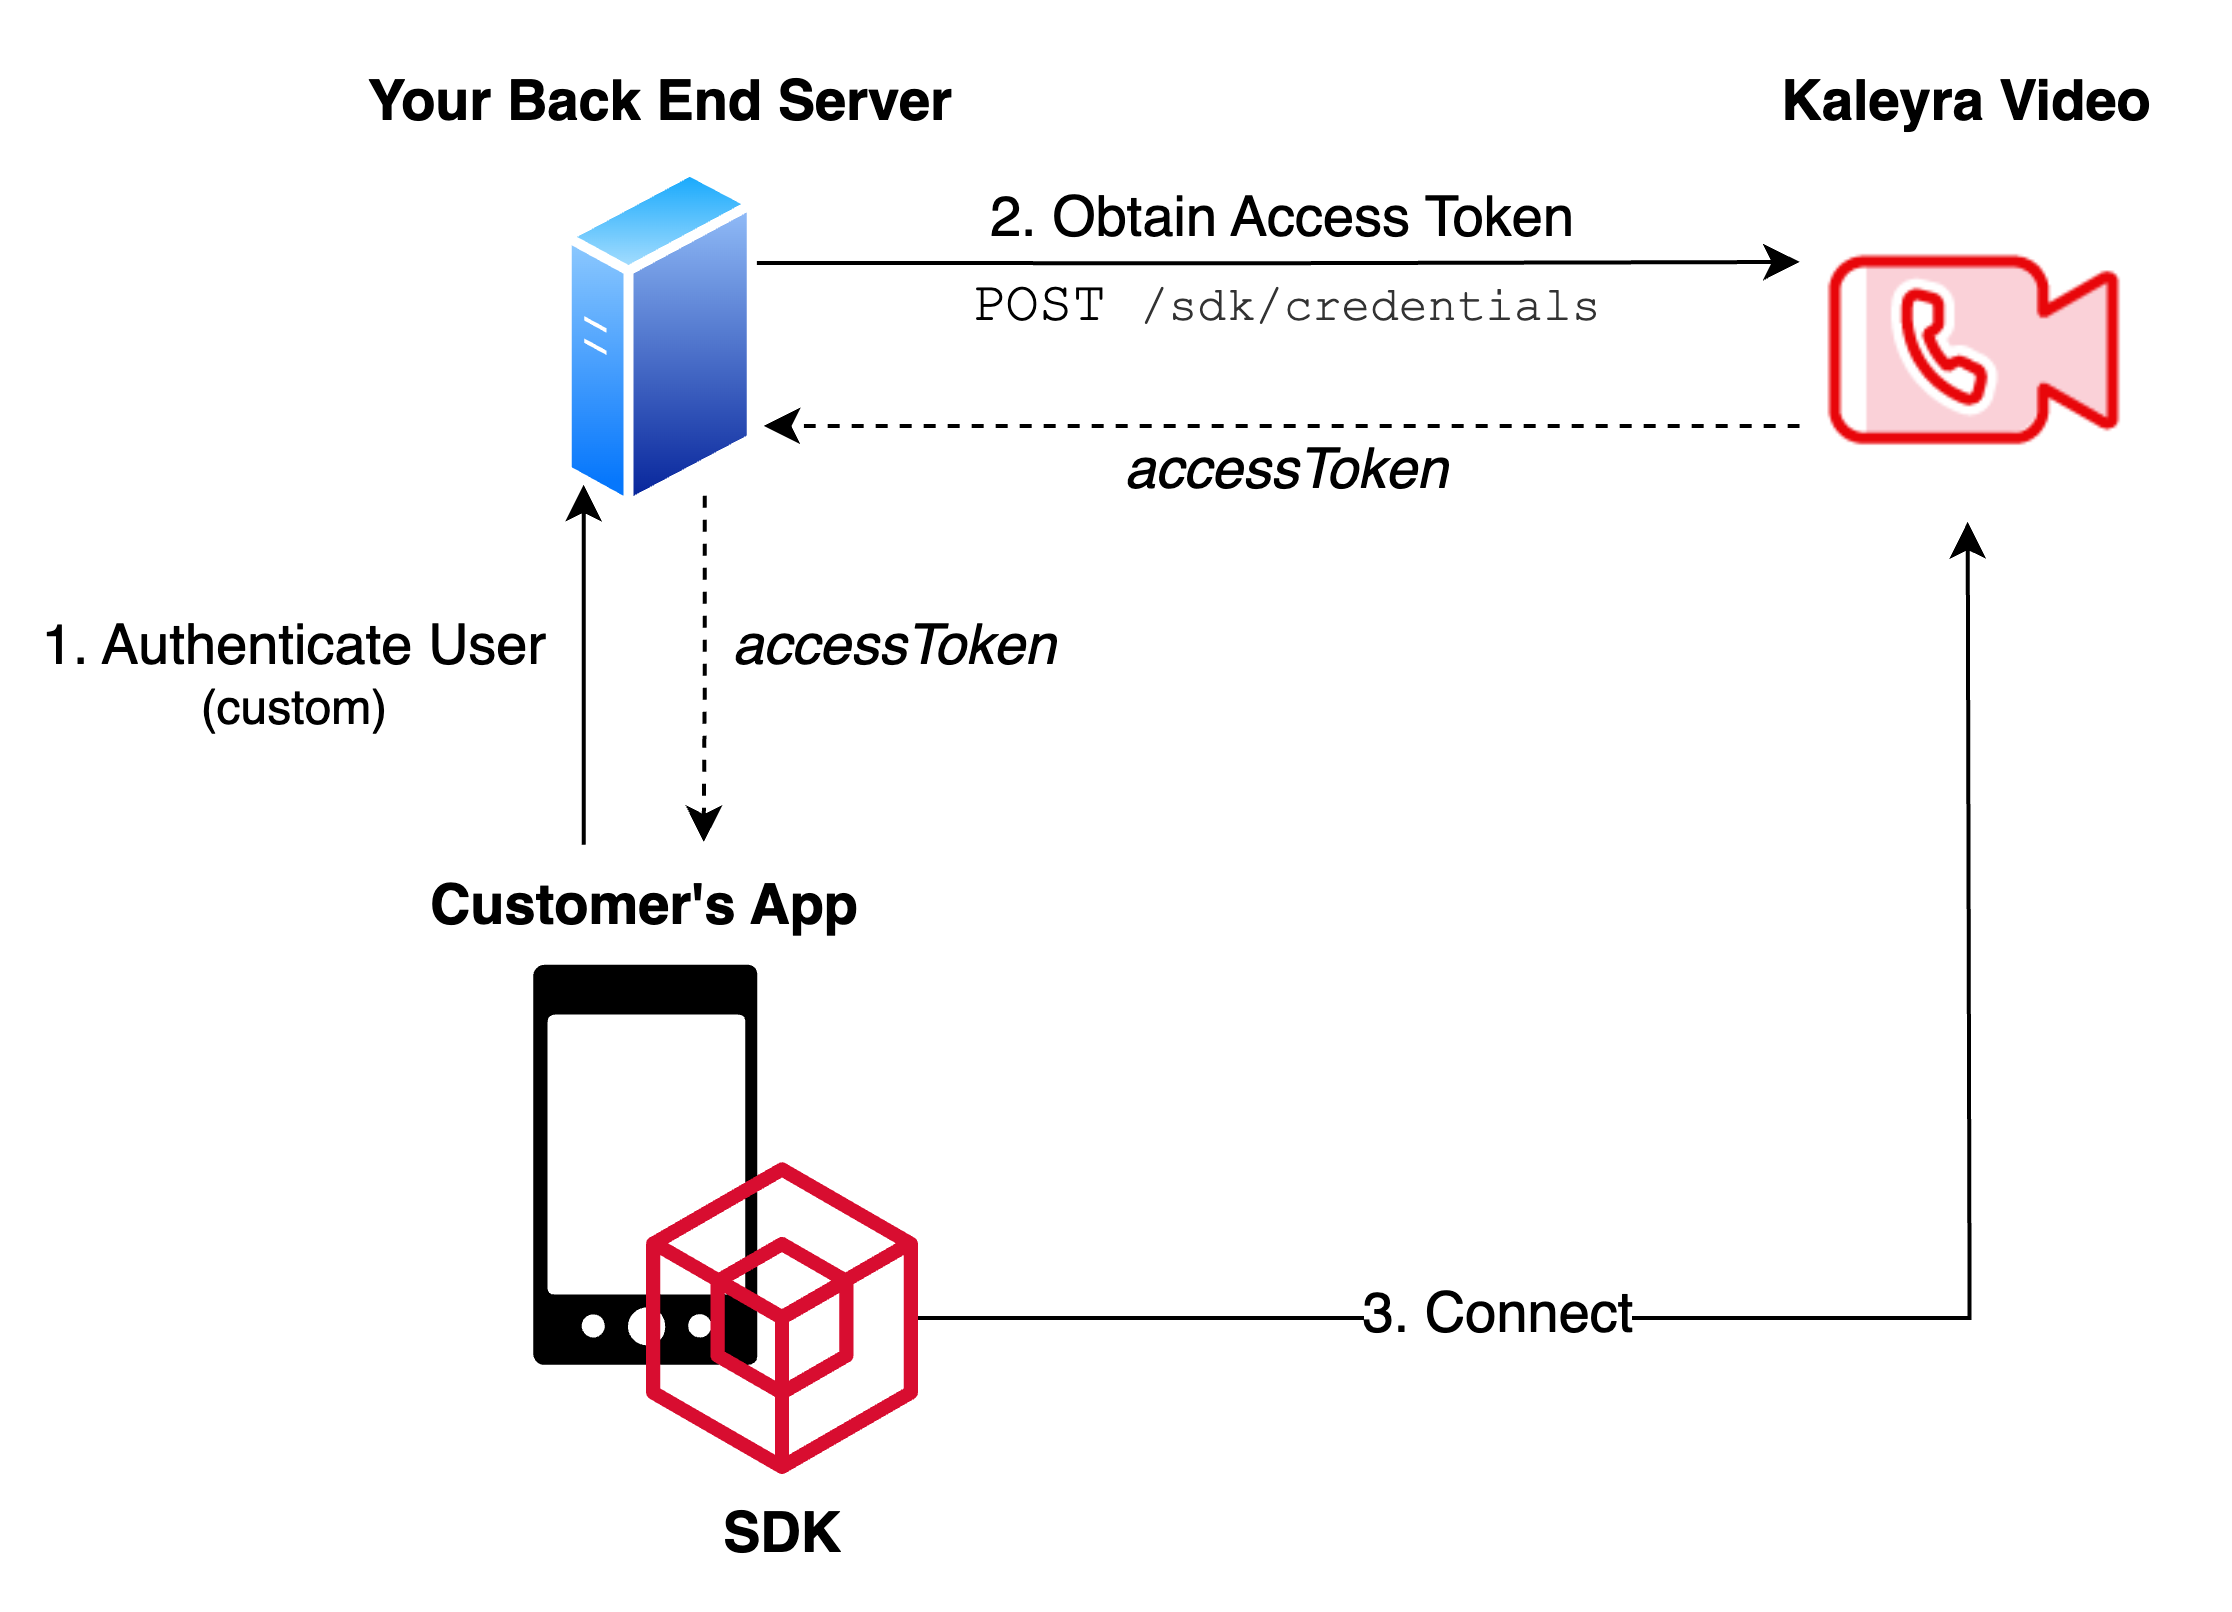
Note:The access token used by the SDK is obtained on the server side. This implementation ensures that the apiKey is not shared publicly, and the access token is bound to the user session on the integrated website.
Using the apiKey on the client side is strongly discouraged and should be absolutely avoided in production.
1. Authenticate User
The user accesses the application by leveraging an authentication method of choice. User authentication is done externally from Kaleyra Video.
2. Obtain Access Token
Refer to the SDK Authentication section.
3. Add SDK
// add maven repository
allprojects {
    repositories {
        ...
        maven { url 'https://maven.bandyer.com/releases' }
    }
}

// add dependency
implementation "com.bandyer:bandyer-android-sdk:$latestVersion"
You can find the latest released version here: https://github.com/Bandyer/Bandyer-Android-SDK/releases.
4. Make a Video call
You can make a basic integration of the SDK for testing purposes by simply copy-pasting the following snippet of code.
Set userId, appId, region and environment variables as indicated in the following code:
val userId = "user id"
val appId = "app id associated to your account starts with mAppID"
val region = Eu // region to which your account belongs: eu, in or us
val environment = Sandbox // Sandbox or Production


// configure
val configuration = BandyerSDKConfiguration.Builder(appId, environment, region).build()
BandyerSDK.getInstance().configure(configuration)

// connect
BandyerSDK.getInstance().connect(Session(userId, object : AccessTokenProvider {
  override fun provideAccessToken(userId: String, completion: Completion<String>) {
    // rest call to your server to request an accessToken for the userId
    completion.success("accessToken")
  }
}))

// call
val usersToCall = arrayListOf("user to call")
val callIntentBuilder = BandyerIntent.Builder()
                            .startWithAudioUpgradableCall(context)
                            .with(usersToCall)
                            .build()
context.startActivity(callIntentBuilder)
String userId = "user id";
String appId = "app id associated to your account starts with mAppID";
String region = "Eu"; // region to which your account belongs: eu, in or us
String environment = "Sandbox"; // Sandbox or Production
// configure
BandyerSDKConfiguration configuration = new BandyerSDKConfiguration.Builder(appId, environment, region).build();
BandyerSDK.getInstance().configure(configuration);
// connect
BandyerSDK.getInstance().connect(new Session(userId, new AccessTokenProvider() {
@Override
public void provideAccessToken(String userId, Completion<String> completion) {
// rest call to your server to request an accessToken for the userId
completion.success("accessToken");
}
}));
// call
ArrayList<String> usersToCall = new ArrayList<>(Arrays.asList("user to call"));
BandyerIntent.Builder callIntentBuilder = new BandyerIntent.Builder()
.startWithAudioUpgradableCall(context)
.with(usersToCall)
.build();
context.startActivity(callIntentBuilder);
NoteIn sandbox environment ‘region’ is always ‘eu’.
Good Job!There are a more customizations available. Refer to Video-Android-SDK for further information.